7" TFT Monitor
Brooke Clarke 2007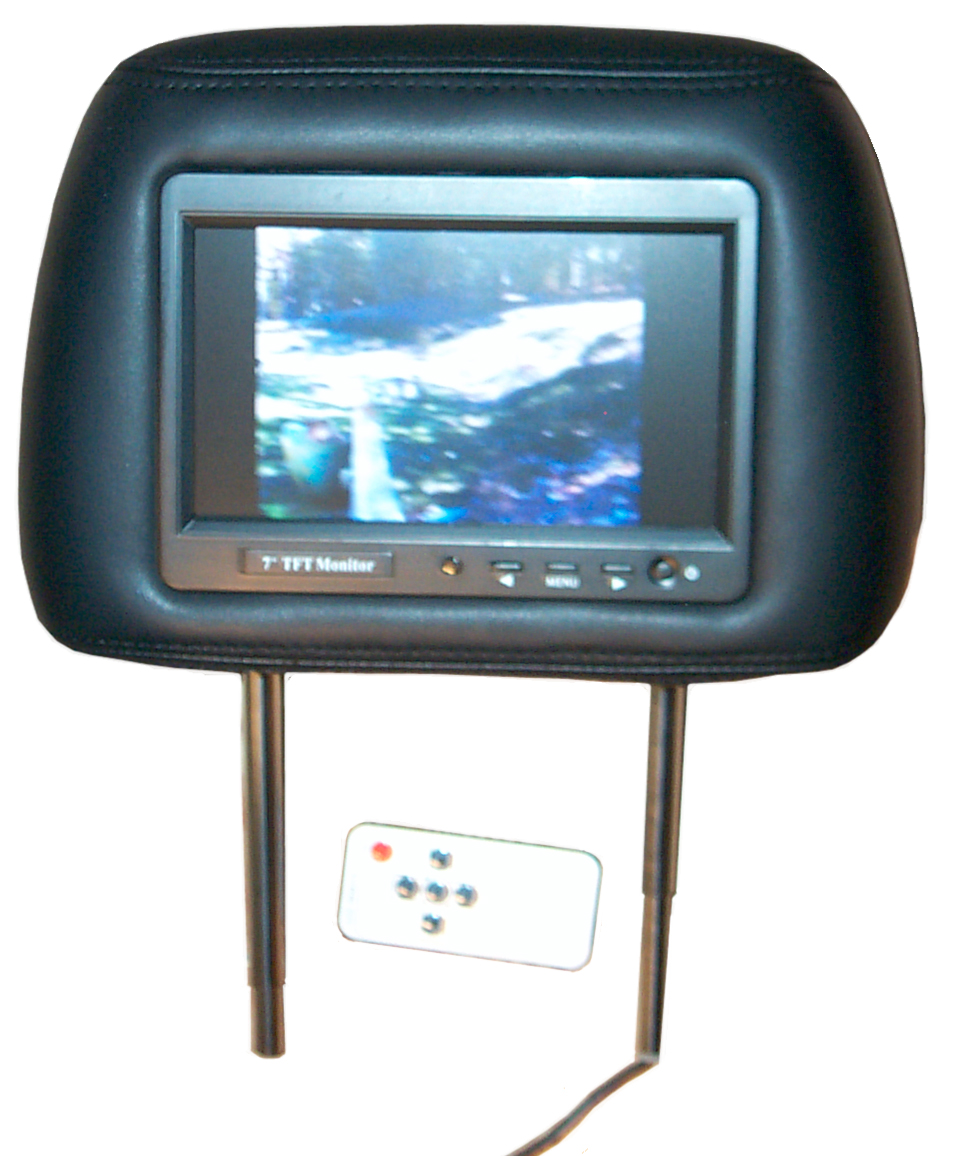 |
 |
| As Received |
After Removing from Headrest |
Background
When working with a CCTV camera you
need a monitor at the camera for setting the lens focus and focal
length as well as doing anything with the on screen display. For
conveyance it would be good if the monitor ran from a battery supply, 12
VDC would be a good choice since the 10 "D" cell battery adapter
I make has an auxiliary output jack. I've read it's also handy to
be able to adjust the contrast and brightness. After shopping
the internet I found this 7" TFT Monitor built into the back of a car
headrest. The screen is 3½" x 6" and one of the On Screen
Menu options is either 16x9 or 3x4 aspect ratio.
Draws 550 ma at 12 volts and 450 ma at 15 volts. Backlight dims at 8 volts.
Draws 550 ma at 12 volts and 450 ma at 15 volts. Backlight dims at 8 volts.
I used it as received but the head rest and the two metal rods out the
bottom made it rather awkward. So I've opened it up and removed
the LCD. I did it the hard way by taking apart the headrest, but
an easier way would be to use some type of upholstery tool made from
sheet metal which could be inserted at the bottom center (just below
the black circle that's not a button but the IR remote sensor) and pushing the spring finger up
while pulling outward. There are 6 spring fingers in total and
probably all three on the bottom (or top) need to be done at the same
time. The fingers are on 74 mm centers.
Geeks.com - 7'' TFT LCD Monitor Car Headrest w/Remote (Black) VT-H702A-WB $99 for one, or $160 for 2 (Sep 2007)
eBay seller Indo Audio Electronics has these for about the same price (when shipping is included) that may have more features.
Geeks.com - 7'' TFT LCD Monitor Car Headrest w/Remote (Black) VT-H702A-WB $99 for one, or $160 for 2 (Sep 2007)
eBay seller Indo Audio Electronics has these for about the same price (when shipping is included) that may have more features.
 |
I cut the outer liner off. Then unscrewed the rectangular plastic panel. Then removed the other visible screws. But this was not necessary since all that needed to be done is to press in the finger tips and at the same time lift the monitor away from the box that's holding it. The finger tips are easy to see from the back. The electrical cable runs down one of the support tubes and the connectors on both ends are too big to go through the tube. So the next step is to disassemble the 4 socket connector on the monitor end of the cable. It can then be reassembled with no soldering, just snap toghther. The box that's glued to the leather and maybe the rectangular cover will be kept to make a box for the monitor. |
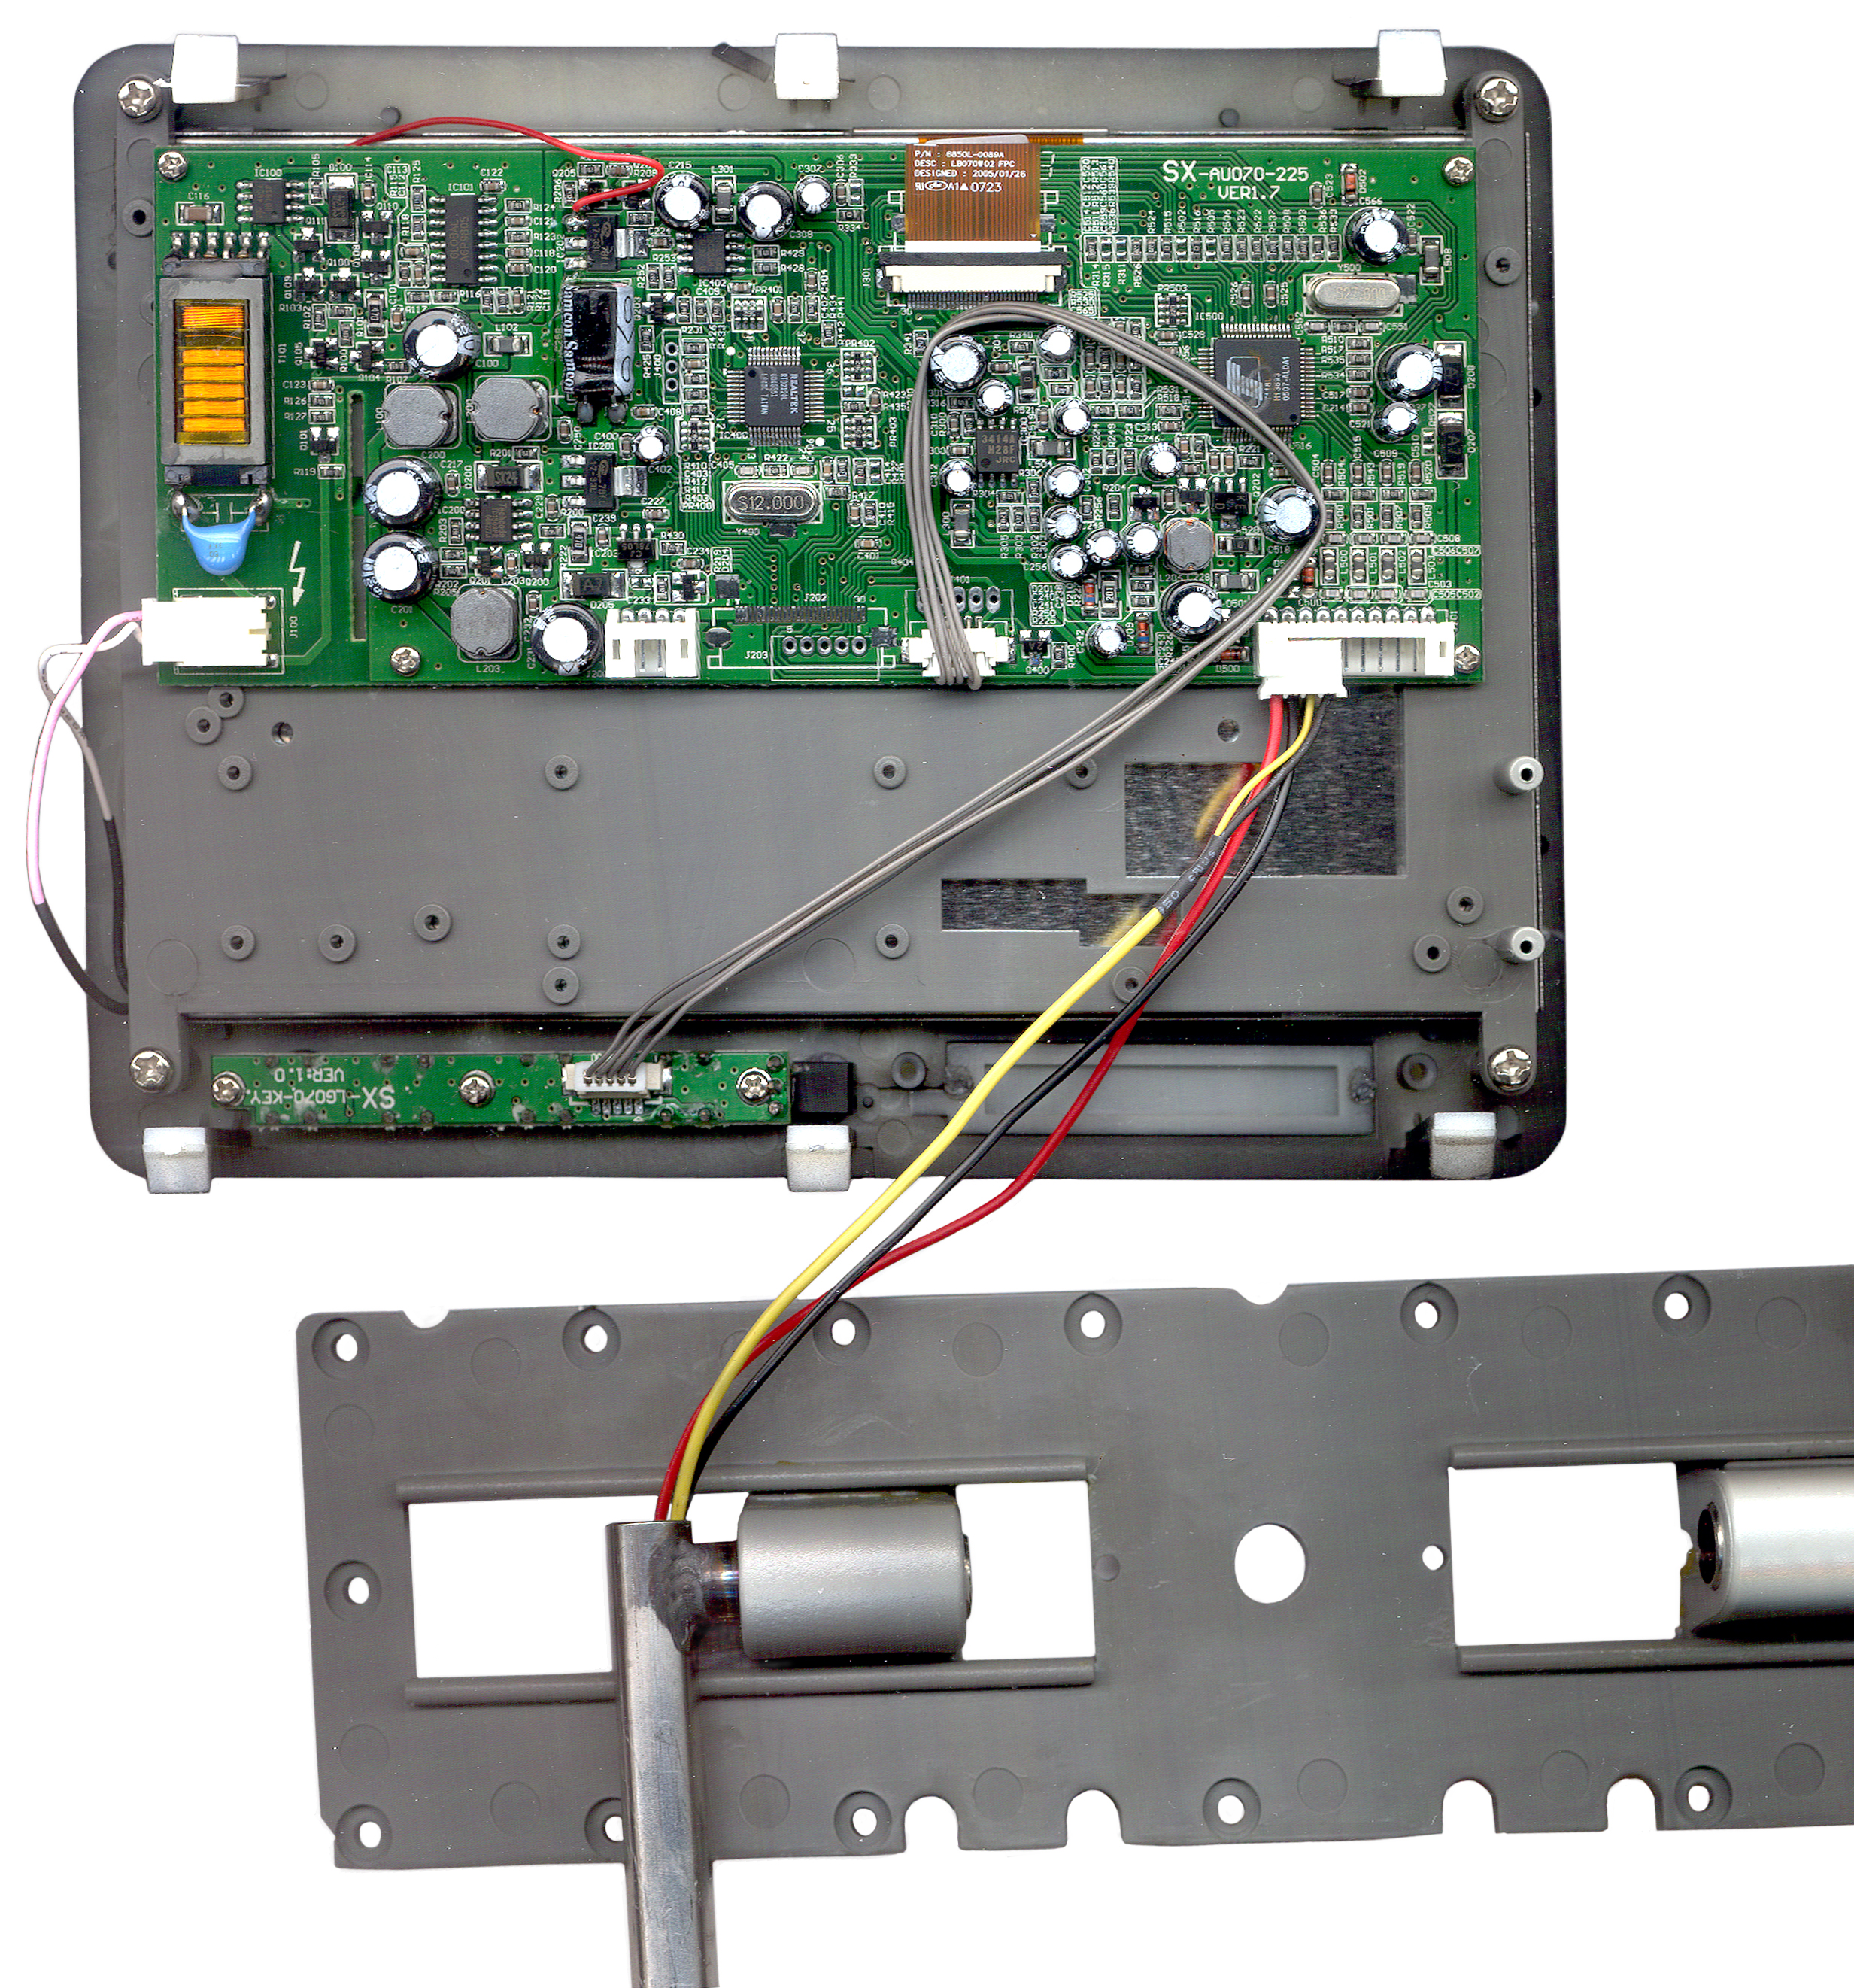 |
You can see the 6 plastic fingers that hold the panel into the box. The bottom center finger is directly below the black square which is the IR remote input. Notice the wires coming up through the hollow tube and ending in a 4 socket connector. The connector goes into a 10 pin header (J201) so that the red wire is on the pin closest to the center of the monitor. Then DC black, then yellow and finally the black shield for the video. There are a number of unpopulated locations including a connector at the bottom center of the PCB. The monitor assembly that's held by 4 corner screws could be detached from the bezel holding the control buttons and fitted into a different bezel. On the right there is a gray plastic insert which is the label 7" TFT Monitor, but I've seen other units with an LED bar graph in that spot. |
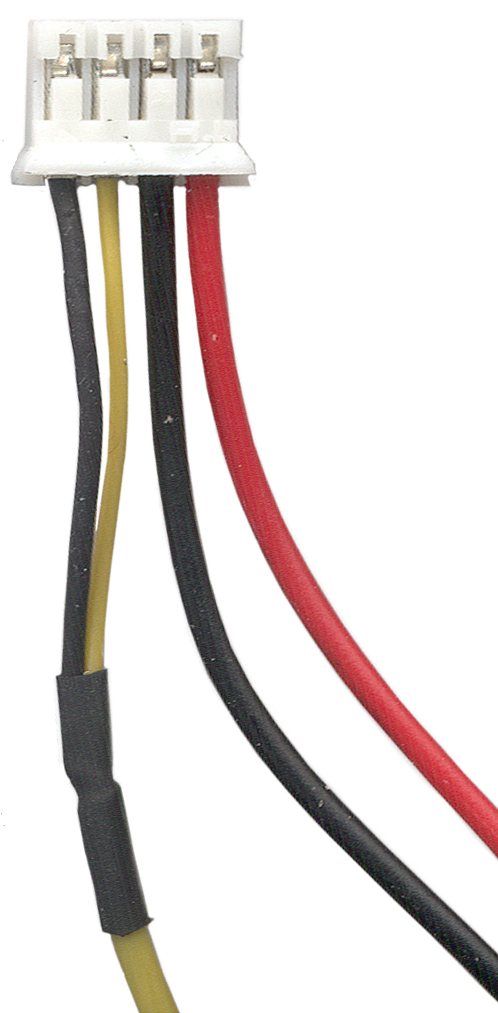 |
Although it looks like there are three wires, Red, Black and Yellow, that's not the case. The yellow wire is actually a coax. |
First Night Use
Invited to a local star party. Took: Mintron camera, Rainbow DC auto iris varifocal lens, Arri Tripod, 7" TFT Color Monitor, 257477BA-PP 10 "D" cell battery pack and the 1¼" to C mount adapter.
With the above setup and with the camera aimed straight up at 128X sense up over a half dozen stars could be seen. But the monitor screen was swimming in green. Next time I'll try adjusting the monitor to see if the background brightness can be reduced. The neat thing is that this battery powered setup was plugged into a 3" wide field scope and a 16" scope. But the 128X integration time is not as good as the Meade DS2 imager where the laptop can do longer integrations, but with this setup no laptop is needed.
The Mintron allows the AES to be on at the same time as the DC auto iris lens. This combination will work on a 24/7 basis.
A problem is the wires get tangled and the plugs get unplugged.
I'm going to keep the rectangular box cover and it's screws. Maybe put a "C" cell battery pack in the box. That would be good to weight it and for self contained power.
The optimum viewing angle is looking up rather than looking down. Looking square on to the LCD works about as good as slightly below. Looks like it was optimized for back children.
For all angles from square on to 89 degrees below the image looks OK, but it starts darkening a few degrees above 90 and by 45 degrees above the image is very poor.
26 Jan 2008 Not Working
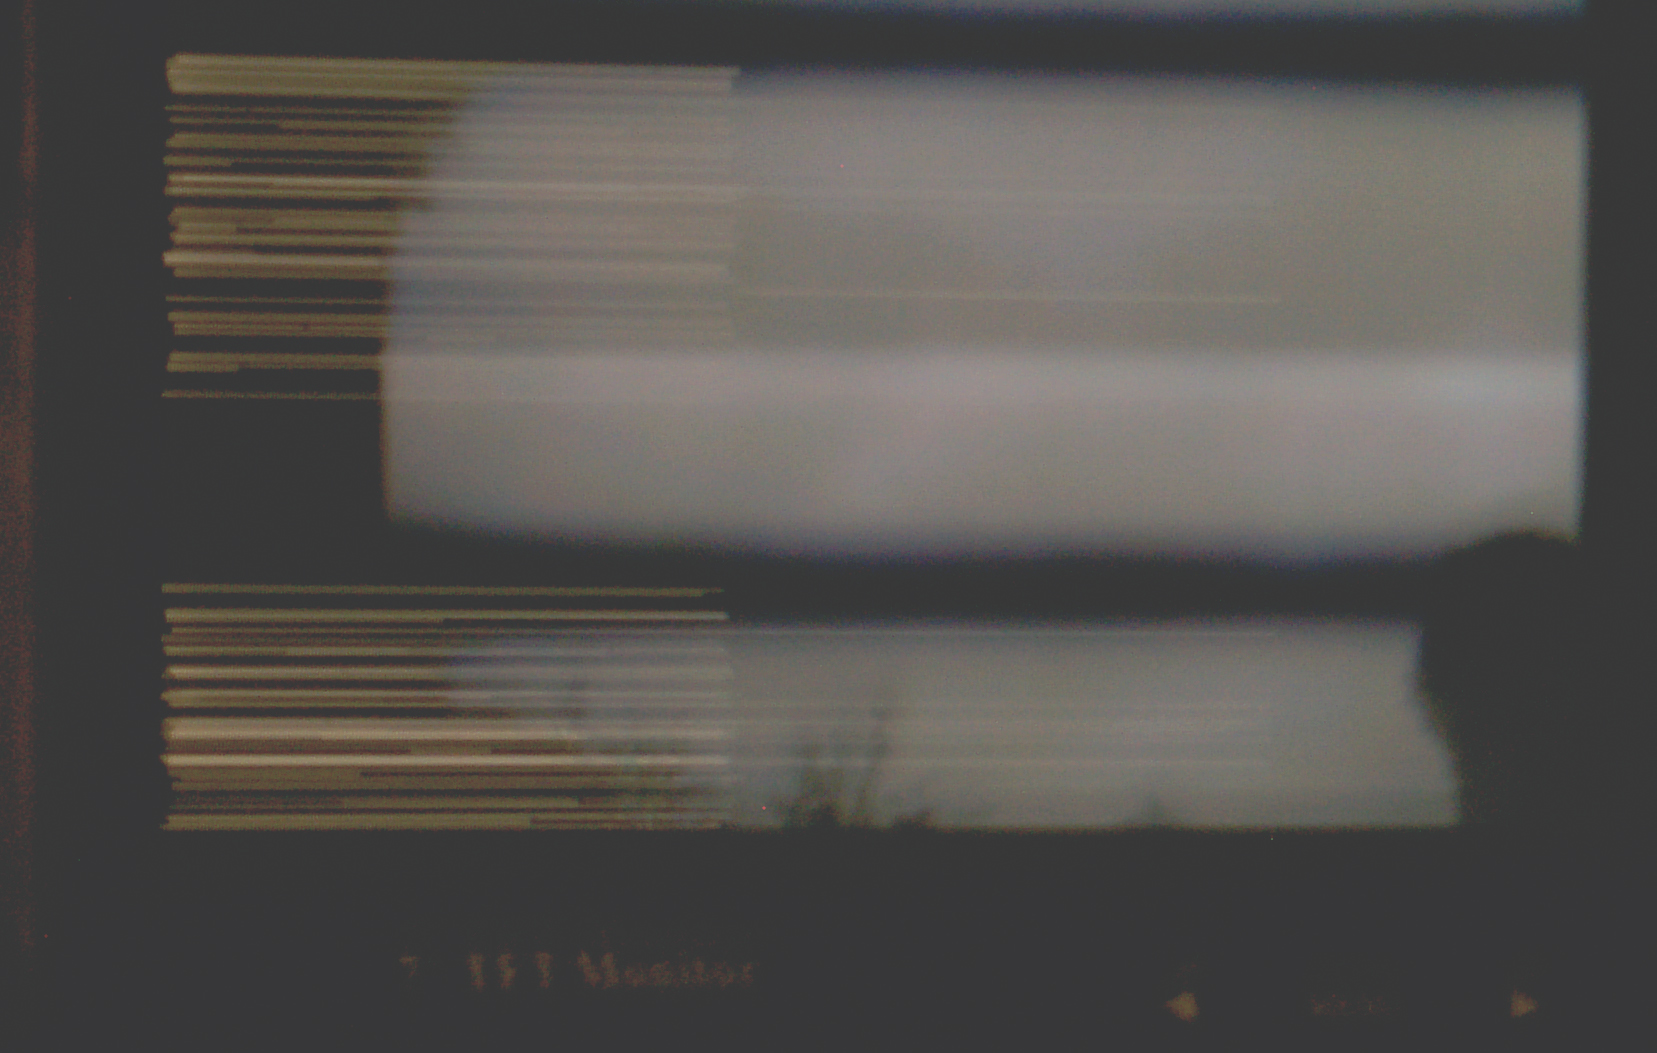
The monitor is showing thin white lines to the left and vertical sync is lost, slow rolling black bars. Sometimes will not turn on. No blue screen when video input unplugged.
4 month life is rather short.
Related
KPC350 (P164C) Low Light Monochrone CCTV camera
Super Circuits P-38 (Mintron 63V5) Color Integrating Low Light CCTV Camera
Harbor Freight Color Security CCTV camera
PC33C - Super Circuits CCTV Color camera
Web Cam 2 - using in still image mode where an image is grabbed at some interval and the .jpg us uploaded to the server. Until the 4 input video card gets here only one camera at a time can be connected to the computer. My 2-way satellite connection has nowhere enough bandwidth to support anything like live video.
Curtis RT700 7" Portable LCD TV refurbished- for $60. has Video/Audio Input Jack, External Battery Compartment: 10x AA (Not Included) i.e. made for car use.
Back to Brooke's PRC68, Products for Sale, Optics, Astronomy, Star Brightness-Security CCTV, Binoculars, Stellar Time, CCD Astronomy, Home page
[an error occurred while processing this directive] created 7 Sep 2007