LabVIEW Install
© Brooke Clarke 2015 |
 |
Description
What's in the box
Software Installation
Net Framework
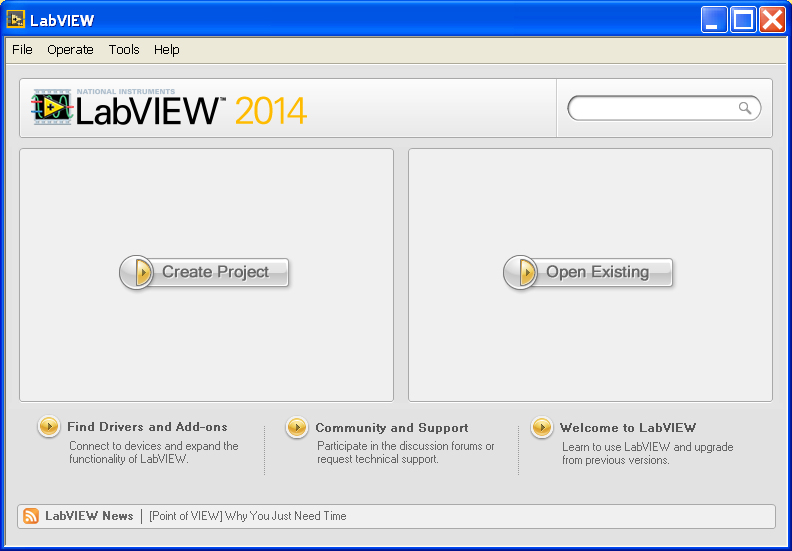
LabVIEW
VISA
VIPM
LINX
Verify Fails
18 July 2015
LINX Firmware Install
LabVIEW
LabVIEW Interface for Arduino
Vernier sensors Arduino Interface
chipKIT
Adafruit
MakerHub
Programs
Old
Current
Instrument Drivers
NI GPIB-USB-HS
Photos
Related
References
Links
Background
For part of my working life I designed and built automatic test systems for variour microwave related components, see Past Projects. The software started with progressive versions HP Rocky Mountain Basic and then LabVIEW, see Computer Languages & HP-IB Controlers. In June 2015 I was thinking about having a computer made that would allow booting into DOS, WIN 3.1, WIN XP and one of the new WIN flavors. This would be a desktop computer with a high capacity power supply and with provision for ISA and PCI add in cards to support things like IEEE-488. Also real RS-232 ports as well as USB ports. Multiple hard drives so that Photoshop has it's own scratch hard drive. To run LabVIEW the op system should be WIN 7. And the CPU needs to be able to run ArcGIS. This would allow using the official home version of ArcGIS.
Yesterday I received an email from SparkFun promoting their new $150 LabView Inventor's kit but could not answer my question about wheather or not IEEE-488 was included.
https://www.sparkfun.com/products/13271?
This kit consists of the hardware they use for the $100 Inventor's Kit (Redboard + proto board+ a bunch of sensors and actuators) plus the Labview activation code. The Redboard is an Arduino compatible board that can be used as an interface between USB and all it's normal I/O. That way a PC running LabView can control any Arduino shield as well as all the sensors/actuators in the Inventor's kit.
https://www.sparkfun.com/products/12060
I surfed the National Instruments web page plus talked to someone about the Home Bundle and discovered that they have various LabView versions for people using it in a business: Basic $1000, Development $3000 & Professional $5000
The LabView home bundle is the same as the Full Development system and includes Control Design and Simulation Module as well as MathScript RT Module and sells for $50.
NI has a bunch of test equipment drivers making it easy to interface IEEE-488 instruments. Many of the HP/Agilent/Keysight instrument drivers advertized as "VEE" also include LV code.
http://sine.ni.com/nips/cds/view/p/lang/en/nid/213095
https://www.digilentinc.com/Products/Detail.cfm?NavPath=2,1269,1473&Prod=LABVIEW-HE
If you're a student you can get a Student Bundle for about $30.
Yesterday I ordered the Home Bundle and have some projects in mind.
There's a link from the LabView Maker Hub web page to the Digilent page as they are the official outlet for it.
https://www.labviewmakerhub.com/
Note on the LabVIEW MakerHub web pages they talk about LINX (LV MarkeHub) which has to do with linking LV to the redboard (Arduino) and is not related to the computer language Linux (Wiki). Confusion is likely since our brains look at the first letter and last letter and doesn't pay a lot of attention to the in between letters (Can you read this).
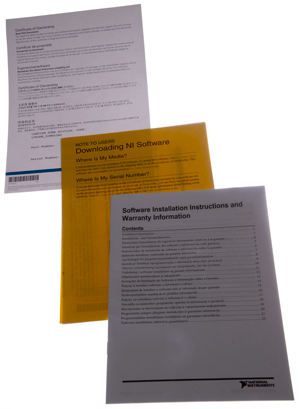
Description
What's in the Box
You get 4 things:
- Certificate of Ownership that contains the Information code, your part number & Serial Number
- License Agreement which allows installing on up to 3 computers, but only for your own use
- Note to Users: Downloading NI Software (good for both software and instrument drivers)
- Software Installation Instructions (worthless since each pair of pages is in a different language and all it says is to install the media (CD-ROM) which is not part of this package.
Software Installation
.NET Framework
Microsoft .NET Framework 4 - is a prerequisite that's needed prior to installing LabVIEW.
LabVIEW
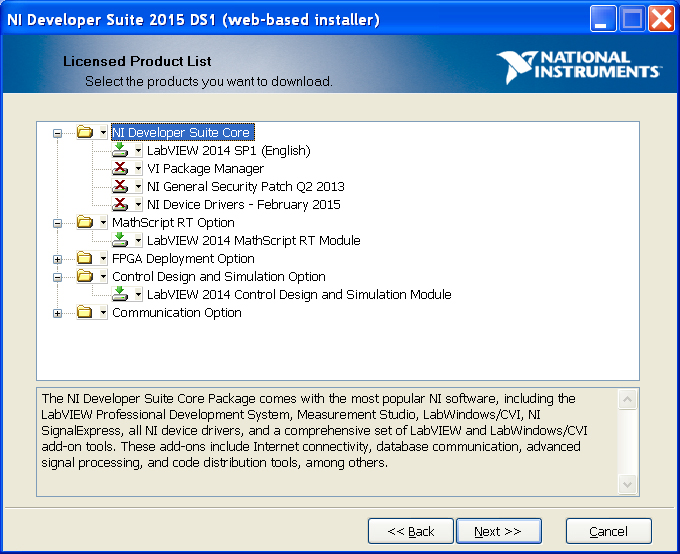
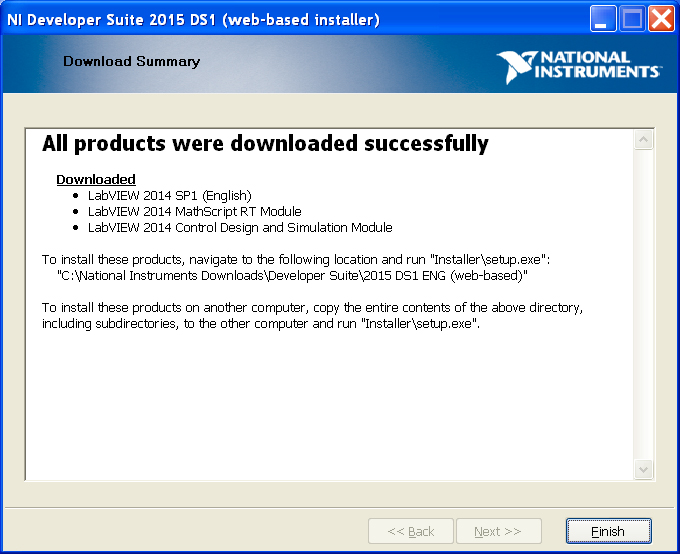
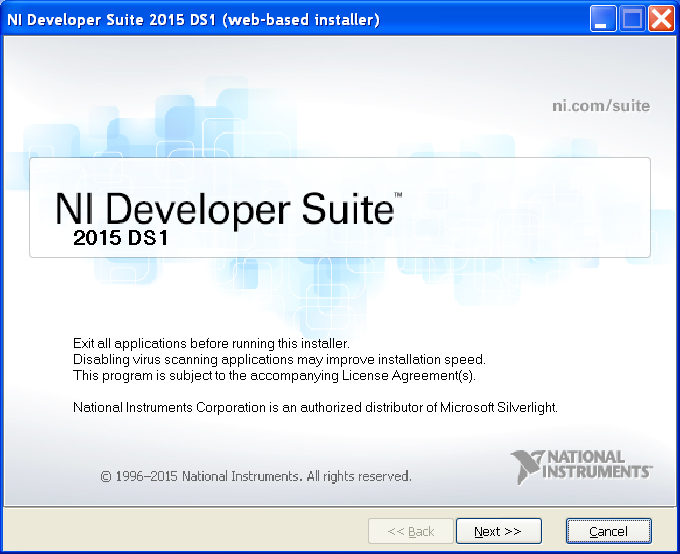
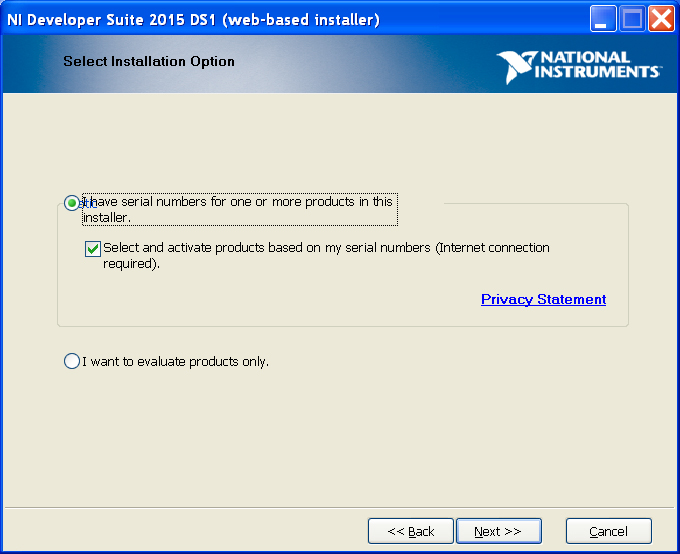
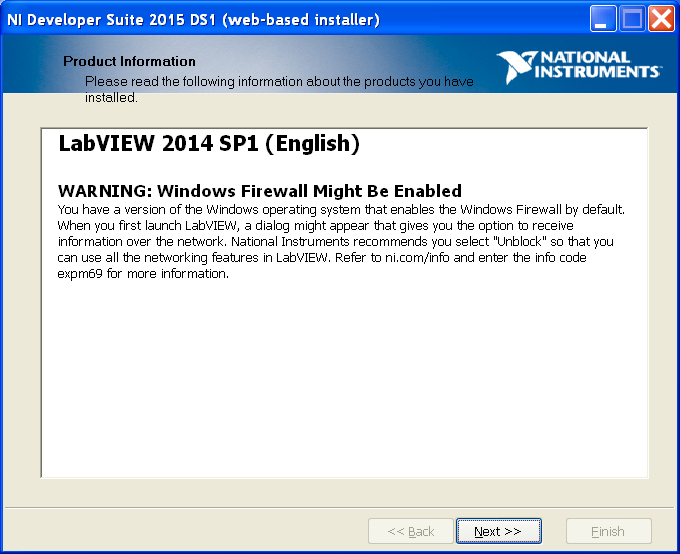
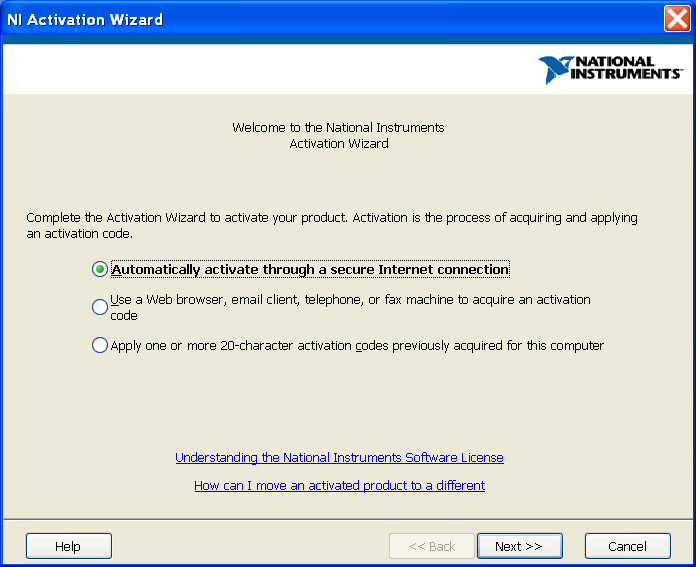
Using the Downloading NI Software link above get DevSuite_2015DS1_ENG_WB.exe
When you run this there's an option to let your serial number determine what is downloaded.
Following are the more interesting screen shots during install. I downloaded the file then did a seperate install.
That way if it crashes I don't need to wait for another download (over an hour closer to two hours at 2.2 MB/sec).
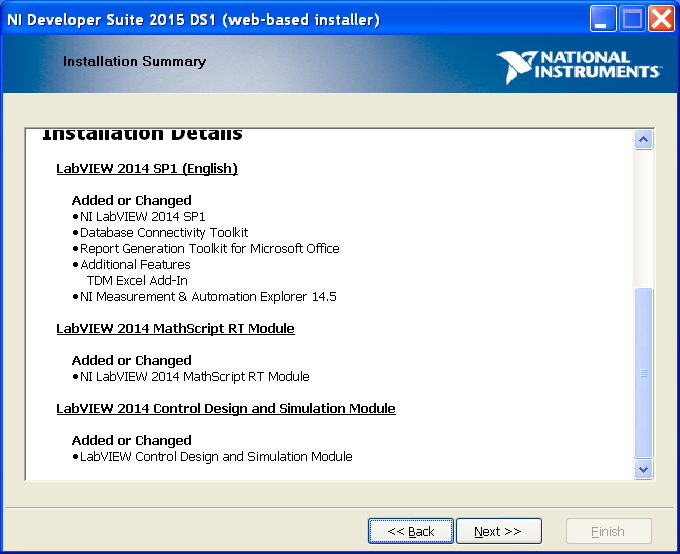
This worked correctly and includes:
NI developer Suite Core
MathScript RT Option
FPGA Deployment Option
Control Design and Stimulation Option
Communication Option
This is a 2377 MB download.
It's too bad that they didn't include a CD-ROM.
I don't have a broadband internet connection
so this is going to take a long time and there's
a change of the internet dropping out while it's
downloading.
VISA
Virtual Instrument Software Architecture (VISA) for more see my computer languages web page.
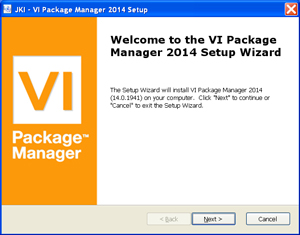
VIPM
Download and Install the VI Package Manager (VIPM)
Note: You must have VI Package Manager installed on your system before downloading LINX.
The VI package manager is run in order to download LINX, you can't load LINX by itself.
My Computer\C:\Program Files\LabVIEW\Download\
After VIPM is installed it runs, and takes some time finding all the possible packages that it might load.
Note:
there's a bunch of Maker Hub VIs.
How to learn more about these, for example
MOXON motors? let me know
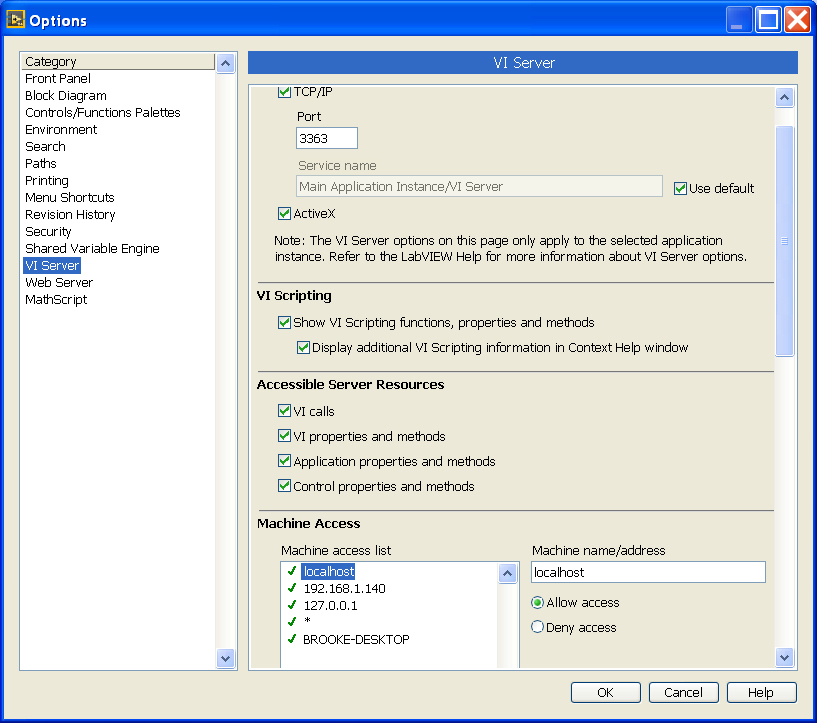
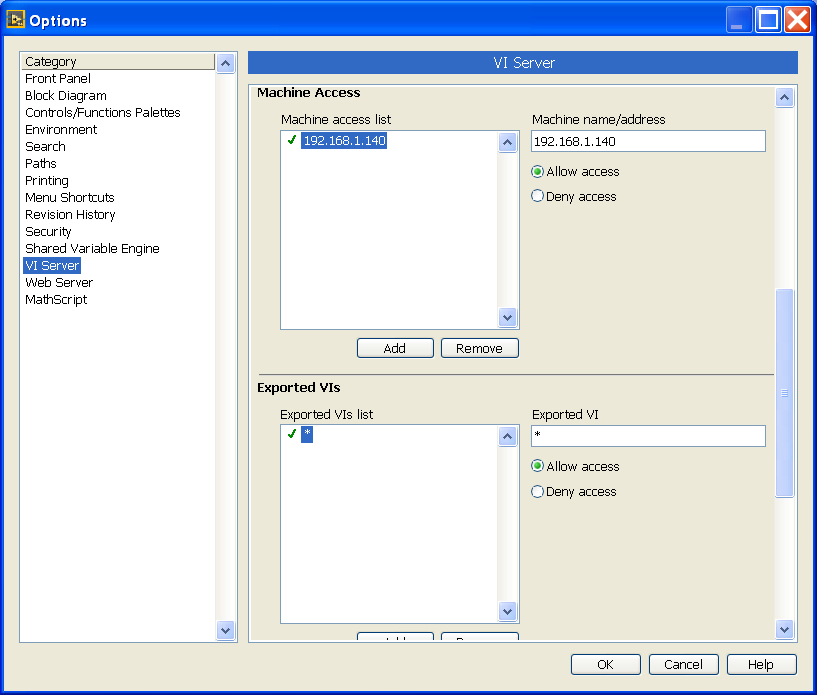
In order to get VIPM to work it was necessary to add my computer name and computer IP address into the LabVIEW VI Server Machine access box.
Control Panel \ Network Connections \ LAN or high speed internet (right click) STATUS open Support Tab for computer's IP address
LINX
LINX provides easy to use LabVIEW VIs for interacting with common embedded platforms like Arduino, chipKIT and myRIO, and more.
Digilent Physical Computing Kit for LabVIEW - 02 | Setup = Installing LINX
The speed depends on how you connect the computer running LabVIEW to the platform.
Serial Interface: ~4mS per LINX VI / Packet
Wifi Interface: ~3mS per LINX VI / Packet
Ethernet Interface: ~0.6 mS per LINX VI / Packet
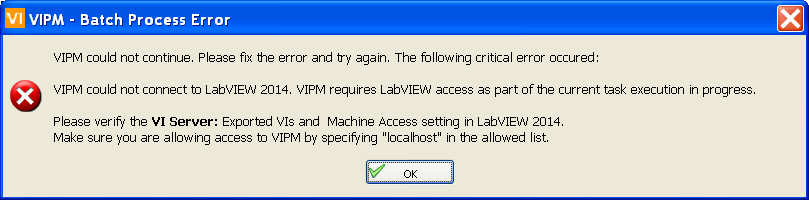
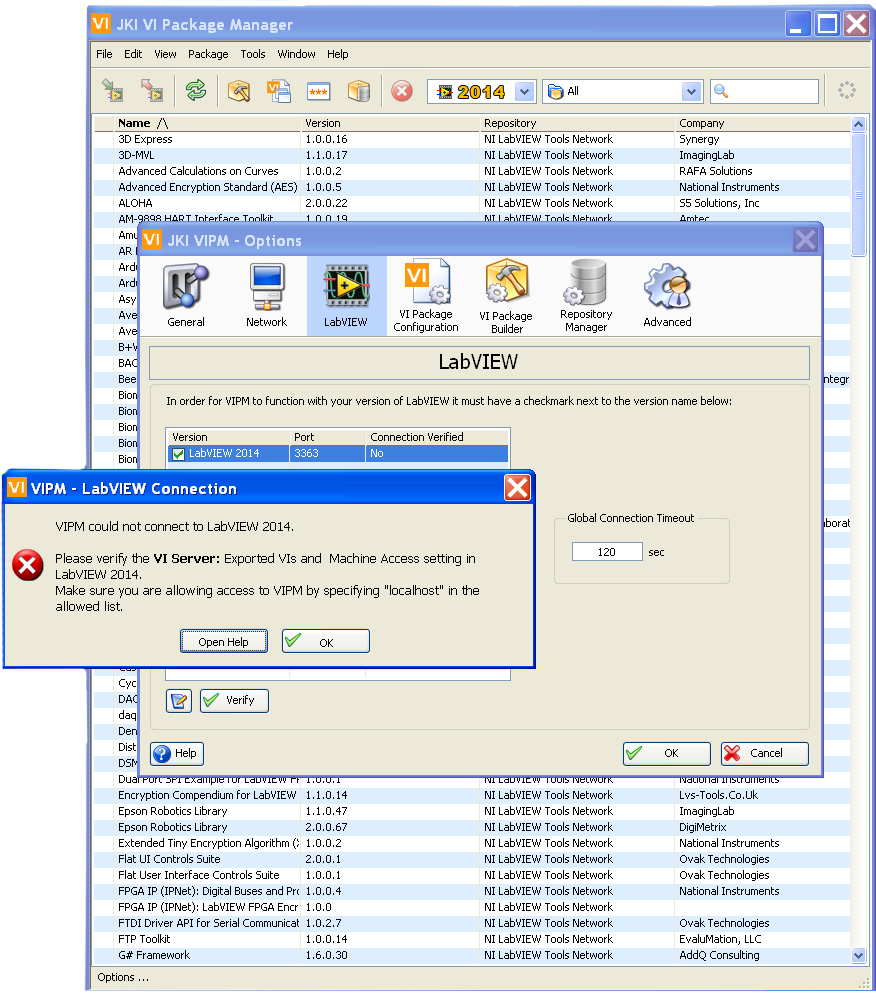
VIPM could not continue. Please fix the error and try again. The following critical error occured:
VIPM could not connect to LabVIEW 2014. VIPM requires LabVIEW access as part of the current task execution in progress.
Please verify the VI Server: Exported VIs and Machine Access setting in LabVIEW 2014.
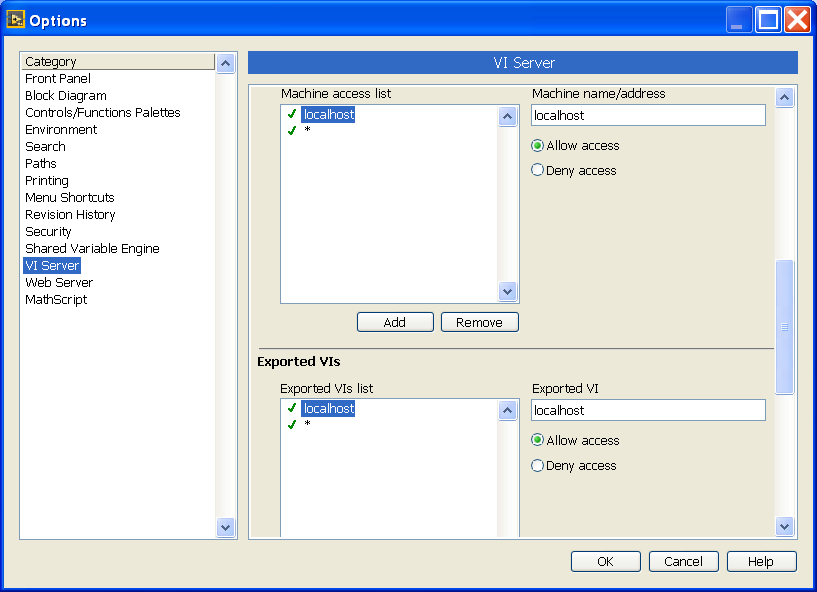
Make sure you are allowing access to VIPM by specifying "localhost" in the allowed list.In LabVIEW \ Tools \ Options \ VI Server there was no "localhost" so it was just added.
Still get error message.
So changed both windows to they only show:
localhost
*
but still get the same error message.
Turning off Windows Firewall did not allow VIPM to work.
Server Settings: Adding 127.0.0.1 to Machine List did not allow VIPM to work.
Machine Access:
localhost
127.0.0.1
*
Exported VIs:
localhost
*
Still getting same error messageServere Settings: enabled TCP/IP & Scripting did not help VIPM.
Verify VPIM Fails
used Add/Remove Programs to uninstall VIPM.
Reboot Computer
ReInstall VIPM.
Reboot computer.
Result: same error messages as above both for LabVIEW verify and when
trying to install MakerHub LINX & Tools.
On Resolving issues with VIPM connecting to LabVIEW
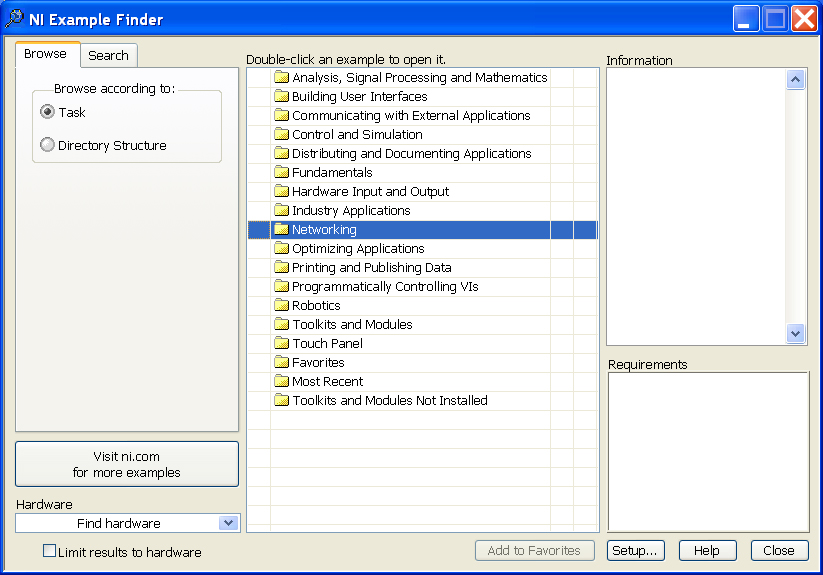
They say to see if LabVIEW will open the Example Finder.
If it does that means LabVIEW can connect to the web.
This was not the problem since Example Finder opened.
When checking Windows Firewall list of exceptions LabVIEW was listed as was the JKI updater, but VIPM was not listed so I added it.
Result: Both Verify and install VIs failed.
Rebooted computer.
Result: Both Verify and install VIs failed.
Control Panel \ Add-Remove Programs - All NI programs - this takes a very long time.
Reinstall the NI software.
Note the following software is still installed:
VIPM
VISA Shared Components
Microsoft Net Framework 4 (Client profile & Extended)
This requires two restarts of the computer and takes about 2 hours.
Result: Both Verify and install VIs failed.
18 July 2015
Used Add/Remove Programs to uninstall VPIM.
In C:\Program Files found a JKI folder and removed it and everything in it.
Rebooted computer.
Reinstalled VPIM, unchecked box for Run VPIM.
Rebooted computer.
Ran VPIM as user Brooke (no password) same error message.
Tried to run as "admin" with no password - login failure
Tried to run as "admin" with password "pass"- login failure
-------------------------- End Software Installation -------------------


LINX Firmware Install
FDTI Drivers
Download the FDTI driver from the Arduino web site.
When the SparkFun Red Board is connected using a USB cable the steer the wizard to the local folder were you downloaded the USB driver. Power off your computer and restart to make the FDTI USB driver active.
LINX Firmware Install
Open Windows Device manager and with the COM ports folder open, plug in the USB cable and Red Board and notice which COM port opens, in my case it's COM20.
Now open LabVIEW \ Tools \ MakerHub \ LINX \ LINX Firmware Wizard. This will load the LINX firmware into the Red Board making it into a LabVIEW I/O device.
Then click on the Run Example which does not require any external hardware since it just blinks the blue LED that's on the Red Board.
Before running the LabVIEW app first use the drop down menu to set the serial port (COM20 in my case) then press the small run (right arrow) button in the upper left corner of the LabVIEW window. Now when you press the green On/OFF button the LED will turn on and off.

COM Port Speed Setting
In Device Manager \ Ports \ Properties of COM20 \ Port Settings \ Advanced \ Latency Timer (change from 16 ms to 1 ms).
In the LINX simple blink example this changes the loop rate from 64/sec to about 214/sec, over 3 times faster.
The yellow Tx LED and red Rx LEB now both flash very quickly.
LabVIEW
There are a number of descriptions of programming languages such as "low level" and "high level". A low level language would be assembly language which is specific for a particular make and model of microprocessor (Wiki) or microcontroller (Wiki). My first computer was a South West Technical Products (SWTP) that used the Motorola 6800 CPU and I programmed it in assembly because there was no software for it. Note that the 6800 supported the programming concepts of relocatable, recursive and re-entrant code unlike the Intel CPU of the time and that was a key reason the Apple used the 6502 CPU instead of an Intel processor, it enabled much more sophisticated programs.
More recently I've programmed a number of the PIC microcontrollers in assembly language. "C" (Wki) is a low level language that's a generic form of assembly language. I haven't learned it.
FORTRAN (Wiki) is a language that I used to write a circuit analysis program for microwave networks based on HP app note 95 S-Parameters that was part of the introduction of the HP 8410 Vector Network Analyzer (Wiki). FORTRAN might be called a high level language. Initially the code was on punched cards and I drove the cards to a mainframe computer (Wiki) in Palo Alto to get the printouts. Later the software was run on a time sharing (Wiki) computer using a telephone modem (Wiki) and ASR-33 Teletype (Wiki) machine.
Next came HP Rocky Mountain Basic which was both an operating system and a language. This was before there were any PCs. This language was optimized for instrument control (the main product of HP was test equipment), but it was also used to write a Mechanical Engineering software package (you might call it an early Autocad).
Then came LabVIEW which differs from all the above in that it's a graphical programming language. Note this is a different concept from a graphical user interface (Wiki GUI). When a program is running if the user sees things like C: and types in text that's not a graphical user interface. In all the above languages when someone writes a program it's done using text, but in LabVIEW (and late in HP VEE) the programming is done by drawing diagrams.
It turns out that the man hours needed to write the code to perform some test task depends a lot on the language that's used to write it. The most efficient by far is LavVIEW both because of the ease of writing good code by also because of the availability of instrument drivers.
But LabVIEW is a computer language and there are subtleties and approaches to how you do things that separate a novice from a seasoned LabVIEW programmer.
LabVIEW Interface for Arduino
The NI web page LabVIEW Interface for Arduino has been moved to LabVIEW MakerHub.
The NI web page has an introductory video and a bunch of Arduino examples.
The interface is not a compiler for the Arduino, but instead is a computer to Arduino interface so that a program running LV can interface with anything connected to the Arduino. The connection method can be USB, Wi-Fi, Blue-tooth or some other method. The software is called LINX (different from the Linux language).
LabVIEW Interface for Arduino Setup Procedure
There is a LabVIEW compiler for Arduino by a third party, but it's a non starter is I can't get LabVIEW to work on WIN XP.
tsxperts - The Arduino™ compatible compiler for LabVIEW ($100 for home version)
Vernier sensors Arduino Interface
Vernier makes an Arduino interface shield with two analog ports and two digital ports to connect to their sensors.
chipKIT
They make Arduino compatible boards except the microcontroller is a 32-bit PIC. Also have various shields that are Arduino compatible. These are listed on the LabVIEW MakerHub.
Adafruit
Makes a bunch of Arduino compatible boards and shields.
It's not clear what LabVIEW software is available.
Adafruit Motor/Stepper/Servo Shield for Arduino v2 Kit - v2.3PRODUCT ID: 1438 ~$20
MakerHub
MakerHub home page - June 27, 2015 there are many problems: when you click on something that's not what you get. The pages were made using cut and paste, but the link targets where not changed.
YouTube - MakerHub channel
Programs
Old
It remains to be seen if it will be possible to fire up these obsolete computers and transfer the programs.
Current
One of my current interests is in analyzing DC permanent motors. I have some combined flywheel-pulleys on order with different central holes to support motor shaft sizes of 1.0, 2.0, 3.17, 4.0 & 5.0mm. By using the HP 6038A DC power supply and the SR 620 Time Interval Counter some testing of motors could be done. A simple photo transistor input to the counter will give RPM but a digital pull scale would be nice for torque related measurements. But until I get the flywheel-pulleys and make some manual measurements the specs for the scale are TBD.
Instrument Drivers
I spend a lot of time writing instrument drivers and once you have them for your instruments then writing LV becomes much easier.
NI has a lot of instrument drivers, as does HP/Agilent/Keysight.
NI GPIB-USB-HS
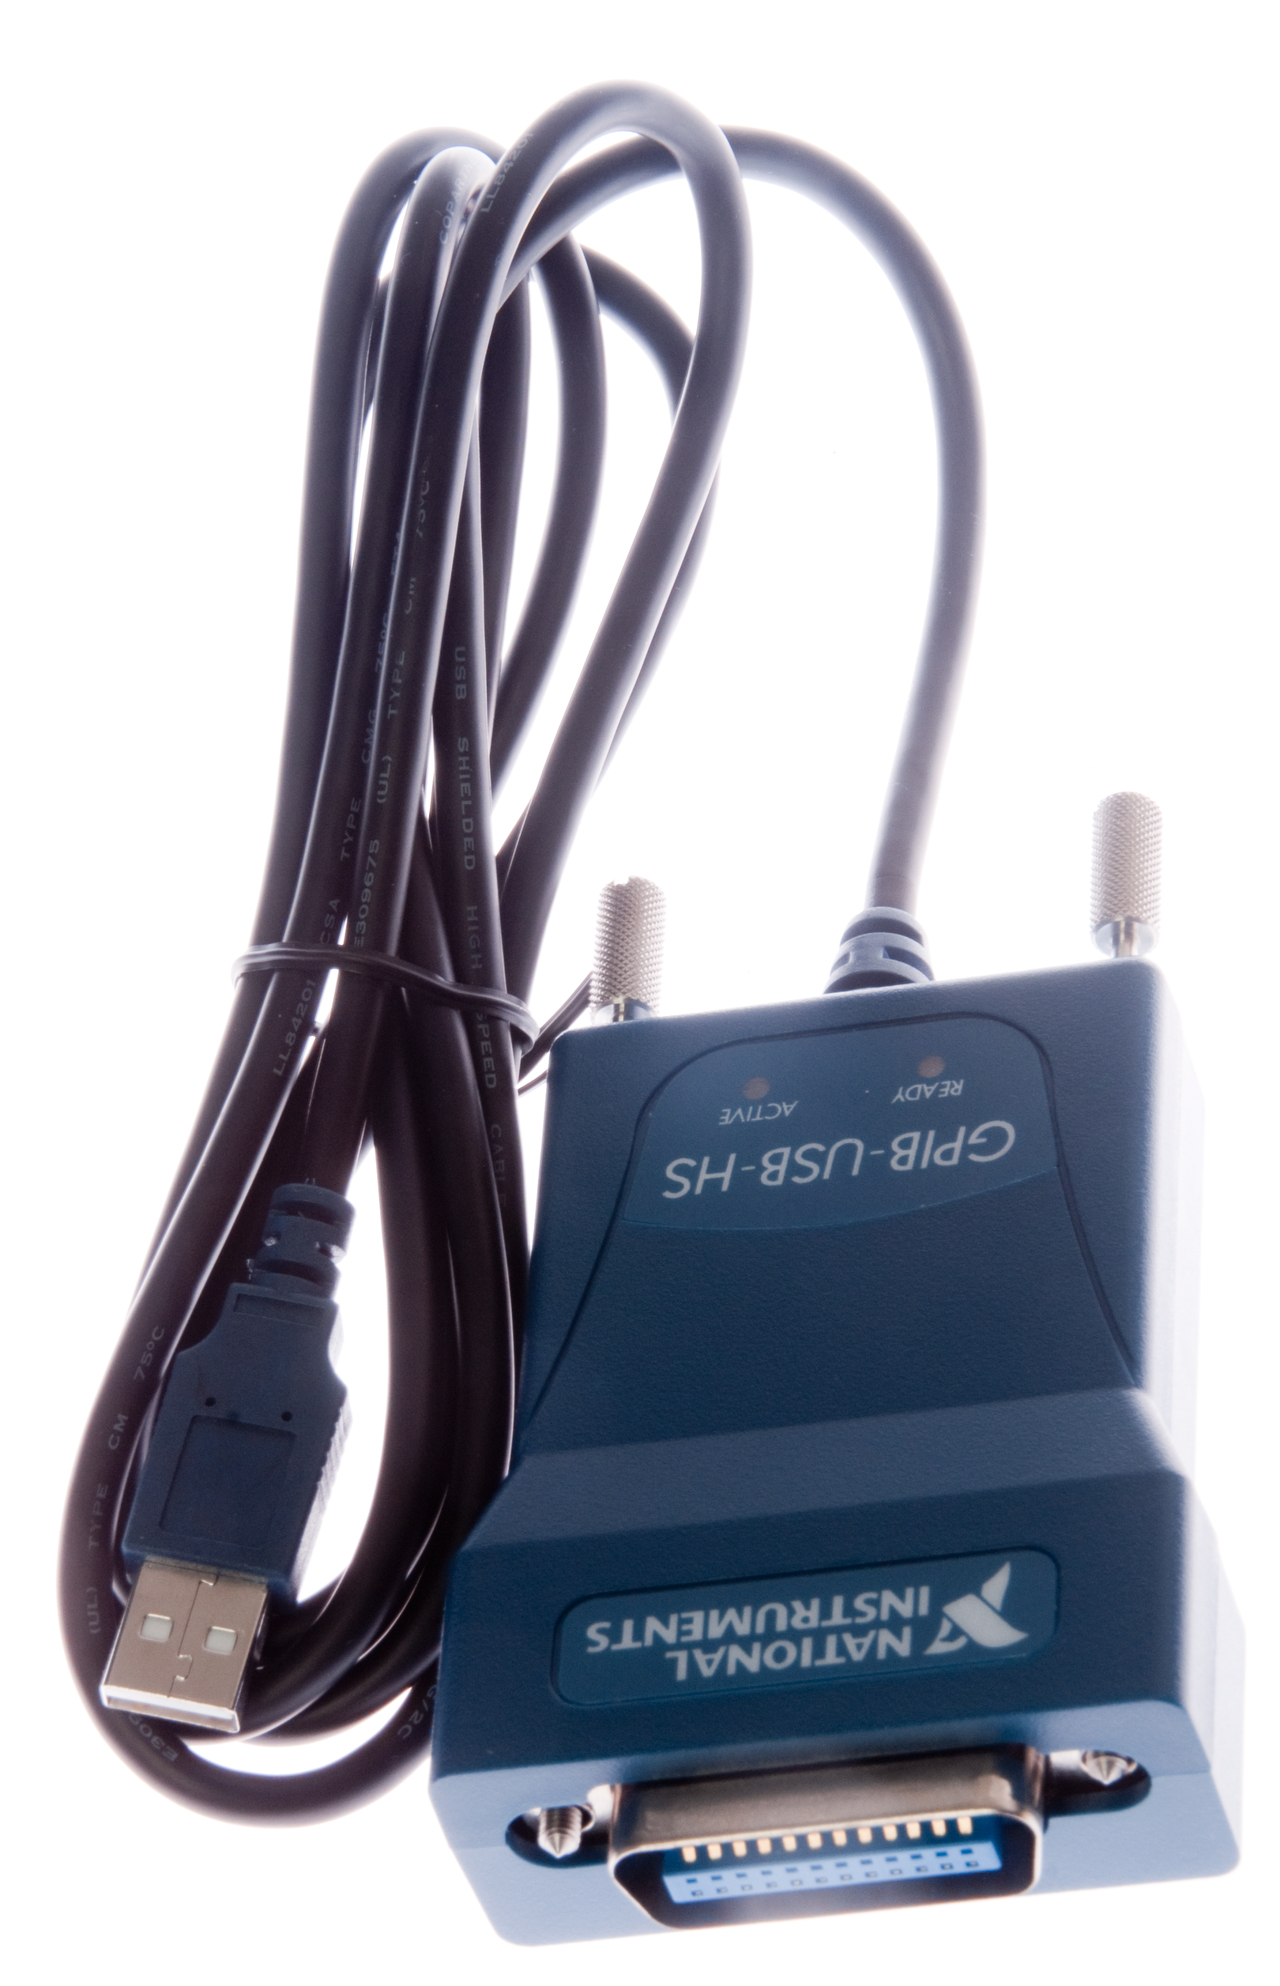
This is the adapter I got to allow controlling HP-IB instruments.
NI-488.2 2.5 - Support for Microsoft Windows Vista - Windows Vista/Vista 64-bit/XP/2000 (about 16 minutes to download 260 MB).
View a list of supported hardware
View hardware installation instructions
(GPIB Hardware Guide.pdf)
Run Add GPIB-ENET/100 Wizard - help file
Learn more about using GPIB and NI-488.2 - help file
NI-488.2 User Manual- no info on using the CD-ROM that came with the GPIB-USB-HS
Instrument Control in Windows with GPIB: Set-up and Configuration- Assumes you have already installed 488.s drivers (Vista)
After Vista is downloaded and installed then plug in the GPIB-USB-HS adapter.
Connected GPIB-USB-HS directly on the back of SR DG535 (tried to connect to an HP E3631A Power Supply but the NI adapter is too big. Need either a IEEE-488 spacer or cable).
Power turned on the DG535, plugged the USB cable into computer.
Found New Hardware bubble after connecting USB cable
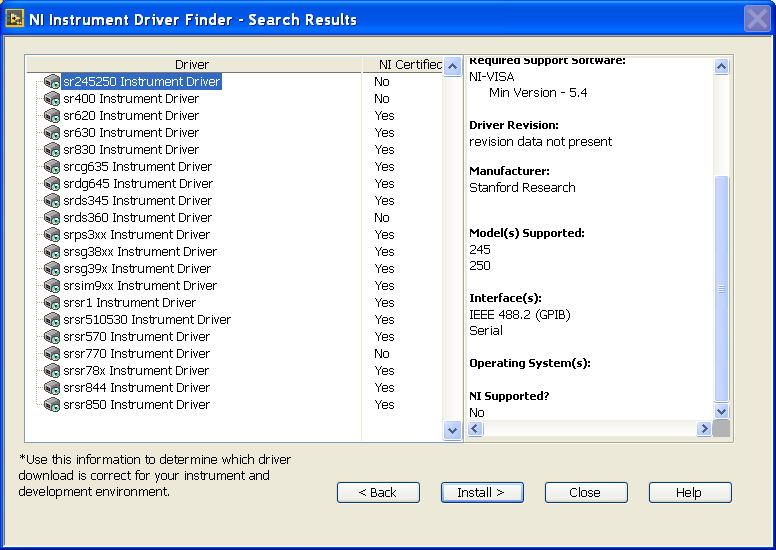
LabVIEW driver for the DG535 - used the 2013 version since my Labview is 2014 and not 2015.
The file srdg535.zip goes to C:Program Files\Labview\Drivers
After loading the driver started LabVIEW and selected Tools \ Instrumentation\ Create instrument driver project - but this is for writing instrument drivers.
Next tried the top choice in the Tools menu: Measurement & Automation Explorer and this caused a crash:
Next, after restarting LabVIEW trying Tools \ Instrumentation \ Find an instrument driver . . . but while a list of Stanford Research drivers appeared the one I loaded did not appear.
Maybe the NI-GPIB-USB-HS adapter needs to be initialized? Probably, but this requires running MAX (Measurement & Automation Explorer, which causes LabVIEW to crash.
So . . . another major problem with no tech support from NI (home edition).
I'll try the LabVIEW mailing list. No response.
Complained to Diligent and 28 Sep 2015) received an email from NI recommending:
1. 0xC0000005 Access Violation when starting MAX software - there's no hardware attached to my computer, the NI MAX software must be part of the NI GPIB 488 package.
Did nothing here.2. Uninstall & reinstall MAX - but the email says I can just install MAX as part of a NI-488.2 install and it will overwrite the old one.
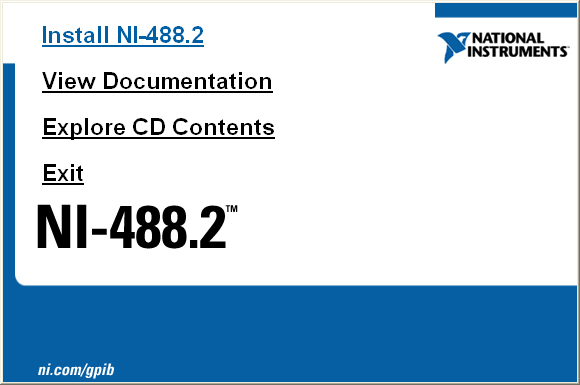
The down loader program ( NI4882_1500f0_downloader.exe) is only 153 kBm but the actual code (NI4882_1500f0.exe) is 604.1 MB so will take about 33 minutes. Reinstalled NI 488.2
After this install MAX works.
Connecting an HP 33120 Function Generator. MAX finds and identifies it.


Photos
Related
Computers
Computer Languages & HP-IB Controlers
PIC 16F88 Getting Started, PIC packages
Precision 6 Digit Clock these ideas led to the LED1PC2 clock (PIC based)
Precision Clock combines the two boards from the PC6 into one board and uses a bigger PIC, Stability table (PIC based)
12 LED Clock - (PIC based)
Precision Clock 4 - Uses LCD display, settable to 1 ms, runs from common standard frequencies 1, 5, 10 MHz. (PIC based)
References
LabVIEW Operating System Support - includes WIN XP with SP3 until July 1, 2016. WIN 8 & WIN RT not well supported) WIN 7 fully supported.
LabVIEW Hacker is now LabVIEW MakerHub
NI myRIO - LabVIEW reconfigurable I/O (RIO)
Links
PRC68, Alphanumeric Index of Web pages, Contact, Products for Sale
Page Created 20 June 2015