Nikon Cameras
© Brooke Clarke 2010 - 2022
Background
Cameras
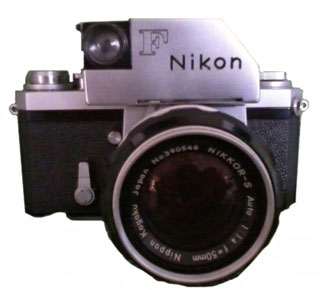
Nikon F with FTn Lightmeter Prisim
Viewfinder
Kodak DC290
Nikon N90
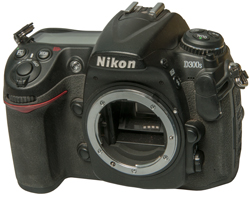
Nikon D300s
D300s
Video
Stereo Mike
USB
Problem Jan 2012
Settings
D300s No 2
D800E
D60
Full Frame
Mirrorless
Z-Mount
Z6
Filmmaker's Kit
Lens
f/Stop
Pre Light Meter
Automatic Diaphragm Lens
Pin & Yoke Metering
Nikon Nikkor-Q
Auto 1.4 f=20cm
AI, AI-S & AI-P
D Series
G Series
AF, AF-D, AF-I, AF-S
Using a Manual Lens on Modern
Camera
Focus
Camera Body Lens Mount
Nikkor FX AF 35-70mm f2.8 D
Lens Full Frame
DX (half frame) AF-S
18-55mm ED Lens
Tamron 80-210 mm AF Nikon
Lens
Kenko MC7 Nikon AF 2X
Tele-extender
Nikkor FX 300mm f/2.8
ED AI-S Lens
Astronomy Use with D300s
Nikon AF Micro-Nikkor FX 105mm
f/2.8G ED-IF AF-S VR (DxO:
36)
Nikon Nikkor-Q FX Auto 1.4 f=20cm
Nippon Kogaku Japan No. 209604
Pin Hole
Nikon FX 55mm Macro f/2.8 AiS
Tokina DX 11 - 16 mm (DxO:
22)
Nikon DX 18-200 mm
Sigma FX AF 50mm
f/1.4 EX DG HSM Lens (DxO:
46)
Nikon AF Micro-NIKKOR 200mm f/4D
IF-ED - (Ken
Rockwell) - on D800E page (DxO:
30)
28-300mm f/3.5-5.6G ED-IF FX AF-S VR II Lens - on D800E
page (DxO: 18)
Metering
Learning
SB-900 Book
CLS DVD
D300s Guide
Mastering the Nikon
D300/D300s
Nikon® Creative
Lighting System, Digital Field Guide
Strobist Lighting Seminar
DVD Set
Lighting
Color Balance
Micro-Disk
Translucent
Lens Cap
Creative Lighting System
Flash
Separate web page for Photographic Studio Strobe
System
Red
Eye
Blinking
Long
Focal Plane
High Speed
Zero Length
Wire
SB-25
SB-900
Optional
DC Power for the SB-900
Nikon Patents Scope Plot of SB-900 Flash Pulses
R1 & R1C1 Close-up Flash
SB-R200
Close Up
Photography
250W Studio Light Flash
Strobe
Set of Two Studio Light Flash
Strobe Monolights
Pro 7" Reflector for Bowens
Strobe - does NOT fit
Yongnuo YN-565EX Flash
Wein WP1000 Flash Meter
Smith-Victor PL10
Hot-Shoe
Manfrotto Clamp
Deluxe
Strobist Swivel Flash Bracket Umbrella Mount
SB-400
Umbrella
Ultra Compact Light
Stand
Spring Clamp
Collapsible Soft Box
Collapsible Reflector
Diffuser
SG-3IR Visible Light Filter
for the pop-up flash
Shooting Table
Flash Bracket Grip
Pocket Wizard RF Remote Flash
System
Einstein E640 Flash
Nikon DC Power
EN-EL3e in camera Battery
EH-5A AC Adapter
Vertical Battery Grip Timer
Memory & Data
SD Cards
Eye-Fi WiFi
Data Transfer
CF Cards
USB Cable
Remote Control
Self Portraits
Wireless Remote Shutter
Wired Remote Shutter Release
Cable
MC-21 Shutter Release Extension
Cord
WT-4a WiFi LAN Control
Wireless USB
Experiments
Filters, 62mm
Polarizing
Lens Chart
Tripod
Carry Case
GPS
Software
Second Nikon Digital Camera
Patents
Related
Links
Background
In the mid 1960s my brother
developed an interest in photography and bought a Nikon F, the top
of the line full frame 35 mm camera at that time. He then
lost interest so I started an interest in
photography.
Over the years the plain Nikon F was upgraded by adding the
Photonic (spelling?) view finder that had a light meter that
mechanically coupled to the f-stop ring on the lens allowing on
the camera metering. The last of the film Nikons was the
N90. It had a couple of computer chips in
the body, one chip in the lens and one chip in the flash. An
accessory back allowed imprinting an alphanumeric image on the
film. To get digital images from the N90 you could get an
optional CD-ROM when the film was developed. The CD
contained a number of images of each frame where they differed in
the file size. I was using the
Nikon
SB25 Speed Light from the N90 with the Kodak
DC290.
The N90 was put on the shelf when the Kodak DC290 digital camera
became my mainstay camera. This digital camera has manual
override capability for exposure, focus, flash, etc. and a script
language that allows it to do things like imprint the image with
GPS coordinates. I wore out the navigation button on the
first DC290 and have been using a second one (bought used) for a
number of years. I've worn out the external flash contacts
on the second DC290 and rplaced it with the Nikon D300s.
It turns out that all the D300s cameras on eBay for a good price
were either demo or refurbished units (not eligible for Nikon
extended warranty). I ended up buying it new form Wall Mart
on line and picking up the camera at the local store (no shipping
cost). This is a new camera eligible for the Nikon extended
warranty, even though I'll live with the factory 1 year warranty.
Cameras
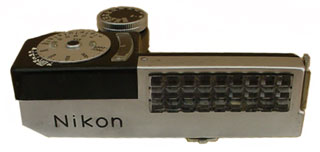
Nikon F with FTn Light meter Prism Viewfinder
Started with the plain F camera with no electronics.
Then replaced the viewfinder with the
light meter
type. You can see the "V" notches on the film rewind base at
the upper right in the large version (click on photo for a larger
image. One of the selling points of this camera was the What
You See Is What You Get viewfinder. The viewfinder in other
cameras was not matched to the film frame,but Nikon went to some
trouble to make the viewfinder exactly the same as the film frame.
Since the Nikon F (
Wiki) came out
in 1959, way before the Dx coding (
Wiki,
YouTube))
of 35mm film, it does not have that feature.

Kodak DC290 Digital Camera
Was used for all my web photos up
till mid 2010 when the D300s became the everyday camera.
Mostly used with the
Nikon SB-25
Speedlight in bounce flash mode.
 |
The A.C. power cord camera
connector wore out and has been replaced with one from
Radio Shack.
It was commonly used connected to both the A.C. power and
USB cords.
|
In addition to the camera there is an accessory lens adapter that
can hold a wide angle, telephoto or close up lens.
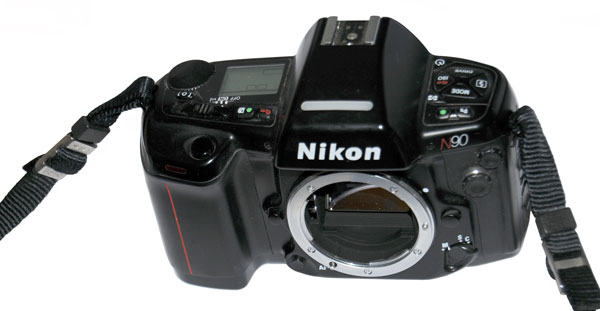
Nikon N90 33 mm Film Camera
Used for my very first web pages
(maybe a couple of dozen images).
|
The larger round cover
below the "N90" is for the same 10-pin interface that's
used on the D300s.
The focus mode switch (M, S, C) is in about the same
position as on the D300s.
The Lens electrical contacts might be:
LVcc: Low Voltage positive rail
AF-A/M: Auto Focus is either Auto or Manual
Pre-view: Stop down to the taking f/stop
RW1: ?
SCK: Serial data clock
SIO: Serial data input or output
RW2: ?
DGnd: Digital Ground
|
|
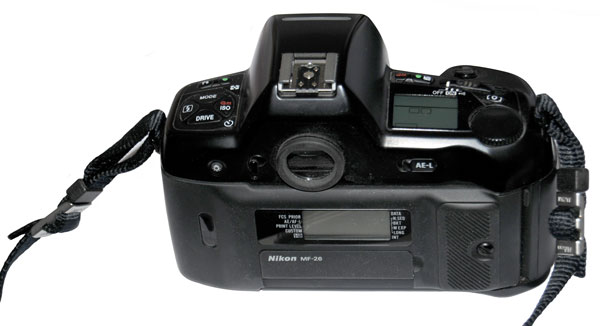
Shown with MF-26
Multi-Function back installed. Uses LED digital
display to imprint film.
|
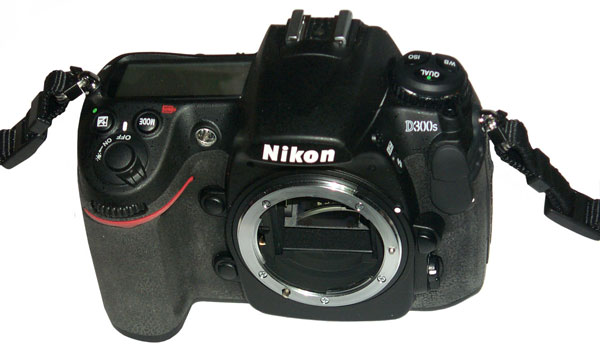
Nikon D300s
The D300s is the next generation of the D300. The D300/D300s
are half frame (DX) sensor cameras and the D700/D700s are the full
frame (FX) versions of the same body. The main thing the
D300s has is HD video mode including 720p and 1080i. This
should look great on a
Home Theather
system. But on the first day of having the camera have not
gotten it to play the HD video on the big screen. It will
however download an .avi video file at 720p (the only format I've
tried so far) that plays on a PC (75 MB for 30 seconds) but the
sound was out of sync with the speakers lips.
The D300 and D300s are GPS (
see below) enabled
cameras. That means when a GPS receiver sends TTL level
digital data to the 10 pin interface connector the camera stores
the coordinates (and heading if available) as part of the data
package for each shot. The shots can then be geo located on
Google Earth. I think the Nikon GP-1 GPS receiver does not
have a heading output but there are after market GPS receivers for
the Nikon that do have heading.
The D300s can not be used to take a photo when the USB cable is
being used to download images. The Kodak DC290 has a switch
on the back and when it's not in the "connect to computer"
position will take photos so the cable can be left on all the
time. Maybe there's a way to turn off the computer link on
the D300s so you don't need to plug and unplug the cable?
I have the self timer set to 2 seconds and when taking hand held
shots it greatly reduces camera movement.
Email response to question about powering on camera flash units 25
March 2015
Phoned Nikon 2 March 2017 asking again about the availability of a
studio (>= 500 WS) strobe that supports CLS. They will
emain an answer in a day or two.
3 Mar '17: "
It
was a pleasure assisting you with your question on
CLS. With our speed lights you can turn the ISO up so
the lights can be brighter with the SB-900 you can set your
ISO as high a 8000. Our newer speed lights can
also go as high as 10,000." That's so say they do not
support studio strobe lights in any way. Raising ISO
degrades the image so is not an option.
It's a frustrating problem. Nikon
neither makes a studio flash with their Creative Lighting
System (CLS) nor supports a third party to make one.
Yes, if you want to use any of their on-camera type flash
units in a studio setting you need to get to the battery
contacts. For at least one model Nikon on camera
flash a third party makes a replacement battery door that
has external power leads. But the battery door on my
SB-900 does not come off. I thought about ways to
get to the battery contacts, but in the end would have had
to drill holes in the battery door and install a wooden
dowel and some wires.
Instead I gave up on CLS and got a real studio
flash. I choose it because it is compatible with the
Pocket Wizard RF flash link and is much more powerful.
http://www.prc68.com/I/PhotoStudioStrobeSystem.shtml#E640
http://www.prc68.com/I/PhotoStudioStrobeSystem.shtml#PW
I have a light table with a number of low cost (100 to 200
Watt Second) monoblock strobe flash units lighting from
the bottom and the E640 on a tripod with the 4 foot
diameter parabolic reflector and a diffusing cloth over
it.
http://www.prc68.com/I/PhotoStudioStrobeSystem.shtml#Light_Table
I use the D300s in Manual mode (f/36, ISO 200, 1/100 sec
although the shutter speed is non functional with a
strobe). The f/stop and E640 strobe power can be tweaked
from that starting point either manually on the E640
control panel, or by using the exposure compensation
function on the D300s which works at double the number of
stops set because it also controls the E640 light output
through the Pocket Wizard.
The other really neat thing is the Eye-Fi SD memory card
in the D300s which uses the house Wi-Fi to download photos
from the camera directly into my desktop computer.
This removes the wear and tear of connecting a USB cable
to the camera (I've had to return the D300S to have the
USB connector replaced) of the wear and tear of removing
and reinstalling a memory card. Note: The
first Eye-Fi card I got would not do .NEF files, so I got
a better one that does since all my photos are NEF files
(and have the camera set for 14 bits per color channel and
AdobeRGB instead of sRGB.
http://www.prc68.com/I/attDSL.shtml
http://www.prc68.com/I/Nikon.shtml#Eye-Fi
http://www.prc68.com/I/DigitalPhotography201StackingImages.shtml#HDR
using RAW files is far better than dynamic range
stacking
http://www.prc68.com/I/DigitalPhotography203.shtml#Spaces
AdobeRGB is better than sRGB and still practical, the
other spaces are not practical |
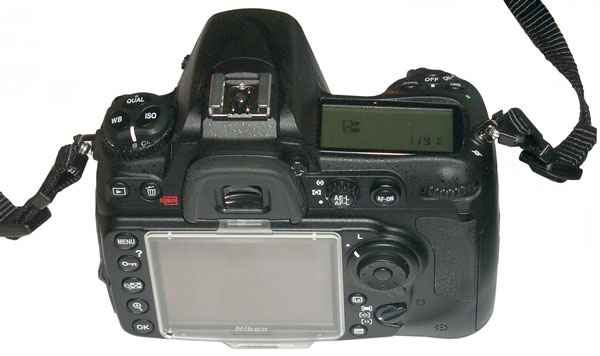
D300s Video
When the Live View button (Lv just
the the right of the LCD screen) is pressed a red rectangle
appears at the center of the LCD image. Now when the
button in the center of the 4-way navigation switch is pressed
"REC" appears and the camera is recording video.
In the SHOOTING MENU there is Movie Settings" and you can
select:
Quality: 1280x720(16:9) (this is not quite as good as 1920x1080
HD but
is a big improvement on normal TV), or 640x424 (3:2), or 320x216
(3:2)
Microphone: Auto, High, Medium, Low, or off
Destination: SD or CF card.
Stereo Mike
The built-in microphone is monophonic but the recording allows
for stereo, so an external stereo mike should enhance the
sound. This is more important if you have a home theater
system. This is an audio-technica PRO 24-CM Stereo
Condenser Microphone with a hot-shoe mount.
I've used the D300s to make
YouTube
videos.
Nikon web videos on using the Movie Mode:
Lesson
1 - 2:14 - use VR image stabilization or a tripod or brace
yourself. If you move, do not zoom or pan, i.e. only one of
these at a time. Don't stop recording and restart when at
the same location (that's called a jump cut, for most of the time
a no-n0).
Lesson
2 1:48 - Composition: Change Point Of View (POV), different
lens focal length. They suggest the old fashioned idea of wide
establishing shot, medium shot then closeup. I think that's
a very old technique that's boring.
Lesson 3 1:48 - quit playing
Lesson 4: There is a time limit for video recording and the
camera just stops recording and if you don't notice that the red
dot turned off, you may think you are recording when you are
not.
Lesson 5: I'ts also easy to press live view and think you are
recording but until you press the center of the navigation button
you will NOT be recording and miss out.
There is a major problem with Live View. You can NOT
look through the viewfinder, but MUST look at the live
view screen. But, I can not focus on the live view
screen unless I hold the camera at arms length, which
results is very shaky videos, so it's not at all
practical. What's needed is a mirrorless
camera that has an electronic eye level viewfinder.
Because the LCD is fuzzy when holding the camera steady
it's very easy to miss the "recording" red dot.
|
Mirrorless cameras with Electronic
Viewfinders:
Sony Alpha, Alpha R and Alpha S
Panasonic GH3, GH4
A neat thing is that you can change the ISO number and that allows
making a video in low light conditions without bringing in flood
lights.
|
|
|
|
|
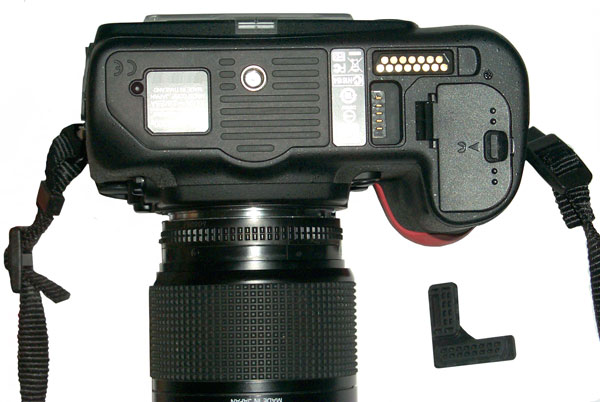
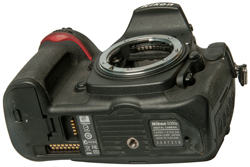
Bottom with "L" rubber boot
removed to expose the two contact fields. These are
used when a eight AA cell battery grip is added. The
door just below the contacts is for the battery.
Nikon EN-EL3e is 7.4 V, 1500 mAh.
There are after market versions with 1800 and 2000 mAh
capacity.
|
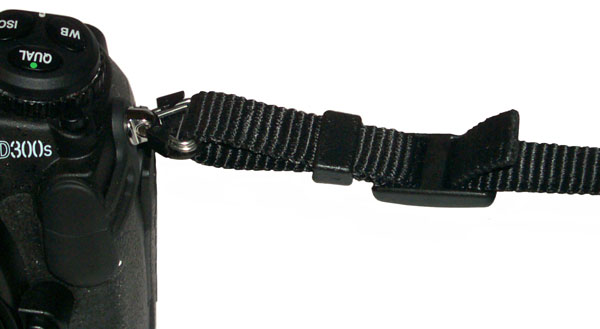
Strap
|
Nikon D300s Shoulder Strap.
The triangular fitting is part of the camera. Over
it is a black plastic plate. It's there to prevent
the metal ring from scratching the camera body.
(thanks to Oliver
Perialis for letting me know.
The shoulder strap has no metal fittings on the end.
This is quiter than a metal to metal connection.
The strap is 0.43" (11 mm) wide where it connects to the
camera.
|
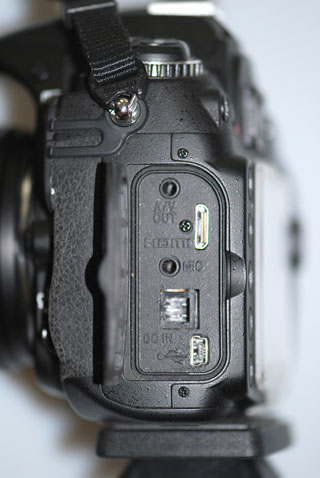
|
From top to bottom:
A/V Out
full size HDMI
MIC in
DC power In
Mini USB (not micro USB)
|
USB Problem 5
Jan 2012
After taking a photo when I plugged
in the USB cable all my USB stuff quit working. Unplugging
the camera restored USB operation. Swapping the USB cable
made no difference, so the camera USB connector is bad.
Looking at it under a stereo zoom microscope shows bent pins and
trying to straighten them broke off a pin, so the camera is on
it's way to the Nikon service center in S. Calif.
This brings up the question of how to get images out of the the
camera. I've probably made thousands of connect/disconnect
cycles on the USB connector (ofter many times a day) and that's
taken it's tool on the connector. Although it's convenient,
it may not be the best strategy.
Another option would be to use the
Universal Card Reader I
got for use with the Home Theather system for viewing
photos. It's going to also have a wear problem but may be a
lower cost item to replace. Note I didn't loose any photos
since they are on the removable memory cards. But if using
the memory card as the transfer method then when (not if) it fails
from all the mechanical mating cycles you will loose the new
photos that are on the card.
The best way to avoid this problem is to use some from of wireless
file transfer to get the photos out of the camera. Some
options are:
- Eye-Fi SD card inside the
camera (for those cameras that will accept it) and a computer
that will run the needed software.
- The Nikon WT-4a WiFi camera interface
(about $800 street price)
- A home brew wireless USB based
interface that replaces the all wire USB cablewith a couple of
wireless USB devices. This way the USB connector on the
camera can be left always connected.
7 Jan 2012 - Saturday camera delivered to Nikon. They will
have it first thing Monday morning. Should take up to a few
days to hear what they find.
Settings
When taking photos of some subjects there are settings that
make for better photos.
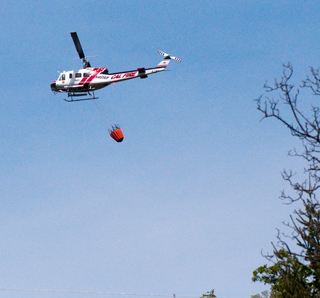
Helicopter in flight
Shutter Release: S (not timer)
ISO: 800 (3200 makes for a lot of noise in image)
Focus mode: Manual (manually focus on something at infinity)
Vibration Reduction: Off (not good for tracking moving
objects)
Focal Length: about 200mm on DX camera, maybe 300mm
Exposure mode: Manual (use Shutter priority first and set
shutter speed as fast as possible, should be 1/500 to stop
rotor blade)
Camera needs to be preset so it can just be picked up, turned
on and point & shoot. There's not going to be time
to make any adjustments.
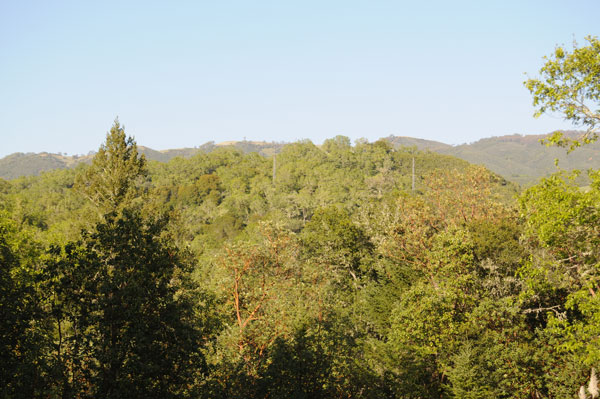
Taken using D300s:
105mm lens with 2X tele extender.
ISO: 3200 (click image to see larger image w/noise)
Shutter: 1/6400 @ f/9
File name: RGB_1564.NEF
|
 |
Astronomy (stars as points, no objects on ground)
Astronomy (stars as points, objects on ground properly
exposed)
Astronomy (star trails)
Every Day Hand Held
ISO: 200 (minimum noise)
image quality: NEF only
NEF bit depth: 14 bit
Color Space: adobeRGB (better reds than default sRGB)
Movie
D300s No 2
Note space between bubble wrap and box

|
Broken plastic part & Crack
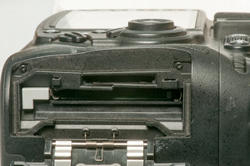 |
Fig 1
|
Fig 2
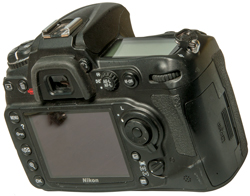 |
Fig 3
 |
|
April 2022 - There are some black spots in the images,
probably from dust on the sensor. When taking photos
using the E640 the first
shot is often washed out. Taking a photo of something
across the room, erasing it, and then taking the desired
close-up photo seems to work. Also since the Eye-Fi card
no longer works the USB socket will get worn out again.
I considered getting a more advanced Nikon but that would
mean getting a new Adobe Camera Raw. That in turn means
upgrading Photoshop to a newer version. That in turn
means getting a newer computer. My current desktop
computer is a WIN7 machine that has some hardware interfacing
capability, but WIN10 and newer versions pretty much eliminate
any external hardware connections, so not an option.
PS for a couple of years inside the support period I suffered
many many Blue Screen Of Death
events and Dell Support was unable to fix it.
No. 2
The camera arrived in a box where you could feel it moving
inside the box. Better packing for shipment would have
required some packing to fill the gap. But the camera
was wrapped with bubble wrap so survived.
So I got a used D300s that arrived looking like new (the
shutter count as advertised as 13504.
But . . . when I tried to install a CF memory card it
would not fit. It was not the case that the button
needed to be lifted, but rather that the thin plastic part the
separates the CF socket from the SD socket is broken and
there's a crack in the plastic opposite to the broken
part. I got a discount on the camera and am gambling
that it can be repaired.
Extra Parts on Order
- SanDisk 16GB Ultra 30MB/S CompactFlash CF Memory Card
- Sandisk SD Card 32GB, 120 MB/s
- EN-EL3e Battery
- Rubber Bottom Terminal Cover
- Nikon Body Cap
D800E<- New web page 2022 Apr
19
The D300s No 2 turns out to have problems even though it will
take photos. So I'm getting the D800E which is
compatible with Photoshop CS6 and ACR 7.1 and is an upgrade to
Full Frame. But that means looking into FX lenses.
Ken Rockwell: Nikon
Lenses for FX Cameras. The 200mm F4 ED AF looks
good. A lower resolution alternative might be the 28-300
AF-S zoom,
Once I have the D800E working I'll send my origional D300s
back to Nikon for a tune up and cleaning.
Ken
Rockwell Review - Nikon
D800 and D800E User's Guide -
D60
July 26, 2014 - When taking photos
for the Microphotography page related to the use of infinity
microscope objectives with a tube lens I used the D60 to
photograph the D300s with the tube lens optics on a light table
with optically triggered strobes below and a Paul Buff E640 strobe
as the main light. See:
Studio
Strobe &
Tube
Lens. When working with this lighting system with the
D300s camera I use "M" manual setting and the automatic settings
don't seem to work. But I used the "P" setting on the D60
and got a properly exposed photo.
It turns out that the shutter speed was way too low and while
there was correct exposure there was also a lot of blur that
shouldn't be in strobe photos, so this DOES NOT WORK.
Jan 2011 - got this camera as a second Nikon digital SLR so that
photos can be taken of the D300s. The criteria used were:
- under $350
- built-in pop-up flash
- CLS compatibility
- Interchangable lens
The D60 will work with the SB-900 in commander mode but does not
have CLS in it's menu system. So the pop-up flash can NOT be
used as a CLS commander. Used cameras that include that
feature cost in the $400 and up range.
Supports (RAW) NEF and/or jpeg file formats.
Uses EN-EL9 battery (different from everything else I have)
Uses SD or SDHC memory cards.
The D60 is considerably smaller and lighter than the D300s.
Note 2 - Lens compatibility was not on my list, but it would be
knowing more about it now.
External Flash Operation
The other problem is getting this camera to trigger the
SB-900 flash that's mounted on the light
stand with umbrella and that's cabled to the old
SB-25.
The pop-up flash is not a CLS wireless controller, so the
SC-17 cable was installed at the base of the
SB-900 and connected to the hot shoe of the D60.
The first problem was switching the SB-900 into REMote mode, it
needs to be just turned on and that means the SB-25
may does not fire.
In order to gain control of the D60 you need to go into the Tools
menu (wrench icon) and then the CSM/Setup menu and select
"Full". This expands the Custom menu from 6 items to 19
items.
Flash metering is either just the subject (when using spot
metering) or balanced (when using matrix metering).
So for using the shooting table and the SB-900 on the light stand,
just connect the SC-17 cable, select "A" mode and some small
f/stop and shoot.
Now to figure out how to get the SB-25 to also fire.
When the D60 is used with a non CPU lens, like the 55mm Micro AND
the Pocket Wizard Flex TT5 you get an error message saying that
you can't use TTL flash metering with a non CPU lens. If
your remove the Pocket Wizard and manually change from TTL to
Manual flash metering you get the same error message when the
Pocket Wizard is installed again.
This is because the Einstein 640 flash is telling the hot shoe on
the D60 that's it's there. The simplest fix is to remove the
Pocket Wizard and enable the pop-up flash on the D60 and you
automatically get optical triggering of the Einstein 640.
Note you need to manually set the f/stop on the lens and manually
adjust the flash head output.
Full Frame (FX)
One of the key benefits to using a DSLR camera for video is that
you can get very shallow depth of focus because of the larger chip
size. So a full size (24x36mm) chip when combined with an ED
glass lens like the 300mm f/2.8 will give depth of focus selection
that's no possible with very expensive professional video cameras.
Sep 29, 2011
I'm currently (2022) using CS6 and ACR 7.1 and the shutter count
is 18,613 on the D300s.
Model
|
Frame
|
Body
List $
|
M
Pixels
|
Image
|
Movie
|
ACR
|
D5 (Nikon, KR)
|
FX
|
6,500
|
20
|
5568 x 3712 |
Good for sports
|
9.5
|
D3S
|
FX
|
5,200
|
12.1
|
4256x2832
|
720
|
5.6
|
D3X
|
FX
|
8,000
|
24.5
|
6048x4032
|
na
|
5.3
|
D600 (Nikon,
KR)
|
FX
|
2,000
|
24
|
6016 x 4016 |
1,920 x 1,080; 30p
(progressive), 25p, 24p
1,280 x 720; 60p, 50p, 30p, 25p |
7.3
|
D610 (Nikon,
KR)
|
FX
|
1,500
|
24
|
6016 x 4016 |
1,920 x 1,080; 30p
(progressive), 25p, 24p
1,280 x 720; 60p, 50p, 30p, 25 |
8.3
|
D700
|
FX
|
2,700
|
12.1
|
4256x2832 |
na
|
5.1
|
D750
|
FX
|
1,900
|
24.3
|
6016 x 4016 |
1920,1280/60p,50p,30p,25p,24p
Built-in WiFi, optional GPS
Internal focus motor so works with older (1977-) lenses
|
8.72
|
D800E
(specs)
|
FX
|
3,300
|
36.3
|
7360x4912 |
1920,1280/30p/25p/24p
|
7.1
|
D800A (Nikon, KR)
|
FX
|
3,800
|
36.3 |
7360x4912 |
IR-cut Filter removed so
good for Astronomy
4x improved H-alpha sensitivity
|
7.1
|
D810 (Nikon,
KR)
|
FX
|
3,000
|
36
|
7360 x 4912 |
1920 x 1080; 60 p (progressive), 50
p, 30 p, 25 p, 24 p
1280 x 720; 60p, 50p
|
8.6
|
D850
|
FX
|
3,300
|
45.7
|
8256 x 5504
|
back illuminated image
sensor (Wiki)
|
9.12.1
|
D300s
|
DX
|
1,700
|
12.3
|
4288 x
2848 |
720
|
5.5
|
| Canon
7DNote1 |
FX
|
1,700
|
18.0
|
5184x3456 |
1080p24
|
|
Canon
5D Mk II
|
FX
|
2,500
|
21.1
|
5616x3744 |
1080p
|
|
There is no full frame Nikon that does 1080p HD movies.
The Canon 7D is the only one that can do 1080p24, i.e. real HD
movie format.
Nikon will be coming out with a full frame
camera that does 1080p?? (no current Nikon will do 1080p at any
frame rate).
Note 1: the Canon 7D has a number of features specifically for
making movies.
Note 2: there have been installation problems with ACR 8.7 and PS
CS6
where the fix is
to use ACR 12.1, i.e. the newest as of Feb 2020. It may
be that instead of using ACR you could use a DNG converter.
Ken Rockwell has a
page of
lens recomendations for the D3x and notes that because of
it's high resolution the lens must be better than for other
cameras.
Mirrorless
There are a number of problems associated with the
mirror. Ken Rockwell: "Mirrorless
vs. DSLR".
One is called called Mirror Slap (Wiki).
I first experienced this with the Hasselblad 500c and it's a
BIG problem on any medium format SLR. The Nikon SLR
cameras also have the same problem and where focus is critical
there's some type of Mirror Lock Up available.
When in Live preview mode (Wiki)
the mirror is locked up and the LCD on the back of the camera
shows exactly what the lens is seeing. Live preview is
mandatory when using the camera in movie mode. BUT . .
when the mirror is locked up the eye level viewfinder goes
black! That's a huge problem since I need to hold the
camera at arms length in order to focus on the LCD screen and
can not hold it still in that posture. See
Lesson 6 above.
|
Because it takes some room for the mirror
to swing the Flange focal distance (Wiki)
between the lens mounting flange and the image sensor
needs to longer than the mirror height.
A mirrorless camera can be thinner and weigh less since
there is no mirror.
So a lens made specifically for a mirrorless camera will
have a shorter back focal distance than that for a SLR
camera.
This difference in back focal length allows using a lens
form a DSLR on a mirrorless camera by means of an adapter.
The adapter needs to be specific to the Lens maker and the
mirror less camera model, but by making it the correct
length the lens will focus.
Nikon
F cameras (44mm hole): 46.50mm
Nikon Z cameras (55 mm hole): 16mm
|
Mirrorless cameras have a number of benefits. Mainly no
mirror slap and eye level view finder operation. While not
a mirrrorless advantage there is an advantage in that the new
Cannon FE mount and the Nikon Z mount support faster f/number
lens designs.
Z-Mount
The Nikon Z series of mirrorless cameras use a new "Z" 55mm
mount, they do not continue with the older 44mm dia. "F"
mount. There is an "F" to "Z" adapter but has many
limitations.
With the Nikon FTZ "F" to "Z" adapter existing AF-S and AF-P
(AF-I?) lenses will work fine. (
Rockwell
review of FTZ)
YouTube:
The Truth About
Nikon Z & Canon RF Mounts -
Telecentric
Lens Design - Did Canon RF and Nikon Z Adopt Similar Approach as
Micro Four Thirds? - (Telecentric lens:
Wiki:,
Edmund
Optics,
Opto
Engineering) - this YouTube used the term "telecentric"
improperly. See the PetaPixel explanation for the design of
the Z-mount by an optical engineer:
PetaPixel:
Flange
Distance and Mount Diameter Explained by a Lens Engineer
& YouTube:
Z Series
Lens Mount Flange Distance Engineer Explanation Mount Benefit
Atsushi - the f/number is defined as (Focal Length)/(lens
diameter).
My first Nikon f (all mechanical, no batteries) came with a lens
rated f/1.4. The fastest lens I have is in the
Mk 20 Mod 4 Gun-Bomb Sight
- where the largest diameter lens is desired for the
collimator output and at the
same time the shortest mechanical length is desired since there is
a very limited space between the lens and the reticle. f =
3.3" focal length / 3.45" lens dia = 0.95
Multiple adapters can be used because there's room. For
example:
Ken Rockwell:
Rangefinder
Lenses on Nikon Mirrorless - Nikkor Rangefinder lens - Nikon
rangefinder to Leica M - Leica M to Nikon-Z - Z6 (note no FTZ
adapter). "In fact, we now can use
Nikon's original 1940s-1960s
rangefinder lenses on the Z cameras!"
YouTube:
Ken Rockwell: Adapt Any
Lens to Nikon Z -
eBay seller:
https://www.ebay.com/usr/freemax188?
FOTOFOX adapter for Leica LM Zeiss M VM mount lens to Nikon Z
mount Z6 Z7camera
Model
|
Frame
|
Body
$ List
|
M Pixels
|
Image
|
Comments
|
ACR
|
Z6 (Nikon,
Rockwell)
|
FX
|
1800
June 2019
|
24
|
6048 x 4024
|
|
11.1
|
Z7 (Nikon, Rockwell)
|
FX
|
3400
June 2019
|
45
|
8256 x 5504
|
Rockwell "World's Highest
Technical Image Quality" |
11.0
|
Z50 (Nikon, Rockwell)
|
APS-C
|
|
|
|
|
12.1
|
YouTube:
Nikon Z6 for
Nightscape Images 27:23 - The
Snap Bridge phone app
works well with the Z6
Video
If a camera is used on a gimbal then prime (not zoom) lenses
are required since zooming causes the center of mass of the
lens to change and that upsets the gimbal balance.
Hardware Items
- Z6 Camera Body
- FTZ Lens Adapter
- 11" Magic Arm (See Go Pro)
- NinjaV 5" Monitor Recorder
- Moza Air 2 Gimbal (for a different gimbal see GoPro)
The following two items are non hardware parts of the kit.
- Vimeo Pro (1 year sub) is part of kit. Plans from $7 to $
75/month, Pro is $20/mo or $240 for a year. Allows for viewer
paying to see video.
Z6
YouTube:
Nikon Z6 Review
for Cinematography 31:45, Mar 18, 2019 - excellent Critical
review for professional use - for now shoot N-log 4:4:2 (causes
small 10% crop) AND must use NinjaV for exposure metering since
there's none in Z6 when in movie mode!
WolfCrow
offers free Z6 cine presets & LUTs. No Rec 709 mode (
Wiki). "Nikon
has gone out of their way to ensure you can’t shoot great video
internally. You MUST use an external recorder."
YouTube:
A NIKON Kit that
Actually DOESN’T SUCK…for once! -
Ken Rockwell:
Pixel
Dumping - unless you make 40" x 60" prints you will not use
the pixels. Smaller prints and electronic screens only have
a few MP capacity.
Nikon
Z7 User's Guide - YouTube
Review -
Pro Secrets (SB-400) -
YouTube: Nikon Z 6 Filmmaker's Kit
Jun 26, 2019 (basis for the kit, 12 bit pro res RAW coming, add
50mm f/1.8 lens)
As of July 2, 2019
Netflix
does not list the Nikon Z series cameras.
Related Movie component suppliers:
Shape - camera &
related rigging
SmallRig -
camera & related rigging
Wooden Camera -
AbelCine
-
NULL Lens Operation
Video - Optical Evaluation Tools -
YouTube
-
YouTube: 5 Z Series
Lens Mount Flange Distance Engineer Explanation Mount Benefit
Atsushi -
1. 16mm Back
Focal distance is as short as they could get while providing
the room for the filter, image stabilization, and shutter.
2. for a full frame sensor (24 x 36mm) the optimum mount hole
diameter is 55mm. Note the larger the hole and/or
shorter back focal distance the faster the f/number
possible. This combination of frame size, back focal
distance and mount ID will support a lens as fast as f/0.95.
Wiki List of Lens
Mounts with dimensions.
Z6 Lens Adapters
The Nikon
Z to F adapter "ZTF" has a couple of problems. The "foot" at
the front interferes with with camera mounting plates; (see Mounts
(Camera)" below. There is no provision to auto focus lenses, like
the
300mm f/2.8 ED AI-S.
This might be corrected by a third party lens adapter company
like:
MetaBones - already has an
Arri-PL
lens to Nikon Z adapter and a
rod
mounting adapter.
Viltrox - Currently has a number
of
adapters
to mount Nikon lenses to various cameras, so will probably
make Z mount adapters.
mtf
(Lens Adapter) - as
of 14 July 2019 has five models of
Z-mount
adapters.
Atomos NinjaV 5" Monitor Recorder
For Video the Atomos
Ninja V Monitor/SSD Recorder + ProRes RAW allows
professional results - Press
Release Jan 8, 2019 - Nikon Z6
support - Shinobi
5" HDR Photo & Video Monitor 4k HDMI - Ninja V 5"
4Kp60 HDR Monitor Recorder part of Nikon's
Fimaker's Kit ($3800) which uses an HDMI cable from Z6 to
NinjaV. ($700 + SSD drive: $100 - $200).
As of 14 July 2019 the ProRes 10 bit RAW firmware upgrade and
not been announced, but it's due this year.
YouTube:
DPReview TV: Atomos Ninja
V Review - it has a fan: that's a problem.
YouTube: Atomos:
Atomos
records 4K 10-bit full-frame N-Log - over HDMI. This
is the introduction announcement Aug 23, 2018. - The 7"
Shogun Inferno ($1300) has the same 10 bit N-Log 4:2:2 capability
as the 5" NinjaV ($700). Note as of 5 June 2019 Nikon has
not released the 12 bit ProRes RAW video upgrade for the Z6 &
Z7. But may not support ProRes RAW from the Z6/Z7?
Also it's not clear what software will be able to use the RAW,
i.e. only Apple Final Cut Pro see Wiki
List
of Video Editing Software and
Comparison
of video editing software.
DaVinci
Resolve 16 has a free version that's more than enough for
anything I'd do. It is tied with Black Magic and since
Atomos is tied to them it may work with Nikon's RAW format? -
Training
- which includes Color Grading 1:56:31 -
YouTube: WolfCrow:
What is a Waveform Monitor
and How do you Read a Waveform Monitor (Part One, Part Two) - (Wiki: Rec.709) -
this is consistent with the use of DaVinci
Resolve where the waveform is king.
YouTube: Video
Codecs & Compression Guide (Feat. Atomos Ninja V) -
The Solid State Drives used with the NinjaV have a much lower
cost per GB than the cards used in cameras ($3.50/GB v.
$0.25/GB) so for cameras with a clean HDMI output are an
excellent way to get higher quality.
YouTube: Nikon Z6 & Ninja V
potentially game changing? | ProRes RAW | 4K 12 Bit, Jan 19,
2019 -
YouTube:
Atomos and Nikon
develop ProRes Raw with HDMI out to Ninja V - CES 2019, Jan 9,
2019 -
Uses Sony L series (NP-F type) batteries but does not come with
any. YouTube: DSLR Video Shooter: Everything You Need to
Know About NP-F Batteries -
NP-F Batteries are all 7.2 Volts (i.e. two Li-Ion cells in
series). So the number of cells in a NP-F battery will
be 2, 4 or 6 cells corresponding to three heights. The
V-mount batteries are twice the voltage (14.4V), so when
comparing batteries pay attention to the Watt hour rating
rather than to Amp hour ratings which can only be used for
batteries of the same chemistry and voltage rating.
| Model |
Batteries |
NP-330, 530, 550
|
2 ea: 18650
|
NP-F 770
|
4 ea: 18650
|
NP-F970
|
6 ea: 18650
|
For more on voltage and Ah ratings for 18650 packs see:
Bicycle Science - Batteries
NP-F Battery Brands:
DSTE
B&H
Moza Air 2 Gimbal
Gimbal (Wiki:
Camera
Stabilizer) also see
GoPro
Gimbal
YouTube Review:
MY MOST
ASKED QUESTION | all gimbal comparison | atolavisuals -
DOES THIS GIMBAL BEAT THE
RONIN S? | MOZA AIR 2 | review Dec 2018 -
NIKON Z6-->Micro USB to Type-C Adapter-->M3C-Micro
Cable-->CAM CTRL port on Air 2. The CAM CTRL port is on the
side of quick release plate, next to 7.4V OUT.
How To Use A Gimbal
Properly -
A
Moza Air 2 Gimbal
is part of the film maker's kit as well as the Moza Magic 11.8"
articulating Arm to hold the NinjaV monitor. ($450) - they also
have a wireless
thumb
controller.
How to Setup & Balance
ANY Gimbal Stabilizer -
-
Moza Air 2 Gimbal Review
- Moza Air 2 must have
accessories (Mounting bracket & handle) DF
Digitalfoto Universal L Bracket -
Gimbal Wars! DJI Ronin-S
vs Moza Air 2 -
The Complete Guide to the
MOZA Air 2 from Setup to Timelaps - the Moza wireless
remote can be connected to a bar with two handles for subtle
movements.
A 5" monitor may not be big enough to use
for focusing whereas a 7" or larger may work. But if the
auto-focus is spot on it's not an issue. TBD.
Mike
A
Rode
Videomic Pro+ Shotgun Mike is also part of the kit. ($180)
MICROPHONES... Here's what
you need to know - @
4:04 Rode Videomic
Pro+ has camera on sense that turns on and off the mike.
Avoids the problem I have with the
Stereo Mike
in forgetting to turn it on resulting in no sound, or forgetting
to turn it off resulting in a dead battery and no way to know it's
dead (which is always a problem, so you need to test the battery
before use or just install a new one).
Lens
Samyang - very low cost cine lenses - Including a
14mm
f/2.8,
85m
f/1.4, from
Samyang
Facebook US -
PL Mount Lens (with WoodenCamera PL to Z adapter)
Wiki: Arri Positive
Lock Mount the standard is based on a 54mm hole, Nikon Z is
55 mm hole so good fit. But PL lenses are manual operation,
not Nikon electronics.
Mounts (Camera)
Handles, Grips, Frames, Rods, Clamps, Cages
Bemyar -
Accessories
-
15mm
rod kit -
edelkrone - Sliders, Heads,
Dollies - self moving tripod -
MoVo Photo -
Stabilizers
& Rigs - they sell their own brand + other brands.
SevenOak -
Cages -
Mikes -
Sliders -
Passive
Gimbal heads -
SmallRig -
Cages (
Nikon,
Z6 #
2258 &
2262
have locating pin) -
Handles (
Moza
Air 2 Plate) -
Quick
Release Plates -
Shoulder Rigs
(15mm dia Rod w/M12f threads both ends) :
Handles,
Rods
(some Cheese rods with 1/4-20 & 3/8-16 holes; no 19mm rods),
Clamps,
1/4-20
Screws,
1/4,
3/8, 16mm thread Adapters -
No. 2244 FTZ Lens Adapter Support -
Z6
-
WoodenCamera -
Handles
-
Rod
Components (
15,
19 & 30mm dia) Clamps to ARRI Rosette -
Nikon
-
Z-Mount
to PL Adapter (factory selected shims,
collimation video) -
Zacuto -
Cages,
Plates, Rods
(15mm dia, 1/2-13 threads (m, f, or cap),
YouTube: Wooden Camera:
Rod
Standards Explained 1:58 -
Playlists:
DSLR
Cages -
Post Processing
The classical Non Linear Editors (
Wiki:
NLE) like Adobe Premiere, Apple Final Cut Pro are based on
treating each frame as an image. DaVinci Resolve is based on
working with the analog voltages on each color channel and so is
the best way to post process a video image to enhance the image
quality. The classic NLEs are more about classical editing.
YouTube: Sony FS5 RAW Upgrade:
Footage by and Conversation with Doug Jensen - before
getting a new camera use Resolve to improve your existing
footage.
Hybrid SLR-Mirrorless
In 2006 Nikon applied for and in 2011 was granted a patent for
a "Camera with Viewfinder" that allows a DSLR viewfinder to work
in either Through The Lens (TTL) mode or in Mirrorless mode.
us7876373B2
Camera with viewfinder, Masahito Ochi, Hisashi Sano, Toshiaki
Maeda, Kazuma Hosoi, Akira Ohmura, Nikon Corp, 2011-01-25 -
Looks VERY expensive.
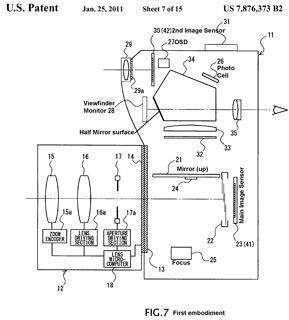
|
The patent includes a number of
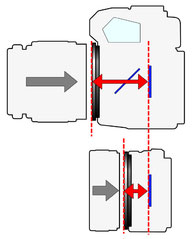
embodiments, Fig 7 shows the first one. I have added
labels to make it easier to understand.
Note that when the mirror (21) is up as shown in Fig 7 the
exposure sensor (26) and the focus sensor (25) no longer
work.
This is a big problem and how it's solved is the heart of
the patent.
The solution in all embodiments is to use a second optical
system (lens 29 & image sensor 30). This second
system needs to
have a filed of view that is not obstructed by a lens
shade on the main lens, i.e. needs to be well above the
main lens.
In the second embodiment it's on the tip of the pop-up
flash.
The main problems are the cost of a second optical system
including all the features of auto focus, exposure control
&Etc plus the problem of seeing over a large lens
shade make this very expensive and clunky.
The real solution for a hybrid mirrorless camera will not
have a second optical path, but rather find a way to
accomplish these goals in another way.
That other way probably is the way it is now done in a
mirrorless camera, and so is already patented.
|
Lens
Filter Sizes Chart
Note 1: Internal not front of lens
Pre Light Meter Automatic Diaphragm Lens
The lens f/stop ring is not directly connected to the iris, but
instead acts as a stop. The picture is composed using the
fully open iris and just prior to the exposure the camera body
stops down the lens to the f/stop that was manually set.
You also can press the depth of field preview button to stop
down the iris to it's preset value.
The D300s has a lever that does this, i.e. you compose the photo
with the lens fully open and it stops down to the preset value
just prior to exposure. It also has the depth of field
preview button.
DO NOT INSTALL THESE LENSES ON MODERN CAMERA BODIES WITHOUT
HAVING THEM MODIFIED. May damage the body.
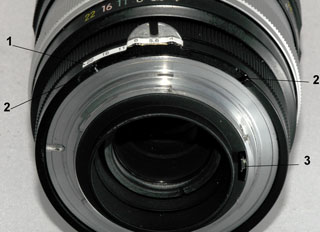
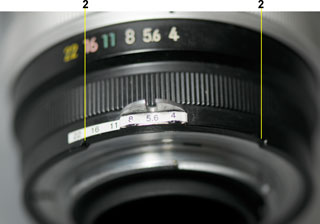
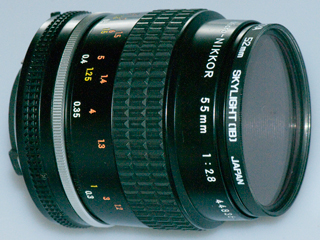
Pin & Yoke Metering
Nikon
Nikkor-Q Auto 1.4 f=20cm Nippon Kogaku Japan No. 209604
This is a
MI (
Manual
Indexing) lens. This seems a
better term than does NAI, i.e. Not Auto Indexing, seems like a
double negative.
The lever at 3 o'clock is
to allow viewing at f/open then stopping down the the
taking f/stop.
The notch at 9 o'clock is for locking the bayonet mount.
Yoke at 12 o'clock couples to the light meter/view
finder.
There are no notches on the outer black ring.
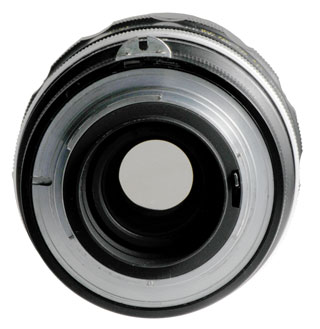
|
f/16, the smallest stop
is colored yellow.
|
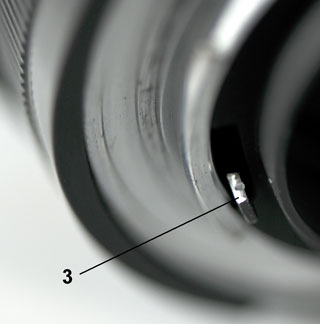
After the AI Conversion
 1. Paper f/stop scale 1. Paper f/stop scale
2. notch to tell camera about lens fully opened
f/#. Note without this notch you can NOT install a
pre AI lens since it would interfere with the tab
sticking out of the camera.
3. the lever that stops down the lens just prior to
exposure seems to have been machined .
The f/stop ring has been modified by adding the
notch. When the f/stop ring is manually rotated
the notch drives the camera telling the camera the
current f/stop.
When in "A" mode you set the f/stop manually and the
camera changes its shutter speed for the correct
exposure.
|
|
|
Hand Held at f/4 1/125sec
setup as Non-CPU lens #2.
|
The first Nikon SLR light meter was an optional
viewfinder. It stuck out over the camera body and had a
pin that coupled to a yoke on the aperture ring of the
lens. (
AI
Conversions photo) It also had a coupling to the
shutter speed dial on the top of the Nikon F body. That
way when you manually changed either the shutter speed or the
lens f/stop a needle would indicate the correct exposure when it
was centered. Pre AI lenses (with the slotted tab) may
need to be modified (
AI
Conversions) prior to connecting to a modern camera.
When installing a lens the pin on the light meter was pressed up
and after the lens was installed the aperture ring needed to be
turned to the min and max positions to train the light meter
what range of f/stops it had. If you did not do this
correctly the exposure may not be correct. Needless to say
this was not a good thing with a film camera when you would find
out AFTER the film was developed.
DO NOT INSTALL THESE LENSES ON MODERN CAMERA BODIES WITHOUT
HAVING THEM MODIFIED. May damage the camera body.
Note: If you have setup the camera to use a non-CPU lens
in the Tool (Setup) menu and replace it with a CPU lens the
camera body knows that. So if you only have one non-CPU
lens it's easy, just leave the camera set for it.
AI, AI-S & AI-P
Nikon web page:
AI
System and Changes in Aperture-coupling Devices
Tamaron 80-210mm AF
Aperture Tab
|
Nikon 35-70mm AF
Aperture Tab
|
The AI (automatic maximum
A
aperture
Indexing )
type of lens was made after 1977. This replaced the pin
and yoke system. AI adds the meter coupling ridge that
tells the camera body the f/stop when the lens is fully
opened. Note that early AI lenses also had the shoe or
yolk so they would work with the light meter - view
finder. Other features of AI lens are the
Aperture-Direct_Reading (ADR) ring and EE Servo Coupling Post.
The D300s has a tab on a ring and when a lens is installed a
notch on the lens causes the camera ring to rotate. How
far the ring rotates tells the camera the f/stop of the fully
open lens. The "G" series lenses do not drive the camera
body ring.
The AI-S (
Shutter
priority) is an all mechanical system which was superseded by
the AI-P that added a micro Processor (chip) to the lens and was
the introduction of the electrical contacts that allowed the
lens to tell the camera some key information. The
smallest aperture is colored orange on the AI-S lenses.
The AI-S lens has a linear f/stop scale to support shutter
priority. The plain AI lens was held wide open until the
exposure was about to start then stopped down to the preset
value, it was not partially stopped down. If the smallest
aperture is not orange it's either an AI lens or a pre AI lens
that's been modified. If you know someone who can "chip"
this 300mm f/2.8 lens please
let me
know.
f/x.xD
In the "
D" type of lens
the focus Distance is sent to the camera. That distance is
passed to the flash unit and is used in computing the flash
exposure.
The f/stop can be controlled by the body, or if the f/stop
coupling link is unlocked the f/stop can be controlled manually.
It's not clear if all "D" lenses are also AF.
f/x.xG
These are the current (2010) Nikon lenses that have no aperture
ring at all. The f/stop can only be controled from a
modern camera. They have internal focus motors.
AF, AF-D, AF-I, AF-S
Lars Holst Hansen has a lot of
information on the F-mount. Table based on
Ken
Rockwell Nikon Lens info. -
Nikon
Lens Compatibility -
AF Mode
|
Year
Introduced
|
Description
|
FTZ
Auto
Focus
|
AF-S
|
1984 -
|
Silent Wave Motor in lens: quiet
|
Yes
|
AF
|
1986 -
|
focus motor is in camera
couples to lens with (-) screwdriver
|
No
|
AF-n
|
1990
|
new style AF with big manual focus ring
|
No
|
AF-I
|
1992 - 1998
|
Stepper motor in lens: fast
|
|
AF-D
|
1992 -
|
Distance info: mainly for setting flash
|
No
|
AI-P
|
2000 -
|
Manual Focus
|
No
|
G
|
2000 -
|
Gelded: no aperture ring to save cost
|
|
AF-P
|
2016 -
|
stepper motor in lens: fast
|
Yes
|
Nikon 35-70mm AF showing
AF drive screw coupling
|
|
The
Auto
Focus lens has a motor drive
for focus and the camera body can automatically control the
focus. The camera body and a selector for
M (Manual),
S (Single) or
C (Continuous) focus.
When switched to M you can manually focus the lens. Some
AF lenses have a M/A switch that can be used to turn off the
Auto Focus. When doing Macro work it's common to turn off
the auto focus and move the camera to focus. What was the
focus control now is used to set the magnification (field of
view).
The AF-D tells the camera body the focus
Distance.
The AF-I lens has an
Integrated
focus motor that allows faster focusing.
AF-S lens uses a Single Servo motor.
IF lens has
Internal
Focusing where the lens does
not have any external moving parts. This is espically
important on a telephoto lens. The
300mm f/2.8 is an IF lens.
Using a Manual Lens on Modern Camera
On the D300s in the menus you can define The focal
length and wide open f/stop for 9 different lenses (numbered 1
to 9).
Menu: Setup (wrench) Non-CPU lens data
If only lens 1 is defined (maybe any single lens number?)
then when a manual lens is installed the camera will show
the exposure f/stop on the top LCD and in the
viewfinder. You can use modes "M" or "A" but neither
"P" nor "S" will work because the camera has no way of
controlling the f/stop that can only be done manually.
Focus
Manual
The first generation lenses could only be focused by
manually turning the focus ring.
like the 300mm F/2.8 and the other manual lenses.
Screwdriver
The next generation, use a shaft that's rotated to
focus. This system is slow compared to using a motor
in the lens.
Thus sports photographers who didn't like the Nikon slow
focus switched to Cannon cameras.
Motor
The lens has a motor that driven from the camera and this
is both fast and quiet compared to the screwdriver focus
lenses.
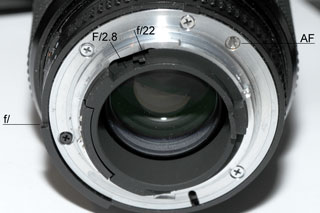
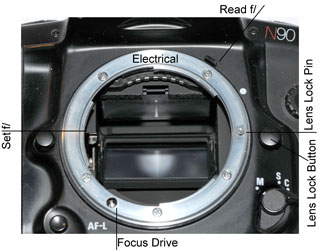
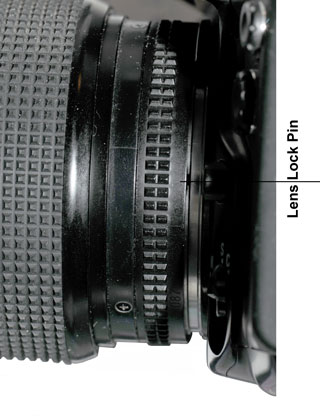
Camera Body Lens Mount (Wiki)
The N90 body shown at
right and the D300s have many common features.
The movable ring that senses the f/ stop of an AI lens.
The sense pin for sensing that the lens has AI-S
The focus drive for a lens without its own motor
The lever that stops down the lens just prior to taking
a photo
Electrical contacts at the top (7 for N90, 8 for D300s)
|
 |
When the 35-70mm AF lens
is installed you can see the lens lock pin snap into the
notch on the lens. The 105mm lens has a rubber
shroud that hides the notch.
|
|
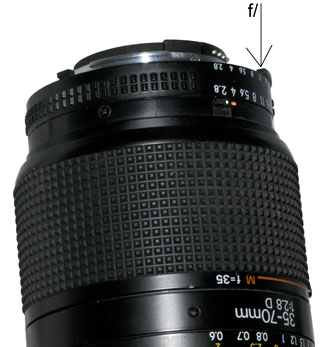
Nikkor AF 35-70mm f2.8 D Lens Full
Frame
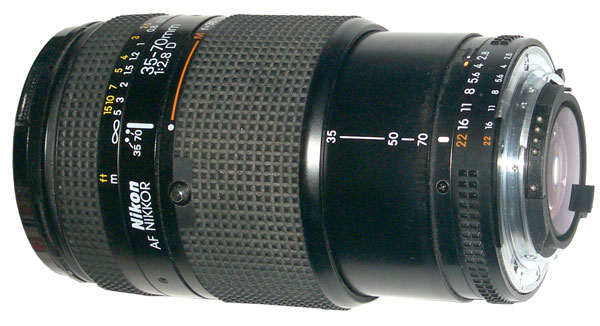 |
This is from the N90 35
mm film camera.
It's an Auto Focus lens.
The red line going up from the white dot with the red
letter M is for the macro function. By pressing
the sliver button near NIKON/NIKKOR the body can be
rotated and the lens then will focus much closer than a
normal lens. The macro mode is only available when
the FL is set to 35 mm. Focusing is done by moving
the camera.
There is a lock on the f-stop ring which when lifted
allows manual control of the f-stop. Otherwise
it's controled from the camera.
Uses 62 mm filters.
weighs 1 ½ pounds. |
Nikon DX (half frame) AF-S
18-55mm ED Lens
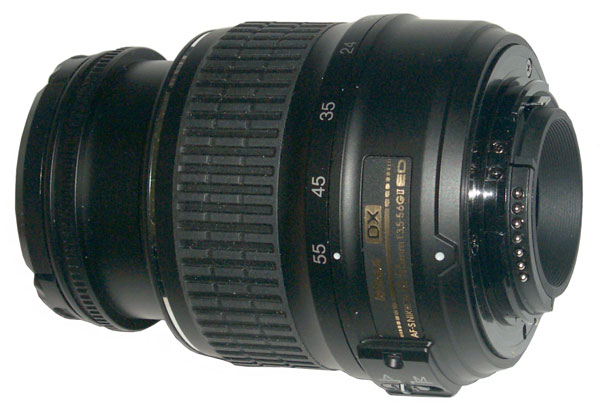 |
uses 52 mm filters.
weighs ½ pound.
Has the Auto - Manual switch and focal length controls,
but no f-stop control. |
Nikon DX AF-S at 18 mm ED
Lens
 |
|
Nikon DX AF-S at 55
mm ED Lens
|
|
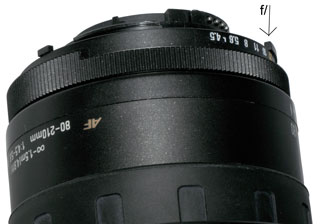
Tamron 80-210 mm AF Nikon Lens
 |
Note the electrical
contacts on the camera end of the lens for Nikon Auto
Focus. |
Tamron 210 mm lens Nikon
D300s
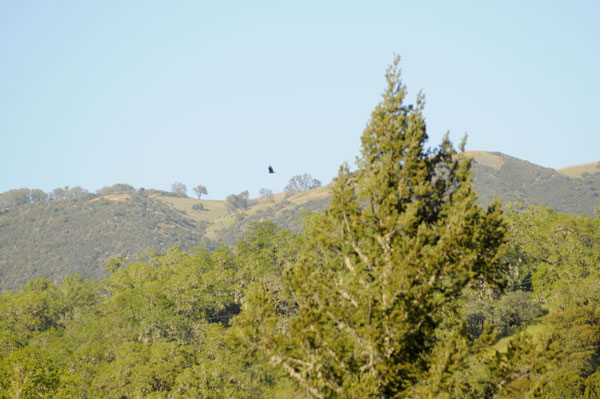
That's not a black smudge but a vulture. |
|
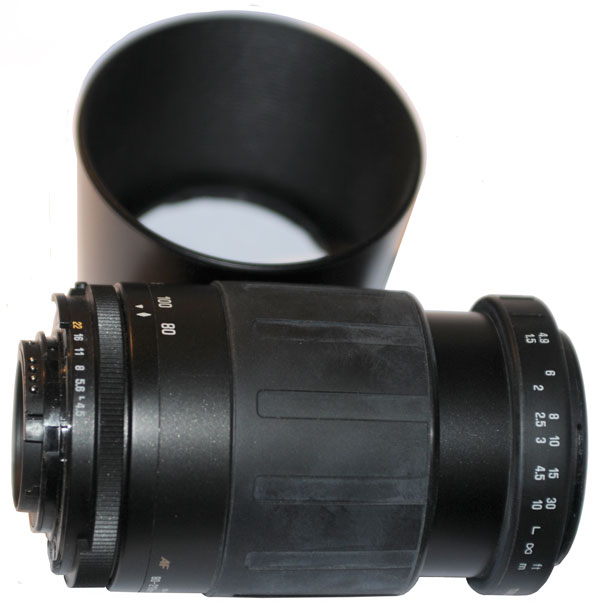
Kenko MC7 Nikon AF 2X Tele-extender
Note that all 7 electrical contacts are present, I think this
means the Teleplus works with each Nikon camera lens that has
some subset of these contacts.
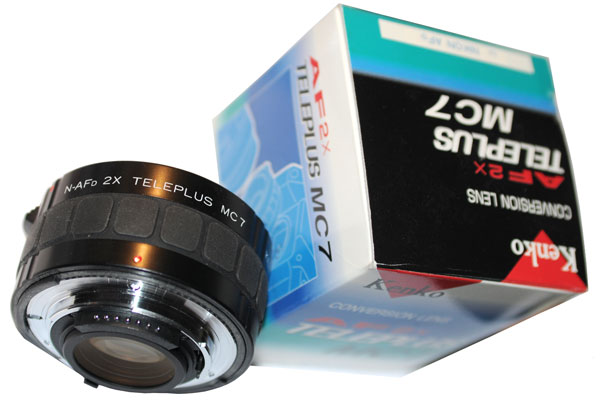 |
Tamron 210 mm lens + 2X
Tele-extender Nikon D300s
 |
|
|
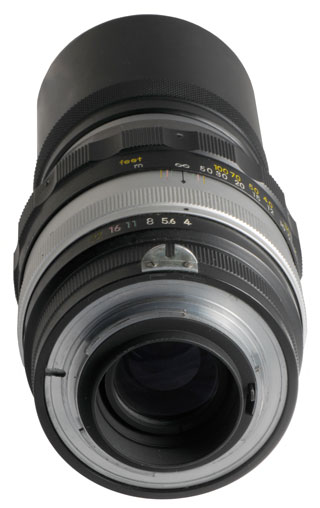
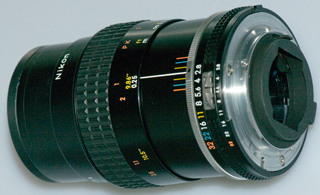
Nikkor 300mm f/2.8 ED AI-S Lens
This may have been the first lens, introduced in 1972 (
Nikon)
that used Extended Definition (ED) glass (
Wiki).
This is an extremely sharp lens (maybe the highest image quality
available).
This lens will work in M (Manual) or A (Aperture) modes on the
D300s. Since A mode is how I plan to use it that's
fine. The point of this lens is that it's fast, i.e. f/2.8
so will mostly be used with the camera set for A 2.8.
This is an ED lens (see label) but it does not have the gold
band. Probably it's one of the first ED lens designs and
prior to the adoption of the gold band (
let me know)
Since this is an AI-S lens (f/22 is orange) it should work
in Shutter priority mode.
There is no focus drive coupling on the back of the lens so it's
not an auto focus lens. Also manual focus is fine,
compared to the price for the
Nikon AF-S
NIKKOR 300mm f/2.8 G ED VR II 2 f2.8. The only
advantage that I'm giving up is the VRII Vibration
Reduction. That may be overcome (time will tell) by using
fast shutter speeds (maybe with increasing the ISO #).
In SETUP under Non-CPU lens data, lens No. 1 has been set to
300mm and f/2.8.
Also in f5 assigned the Fn button + dials to selecting a non-CPU
lens.
When in A mode the aperture is set by rotating the ring on the
lens and the camera shows the f/stop.
When in P mode as the f/stop ring is turned the shutter speed
changes and the f/stop is shown on the camera body.
When in S mode you need to rotate the f/stop ring, but there's
not much point.
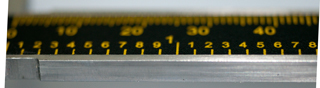
The close focus distance is 3 meters (10 feet). Will need
to use a tripod to test that, see the tape measure shot
below.
KenRockwell -
History
of the Nikon 300mm f/2.8 - my lens looks like the one made
between 1986 and 2005 i.e. it focuses down to 10' and the 122mm
filter has been replaced with a protection plate, hood is the
HE-4.
The next version of the 300mm f/2.8 lens used screwdriver type
auto focus. It was so slow that many sports photographers
switched to Cannon.
Nikon also offered the TC-16A Auto Focus 1.6X Tele
Converter. It worked on some early AF camera bodies, but
in stock form does not work on newer AF camera bodies. But
there are people who modify the TC-16A to work on modern AF
bodies and so allow limited range AF operation of MF lenses,
like the 300mm f/2.8.
foolography -
Modify
TC-16A -
Matrix
metering chips - and electrical contact pin functions
4176913
Telephoto
lens with large relative aperture, Nippon
Kogaku K.K., Dec 4, 1979,
359/746,
359/745 - for 200mm f/2, but
applicable to this lens.
Note: Double click photo to see larger image and if cursor
is (+) click again for even larger photo.
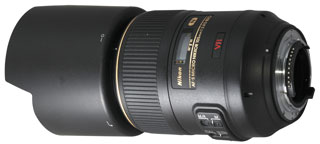
Nikon AF Micro-Nikkor 105mm f/2.8G ED-IF
AF-S VR
This is a case where I plan to be doing hand held macro
(close-up) work and wanted the VR feature so got this lens
instead of an older version of the same
lens. There is no DX on this lens, i.e. is good for either
full frame or half frame camera bodies. That's probably
why it's so heavy (1# 13 oz)
Bummer - I was investigating teleextenders (for example my MC7 (
above) has 7 electrical contacts,
but this 105 mm lens has 8 electrical contacts. The Nikon
USA web page has a compatibility chart that says that this lens
will not autofocus with any tele-extender. If you know
why,
let me know.
The autofocus function may not work if the lens is wide open is
f/5.6 or dimmer. So when a 2x tele extender is applied to
a lens that's f/4 wide open the two stop penalty brings it to
f/8 which is too dim for auto focus. BUT, the 105 mm lens
is f/2.8 so this should not be a problem. Maybe it's that
there are 10 electrical contacts on the 105mm lens?
 |
 |
 |
|
P mode - you can hear the
VR system humming
 |
P mode w/SB-900
 |
A Mode f/32 w/SB-900
 |
|
Pin Hole
55mm Macro f/2.8 AiS
This lens was purchased to be used
with the
StackShot
close-up system to be used in the reversed lens configuration
where the electronic features of the lens will not work.
Therefore ideal candidate lenses are manual types since they cost
less than modern electronic types. That this lens is an AiS
type means that it will also work in the non reversed
configuration with manual focus, which for macro work is the
normal mode.
The
Ken
Rockwell review of this lens says it's the standard against
which other lenses are compared for sharpness, not only for close
up work but at any magnification. Note: his review is
assuming you're using a 35 mm film camera or a FX (full frame)
digital camera. It was introduced in 1979 and still is available
new from B&H photo.
Because this lens was made for use on a full frame 35 mm film (36
x 24mm) camera the magnification numbers shown on the lens barrel
(1X max when fully extended when mounted directly on a camera)
need to be doubled when used on a DX (half frame) digital
camera. The "PK" scale assumes the PK-13 extension ring is
being used also needs to be doubled (max from 2X to
4X).
The focal length was a consideration since the effect of using
extension rings or a bellows works in proportion to the lens focal
length. The shorter the focal length the more effect a given
amount of extension will have.
The Canon MP-E close up lens is a reversed design with
magnifications up to 5X without the use of extension rings.
This lens when used with the PK-13 should come very close to the
same magnification range and hopefully similar performance.
There's a note in the manual saying best results at f/4, but that
can be confirmed by taking photos.
To take photos with higher magnification requires using thing like
microscope objective lenses on the camera, see the Micro
Photography web page for that.
shown collapsed
|
shown fully extended
|
Normal configuration, fully
extended
The D300s imaging chip is half size, or 18x12mm and
the front scale is showing 18 mm so this is a 1:1 or
1Xmagnification.
|
Reversed Lens, fully
extended

about 10.7 mm showing on 18mm chip or 1.7X magnification
when lens used reversed. This is may just be the
extension
caused by the reverse adapter ring.
|
Tokina 11 - 16 mm
My main motivation for getting this lens was to do long
exposure astrophotography.
It's also handy for taking photographs inside a car or room
where you just can't back up enough with a normal lens. A
friend was doing a kitchen remodel and this lens allows
capturing much more than any other lens I have.
Nikon 18-200
mmAF-S
I've wanted one of these since I got the D300s camera, but they
were too expensive. A local wedding photographer is
upgrading to full frame Nikons and this lens was surplus and at
a fair price. It will become one of my standard lenses
along with the 105mm.
This has been my standard lens for most things and the 105mm is
used for hand held close up work so a tripod is normally not
used.

|

click to see larger photo.
|
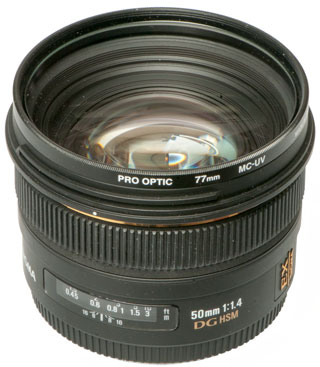
My first Nikon F camera had a 50mm f1/4 lens. The 1.4 was
not the fastest lens available (maybe it was the f/0.95).
But for film having a fast lens is a good thing for low
light. I read about this lens (Ken Rockwell)
and it was also rated as very sharp at all f/ stops. I
found one on eBay far much less that appears to be in like new
condition. This is an FX (full frame( not a DX (half
frame) lens.
In the review Ken says "The Sigma 50mm f/1.4 DG has no visible
distortion, which is much better than any f/1.4 or f/1.2 lens
I've ever tested." But for focal distances below 1 meter
he has factors to correct the slight barrel distortion.
But it turns out Photoshop CS6 under Filters \ Lens Correction
has a Lens Profile for this lens (maybe got it from the digital
ID file?). When it is applied there's a very slight
change.
This is BIG glass and uses a 77mm filter.
Can be used with the Sigma
USB Dock. This device allows changing some settings
inside the lens. All the YouTubes I watched showed this
being used to calibrate the auto focus on zoom lenses.
This is done using a Spyder LensCal by Datacolor to see where the
auto focus is actually focusing and then changing a table where
there are 4 distances for each lens focal length. Since this
lens only has one focal length (50 mm) there can only be 4
adjustments at some factory predetermined distances. There
are some other adjustments and the ability to upgrade the
firmware, if there's a new version.
Nikon: How
to use the AF Fine-Tune function in the camera body - this
is a single point adjustment so only good for one lens + camera
combination and may be wrong if another lens is put on camera.
None of the explanations I've seen makes any mention that the test
flat target (a book in the Nikon case) needs to be exactly
parallel with the image sensor. Even if a bubble level is
used on the tripod and the bubble level built into the LensCal are
exactly centered if the camera is panned either left or right that
will cause a problem. Maybe it would be better to focus on
the flat (book) at a spot just adjacent to the ruler rather than
at the center of the book?
Note that the Nikon Z6/Z7 mirrorless
cameras use the actual image sensor for focus so do not need this
type of calibration. This lens has separate focus and image
sensors.
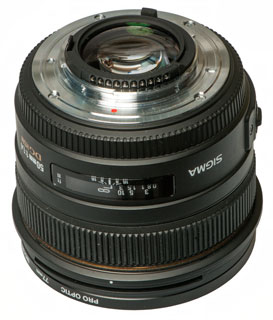
|
Contacts
 |
View from front door
Tripod 1/60 f/6.3 ISO:200 50mm AdobeRGB
|
Nikon AF
Micro-NIKKOR 200mm f/4D IF-ED
Got this full frame (FX) to go with the D800E since when
working with the D300S
and the 18 - 200
mm AF-S Zoom, it's mostly used at 200mm.
Mainly based on the Ken
Rockwell review, "World's Best Macro Lens":
AF: Auto
Focus.
Micro: Macro lens.
NIKKOR: Nikon's brand name
for all their lenses.
D: The
lens tells the camera the distance to the subject, which helps the
exposure meter, especially with on-camera flash.
IF: Internal
focusing. Nothing moves outside the lens as you focus.
ED: Extra-low
Dispersion glass, for reduced secondary lateral color fringes.
Metering
The Nikon F was an all mechanical
camera with no metering (no batteries). It did have a
removable penta-prism view finder and under that an
interchangeable focus screen.
The shutter speed dial was on the top surface just to the right of
the view finder. The early light meters coupled to the
shutter speed dial.
See my
Weston light meter
web page for more on light meters.
Meter 1
Nikon F selenium
meter is of the Type III (all types Se from
1959-62) (thanks Geoff)
The first light meter was coupled to the shutter
dial.
The tab on the bottom couples to the notch on the lens
f/stop ring.
The dial on the top is to set the film ASA speed.
It has a center the needle read out.
It was not Through The Lens (TTL) metering, but just
incident light like a hand held meter.
Selenium works like a solar panel so no battery is
required.
The view angle was rather large and had no relationship to
the lens focal length.
|
|
Photomic Light Meter
Like the original meter its a forward facing (not TTL) but
now there's a single lens with an optional snoot that
narrows the field of view to match medium telephoto lens
Field Of View (FOV). The pin and yoke coupling is
now incorporated for sure. "Center the needle" read
out visible both from the top (like meter 1 above) and you
can see the needle through the lens.
Powered by a button Mercury cell battery (Mercury
batteries are no longer available so this is a problem).
When this light meter came out I already was using a plain
Nikon F camera so all that was needed was to purchase just
the meter. The snoot was stored on the side of the
meter when not being used which was most of the
time. So either the snoot is installed in the photo
at the right or it's missing.
|
|
Photomic FTn Light Meter
This was the first Through The Lens (TTL) meter and like
the plain Photomic was a replacement penta-prisim view
finder. Prior to installing a lens the pin that
rides on the lens yoke needs to be pressed up thus
resetting the wide open f/stop setting (that way a lens
without the yoke will do something that's
consistent). Then after the lens is installed it's
rotated to the min and max f/stop positions. The min
f/stop position trains the FTn meter and the pointer on
the front will show the full open f/stop of the installed
lens.
Like all the previous light meters it's a "center the
needle" type and viewable from the top or through the
lens.
Powered by a Mercury button cell battery.
|

|
Starting with the F2 camera
body the light meter was built in.
The camera body now needs to have a battery.
|
|
Learning
I've been watching some YouTube
videos and have on order:
"
The Nikon Creative Lighting System: Using
the SB-600, SB-800, SB-900, and R1C1 Flashes" book by
Mike Hagen (
@Amazon
)
For most of the SB-900 flash
functions to work the camera needs to be set to Matrix
metering. The center position of the 3 available that
surrounds the AE-L/AF-L button on the back of the camera just to
the right of the viewfinder.
Nikon Creative Lighting System, Digital Field Guide,
2
nd Edition by J. Dennis Thomas, ISBN978-470-45405-3
Includes the SB-900. Lists
CLS cameras: F6, D3/D3X, D2X/D2H/D2Hs, D700, D300/D300s, D200,
D70/D70s, D80, D90, D40/D40x, D50, D60, D3000, D5000.
Includes a test card, gray on one side and color squares on the
other side.
"
Nikon- A Hands On Guide to Creative Lighting"
DVD SB-900
Creative Lighting System Cameras
Camera
|
CLS Controller
|
Close-up Flash1
|
| D700,
D300, D200, D90, D80 |
built-in
pop-up flash
|
R1
|
D3,
D2XS, D2X, D2H, D705, D70, D50, D60, D40X, D40, F6
|
SB-900,
SB-800, SU-800
|
R1C1
|
Note 1: R1 is the two Ring lights, R1C1 has the same two Ring
lights plus the SU-800 Controler.
A neat way of mounting the SB-900 and a translucent umbrella is
demonstrated. By using a ball adapter the flash head is
offset from the umbrella holder and can be positioned along the
side of the umbrella support rod, i.e. very close to the
umbrella center line. Since the idea of the umbrella is to
get a wide light source as seen by the subject it's best to use
the shoot though mode and place the top of the umbrella close as
possible to the subject.
Using color gels to change the flash light color to match the
ambient light allows changing the camera white balance to match
the ambient light. Using the "wrong" gel and/or WB setting
is a way of colorizing the image.
Using bounce light from a reflector on the floor/ground can
provide a soft fill light, for example when someone is wearing a
hat or wedding veil.
Slow-sync flash allows the shutter to be set to illuminate the
background while the f-stop is set for proper flash
exposure. It's not as nice as the EV rings on a
Hasselblad, but a step in
the right direction. How to use slow-sync, or for that
matter any of the demonstrated methods was not explained on the
DVD. I think in order to use slow-sync you first need to
use spot metering on the main subject to determine the f-stop,
change to A mode with that f-stop, enable slow-sync and let the
camera TTL metering figure out the background. Note:
This probably will result in a long exposure so a tripod or
image stabilization (Vibration Reduction) lens would be good.
"
David Busch's
Nikon D300s Guide to Digital SLR Photography"
The Nikon factory manuals leave a
lot to be desired. For example some flash features are
controlled by the camera and are mentioned in the SB-900 manual
but there's no information about how to get them to work.
For example Red eye is mentioned on page D56 but not how to turn
it on. In the D300s manual on page 175 is says red eye
reduction is supported and also in slow sync mode, but does not
say how to turn it on. On page 282 it mentions e2 flash
shutter speed in relation to red eye reduction but no info on how
to turn it on. Hopefully this guide will help.
9-1/8 x 7-3/8" and 525 pages. Glossy color pages.
The Index has comprehensive listings (for example I found AF-S
there, but not in Mastering).
I tried using RAW (NEF) files with 14 bits/channel, but the Nikon
transfer program makes a .xmp file that's only 8 kb in size, so
something appears to be wrong. By using Windows Explorer and
looking at My Computer the D300s file system shows .NEF files that
are about 15.1 MB in size which are about half the size of the
.tif files that are 37 MB. Photoshop CS4 with Camera Raw 5.7
will open the NEF files and can work with them, it's not very user
friendly so going back to .tif files.
Turned off the Active-D lighting and will activate it only when
it's needed.
2014 - I'm now using only RAW files at 14 bits/color channel.
Nikon ViewNX version 2.2.1 to transfer files from camera to
computer.
(Should be using the wireless card, but haven't set that up for my
desktop computer).
Using Photoshop CS4 with Adobe Camera Raw (ACR) to "develop" and
then process the images.
In ACR you are working with a high dynamic range photo (the
difference between a .jpg file with 8 bits/channel and a RAW file
with 14 bits/channel is 6 full stops or 6 f/numbers!)
There is a "Fill Light" slider in ACR that allows adjusting the
fill light after the exposure so all the high dynamic processes
that are done in the camera are not needed nor are any HDR post
processing software packages needed.
Color balance is selected in ACR and since most of my shots are
done with
Studio Flash,
I just select Flash for color balance, but you have many
other options.
I typically use an 8-bit/channel output from ACR, but it can be
set to higher depth if needed.
Mastering the
Nikon D300/D300s by Darrell Young, rockynook
NikoniansPress, 2011, 400 pages
There are gray boxed text examples
of the subject matter that help me understand the topic.
Without these examples some of the ideas are too theoretical to
put to practical use. {Cannon cameras are more user
friendly, but Nikon cameras are much more powerful. But
with the power you need to work through the learning curve to
really use them.} There are paragraphs at the end of some
sections titled "My Conclusions" and are the author's take on
the subject usually based on it's prior history.
Nikon® Creative Lighting System, Digital Field
Guide, 2
nd Edition by J. Dennis Thomas, ISBN:
978-0-470-45405-3, 2010
Got this book because it has info
on taking portraits. Also includes a test card with gray
on one side and color swatches on the other side.
On pg 132 Fig 5.1 shows an SB-900 (?) on a light stand with an
umbrella, BUT the flash head center line is far from the
umbrella support rod making for something like my
photo below.
The problem with flash head offset to umbrella is that the light
source is too small if the zoom is set to narrow, or if the zoom
is set to illuminate all of the umbrella then some light misses
the umbrella and you have a dimmer light. Flash head
offset is like having the flash head centered on the umbrella
and turning down the power and making the umbrella
smaller. Centered gives a larger light AND brighter light
source.
This is a set of 8 DVDs.
Four of them were made during a two day lighting seminar and
additional DVDs were made to illustrate ideas presented in the
seminar. It's Nikon based, but with a lot of Do It
Yourself rather than just buying expensive items. He
promotes manual control rather than using CLS and has some good
arguments for that.
I used info on the
Strobist
site to make the remote setup for the
Nikon
B-25 flash and light box. They have
Lighting
101 free on line.
Lighting
Nov 2011 - I've taken a couple of
photos near sunset where the auto color balance said the color
temp was in the 4000 K area, which was not correct. So it
looks like for normal photos taken outside during full daylight
the auto white balance may be correct, but you can't count on
it. One of the BIG advantages in using RAW (NEF) file
output from the camera is that when you open the file in
Photoshop CS4 the Adobe Camera Raw (ACR) program displays the
color temperature and allows changing it. Need to do more
work with these devices.
It turns out that the default setting for White Balance (WB) on
the Nikon D300s and the D60 is AUTOmatic white balance. It
works, that's to say you really don't need these gadgets for
most things. Maybe for something that requires tight color
balance control, like would be needed if a book with color
plates was being worked on.
Another way of achieving good color control would be to make
sure something with no color at all was part of the first
exposure and then in Adobe Camera Raw you can color correct all
the shots taken in that light.
Although most digital cameras have a number of standard color
balance settings such as Sunlight, Tungsten, Florescent, shade,
etc. the actual color temperature where you are shooting may
have a different color, such as when there's reflected light
from a colored surface such as vegetation that changes color
with the seasons. There are a number of ways to work with
this. One is to use RAW data files and to the color
correction in post processing, but then you need a
standard. That's why 18% gray cards may be shot on
location as the reference. Another is to measure the color
temperature using the cameras White Balance measurement function
(if it has one).
In ACR (when processing a RAW image where there's no color
correction in the camera) you can easily (one click) set
the color balance if the shot includes an area that's either
white or gray. So if you're shooting RAW just take an
extra shot with a white card for color balance for that session.
Micro-Disk
I haven't used this since I now shoot only in RAW mode.
Although these often are
advertised as a "lens" they are reflectors of light. They do not
mount to the camera unlike lens caps so the size is not critical
in relation to the lens, but should be large enough to fill 70%
of the frame.
Patents
7719606
System and method for effectively performing a white balance
procedure for Electronic Cameras, Diane Wallace - a transmission
filter
Translucent Lens Cap
These need to be ordered in the same size as the lens cap, in my
case 52 and 62mm fit everything except the 300mm f/2.8 lens.
Creative Lighting System (CLS)
Only Nikon cameras with a pop-up flash (and with built-in CLS
functions: D700(s), D300(s), D200, D90 & D80) can act as CLS
commanders. Other Nikon cameras need to use the SU-800 flash
controller to take advantage of the CLS. For example the D3
does not have a pop-up flash and so needs the SU-800, SB-800 or
SB-900 to act as the flash commander.
The D300s supports CLS with three groups: Built-In, Group A
and Group B.
When at the top of the Custom Setting Menu it's fastest to press
the navigation ring UP and go "e Bracketing/flash"
then to e3 Flash cntrl for built-in flash
then right to Commander Mode
then the LEFT and RIGHT navigation controls which field is
highlighted and the UP/DN navigation controls the value of the
field.
All the flash equipment in a system needs to be on a single
channel number. This allows different photographers to use
different channel numbers. You might have a number of
different cameras (probably each with a different lens) all on the
same channel number and using the same lighting setup.
The group letter allows different flashes in the same setup to
have their power levels controlled independently for each group
from the CLS camera or the SU-800 controller. This is one of
the key features of the CLS, i.e. you can adjust the light output
of all the flashes in a setup from the camera position. It
can be done two ways. The most straight forward (and
recommended) way is to change the Exposure Value correction for
the group letter while in one of the TTL modes. The other
way is to use a non TTL mode and manually control the light
level. The former is easier and retains corrections for
changes in the natural lighting level while the latter may offer a
wider range of light levels.
CLS Cameras
| Camera |
Pixels
Meg
|
Frame
size
|
Pop-up
Flash |
Accy
Conn
|
Storage
Media &
File Types
|
Interchangeable
Lens |
Jan 2011
eBay $
used Body
|
| F6 |
|
Film
|
No
|
|
|
Yes
|
1850
|
D2X
D2H
D2Hs |
|
DX
|
No
|
10-pin
|
|
Yes |
455 -
700
|
D3
D3X |
|
FX/DX
|
No
|
10-pin |
|
Yes
|
5900 -
8100
|
D40
D40X |
6.1
10.2
|
DX
|
Yes
|
|
SD SDHC/NEF jpg |
Yes |
80 -
363
80 - 667
|
| D50 |
6.1
|
DX
|
Yes
|
|
|
Yes |
150 -
300
|
| D60 |
10.2
|
DX
|
Yes
|
|
|
Yes
|
100 -
560
|
D70
D70s |
|
DX
|
No
|
USB? |
CF1 CF2
NEF jpg
|
Yes
|
240 -
500
|
| D80 |
|
DX
|
Yes
|
USB? |
SD SDHC
NEF jpg
|
Yes
|
250 -
550
|
| D90 |
|
DX
|
Yes |
|
|
Yes
|
455 -
997
|
| D200 |
|
DX
|
Yes |
10-pin |
|
Yes
|
385 -
630
|
D300
D300s |
|
DX
|
Yes |
10-pin
|
NEF
TIFF jpg
NEF TIFF jpg AVI
|
Yes |
708 -
1148
|
| D700 |
|
FX
|
Yes |
10-pin |
|
Yes |
1500 -
2350
|
| D3000 |
|
DX
|
Yes
|
|
|
Yes
|
200 -
885
|
| D5000 |
|
DX
|
Yes
|
|
|
Yes
|
460 -
885
|
Flash
I've been using the Nikon SB-25
Speedlight that was purchased for the Nikon
N90
but when used on the D300s it doesn't have the nice features like
good two way communications between the flash and camera. In
particular it does not have the Infrared remote trigger
feature. This allows removing the flash from the camera and
triggering it without using wires.
The SB-800 and SB-900 Speedlights both can act as a remote
commander for the R1C1 close-up speedlight set or other remote
flash units. The SB-900 adjusts beam size to match 12 to 200
mm DX lens coverage and has auto sense for DX (half frame) or FX
(full frame) size. The SB-800 user interface is impossible to work
(user hostile) without the instruction book (i.e. press two
buttons to get some obscure result but only if held for more than
3 seconds), the SB-900 is much more user friendly.
Red Eye
Red eye is caused by photographing an eye in dim light and where
the flash light source is close to the camera lens. Most
cameras, including the D300s, have a red eye flash mode where
the flash winks a few times to cause the eye's pupil to contract
prior to the actual picture taking flash. I haven't had a
problem with red eye.
Blinking
This is when the subject closes her eyes because of the flash of
light. This has been a problem for me. Even when
turning off the pop-up flash in commander mode the pop-up still
makes light in order to act as the commander and that causes
blinking, i.e. photos where the eyes are closed. One
solution that's worked is to tape the infrared filter from the
SDU-5/E strobe to the support
rails of the Puffer diffuser. I have the SG-3IR filter on
order which should do the same job.
Another solution may be to use the
SC-17
cable and the SB-900 as the commander flash. If the SB-900
can be moved far enough away so that the subject does not have a
direct flash to eye path it may work. That means using one
less light, i.e. the pop-up flash will no longer be used at all.
Long
The depth of field preview mode allows the flash to pulse and to
your eye it looks like it's on all the time. This would be
a neat way to light close up subjects when the camera is on a
tripod. But it is not allowed because the flash tube would
have a very short life. Maybe there's a workaround by
using multi exposure?
Focal Plane High Speed
There are two modes of focal plane shutter operation.
Wiki:
Focal
Plane - Two Curtain Shutter
Slow (< about 1/250
sec)
The rear shutter is already open. To start an exposure the
front shutter opens (this takes some tijme T1) and after the
required exposure time the rear shutter closes (this takes some
time T2). A strobe flash can only be triggered after T1
and before the start of T2 in order to expose all of the
frame. On first generation focal plane shutters the fastes
"sync" speed was 1/60 second. On modern cameras it's more
like 1/250 second.
X sync works with the "slow" shutter speeds for triggering
either a regular flash bulb or an older strobe flash.
Fast
The rear shutter is already open. To start an exposure the
front shutter opens and after the required exposure time the
rear shutter starts to close, but the front shutter is still
moving, so a slit is open and moving across the imaging
chip. If a strobe was to fire it would only illuminate the
slit leaving the rest of the frame black.
In order to use flash when the shutter speed is "fast" a special
flash bulb was designed that has a long flat light vs. time
curve called FP (Flat Peak).
FP sync is used to trigger these Flat Peak flash bulbs.
When the Nikon SB-900 flash is instaled on the D60 camera and
the "S" exposure mode is selected the fastest shutter speed is
limited to 1/200 sec.
In the set of 8 "Strobist" DVDs the Nikon D70 is mentioned a lot
because it uses two different types of shutter, a mechanical
shutter for low speeds and the imaging chip is electronically
controlled for high shutter speeds. This allows X-sync to
work at very high shutter speeds IF the speed light is NOT
installed on the camera's hot shoe. That allows much more
latitude when balancing existing light with strobe light.
The Hasselblad lenses have two adjacent rings for controlling
the f/stop and shutter speed (EV). They interlock and turn
as a pair providing the same exposure in each position, but
trading f/stop and shutter speed. The rings can be pulled
apart to allow setting the existing light exposure then turned
as a pair to control the f/stop which controls the strobe flash
exposure.
The Nikon D300s has automatic High Speed Sync or FP sync when
the SB-900 flash in installed on the hot shoe. What this
does is provide a series of precisely timed flashes so that all
of the frame is illuminated. For example you use "S"
exposure mode and set 1/8,000 second shutter speed and the frame
is evenly illuminated. So the D300s is just as capable as
the D70. But, if the flash is removed from the hot shoe
then the shutter speed is limited to 1/200 second. That's
because the pop-up flash does not have enough power to fire
rapidly enough and with enough light to work.
This is a proprietary feature of the latest (2011)
Pocket Wizard
flash triggers. It allows studio strobes to be
synchronized at speeds faster than possible using X-sync.
I haven't used this feature of the Pocket Wizard, but do use
them to trigger the E
640
studio strobe light and that's my standard setup (2014).
SB-25
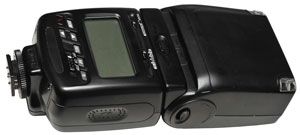
The SB-25 was the flash that was current with the
N90 35mm film camera but does not
have anywhere near the features of the SB-900.
Note that a wheel is used to clamp the SB-25 to a hot-shoe.
The SB-900 uses a lever rather than the wheel. The
SB-900 lever is much easier to operate.
The SB-25 when used with the SU-4 remote trigger supports turning
off the flash when enough light has been collected by the
camera. So this may be a way of using the SB-25 with the
Creative Lighting System?
Main capacitor is 1,400 uF at 350 V. The SD-9A auxiliary
power unit will not fit the SB-25. That must be because of a
difference in the control signal.
SB-900
As of 2010 this is the flagship flash for the Nikon line.
It's one of the speedlights that has the Creative Lighting System
(CLS). This system allows controlling the remote flash
output from the camera or a flash acting as the wireless
commander. For more details see the
Nikon
Patents below.
When the switch on the SB-900 is turned one click from OFF to ON
it comes up in TTL BL (Through The Lens, Balanced Light) mode,
which is the good one.
To take the SB-25 photo above I just swiveled the head (SB-900 on
camera hot-shoe) so it was pointing to the ceiling and that first
shot is the one you see.
The SB-900 can be removed from the camera (and mounted on the
supplied AS-21 crows foot stand (see photo of
SB-900
Set below). Then the on camera pop-up flash is
activated. To get this to work some settings are
required on the camera and SB-900, unlike the default hot-shoe
operation.
SB-900 as remote
Turn from OFF to REMOTE. The default is Group A, Channel 1,
24 mm.
D300s as Commander
In the Custom Setting Menu, e. Bracketing/Flash e3. Flash Ctrl for
Built-in flash, select Commander Mode where the default is
Built-in flash TTL, Group A TTL and Channel 1. Press OK and
exit.
NOTE:
For
remote commander mode to work the pop-up flash needs to be
opened!
After I wrote the above using normal text, made the mistake again,
hence the bold and red type face.
You will hear a sound from the remote to indicate that it fired.
Note: You can change the light output of the on camera flash
(all the way down to off, but you still need to have it opened to
talk to the remote flash) and control the light output for Group A
and B flashes by changing setting in the camera menu (i.e. you
don't need to have access to the remote flash to change it's
output. When the SB-900 is connected to the hot-shoe it can
act as a more powerful Commander than the pop-up flash.
Note: When the SB-900 is mounted to the hot-shoe or
connected to the camera with the SC-17 cable the angle of coverage
of the flash changes when the zoom lens is changed. But when
using the remote commander mode the flash zoom does not change and
defaults to 24 mm. You can get a much higher guide number by
manually changing the flash focal length setting. To change
the FL of the flash:
- Press "ZOOM"
- Rotate the dial to get the desired FL
- Press the "OK" button in the center of the dial.
- Note: the new zoom setting survives turning the flash
off. But when the SB-900 is mounted on the camera then
the lens controls the flash FL. But using the "ZOOM"
button will allow overriding the auto FL setting. You
may want to do this when the head is aimed up for bounce light
to get a higher guide number.
One of the modes of operation is called "SU-4". This refers
to a Nikon remote trigger product called the
SU-4.
To get "strobe" stop motion effects:
- Press the MODE button until you see "M" (manual) mode the
press OK.
- Press the left function button (just below the letter M on
the LCD, now the number just to the right of M in the upper
left corner of the LCD is highlighted
- Turn the control dial until a small fraction appears, such
as 1/16 and press OK.
The top left photo of the
Chinese
Spouting Bowl was taken with the Nikon D300s in "P" mode,
self timer at 10 seconds (time to get from the tripod to the
bowl). The SB-900 manual (page F-15) says that at M1/16 the
flash duration is 1/10,000 second. Although the D300s
supports shutter speeds as fast as 1/8,000 you can only get that
when the lighting supports it, so it's not an option for things
like the spouting bowl. In TTL BL FP mode the shutter speed
can be increased to speeds faster than can be used for a single
flash. As the shutter opening moves across the sensor there
are multiple flashes to illuminate all of it. See the
Chinese Spouting Bowl page
were this mode was used in camera S mode at 1/320 second.
Flash bulbs came in normal the FP versions. The normal flash
lamp had a peak in the light output vs. time plot and the FP
(Focal Plane) lamp has a constant light output for some specified
time (i.e. a flat top light output curve). Since it takes a
lot of power to keep a xenon lamp on all the time the FP mode
flash is accomplished by using multiple flashes to cover the image
sensor as the slit in the focal plane shutter moves across.
It's not clear what shutter speeds are supported (1/320 or
1/8,000?).
The SB-900 comes with filter gels that can be used to change the
color temperature of the flash to tungsten or florescent or red or
blue. They can be used to match the color temperature of the
flash to the ambient light so the White Balance (WB) on the camera
can be set to the ambient light color.
SB-900
Set - what's in the box

|
|
|
Nikon
SC-17 Flash Cable
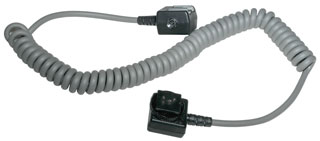
When the focal length of the lens is changed
the flash changes it's focal length when this
cable is used.
|
The SC-17 cable uses a
pinch wheel to hold onto the camera and the remote end
does not have the hole of the lock lever.
The pop-up flash will not open when the SC-17 is on the
camera.
The SC-28 cable uses the lock lever system.
|
|
Gary Fong Puffer - hot-shoe
mount diffuser that clears pop-up flash
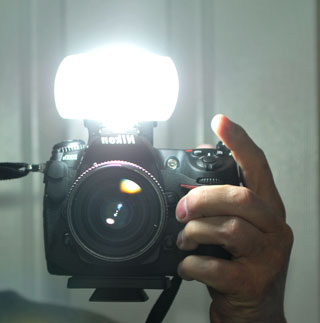
|
Tits on Puffer keep it from
seating in the camera hot-shoe.
A wood chisel will clean off the tits allowing the bracket
to seat fully on the camera hot-shoe.
|
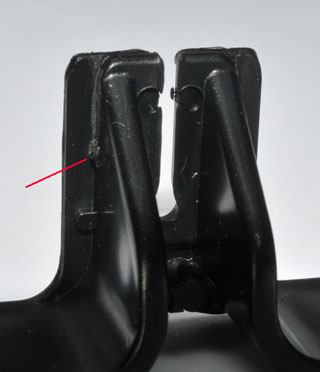
|
SG-3IR
Visible Light Filter for the pop-up flash
|
Puffer Pop-up Flash
Diffuser
|
|
SG-3IR filter does not
block all visible light from the
pop-up flash, but does reduce it. So it's not a
solution
for people who blink.
|
|
|
Optional DC
Power for the SB-900
The SB-900 runs on 4 internal AA
batteries that can be pretty much any chemistry (primary or
secondary). These power the electronics and flash.
When an external battery pack, such as any of the SD-x series,
they supply 300 Volts to the flash capacitor to lower the recycle
time. The external pack does not replace or supplement the
internal pack. There's no need to match cells between the
internal and external packs. But all the internal batteries
should be very much the same. All the batteries used in the
external pack should be very much the same.
2014 - for over a year I've been using NiZn AA batteries in the
SB-900. They have almost 2 Volts per cell when fully charged
and make for a faster cycle time. They require a special
charger.
SD-7 holds 6 "C" batteries and 3
female terminal plug
SD-8A holds 6 "AA" batteries and 3 female terminal plug uses
coil springs (higher resistance than straps)
SD-9 holds either 4 or 8 AA batteries
SD-9A holds 6 "AA" batteries and 3 female terminal plug has
lower resistance contacts than the SD-8A
AC Adapter or Studio Strobe that works with CLS
There is no AC adapter for the
SB-900 but there should be. Or, as an alternative, Nikon
should either offer studio strobe lights that work with their CLS
or work with studio strobe makers so that there was a CLS
compatible studio strobe. Being forced to use a bunch of AA
cells is a real PITA.
Shoot SD-9A Auxiliary
Battery Holder for Nikon SB-900
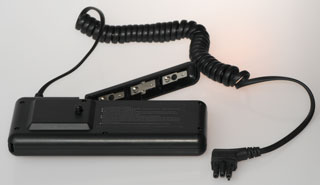
|
Holds 6 AA Batteries.
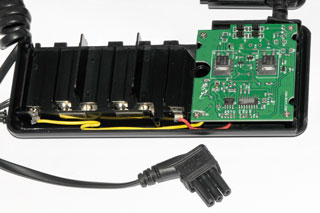
The current draw when the flash is recharging exceeds 1
Amp, the limit of my bench power supply.
|
Switch Mode HV Power Supply
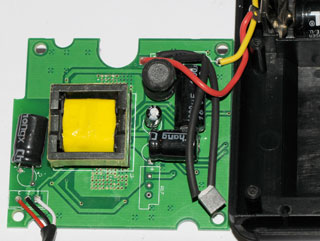
|
Black = Ground
White = control
Red = 300+ Volts DC just after a flash, near zero the rest
of the time.
marked 330 V
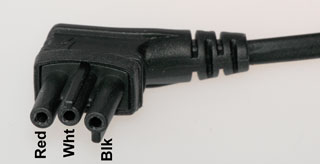
Any auxiliary power unit that has this connector is a HV
power supply,
not a simple battery supply.
|
I've cut a hole in the
carry bag so that you can see the charging LED.
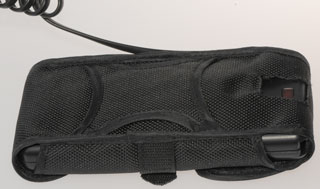
|
|
When connected at idle there is almost no current draw from the
string of 6 batteries. Note it does not matter how these
batteries compare to those installed in the SB-900. But all
6 batteries need to be the same brand, model and state of
charge. Since the auxiliary supply is a HV supply the SB-900
needs to have 4 operational AA batteries installed for it to work,
i.e. you can not power the SB-900 with just the auxiliary supply.
If you have a schematic of the SB-900 or other Nikon Flash that
accepts the same 3 prong plug let me know. I'm wondering if
you could just connect a capacitor charged to 330 Volts to the Red
and Black terminals. A potential problem would be that the
energy stored in the external cap might burn out the Xenon flash
tube. If you have a dead SB-800 or SB-900 that could be used
for testing
let me know. The
problem is if the camera wants a lot of light the flash tube will
be on for much longer than it would be if powered by just the
internal 4 AA batteries and that might fry it.
I used to have a
Stroboflash IV
which used a couple of 225 V batteries. Using a similar
system with the SB-900 might be interesting in that there would be
almost no recycle time needed between flashes.
SK-6 Power Bracket - allows mounting flash at side of camera + has
a 4 AA battery holder to shorten recycle times.
SF-17 - 6 AA
SF-18 - 8 AA
Diffuser for SLR cameras
Gary Fong Puffer SLR
Flash Diffuser - fits in the hot shoe and allows the built-in
flash to be opened.
11/285,947
Photographic light diffuser, Gary M. Fong -
D578151
Photographic light diffuser, Gary M. Fong -
D607915
Photographic light diffuser, Gary M. Fong -
D591785
Lightsphere (note the hemisphere from the lightsphere can be
used in front of a lens for a custom white balance.
7380966
Lightsphere
7748858
Photographic diffuser, Gary M. Fong - Puffer
Nikon Patents
4896181
Camera System Jan 23, 1990 - explains the screw driver auto focus
digital data protocol, although the length of the actual packets
may be longer.
5585987
Camera system including electronic flash device with slave
emission function, Dec 17, 1996 - might be the
SB-25
5724620
Wireless light-amplifying strobe system and strobe device usable
with the System, Mar 3, 1998 -
5754898
Control device for a camera capable of using a flash device, May
19, 1998 - works with two shutters
5794082 Electronic flash device with slave emission function, Aug
11, 1998 - might be the
SB-25
6088542
Housing for camera flash control components and circuitry, Jul 11,
2000 - the housings used on parts of the camera and the flash
units transmit infared light. This is probably part of the
Creative Lighting System.
When they say wireless, they mean IR, not radio.
6654558
Electric flash and connector, Nov 25, 2003 - a "noise" signal from
the pop-up flast triggers the flash unit mounted in the hot-shoe
6795647
Flash control device and flash control system, Sep 21, 2004 -
details of the digital light communications between camera and
remote SB-xxx flash unit
6798986
Slave flash controlling device and slave flash device, Sep 28,
2004 - the camera speedlight emits a pre-flash then there is a
pause while the camera meters the light from the combined on
camera and slave flash light, then the camera emits a timed pulse
of light that also triggers the slave flash.
7340275
Wireless communication unit, Mar 4, 2008 - Compact Flash (CF) card
wireless unit
12/312,463
Electronic Camera, Dec 20, 2007 - internet connected camera
R1 & R1C1 Close-up Flash
The R1C1 close-up flash set contains
a couple of SB-R200 Ring light flash units and the SU-800 flash
commander plus accessory items.
The R1 close-up flash set contains a couple of SB-R200 Ring light
flash units and accessory items.
When the SU-800 is used (R1C1 set) on a camera with a hot-shoe but
without the Nikon Creative Lighting System (CLS) it needs to be
cabled to the ring lights and the switch in the battery
compartment needs to be set to Close-Up mode (flower symbol).
For cameras that have CLS there is no need for the SU-800 since
the camera's pop-up flash will control the SB-200 lights.
The manual mentions that some cameras, like the D70, the pop-up
flash emits some light that might interfere with the exposure and
so the sets include the
SB-R200 Flash
This is one of the flash units that
go with the R1 and R1C1 close-up sets. It's powered by the
common CR123A photo flash battery.
This flash can not be used at full power in the repeat flash mode,
but will work for a small number of repeats when turned down to
1/8 power or less.
The SB-200 comes with a
carry case with pockets for
the included gels and gel holder, theAS-20 crows foot
stand and three manuals. Runs on a CR123 battery.
The exposure compensation can only be turned down about 3
stops. Need to try using both increase on the SB-900
and decrease on the SB-R200.

|
8 pin connector is for the
SC-30 cord for Close-up (non CLS camera) operation.

|
a single CR123 photo
battery powers the SB-R200.
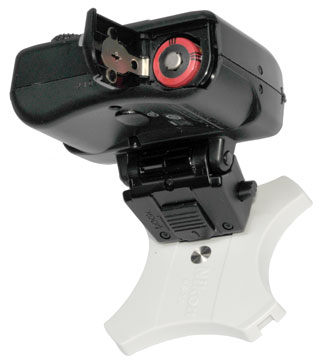
|
A problem with the pop-up flash when taking close up photographs
is the shadow of the lens falls on the subject.

|
SB-R200 flash with AS-20 Mount taken as subject
pop-up flash is the main light showing lens shadow.
To eliminate the uneven lighting from the pop-up flash you
could just close it,
but then it can not act as the infared remote for the CLS
system.
|
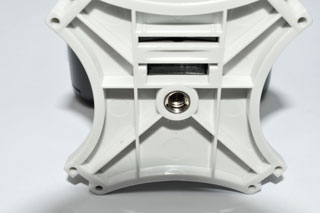
|
Camera pop-up flash set to TTL 0 correction
Pop-up flash is up
SB-900 in remote mode bounced of ceiling.
Subject (AS-20 on bottom of SB-R200) on desk on a piece of
copy paper.
The lens shadow is still present.
|
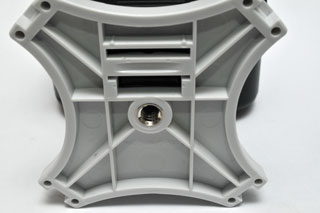 |
Camera pop-up flash set to off (-- in menu e3).
Pop-up flash is up to allow the commander mode to control
the SB-900
SB-900 in remote mode bounced off ceiling.
Subject (AS-20 on bottom of SB-R200) on desk on a piece of
copy paper.
|

|
Nikon CLS 3 flash sources, pop-up, SB-900 & SB-R200
taken in a home made light box where the bottom is copy
paper sitting inside the cardboard,
i.e. there's no light from the bottom.
There's still a shadow on the bottom edge.
A collapsible light box is on order and I think it has a
suspended bottom that's translucent so light can come from
below.
|
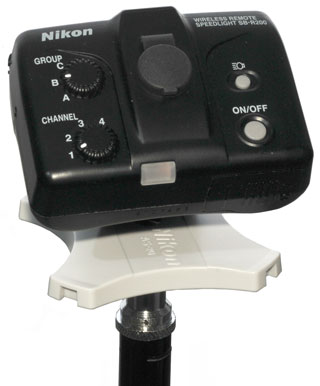
|
The AS-20 has a 1/4-20
socket on the bottom which matches the 1/4-20 stud that's
part of the light stand.
|
One of the advantages of the R1 or R1C1 kits is that they include
adapters that mount the SB-R200 flash so it's located at the front
of the lens. This allows the light to fall on the subject
directly. But you can get a very similar result by using the
AS-20 stand.
Close Up Photography
The owner's manual for the SB-R200 recommends three Nikon lenses
for close-up work:
AF Micro-Nikor 60mm f/2.8D - 8" min. working distance may make
lighting difficult
AF Micro-Nikor 105mm f/2.8D - this lens has a good reputation for
CU optics and is now reasonably priced. 12" min. working
distance
AF Micro-Nikor 200mm f/4D IF-ED - 19" min. working distance.
The AF-S VR Micro-Nikkor 105mm f/2.8G IF-ED Lens came out after
the manual was printed. The Vibration Reduction (VR) feature
should be handy for hand held close up work especially in natural
light conditions.
Note the minimum f/stop has no meaning in terms of light gathering
since a much smaller f/stop is typically used in order to get a
reasonable depth of field. But it does have meaning in that
it relates to the optical design of the lens. For example
there are a number of 105 mm "Micro" lens designs and some are
much better for close up photography than others. The early
designs were f/4 (shown as 1:4 on the lens barrel) and are not as
good as the later designs that are f/2.8.
For close up work focusing is typically done in Manual mode by
moving the camera so Auto Focus is not a requirement. But AF
is nice for regular use of the lens as for portraits, and general
shooting. The only problem with a first generation film lens
is the lack of f/stop communication with the camera body. So
manual input to the camera body of the f/stop would be
required. It would seem that any any "Micro" lens with
electrical contacts would work as well and any of the newer lenses
for close up photography.
SB-400
This is a small speedlight, similar to the SB-R200 or the on
camera pop-up flash. It's part of the CLS. A big
advantage it has over the SB-R200 is that it uses a couple of AA
batteries instead of the CR123 in the
SB-R200.
There are rechargeable versions of the CR123 (i.e. RCR123) but the
selection of chemistry and specifications is huge for the AA and
the AA is available on sale.
Although Nikon says this is a CLS flash, it can only be used on a
CLS camera as the master unit, i.e. it can NOT be used as a slave
flash!
They do say there are no wireless communications channels, that's
to say it can not be used as a remote.
After Getting a "
3 Pc Hot Shoe Kit Flash
Adapter" (eBay search phrase) so that a PC cable could be used
to trigger the SB-400, it did not work!
Using metal to short the center hot-shoe terminal to the frame
does NOT fire the flash! I confirmed with Nikon that the only
way to use the SB-400 is by means of a digital interface like a
modern camera from the hot-shoe or using the SC-17
or SC-28 cable. What a bummer. I've told Nikon this
is a design defect.
250W Studio Light Flash Strobe 110V
Photo Light F250
23 Oct 2011 - completely DEAD. Received 4 Aug 2011. Checked
the line cord and it's fine. Opened panel end and On-Off
switch is fine.
The white seal covering one of the bottom screws looked like it
may have been applied over another seal, so this may be a
refurbished unit.
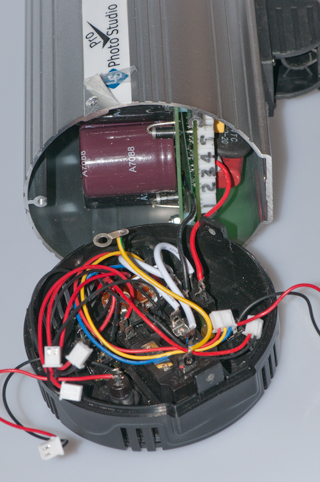
|
1
|
Blu
Yel
Org
|
Power
Pot
|
J1
FW
|
2
|
Blk
Red
|
Buz
|
J5
BUZZ
|
3
|
Blk
Red
|
Ready
Lite
|
J3
LED
|
4
|
Blk
Red
|
Mode -
|
J6
LW
|
5
|
Blk
Red
|
TEST
P.B.
|
J4
TEST
|
6
|
Blk
Red
|
Top
Red
Lite
|
J2
GM
|
behind
5
|
Blk
Red
|
Sync
|
J7
SYNC
|
|
|
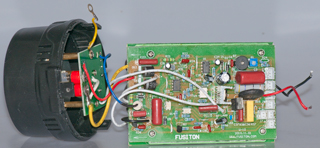
|
Fusiton -
URL on PCB
|
|
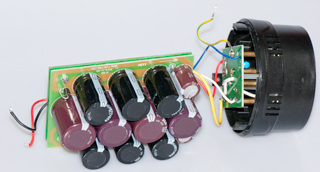
|
The Red and Black wires are
from the AC On-Off switch.
The Black wire goes to the Capacitor board and four
diodes.
This accomplishes two things, it eliminates the need for a
input transformer
and it provides energy storage for the flash
|
|
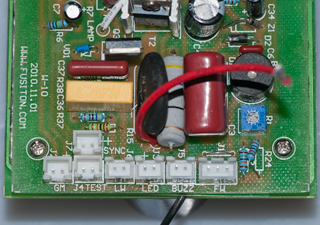
|
|
|
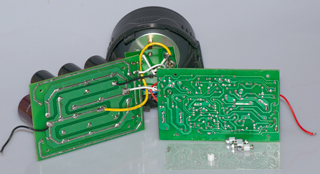
|
There's an extra (and
broken) insulating spacer between the two PCBs, so this
probably
is a refurbished unit.
There a burn hole at the left side of the clear plastic
insulating sheet indicating a short from
the Capacitor Board to the other board that probably
killed the other board. But the modeling
light should still work but doesn't.
The C board measures 2560 uF. (10 ea 220 uF @ 450 V) which
are for the flash tube
& another two 68 uF @ 450 V caps that are the power
supply for the other board
The Black AC line wire at the left is connected directly
to the yellow wire that feeds both the flash tube
and the modeling light, nothing to go wrong here.
The Red AC line wire on the right needs working electronic
parts in order to power the modeling light
which is not happening, so, as stated above, this board
has fried components.
|
|
This type of strobe is also called a Monolight. That's
because it's self contained unlike the prior studio lights that
had a power supply box that sat on the floor plus light
heads. The mono lights are simpler and much more cost
effective than the old type studio lights and it's easy and cost
effective to expand a system by adding lights.
The two main motivators for this purchase are to get more
light and to eliminate the hassle of using batteries for studio
work. I've been complaining to Nikon to add an AC adapter
for the SB-900 or offer a studio light that's CLS compatible and
much less expensive than the SB-900 or license someone else to
make a CLS compatible studio strobe, but so far nothing has
happened.
 |
This is a 250 Watt Second
strobe light that cost about $80. It probably has no
TTL metering capability.
There is a Metz 45 Watt Second strobe that retails for
about $900 that will work with the TTL metering of the
D300s, but that's just too much a premium. In
addition the owner's documentation is very poorly written
and illustrated.
I'd guess the SB-900 is about 50 Watt Seconds. One
stop more light would be 100 WS another stop would be 200
WS so the F-250 strobe is a little more than 2 stops
brighter. A better way to compare is using Guide
numbers where the ISO number is specified as well as the
view agnles (hor & vert), but that gets difficult
because the light cones have different shapes, i.e. the
SB-900 has a rectangular shaped beam that matches the
camera's image format but the studio strobe is far less
well defined. When using the reflective umbrella
there's probably an increase in guide number.
But just looking at the below photos shows that the F-250
is much brighter than the SB-900 and there's a huge cost
difference (SB-900 is about $500 and the F-250 is about
$90).
|
The paragraph title is the eBay item description. This is to
experiment to see if it will follow the Nikon camera Creative
Lighting System (CLS) pulses. I don't think it will.
But even if not it can still be used as a way to get more light
for close-up work where f/32 is needed for depth-of-field.
The light stand and subject were not moved between these two
shots. At left the SB900 is the light source and on the
right the F-250 strobe trigered by the on camera flash.
Both photos taken in A mode at f/36. Images have been
cropped but no other changes. In both photos you can see the
bright spot that's the on camera flash.
Shots 1. through 7. takes with D300s & AF-S 105 mm lens.
1. SB-900 Reference shot
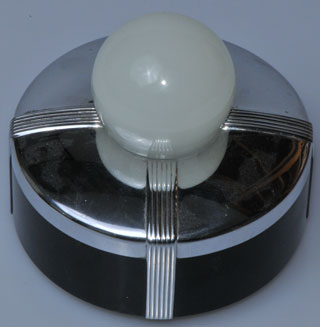
|
2. First try F-250 photo
eye trigger

|
You can see the umbrella in
this photo.
Custom Setting Menu/Bracketing Flash/
e3: Flash cntrl for built-in flash: Commander Mode
|
In this photo the F-250 did
not contribute any light.
Custom Setting Menu/Bracketing Flash/
e3: Flash cntrl for built-in flash: Commander Mode
The strobe fired, but no light on subject.
|
3. CLS mode turned off
A mode f/36 (shutter speed 1.3 sec)
Trigger by PC cable, note no hot spot from on camera
flash.

You can see the blur caused by hand holding at 1.3
seconds.
The image stabilization can not help here.
|
4. CLS off,
M mode 1/60 @ f/36 trigger using PC cable.
Trigger by PC cable, note no hot spot from on camera
flash.
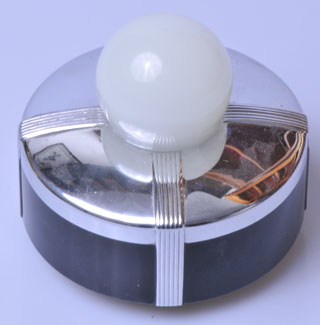
|
5. CLS off, M mode 1/60 @
f/36 trigger usingF-250 photo eye
Note, hot spot from on camera flash.
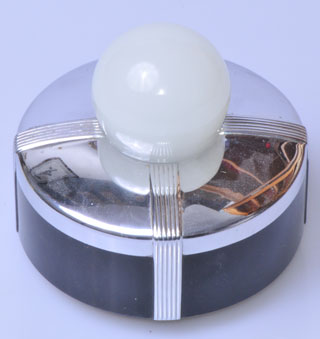
|
6. same as 5. except added
SG-3 IR pass filter in front of
on camera flash.

|
7. same as 6. except soft
box added +
SB900 & SB25 used below for bottom light.
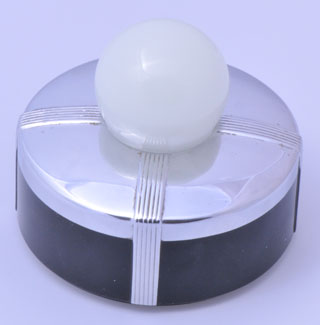
|
8. View of setup taken with
18-55 zoom lens
which only stops down to f/25 so it's overexposed.
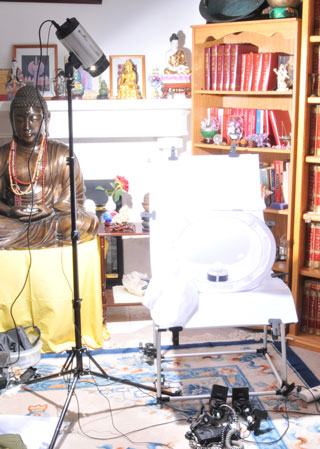
The SB-900 and SB-25 on the floor are turned off,
or more correctly the F-250 was left on and I just took
this photo.
|
I'm going to order a couple more of these strobes. One for a
second main light (or fill light) and another to back illuminate
the background.
eBay item title: Photo Studio Lighting Photo Flash
Strobe Light, LF01
Set of Two Studio Light Flash Strobe
Monolights
eBay item title: Photo Studio Lighting Photo Flash Strobe Light,
LF01
Kit includes:
| |
2
x 100W Model Light Bulb |
| |
2
x 200W Flash Light Bulb |
| |
2
x Studio Light Tripod Stand |
| |
2
x Black/Silver Umbrella Reflector |
| |
1
x LS Photo Studio Carry Bag |
The the ubmrellas that come with this kit are black on the sky
side and silver on the strobe side. This is less diffuse
than the existing umbrella that's translucent and can be
positioned with the umbrella between the strobe and subject
providing light through the umbrella (from the point of view of
the subject the light is much larger. But for a fill light
and background light the provided umbrellas may not be needed.
Note the strobe above is a 250 Watt Second (WS) unit, but the kit
includes 200 WS strobes. The difference is a fraction of a
stop and so in not significant.
|
This is an early attempt to
use the Extract
plug-in for Photoshop CS4. I've done the green
pencil outline but have not done any of the History Brush
touch up work. Click on the photo to see a larger
version.
|

|
The removal of my floor as
the background was done in Photoshop 7 using the erase
tool.
In the center of the case there are some case divider
parts that have Velcro strips, but this set of parts may
not need them or they may need to be modified to really
fit.
|
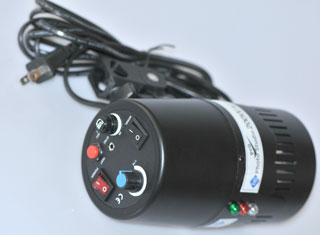
|
The 200 WS Monolights that
come with the set have a fixed core, not the IEC type
removable line cord that's on the F250 Monolight.
They only have two switches: Main On/Off and Modeling
Light On/Off. The Light Brightness control comes all
the way at minimum power, so needs to be turned up to Full
power.
For the 200 WS light under the Light Table to show up
white the camera needs to be at f/8 or more open.
Shutter speed 1/60 works best, anything faster and there's
a slight dimming effect.
D300s Custom Menu, 32 Flash Shutter Speed, 1/60.
|
Test Photo using Light
Table & 3 Monolights.
The highlight level has be adjusted, still not enough
light.
|
Test Photo using Light
Table & 3 Monolights.
The highlight level has be adjusted, still not enough
light.
|
Pro 7" Reflector for Bowens Strobe
Got this in the hope it would fit
either of the above monolights, but it does NOT fit either of
them. The idea was to increase the Guide Number.
The back I.D. is 3.604" (91.5 mm) whereas the nose O.D. of the
200WS & 250 WS strobes is 3.705" (95mm).
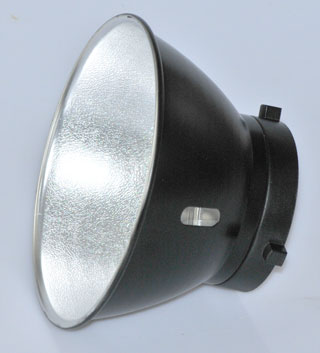 |
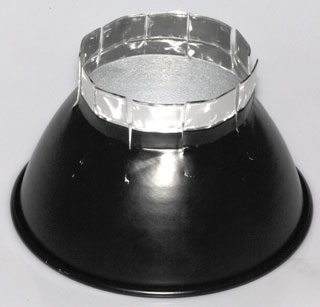
|
Stock
|
Modified
by hacksawing off the ring,
then using Tin Snips to
make cuts.
Not fits Monolights.
|
But it's difficult to compare the light from the 250 WS
monolight when using the modified 7" reflector and the same
light when using the metalized unbrella because the distance is
very different and the softness of the light is verry different.
Yongnuo YN-565EX Flash
This appears to be a knock off of the SB-900 (SB-800?) or similar
flash that works with Nikon and Canon cameras including the remote
digital modes.
Factory
web page -
CLS demo
video -
eBay
search - 15 Aug 2011 $165 including shipping from China or
Hong Kong
It has a high voltage socket for the SF-18C or SF-17C
auxiliary power packs which are the Cannon style (580EX, 550EX),
not the Nikon style.
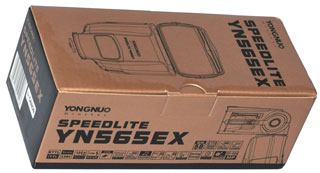
|
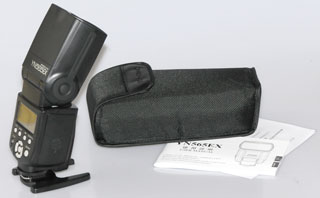
|
n = Nikon (not c: Cannon
not cn: Cannon or Nikon)
1 = Channel #
A= Group
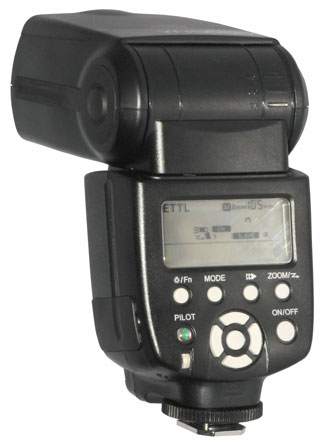
|
|
Smith-Victor PL10
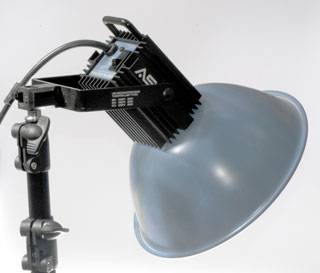
|
This is a Photographic Light for standard household Edison
base lamps.
In order for the reflector to work properly one of the
following lamps
should be used:
Lamp
|
Color
°K
|
BBA
|
3400
|
BCA
|
4800
|
ECA
|
3200
|
The markings on the installed lamp are: BCA #1 3 hours
average life.
I think there is no electronics in the box, but rather the
heat sinks are there
to help keep the lamp cooler than it otherwise would
be. This product has
been on the market for decades (my father bought this
one).
|
Wein WP1000 Flash Meter
This was also sold under the
Honeywell name and there was a WP500 model.
As received the needle was pointing at f2.8 to f 4 and the
screwdriver would not adjust it. Removing the plastic
cover allowed the zero adjustment to work fine. But when
the plastic cover was held near the needle it again moved up
scale. The poblem was static on the plastic. Getting
a Downey cloth from the laundry room and wiping the
plastic and the box and reassembling solved that problem.
Installed a fresh 9V battery.
The dial on the front has no effect on the meter reading, it's a
replacement for the paper sticker that was on earlier models of
the meter to allow translating the f/number for different film
speeds.
The Guide Number of a flash aimed at the meter and 10 feet away
is found by switching from off to on and firing the flash.
Multiply the f/stop shown on the meter by 10 feet (or if it was
3 meters away by 3) and the product is the guide number.
The setup as it is not shows f/11 so the guide number is 110.
An on line manual claims that the WP1000 is accurate to 1/6 of a
stop, better than the 1/3 stop for the WP500.
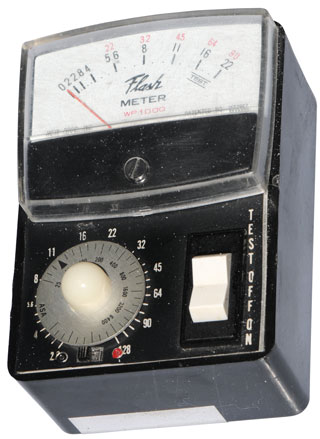
|
|
The paragraph title above is the eBay item name. Under $50
half list price. It got a good review and is accurate to 1/3
f/stop. Will be used to compare monolights (using various
optical arrangements to control their light) and hot-shoe flash
units.
As a first test looked at the light from the 250WS monoblock light
with silver umbrella. It's about 1-1/2 feet from the lamp
plane to the inside of the umbrella, so placing the light meter 7
feef from the lamp plane results in a reading of f/6.3 or a guide
number of 63. With the umbrella removed and the meter 10
feet from the lamp plane (now facing the meter) the guide number
is 50.
The Nikon SB-900 (zoom at 200 mm) at 10 feet is f/8 or a guide
number of 80. This agrees with my limited experience with
both units.
Hot-shoe
Manfrotto Clamp
A very handy thing to carry in the
camera bag. Clamps to flat surfaces like doors, shelves, etc
or to cylindrical tubing. See my
Nikon SB-25 flash page for
more.
Deluxe Strobist Swivel
Flash Bracket Umbrella Mount
This is part of a studio lighting
setup and is used to hod both the umbrella and a hot-shoe flash on
a light stand or camera tripod. The paragraph heading
matches the
eBay
listing title (
@
Amazon
). Photoflex
calles it a
ShoeMount
MultiClamp.
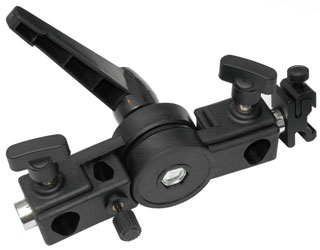
|
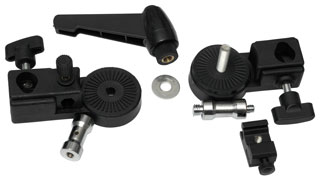
|
There are four positions
for the metal dumbbell tripod adapters. The smaller
hole is for the umbrella shaft.
|
The two metal dumbbells
each have US thread on one end and European thread on the
other end.
They can be installed either along the axis of the clamp
or at right angles to the clamp making for a large number
of possible setups. There are teeth between the two
parts of the clamp so it will hold it's position better
than a friction only swivel. Don't know why the hole
in the female threaded dumbbell. Let me know why it's there.
|
Umbrella
Shooting Table
The eBay ad says 24" x 51", but they cut the white translucent
sheet more like 23-1/2" wide which impacts how you assemble (set
the distance between the) rods.
24" x 51" Photography
Camera Shooting Table Overall View
You can see the SB-R200 below the table and at the upper
right is the SB-900 clamped to the bookcase.
The SB-900 can also be used on the tripod or with the
umbrella.
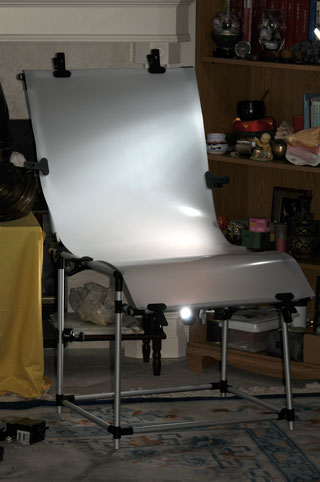
It's very inconvient to turn on and off the SB-R200 that's
below the shooting surface. When the SB-25 is added
or replaces the SB-R200 (or the SB-400 is used) it gets
more difficult.
Since this is really a studio type application it would be
nice to have an AC power supply for all the lights that
are under the shooting surface with a switch somewhere
that's easy to get to. This also applies to the
SB-900.
2014 - I've quit using any battery powered flash.
The main flash is the E640 and now there are 4 monolights
below the table. The mono lights have built-in
photocells and trigger from the main flash.
|
|
Using
SB-900 as Wired Flash Trigger
As you can see in the photo above the
SB-R200 does not light up the "seat" of the shooting
table. I'll try lowering it for more coverage.
I think by using a universal hot-shoe adapter the SB-400
can be triggered using a PC cable from the SB-900.
eBay search words: 3 Pc Hot Shoe
Kit Flash Adapter |
Flash Bracket Grip
The eBay search words are "Flash Bracket Grip". It
allows mounting the SB-900 with more offset from the lens (should
help reduce or eliminate red eye).
Also allows mounting other items high enough above camera like the
GPS receiver thus allowing the pop-up flash to work.
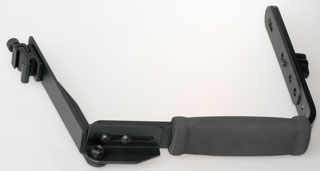
The Pocket Wizard line got rave reviews in the
Strobist lighting DVDs. So I browsed
their products and found that they have CLS capability AND that
the Einstein E640 Flashpower can be commanded via CLS. This
also works for the AlienBees and White Lightining
MiniTT1-Nikon
- fits the hot shoe.
PowerMC2
- specifically to control the Einstein E640 Flash.
FlexTT5-Nikon
Transceiver - mounts on camera hot shoe or can be used to mount a
speedlight (has hot-shoe socket). Responds to MiniTT1-Nikon.
Tracks camera f/stop and ISO
changes.
AC3
- clips on top of the MiniTT1-Nikon and allows control of three
zones (Nikon speak: Groups) and has manual control dials for each
group.
Has a socket on the top that accepts the MC2 control. The
MC2 will trigger from any of the Pocket Wizard transmitters, but
when the NiniTT1-Nikon transmitter is used the CLS system controls
the flash power. For example if I press the exposure
compensation button on the D300S and turn the wheel the power
level of the E640 changes. But . . . two things are
happening in parallel, the flash output changes by the number of
f/stops you select AND the camera changes it's f/stop by the same
number, that means the total correction is twice as big.
Nikon D300s DC Power
If you know the max voltage allowed
on the external power connector
let me
know. This might allow using a cut off cord from
the AC adapter with my 10 "D" cell battery holder.
Memory & Data
SD Cards
16GB capacity, PNY Optima
Eye-Fi WiFi Data Transfer
Aug 2015 - Message sent to Eye-Fi tech support:
The Problem reporter showed "complete" on the progress bar,
but it never closed. I had to terminate it.
Maybe you need a software update for that.
The (fails to automatically upload) problem has happened a
number of times. I think I know why.
The card is an Pro X2 16 GB+Wi-Fi and camera Nikon D300s.
When the card is working I normally do not erase photos
after uploading to my computer so at some point the card
fills up and I've set the camera to then switch from the SD
card to the CF card so I don't notice that the Eye-Fi SD
card is full. The next time I download I'll notice
that the Eye-Fi card was full and after manually uploading
the files will erase all of them from the Eye-Fi card.
But then it no longer automatically uploads.
In the process of reporting this failure earlier today I
removed the Eye-Fi card to tell you it's model and after
reinstalling the card the automatic uploading started
working again.
Now that I know this is how it works and if I can remember
it's easy to work around. But a software update would
be nice to fix this. Maybe there's a way the Eye-Fi
card can let me know that it's full?
May 2015 - Sometimes the upload does not start as soon as I
think it should. That may be because I put the camera
down with the bottom (where the tripod threads are)
down. Note that when you hold the camera in your right
hand your hand is covering the SD card and probably blocking
the signal.
But if you sit the camera down on it's left side with the
right side up then the SD card antenna is up and in the
clear. Based on one time I'm going to be using this
method to see if that improves the operation.
Feb 2015 - There are three different upload folders that can
be set independently: Photos, RAW and Video. I was
getting uploaded photos appearing in a sub folder generated by
Eye-Fi with the date of the upload, but did not want that so
turned off the make folder with date feature in Photos.
But it did not work. It turns out that I'm working with
RAW files (that's why I no longer use the Eye-Fi Explore|X2
8GB+Wi-Fi card because it does not support RAW files).
So I just finished turning off folder generation for RAW and
video files.
Feb 2015 - after a number of emails with tech support they
exchanged my old car for a new card with the same model (Pro
X2, 16GB+Wi-Fi). Note this card supports RAW files.
There is a procedure
to add a new card to an existing account. This got
the card working in the sense that the camera transfers image
files to the desired desktop folder just after then are
taken. But it made a new sub-folder with today's
date. By putting the card in a USB reader and plugging
it into the desktop the option to make new folders was turned
off and now it's working great.
Note: I'm shooting RAW files that are about 14 MB each
so it takes a little time for the file to be uploaded, so do
not turn the camera power off until you see on the computer
screen that the small file transfer window in the lower right
has finished the upload.
July 30 2014- It worked for a couple of months then
stopped. I've spend many hours with tech support trying
to get it going again to no avail.
At one point they thought the problem was my Eset NOD32
anntivirus software, but removing it did not solve the
problem.
It may be been that the SD card got full or that WIN XP SP3
has some problem and since Microsoft no longer supports XP
neither does Eye-Fi.
The card does with with a friends Apple iPad Air, so the card
and my Wi-Fi network is OK. It's been a week since tech
support said they would get back to me so it looks like it's
not going to work.
May 29, 2014 - It's working. As each photo (.NEF RAW
files) it taken it's automatically uploaded to my desktop
computer in the proper folder.
The Eye-Fi Pro X2, 8GB+WiFi card is the one I'm using, not the
Explore card shown below that does not support RAW files.
This not only will save time, but also the wear and tear on
the camera USB socket (I've replaced it once already) or wear
and tear on either the CF or SD card sockets.
So, not only faster but no wear and tear on the camera.
Eye-Fi ended
support for these June 30, 2016 (Wiki).
Too bad since it worked well. Tried the ez Sh@re Wi-Fi
SD Card, but so far it is not working in the D300s.
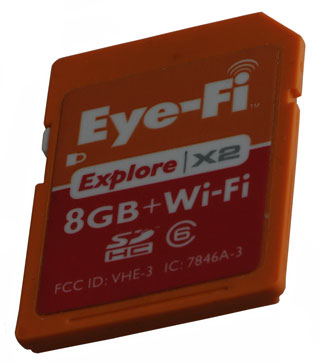 |
2022 photo since the card no longer
works.
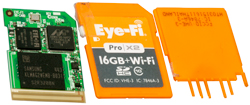 |
The Eye-Fi EXPLORE X2
8GB+WIFI Wireless Secure Digital Card allows wireless
image file uploading to a computer or photo web sight.
It appears that they have a
software package you can run on you computer that in addition
to the image file management functions includes a firmware
upgrade capability for the SD card itself.
My ASUS laptop is running WIN XP SP3 which is a requirement
for the Eye-Fi software so that's where I tried to install
it. BUT . . . there have been numerous problems and so
far I have not been able to get it to work. The first
problem was the "Unable to connect eye-fi server" error
message that appeared when trying to load my wireless network
settings into the card. This was fixed by turning off
the firewall and Avast anti virus. Turning these on
again resulted in the card being installed. But, when
trying to enable photo file downloading the error message is
now "You must be connected to the internet to change this
option" so cannot enable the key function needed. The
latest message from Eye-Fi support is that I need to uninstall
my Avast anti virus software. More later . . .
9 Feb 2012 - The
CF-30
Toughbook laptop is running WIN XP Pro SP3 and has my
digital camera software on it. After fighting with the
Eye-Fi installation finally got it to sort of work. The
D300s Menu settings:
- The Explorer X2 8GB SD card is set to: ON
- primary storage device: CF card
- Secondary storage device: RAW to primary, jpeg to
secondary. This way the Expolre X2 card gets the
jpeg file it can handle.
- jpeg: highest quality, not file size.
I've ordered one of the Eye-Fi Pro X2 8GB cards that supports
NEF raw file transfers ($15 on eBay), Well, eBay has
canceled the Buy It Now auction after I paid for the
card. Now to see if the seller is going to ship it or do
I need to put in a claim for a refund.
2014 - Got a Pro X2 card a year or two ago and synchronized it
with the CF-30 laptop. But it turns out that I do 99.9%
of my photography in the studio using studio flash, so haven't
really made use of it. But once had the CF-30 in the
studio for another reason and it was powered up, and it did
download each photo I took. So now need to install and
configure the Eye-Fi software on my desktop computer.
2014 - downloaded the latest WIN software and tried to reset
my password, but . . .that did not work. Waiting for
tech support.
Tech support is a problem because the options you MUST fill in
to get support do not include what I'm doing.
Got some help and now it seems to be working. Required
using an SD to USB adapter to connect the Eye-Fi card directly
to the desktop computer, can not use the USB cable to the
camera.
It's not clear when the RAW files get uploaded. Maybe by
themselves or maybe only when I open the Eye-Fi Center.
NOTE: when you open the Eye-Fi center a second window opens
directly on top of the center and you need to click the small
x in the upper right to see the center.
CF Cards
8 GB capacity 30MB/sec SanDisk
Ultra
USB Cable
The USB-Amale to USB-Bmale Mini
cable is 99¢ on eBay (including postage)
Note: This is NOT a USB micro cable which has a smaller
connector.
2014 - Got a new cable that's 10 feet long allowing plugging
into the back of my desktop computer (to avoid the hub which
seems to solve some problems).
Remote Control
The key issue is getting
focus. The problem is that when the shutter release is at
the half way position the focus is set. So if you set the
self timer and press the shutter the focus is set at the time you
pressed the shutter, not the time when the exposure happens.
Possible ways to get focused images:
- Use a remote shutter release. (That's why I'm putting
this topic under Remote Shutter Control). The problem
with the MC-30 or knock-off version is that the cord is only 1
meter long, not quite long enough for a self portrait.
The solution to that is the MC-21 2 meter shutter release
extension cord.
- Switch the camera and/or lens to Manual focus. I tried
using a tape measure, but did not get good results. What
worked was trial and error. But the quality of focus is
not as good as you get with matrix autofocus.
- One thing yet to try is using AF Tracking (Contionous focus)
to see if the focus changes when I sit in the chair.
For movie self portraits the remote will not work since you need
to press the center of the navigation button on the back of the
camera to start/stop a movie. In a similar manner neither
the self focus nor the slef timer works when doing a self
portrait. Use manual focus, use a small opening (high
f/number) and increase the ISO speed to a high value (200 stock,
set to 1000) so that you don't need flood lights.
Wireless
Remote Shutter
This is a 433 MHz RF wireless
shutter release that mates to the Nikon 10-pin connector.
Note there are other versions that look very similar but have a
different camera connector. Marked Meike MK-RC6.
The remote uses a CR2 coin cell battery.
The camera receiver uses a 23A 12V battery.
28 Sep 2011 - received two new 23A batteries and still the
receiver is not working. The battery in the receiver was hot
to the touch after being installed just a few minutes. It
tests about 1/3 of full charge. The other new battery tests
100% of charge. Something has gone bad inside the
receiver. Not sure how to get it opened up. Removing the
screw between the hot-shoe and switches and peeling back the
battery polarity diagram does not free up the two halves. If
you know how to open it
let me know.
Note pressing the large button on the receiver when there's no
battery in the receiver causes the camera to take a photo.
During all these tests I've not seen any LED on the receiver light
up.
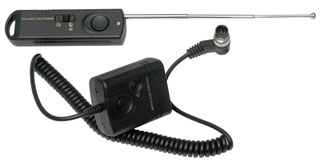
|
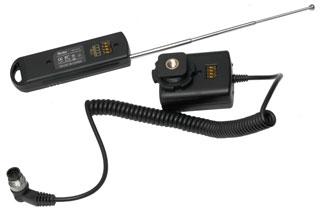
|
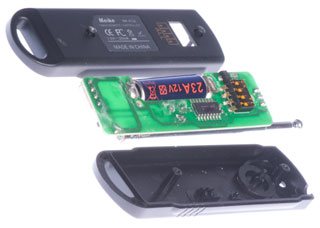
The label says 3V....20ma, but clearly the 23A battery is
marked 12V.
|
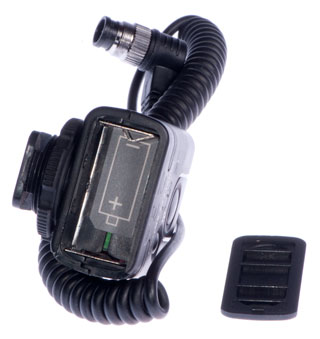
The battery compartment holds a 12V type 23A battery
|
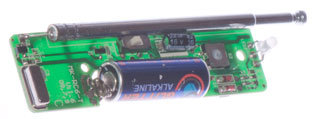
|
|
It turns out that the Pocket Wizard flash system can also
be used to
trigger an exposure.
|
|
Wired Remote
Shutter Release Cable
This works reliability and does not
need any batteries. It's only problem is that it's about 1
meter long, not enough for a portrait.
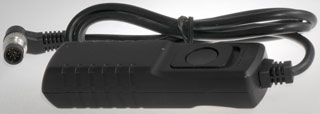
The rectangle part surrounding the 2-stage shutter release
button can be slid upward locking the button in the down
position to make long time exposures when the camera
is in the Bulb shutter mode.
May be similar to the Nikon MC-30 cable.
Marked RS-3004 Remote Switch.
Probably works on any Nikon with the 10-pin connector.
eBay search terms: "Wired Remote Control for Nikon
D3"
|
|
MC-21 Shutter Release Extension Cord (10'
3" - 3 m)
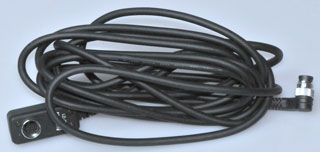
The instruction sheet says up to three of these ten foot
cords can be connected in seires to make a thirty foot
extension.
But just one of these and the MC-30 shutter release cable
will give enough length to make self portraits using up to
_____ mm lens.
|
|
WT-4a WiFi LAN Control (Nikon)
This is a full 2-way remote
control based on IEEE 802 WiFi. If you have a home WiFi network
it has more advantages.
When used with
Camera Control Pro 2
software you have full remote control.
Without the CCP 2 software you can automatically download images
from the camera to a computer.
Nikon has already patented the idea of building 802 WiFi into
the camera body, but so far these have not come on the market.
This is a Compact Flash card that
can plug into a camera that uses them for memory (like the Nikon
D300s). But it's so picky about the configuration of the
computer that I was not able to get it to work. It's a one
way download system that can send photos to your computer or if
you're in a WiFi hot spot, home Wi-Fi system or to a designated
photo hosting site.
Wireless USB
The idea is to use a pair of
wireless USB adapters, one at the computer and the other at the
camera to achieve wireless control, photo downloading or
tethering. The trickey part is that the camera wireless
USB adapter needs a 5 Volt supply and a USB to USB printed
circuit board to allow injecting the DC. See:
PeteTether
1.1 - A Wireless Portable USB tether
Experiments
X-Connect Wireless USB Data Kit
After installing the software on the CF-30 laptop and connecting
the rightangle dongle to the laptop and the straight dongle to
it's stand-power adapter and the stand to the D60 camera, Nikon
Camera Control Pro 2.9 will talk to the D60 with a wireless
link.
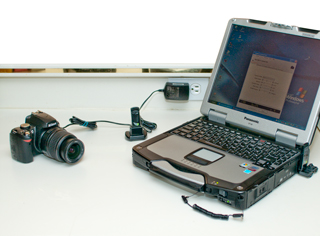
But when the X-Connect vertical stand-power adapter is replaced
by a USB hub with external power the wireless link no longer
works.
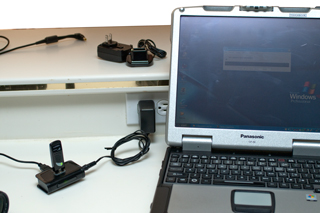 |
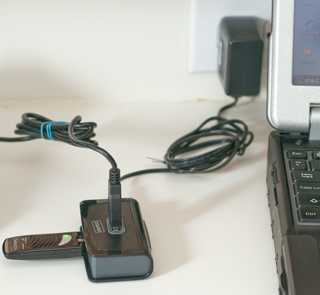
|
| With Wireless USB dongle
in top port - does not link |
With Wireless USB dongle
in side port - does not link
|
|
|
The X-Connect stand-power
adapter just has two USB connectors
with their pins soldered to each other (no PCB) and the
negative PS
pin soldered to the shell. The center pin from the
external power
module is soldered to the + USB pin.
|
|
Why does the hub cause the link to quit working? Maybe
it's the voltage difference, X-Connect 6V and Staples USB Hub 5
V.
Filters
Lens Chart
Note 1: Internal not front of lens
Tripod Slik F740
To use the camera in the
kitchen to make YouTube
Videos a tripod that would not dent the floor and one
that would not spread was needed. The Arri movie camera tripod was not
suitable and the cheap flimsy one is not stable enough so I
got a Silk F740 from the local camera store. This is a
purchase that's best done in person so that you can evaluate
the tradeoff between cost and stability.
Note: Purchased at the local camera store. That
way I can see the tradeoff between steadiness, price and
weight.
Slik F740.
The tilt mechanism is locked by turning the handle.
The handle is plastic and has a 1/4-20 threaded rod that
goes into the head.
That rod works to tighten a slot around the tilt drum.
In order to do that the 1/4-20 rod screws into a common nut
that sits in a hex plastic pocket. But when you mount
something heavy and tighten the handle it can split the
plastic near the nut and also pull the rod out of the
handle. This is the problem with plastic parts used in
mechanical applications.
I got a spare head, but it split again, probably because the
handle was also defective. Next I'll send it to
southern California and let them repair it.
I like it for portability and it works fine with just a
camera and normal lens, but not for telephoto lens or other
heavy items.
It turns out the max weight spec is 1.46 kg (3.2 #).
So it depends a lot on which lens is attached to the D300s.
That's to say it's not rated for the heavier hand held
lenses.
The Moza Air 2 gimbal (see Filmmaker's
Kit above) is rated for 4.2 kg (9.25 #) which is a
more practical weight spec for a tripod for the D300s.
The D300s and 18-200 zoom weighs 3# 6oz.
|
 |
Instead of having a 1/4-20
male thread as is commonly used on U.S. camera tripod heads,
it has a quick release head similar to the Arca-Swiss (factory
web site) type (Wiki)
BUT the Silk is 42mm x 42mm (a little larger than 1-5/8")
and the Acra-Swiss is 37mm x 37mm (a little smaller than
1-1/5") so not compatible.
|
|
Tripods
that have Acra-Swiss compatible heads are:
Acratech -
Arca-Swiss
-
Giottos -
Henjar - eBay
standard products - custom prod avail
Kirk Photo -
Markins - Markins North America
-
Really Right Stuff
(RRS) -
Wimberley - heads,
QR related, no tripods
|
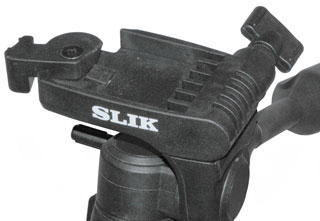
|
July 2013.
The part that the handle screws into has broken.
Turning the handle locks the head up-down tilt movement.
The plastic has broken away from the nut.
The problem is caused by the weight of the 105mm close up
lens and the need to point it down.
It would be good to add a counter weight.
Within a day I have p/n: 3/1-K615-52-6 on order for a total
under $10 including shipping and tax.
The California office phone is: 800-421-1141
|
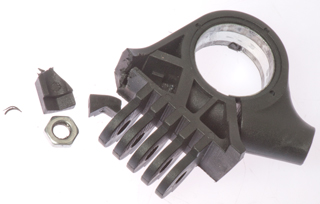
|
Ultra Compact Light Stand
Spring Clamp
These have a spigot/stud topped with
1/4-20 male thread. The spigot is held on by a couple of hex
head screws, one of which you can see in the photo.
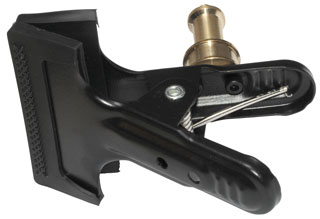
Collapsible Soft Box Light Tent 16"
Collapsible Reflector Diffuser
This is handy to use with the SB-900 when the SB-900 is
in the remote mode and the reflector is used as a backdrop, like
for the garden club flower photos.
Carry Case
Lowe
Pro Runner
200 AW
Note: Purchased at the local camera store so that I could see the
quality and how the camera fit with lens attached.
Hint: When photographing long subjects, like this camera
case, it's good to frame them in the viewfinder on a diagonal and
later rotate the image. That way there are more pixels on
the subject.
SB-900 Direct D300s: A mode
f/22
|
SB-900 Bounce D300s: P mode
|
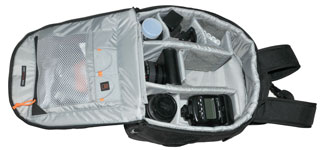
|
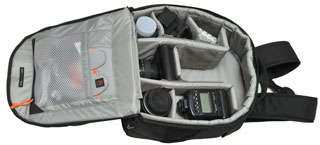
|
As of Dec 2010 this carry case no longer can hold the D300s and
the accessories shown on this page. It may be that a second
case (details to be determined) can be used to hold the lighting
related equipment.
GPS
The D300s and other digital SLR
cameras support GPS data logging of each shot. But the Nikon
GP-1 and most of the after market GPS camera accessories do not
include heading information. The only on camera solution
that I've found is the
MetaGPS
model M2 (the M0 and M1 models do not include heading).
Geotagged photos can be uploaded to
Panoramio which will show
up in Google Maps if done properly.
Geocoding
photos using any GPS.
Wiki:
Geotagged
photograph, EXchangeable Image File format (
EXIF) "The
specification uses the existing JPEG, TIFF Rev. 6.0, and RIFF WAV
file formats, with the addition of specific
metadata tags. It is not supported in
JPEG 2000, PNG, or
GIF."
Another way of getting photos on Google Maps or Google Earth is to
use the
Locr software.
It allows adding position info to photographs or videos based on a
GPS track file or on street address. Has an uploading
function to Google that includes file converion to .KML or
.KMZ file format
Meta GPS M2
The M0 and M1 models don't have the magnetic compass for bearing
info.
When used the first time in a location far from the last use a GPS
receiver may need 15 minutes to get a fix. But this receiver
(uses SiRF chip set) got a fix in a couple of minutes.
Meta GPS Nikon model M2 with Magnetic Comapass
Note the neck strap to hot shoe adapter
is not a good idea if you want bearing information,
for that hte GPS receiver needs to be
on the camera hot-shoe.
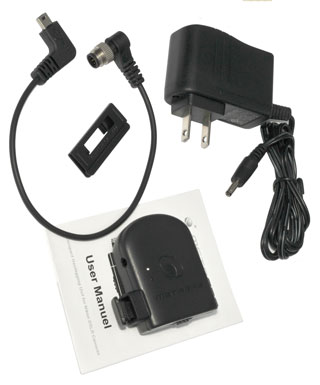
|
Data from D300s with GPS
Adobe Photoshop CS4: FILE / File Info.../ Raw Data
Adobe Photoshop 7: FILE /
File Info.../ EXIF
Scroll down to see the GPS data that's shown in bold font.
<?xpacket begin="" id="W5M0MpCehiHzreSzNTczkc9d"?>
<x:xmpmeta xmlns:x="adobe:ns:meta/" x:xmptk="Adobe XMP
Core 4.2.2-c063 53.352624,
2008/07/30-18:12:18
">
<rdf:RDF
xmlns:rdf="http://www.w3.org/1999/02/22-rdf-syntax-ns#">
<rdf:Description
rdf:about=""
xmlns:xmp="http://ns.adobe.com/xap/1.0/">
<xmp:CreatorTool>Ver.1.01 </xmp:CreatorTool>
<xmp:ModifyDate>2010-11-26T10:05:53-08:00</xmp:ModifyDate>
<xmp:CreateDate>2010-11-26T10:05:53-08:00</xmp:CreateDate>
<xmp:MetadataDate>2010-11-26T10:05:53-08:00</xmp:MetadataDate>
</rdf:Description>
<rdf:Description
rdf:about=""
xmlns:tiff="http://ns.adobe.com/tiff/1.0/">
<tiff:ImageWidth>4288</tiff:ImageWidth>
<tiff:ImageLength>2848</tiff:ImageLength>
<tiff:BitsPerSample>
<rdf:Seq>
<rdf:li>8</rdf:li>
<rdf:li>8</rdf:li>
<rdf:li>8</rdf:li>
</rdf:Seq>
</tiff:BitsPerSample>
<tiff:Compression>1</tiff:Compression>
<tiff:PhotometricInterpretation>2</tiff:PhotometricInterpretation>
<tiff:Orientation>1</tiff:Orientation>
<tiff:SamplesPerPixel>3</tiff:SamplesPerPixel>
<tiff:PlanarConfiguration>1</tiff:PlanarConfiguration>
<tiff:XResolution>300/1</tiff:XResolution>
<tiff:YResolution>300/1</tiff:YResolution>
<tiff:ResolutionUnit>2</tiff:ResolutionUnit>
<tiff:Make>NIKON CORPORATION</tiff:Make>
<tiff:Model>NIKON D300S</tiff:Model>
</rdf:Description>
<rdf:Description
rdf:about=""
xmlns:dc="http://purl.org/dc/elements/1.1/">
<dc:creator>
<rdf:Seq>
<rdf:li>BROOKE
CLARKE
</rdf:li>
</rdf:Seq>
</dc:creator>
<dc:format>image/tiff</dc:format>
<dc:rights>
<rdf:Alt>
<rdf:li
xml:lang="x-default">2010
</rdf:li>
</rdf:Alt>
</dc:rights>
</rdf:Description>
<rdf:Description
rdf:about=""
xmlns:exif="http://ns.adobe.com/exif/1.0/">
<exif:ExifVersion>0221</exif:ExifVersion>
<exif:FlashpixVersion>0100</exif:FlashpixVersion>
<exif:ColorSpace>1</exif:ColorSpace>
<exif:DateTimeOriginal>2010-11-26T10:05:53-08:00</exif:DateTimeOriginal>
<exif:DateTimeDigitized>2010-11-26T10:05:53-08:00</exif:DateTimeDigitized>
<exif:ExposureTime>10/200</exif:ExposureTime>
<exif:FNumber>220/10</exif:FNumber>
<exif:ExposureProgram>3</exif:ExposureProgram>
<exif:ISOSpeedRatings>
<rdf:Seq>
<rdf:li>200</rdf:li>
</rdf:Seq>
</exif:ISOSpeedRatings>
<exif:ExposureBiasValue>0/6</exif:ExposureBiasValue>
<exif:MaxApertureValue>30/10</exif:MaxApertureValue>
<exif:MeteringMode>5</exif:MeteringMode>
<exif:LightSource>0</exif:LightSource>
<exif:Flash rdf:parseType="Resource">
<exif:Fired>False</exif:Fired>
<exif:Return>0</exif:Return>
<exif:Mode>0</exif:Mode>
<exif:Function>False</exif:Function>
<exif:RedEyeMode>False</exif:RedEyeMode>
</exif:Flash>
<exif:FocalLength>700/10</exif:FocalLength>
<exif:SensingMethod>2</exif:SensingMethod>
<exif:FileSource>3</exif:FileSource>
<exif:SceneType>1</exif:SceneType>
<exif:CustomRendered>0</exif:CustomRendered>
<exif:ExposureMode>0</exif:ExposureMode>
<exif:WhiteBalance>0</exif:WhiteBalance>
<exif:DigitalZoomRatio>1/1</exif:DigitalZoomRatio>
<exif:FocalLengthIn35mmFilm>105</exif:FocalLengthIn35mmFilm>
<exif:SceneCaptureType>0</exif:SceneCaptureType>
<exif:GainControl>0</exif:GainControl>
<exif:Contrast>0</exif:Contrast>
<exif:Saturation>0</exif:Saturation>
<exif:Sharpness>0</exif:Sharpness>
<exif:SubjectDistanceRange>0</exif:SubjectDistanceRange>
<exif:GPSVersionID>2.2.0.0</exif:GPSVersionID>
<exif:GPSLatitude>39,11.4155N</exif:GPSLatitude>.............................39:11:4155
North
<exif:GPSLongitude>123,9.8526W</exif:GPSLongitude>.....................123:09:8526
West
<exif:GPSAltitudeRef>0</exif:GPSAltitudeRef>
<exif:GPSAltitude>270/1</exif:GPSAltitude>
................................................270 meters
elev.
<exif:GPSTimeStamp>2010-11-26T18:05:53-08:00</exif:GPSTimeStamp>
<exif:GPSSatellites>06</exif:GPSSatellites>
<exif:GPSImgDirectionRef>M</exif:GPSImgDirectionRef>
<exif:GPSImgDirection>5900/100</exif:GPSImgDirection>................................59
deg
<exif:GPSMapDatum>
</exif:GPSMapDatum>
</rdf:Description>
<rdf:Description
rdf:about=""
xmlns:photoshop="http://ns.adobe.com/photoshop/1.0/">
<photoshop:ColorMode>3</photoshop:ColorMode>
<photoshop:ICCProfile>sRGB
IEC61966-2.1</photoshop:ICCProfile>
</rdf:Description>
</rdf:RDF>
</x:xmpmeta>
|
When the GPS is connected
to the camera you can see it's output on the LCD screen in
the SETUP MENU under GPS \ Position. The data fields
will be blank until the GPS gets a fix. The North
arrow in the photo at right was with the camera held close
to 0 or 360 degrees.
|
Nikon GPS tif file EXIF
test
.tif files don't display on web pages
Nikon GPS gif file EXIF
test
|
Software
Photoshop
I've been using Photoshop (7, CS4) for some time mainly to erase
the background. This is done manually using the Pan Opacity
Flow Airbrush set for 5 pixels. Prior to erasing the
histogram is adjusted to remove the ends of the curve where
there's no data and possibly adjust the gamma so that the subject
can be seen against the background. Where this is the
hardest is when a black subject is sitting on white paper and it's
hard to see into the shadows. This can be improved on by
using more diffuse light and/or a light box.
CS4 has a number of features that depend of stacking multiple
images. This can be used to increase the dynamic range (HDR
- High Dynamic Range) or to obtain a depth of focus that would be
impossible to do with a single exposure.
I think there's also a way to make corrections for lens
aberrations. I first learned about this idea while reading
about he Hasselbald digital camera's software. There are
software packages that include lens corrections for Nikon lenses.
Remote operation (Tethered) software is another interest. As
of 2014 I haven't spent any time getting that to work, but I'm
trying again to get the Eye-Fi card to work.
I'm now working on
Micro
Photography and it would be good to not disturb the camera
so the ability to remote control the camera and in parallel see an
HDMI image on a big screen makes a lot of sense. I'll post
more on the Micro Photography web page as this develops.
Nikon Camera Control Pro
This software package should allow tethered operation of the
D300s. See
details below.
Two big problems are:
1) no support for Creative Lighting System (CLS)
2) no support for making videos
Digital Enhancements that are Not possible with Film
Lens Correction
I first read about this idea in
connection with the modern Hasselblad digital cameras.
They have a software package that corrects the raw image file to
take into account any aberrations in the lens that was used to
take the photo. This can also be done in Photoshop if the
correction factors are known for the lens of concern.
There are also programs that make lens corrections for various
Nikon lens designs. I think any software package
that can make lens corrections can also make geometrical
corrections, but not vice-versa.
High Dynamic Range
Photoshop has the ability to stack
a number of images that were all exposed so that one has
highlight detail and another had shadow detail. When
combined the composite image has a range of detail that far
exceeds what can be captured in a single exposure. This
can be done to some extent inside the D300s either as part of
the original exposure or as a post processing step inside the
camera.
Depth Of Focus
In a manner similar to the
stacking for exposure range it's also possible to stack a number
of images, all exposed properly and at the same f/stop but that
are focused at different distances into the scene. The
result is a photo that has more depth of field than is possible
to capture with a camera.
Working with RAW (Nikon Electronic File NEF) Files
NEF is a Nikon propritory file format where there has been the
smallest amount of processing in the camera and so is the most
flexible file format when it comes to digital image
processing. The Camera Raw plug-in for Photoshop is a free
plug-in allowing photoshop to import the NEF file.
The common image adjustments such as luminance curve, color
balance, hue, saturation, etc. are typically all part of the RAW
converion software.
Noise Reduction - Noise
All digital cameras have some noise in each of the image
planes. Some of the noise can be reduced in software.
Remote Control - Rem
The idea is to operate the camera remotely. This involves
seeing what the camera sees and controling all the settings of
the camera.
Tethered Operation - Tether
This is different from remote control. The idea is to have
the images from the camera automatically loaded onto a computer
where you can see on a larger (and hopfully color calibrated)
screen the image you just shot. This no only lets you
better understand the quality of the image but also eliminates
the problem of limited in camera storage space. The latter
is extreamly important when working with huge image sizes.
My idea of tethered operation is that it's automatic. For
example the
Eye-Fi SD card can be setup
so it automatically uploads images as they are taken.
While Photoshop can import emages using the File menu it does
not automatically upload them so can not be considered a
teathered application.
Table
I don't have all these programs and am trying to understand what
each one does. Not an easy task since they all assume you
know already. The Yes (Y) marks in the table are my best
understanding and the blank squares are where I don't
know. If I knew better there might be some No (N) table
entries. Probably better than Y or N entries would be a
numeric scale between 0 and 5 where 0 means No and 5 means does
it very well. Also the version of the software
matters. For example you need Photoshop at or above CS4 do
do some of these things.
Camera Control Pro 2
Dec 22, 2010 - You can download a free trial version of CCP2
from the
NikonUSA web
page along with the users manual.
There is no support for movies or Creative Lighting System (CLS)
in version 2.8.0 with the D300s, but I get the feeling that
Nikon will support this in future versions.
Also note there is no control of the SB-900 other than simple EV
or exposure compensation i.e. camera controls, not SB-900
controls.
What you get is the
CD-ROM box and a disk.
|
|
Nikon Camera Control Pro
2.8.0 Exposure 1 screen
 Note: Note:
Exposure Compensation and Flexible Program are active
controls (P mode) but the other controls are grayed out.
When the SB-900 is installed the Flash Compensation
control becomes active.
How to use the Creative Lighting System (CLS) flash
controls that can be accessed manually on the camera?
Answer: No CLS support.
Suggestion:
Show the Information screen on the back of the camera in
the Control software along with the buttons and
navigation controls so that anything that can be done on
the camera can be done remotely.
|
|
Nikon Camera Control Pro
2.8.0 Exposure 2 screen
|
|
Nikon Camera Control Pro
2.8.0 Storage screen
|
|
Nikon Camera Control Pro
2.8.0 Mechanical screen
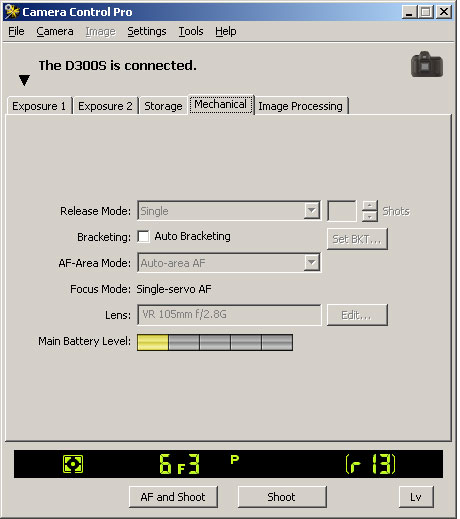
|
|
Nikon Camera Control Pro
2.8.0 Image Processing screen
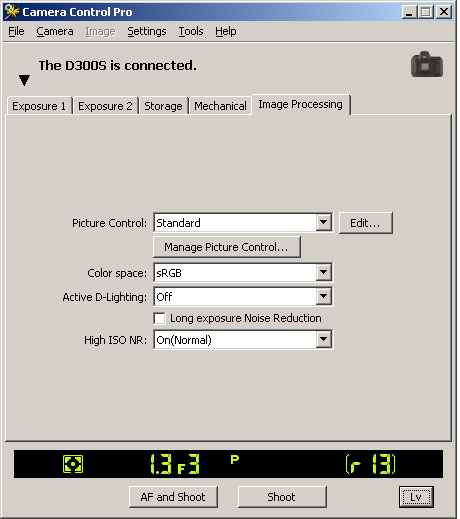
|
|
Nikon Camera Control Pro
2.8.0 Live View Screen
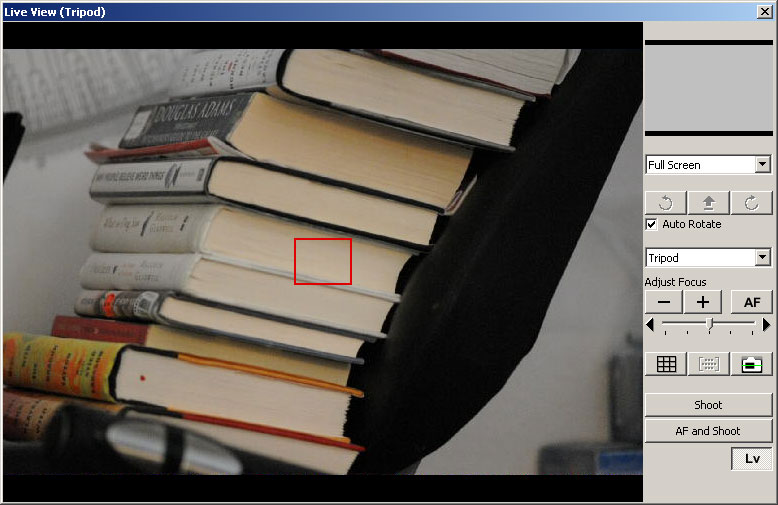 Note: Note:
CCP2 2.8.0 does NOT allow movie control with the
D300s. But does allow movie control with the
D7000. So a future version may support movies.
I think that only with cameras that have Live View mode
can you see what the image will look like.
|
|
To use CCP2 with the Nikon D300s requires both the latest
version (2.8.0) AND WIN XP SP3. This is a problem for my
desktop computer because the graphics card I'm now using does
not work with SP3 (i.e. this computer is on SP2). For now
I'll install the trial version of 2.8.0 on a laptop that's
running WIN XP SP3 and if that works use the product key on that
computer. Then decide wheather or not to upgrade the
graphics card on this desktop computer.
It's working in the free trail mode on my WIN XP SP3 laptop.
Second Nikon Digital Camera
It would be handy to have a second
Nikon digital camera to take photos of the D300s in connection
with other photo equipment, i.e. to no longer be using the
Kodak DC290. Some features that would be
required are:
- Interchangeable lens
- CLS capable with pop-up flash (eliminating the D3000 which
is now under $300 because the D3100 with movies is now
out). The D80 (replaced with the D90) looks like the
most economical solution and may be under $300 as a used body
only camera.
Patents
3632190
Catadioptric telephoto objective lens system, Yoshiyuki Shimizu, Nikon,
1972-01-04, - 500mm f/5 Reflex with knob focus on the back -
used this with Nikon F film camera. A latch can be
released allowing the camera body to be turned 90 degrees - needed
when tripod is mounted to the lens for better balance.
3771853
Four component zoom lens, S Nakamura, Nikon,
1973-11-13, - Internal Focusing (IF), cited by 30 patents
3836772
Detecting apparatus for determining when image is in focus,
Norman
L. Stauffer, Honeywell,
1974-09-17, -
4306787
Exposure control apparatus for camera provided with multi metering
device, Toru FukuharaTakashi SaegusaKoichi Higashi, Nikon,
1981-12-22, - Multi spot metering
4400063
F(θ) Lens system of four-group construction, Bun
Hayashida, Nikon,
1983-08-23, - FAX machine
4176913
Telephoto lens with large relative aperture, Soichi Nakamura,
Kiyoshi Hayashi, Nikon,
1979-12-04, - 200mm f/2.0
4368966
Photographic system including remote controllable flash unit, Nobuyoshi
Hagyuda, Nikon,
1983-01-18, - Creative Lighting System (CLS),
4464034
Device for electrically connecting lens and camera, Naoki
Tomino, Nipon,
1984-08-07, - 6 contacts,
4482235
Automatic focusing device for camera, Seiichi Yasukawa, Nobuhiko
Terui, Toru Fukuhara, Nikon, 1984-11-13, - TTL DSLR, works with
zoom lens,
4636054
Photometric method and apparatus for cameras, Takashi
Saegusa, Nikon,
1987-01-13, - Multi spot metering
4510411
Drive circuit for surface-wave driven motor utilizing ultrasonic
vibration, Kazuo Hakamata, Tadao Takagi, Yukio Hyodo, Nikon,
1985-04-09, -
4666259
Catadioptric telephoto lens, Yutaka
Iizuka, Nikon,
1987-05-19, -
4737812
Automatic focusing camera, Hiroshi Hasegawa, Takashi Saegusa, Nikon,
1988-04-12, -
Related
Links
Brooke's PRC68, Products for Sale, Personal Home Page
page created 30 Jan. 2000.

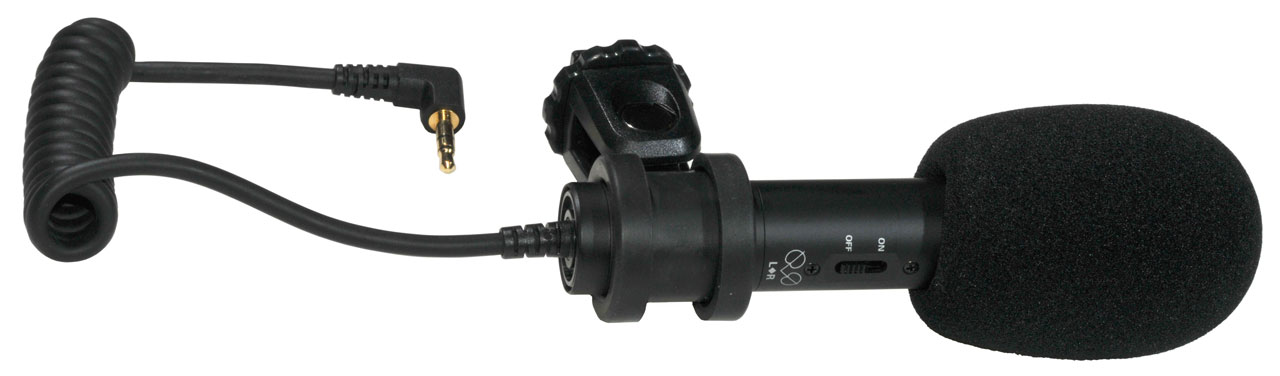
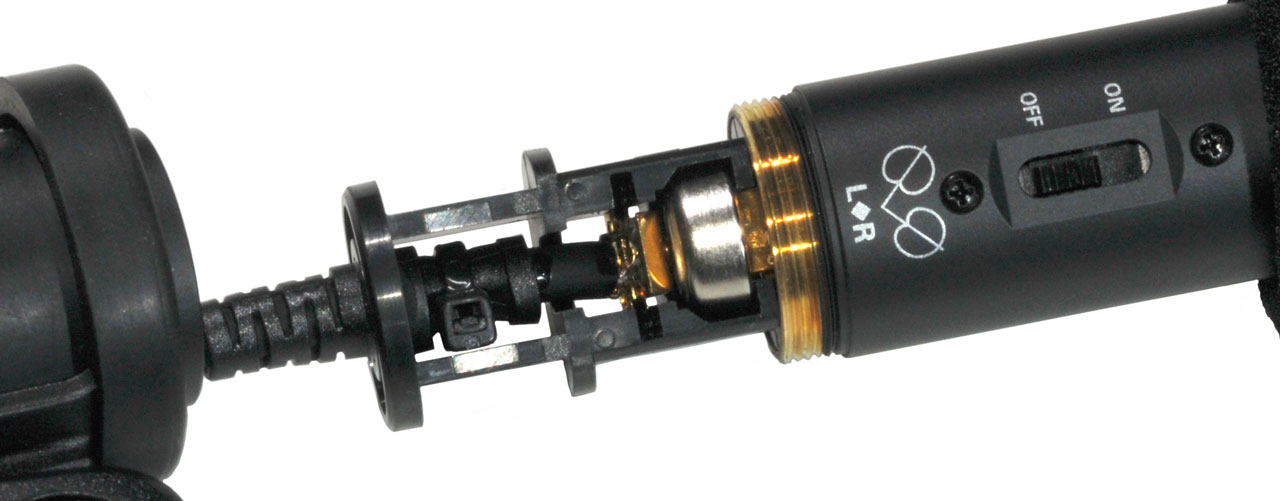


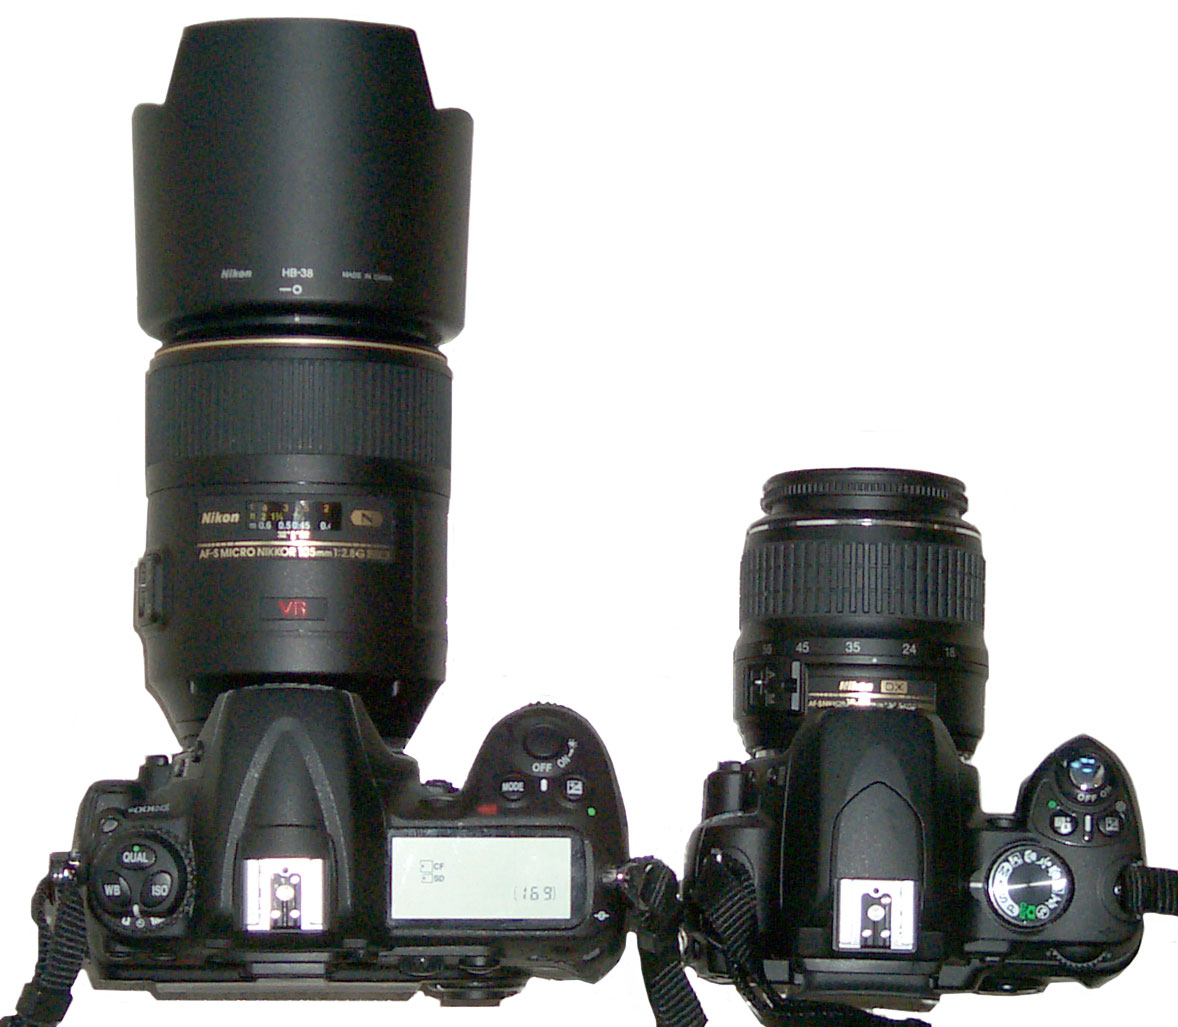

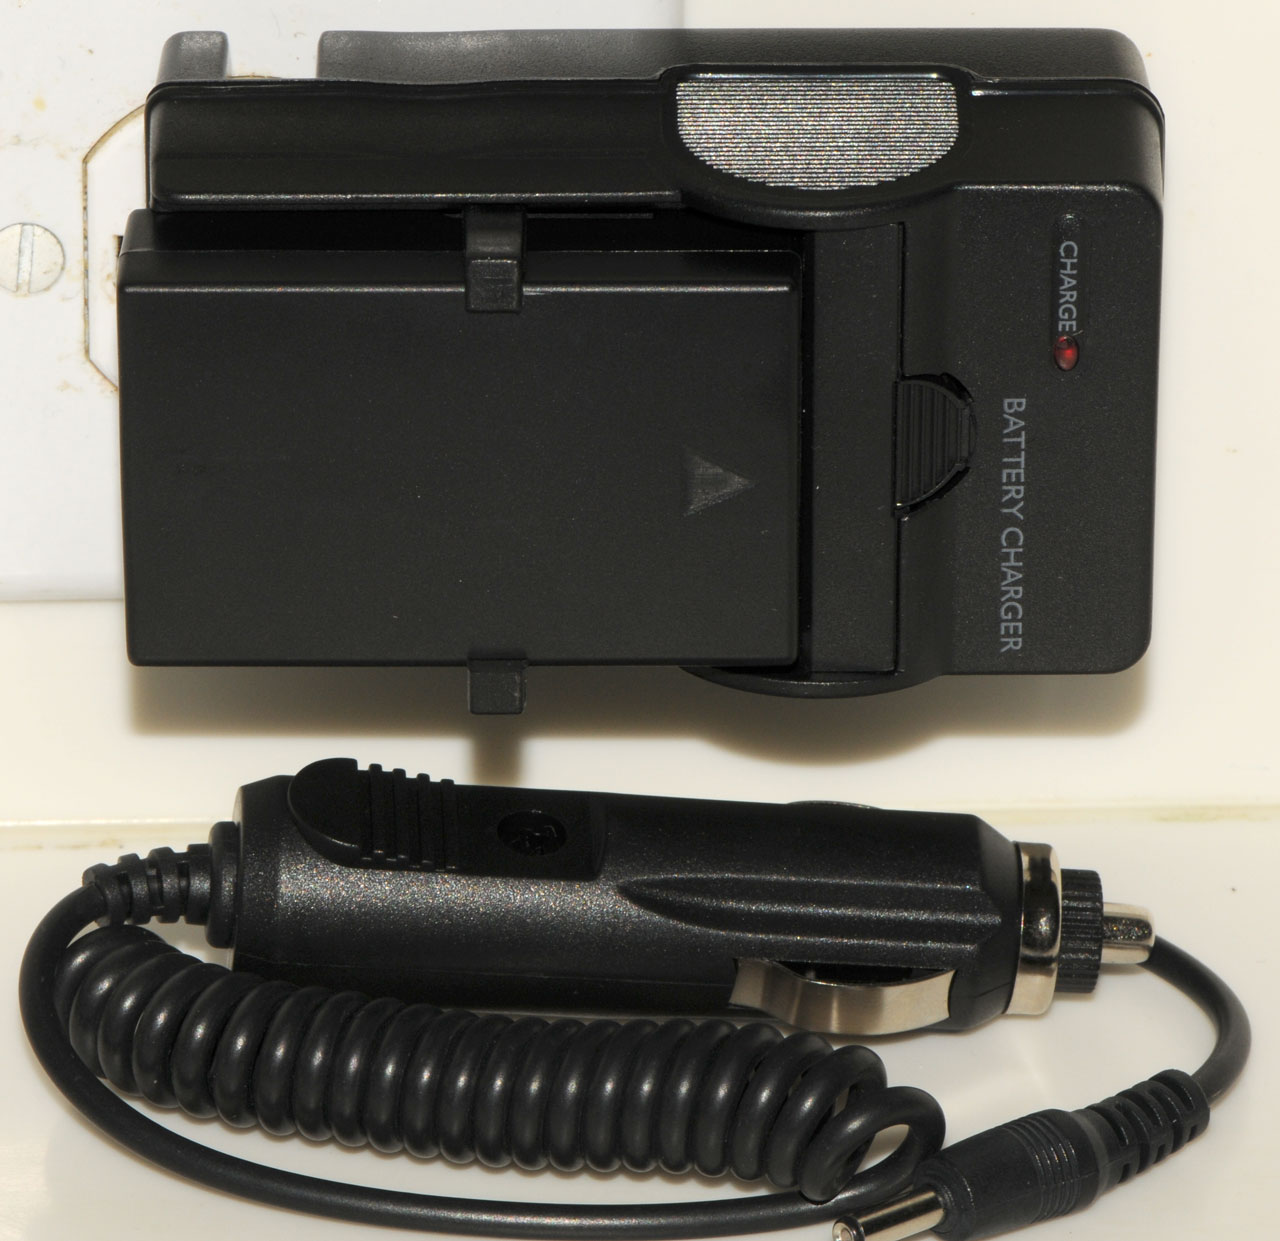
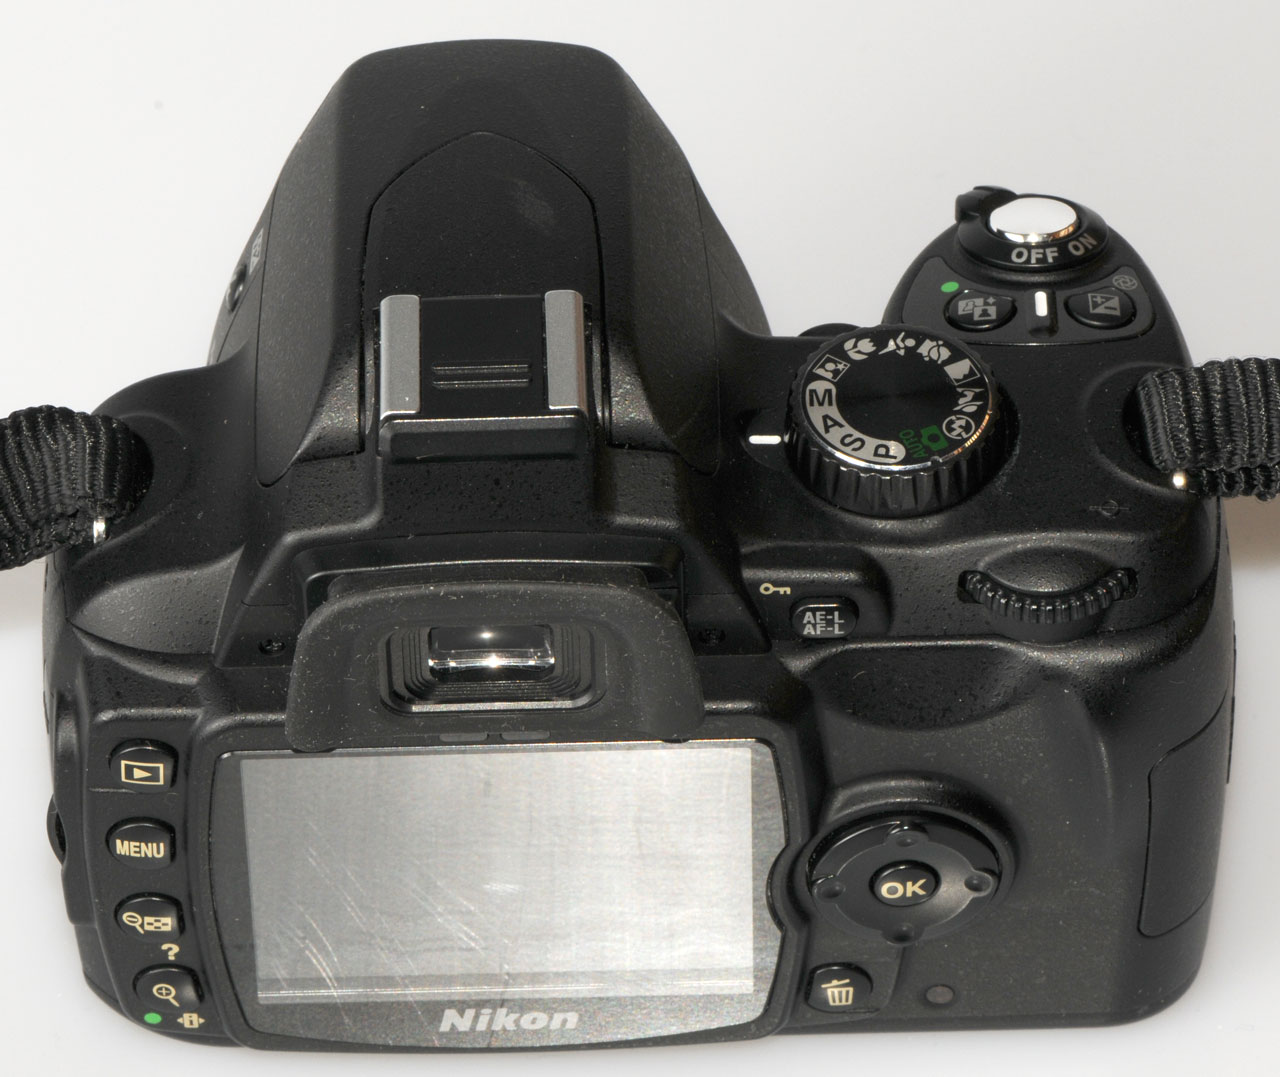
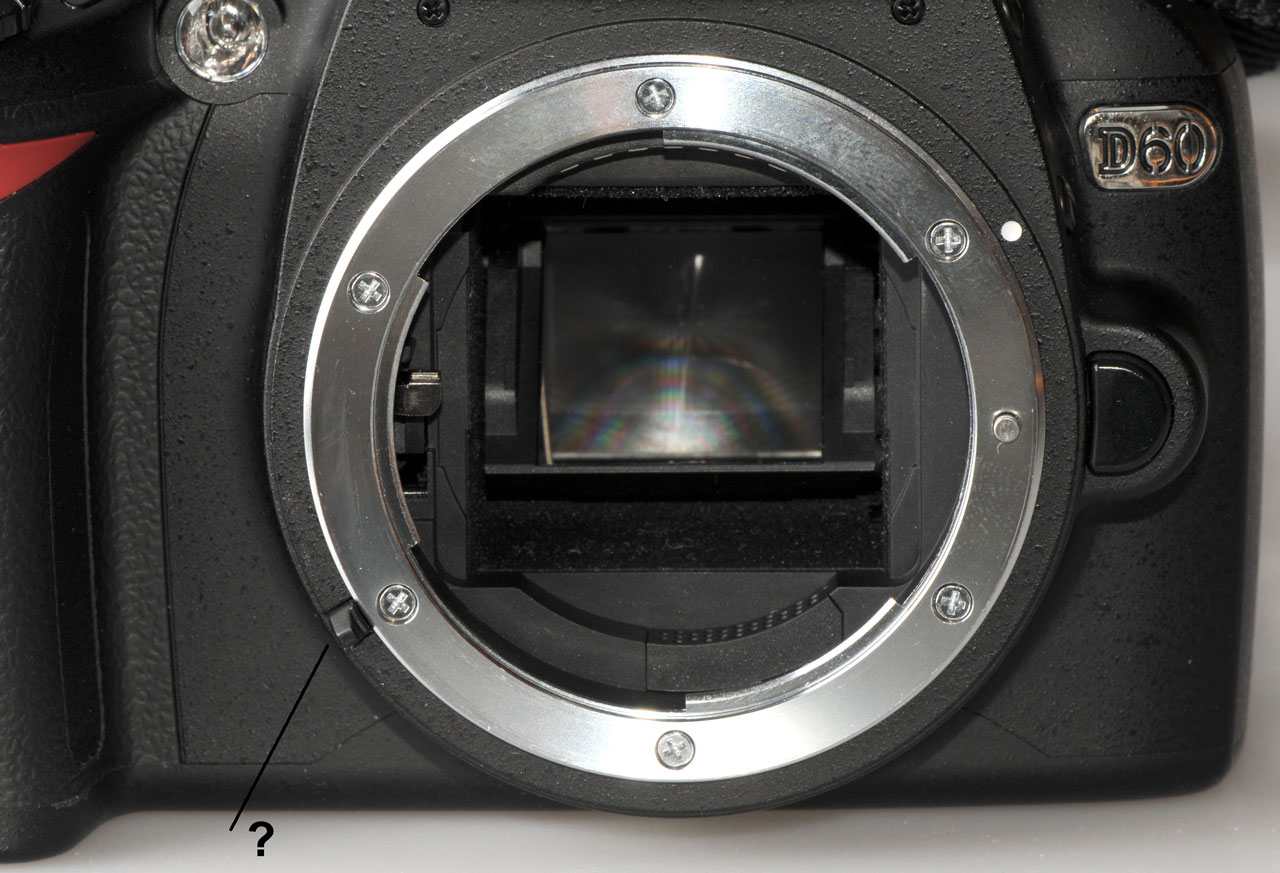
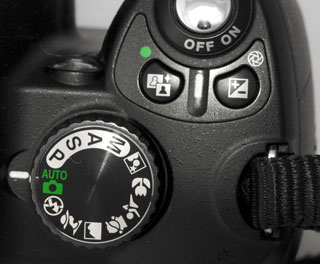


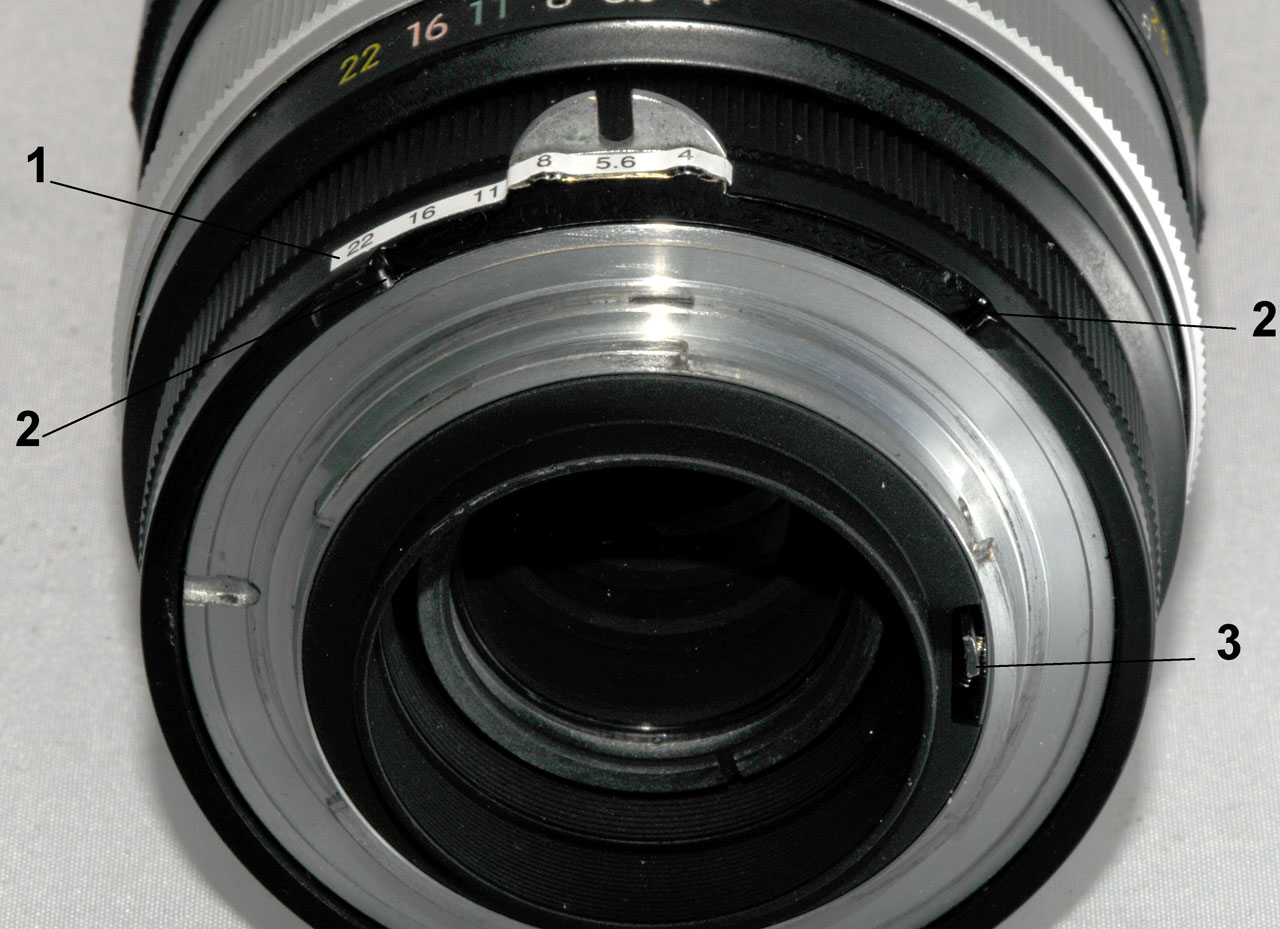
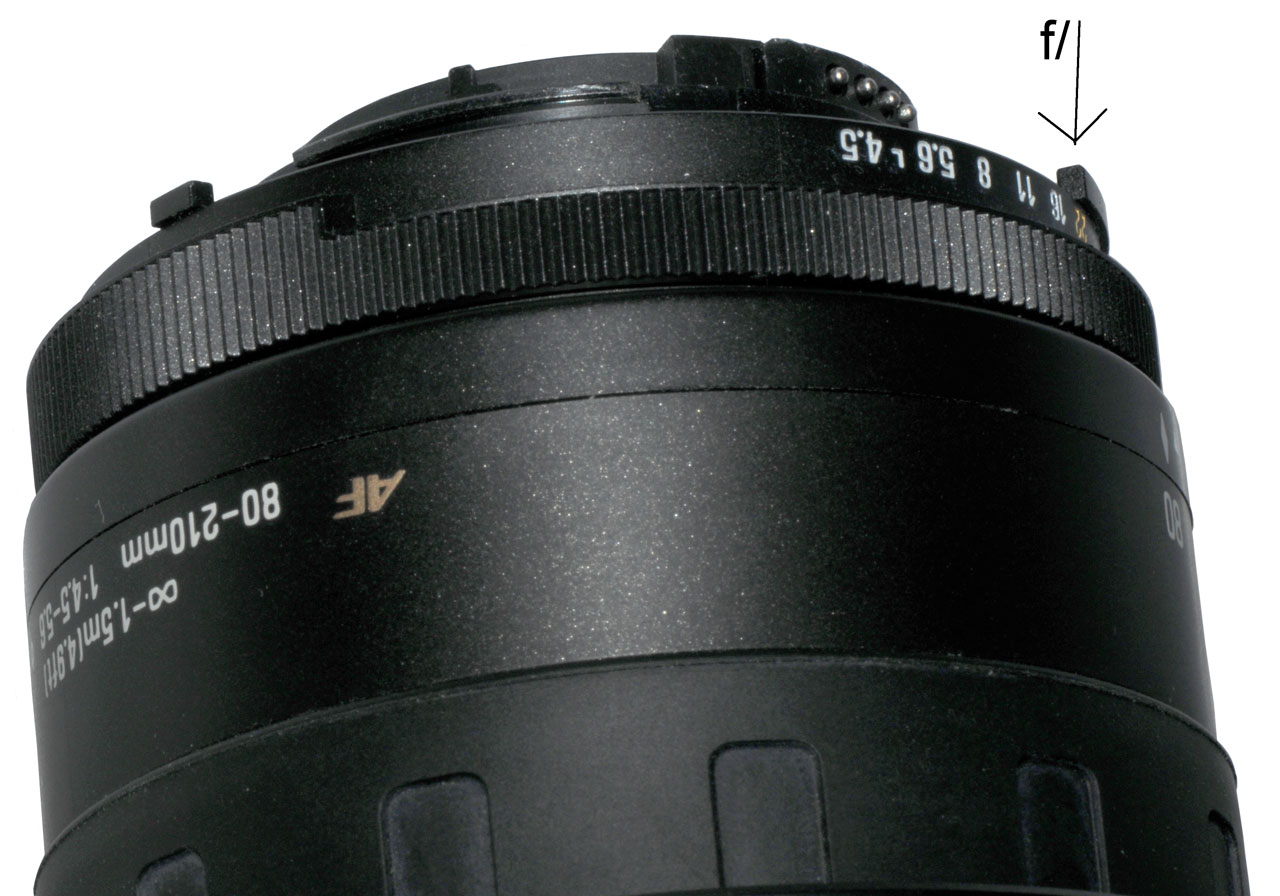
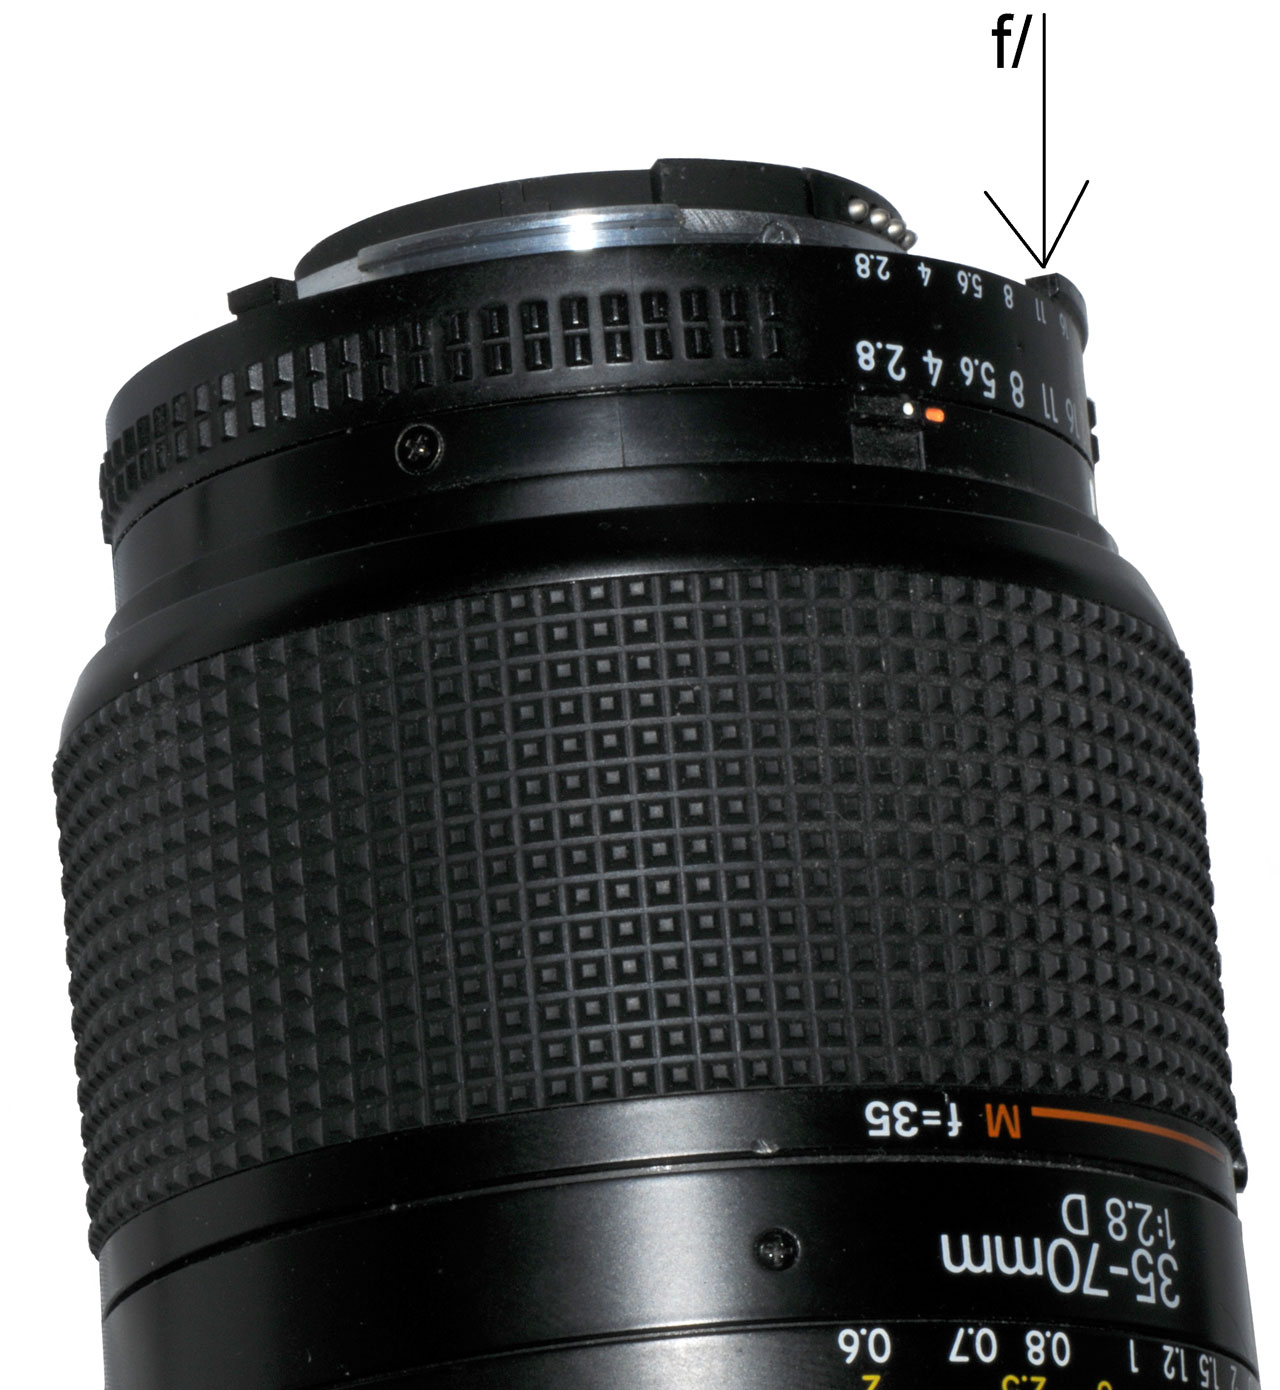
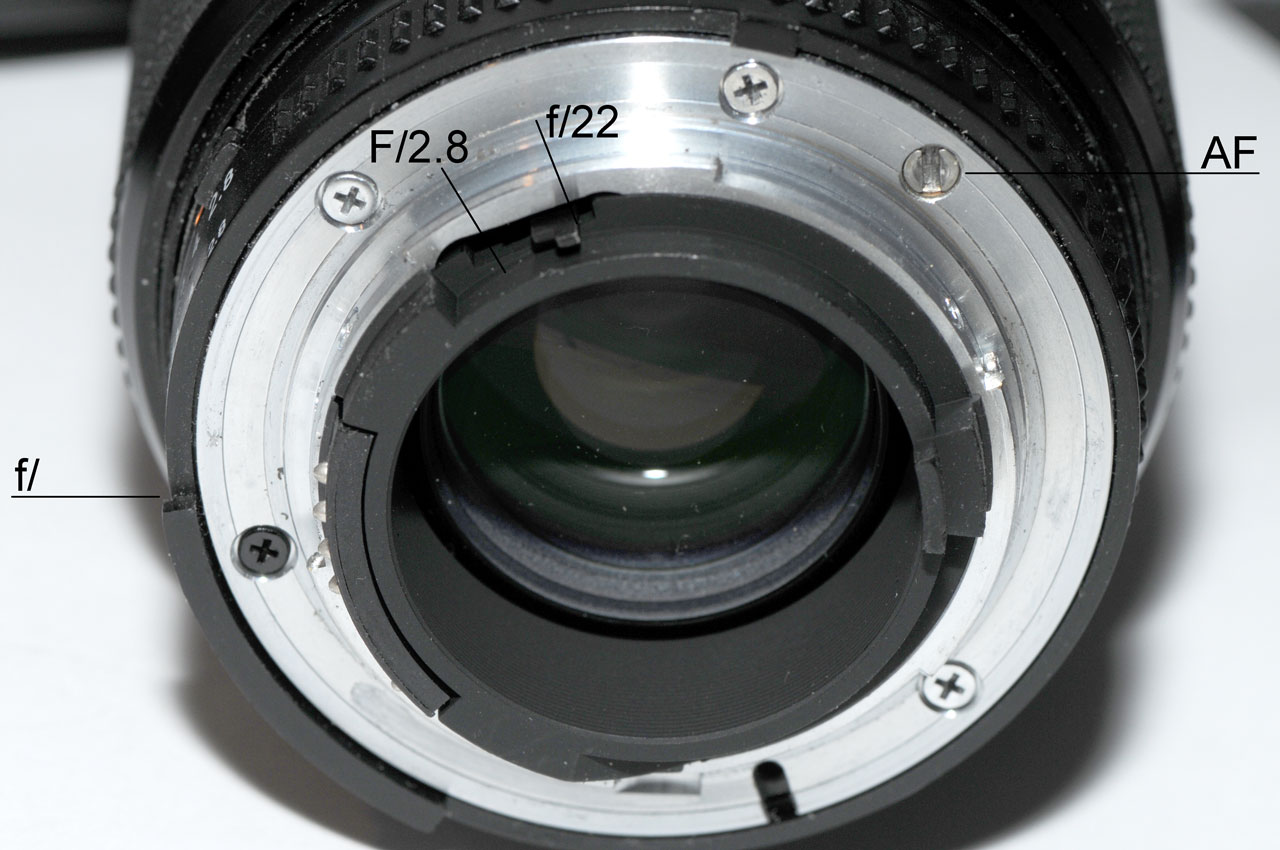
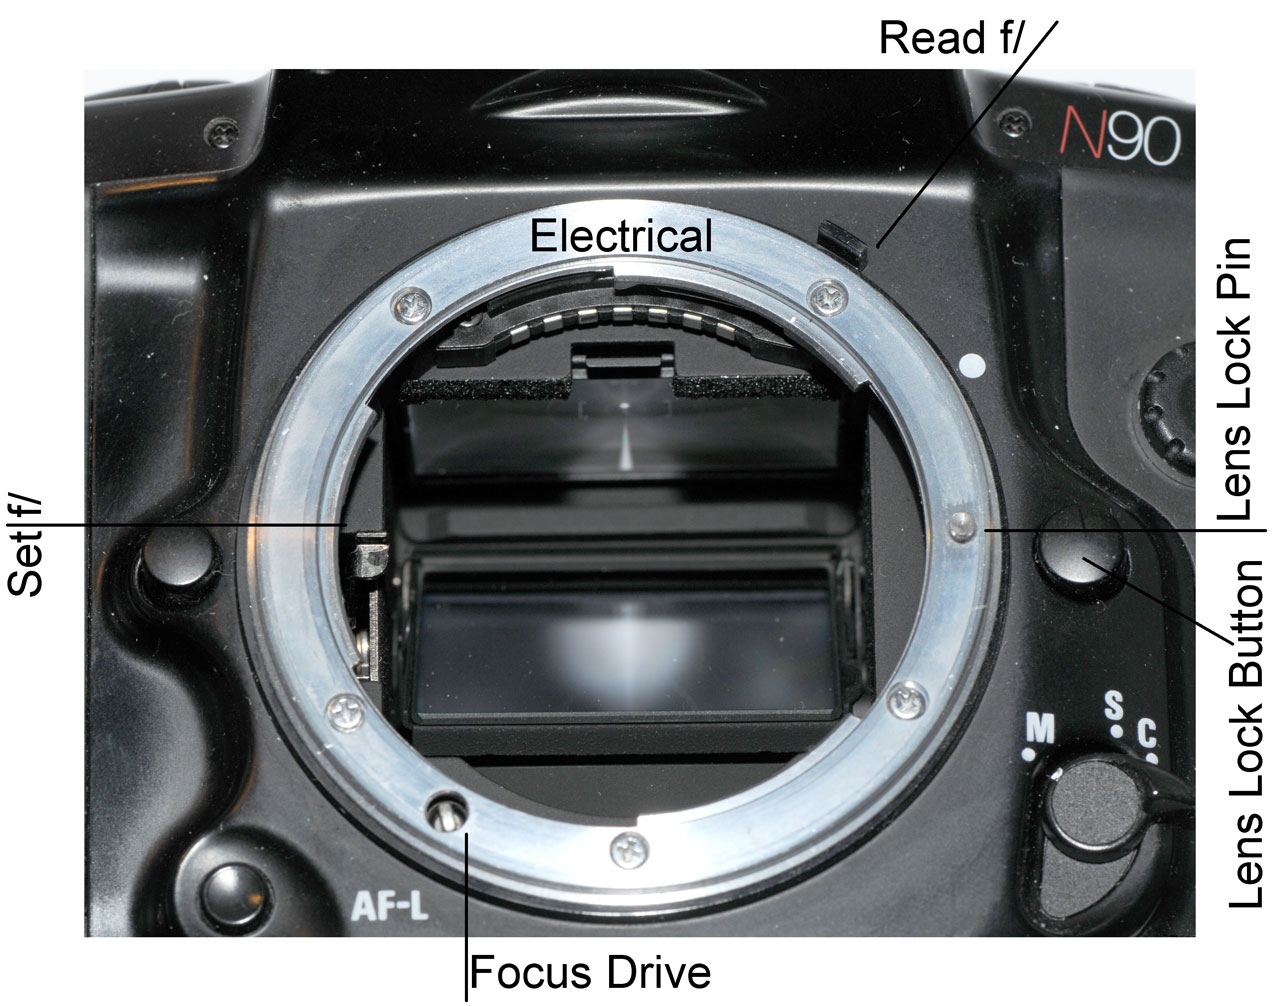


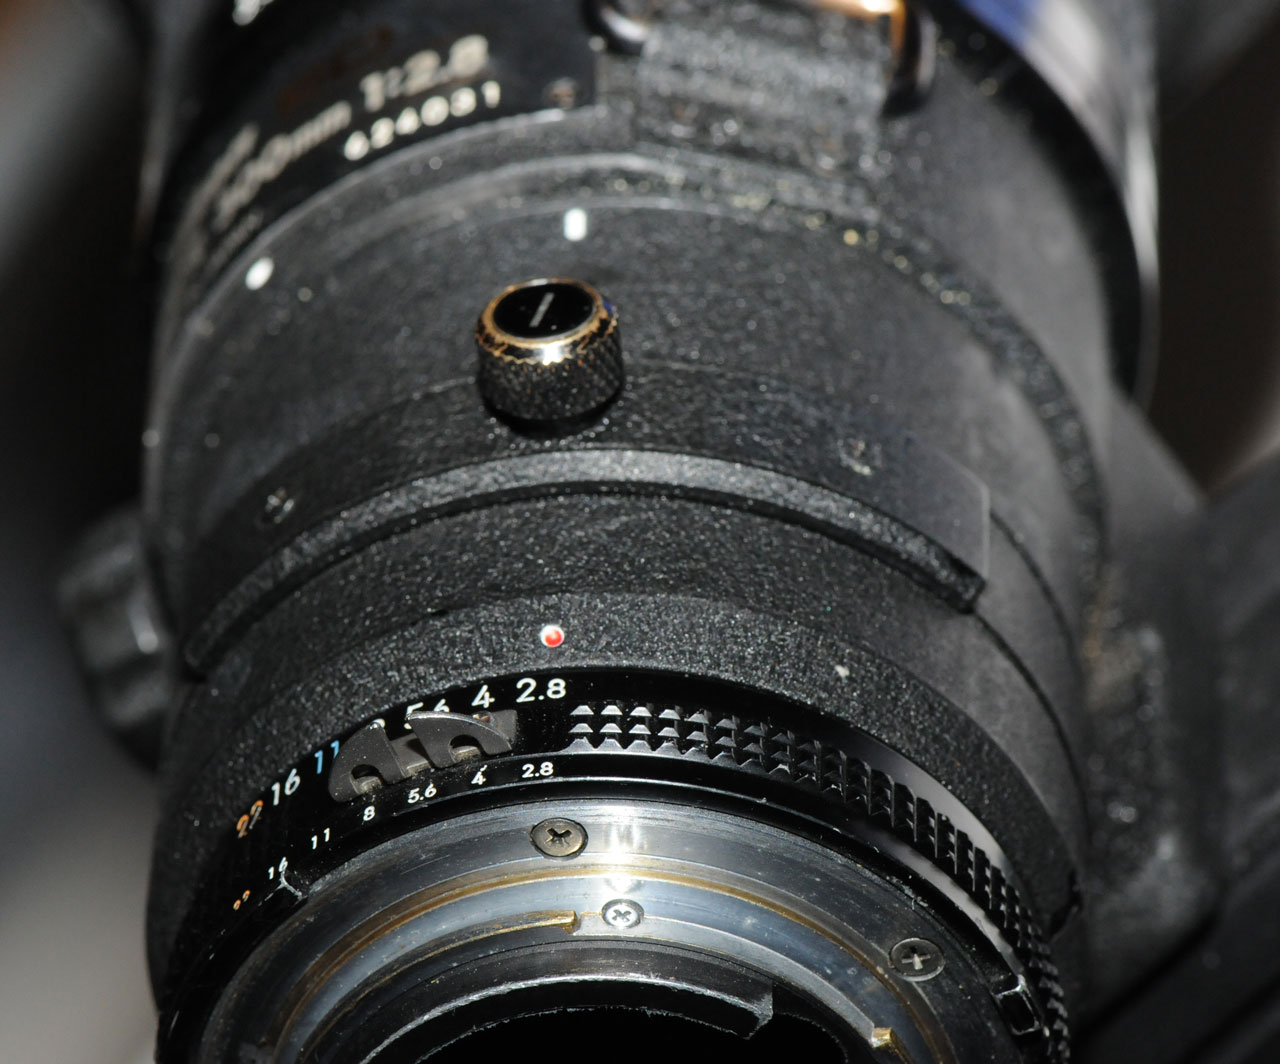


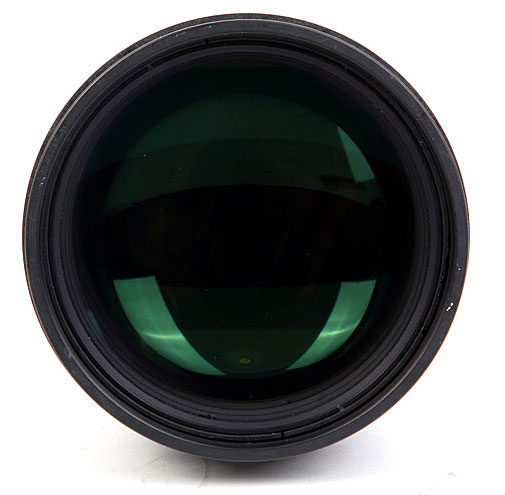
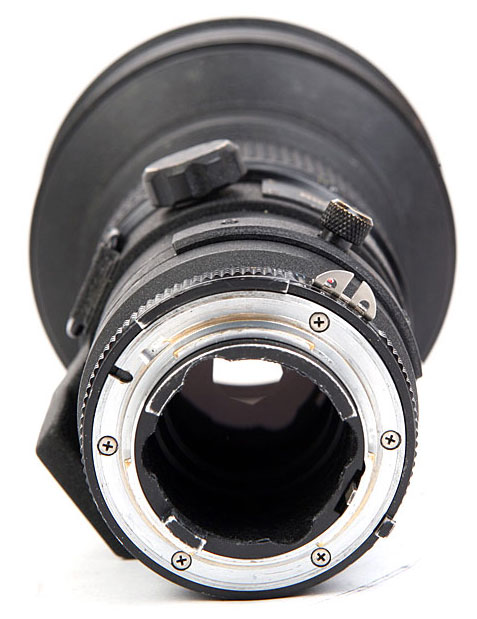
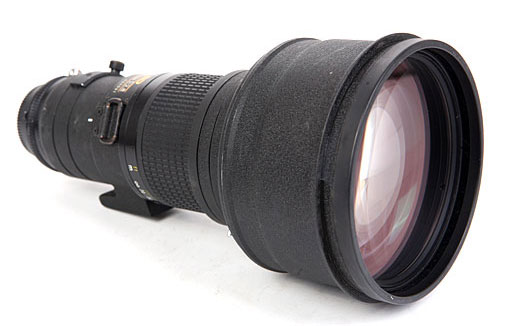

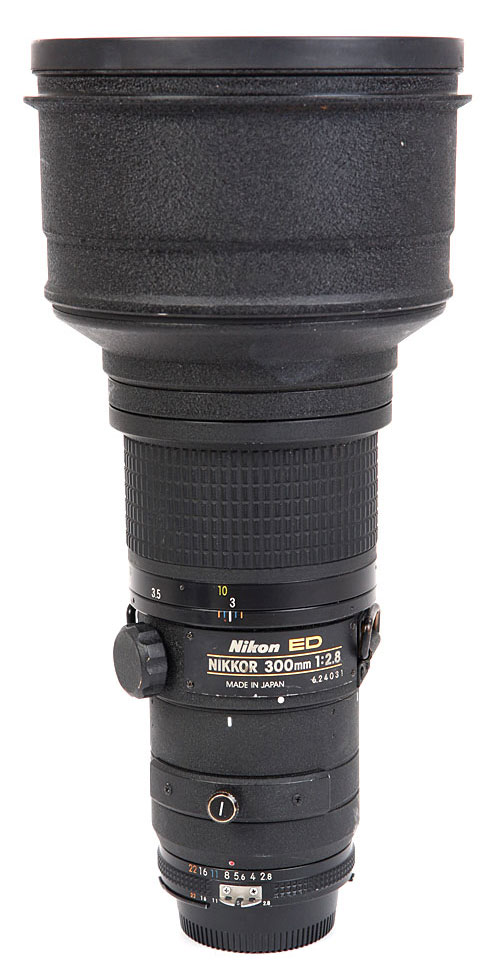
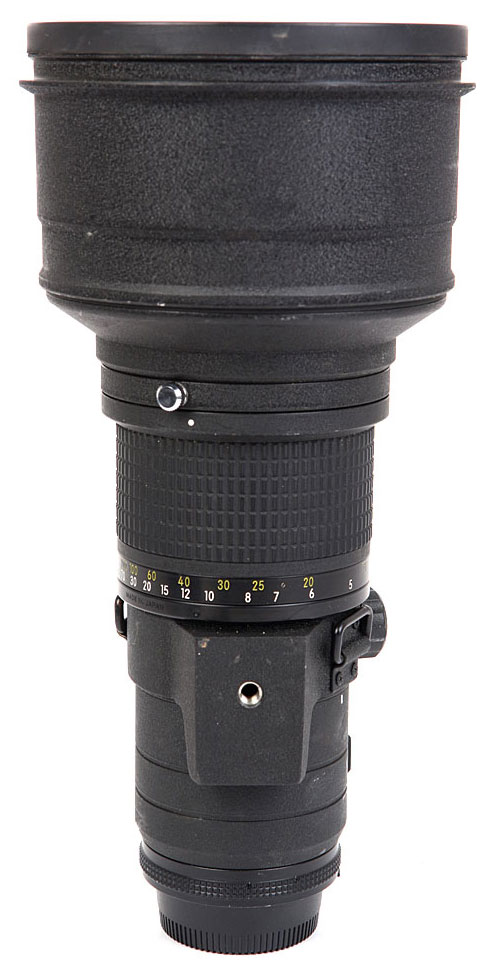


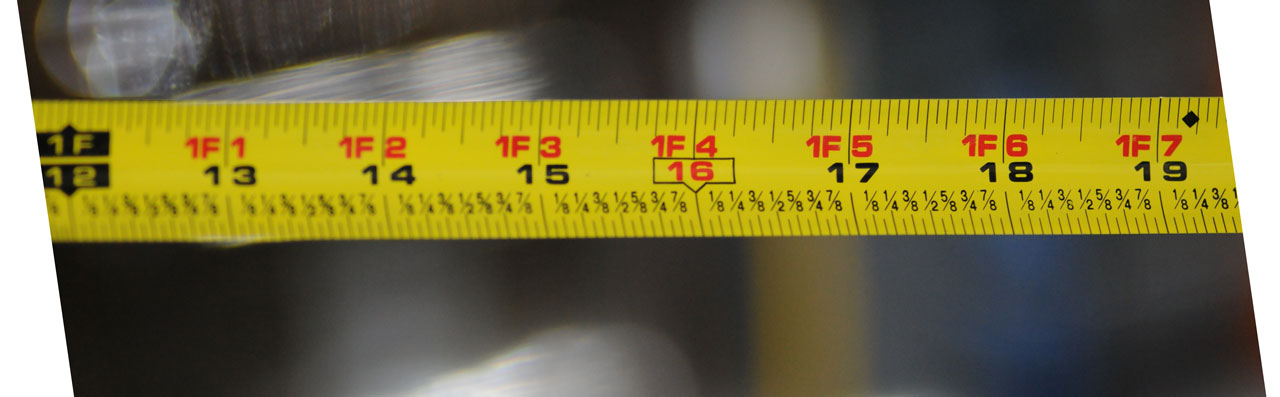
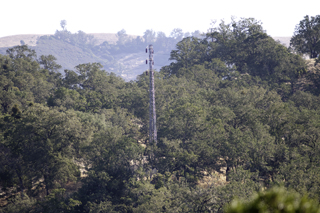


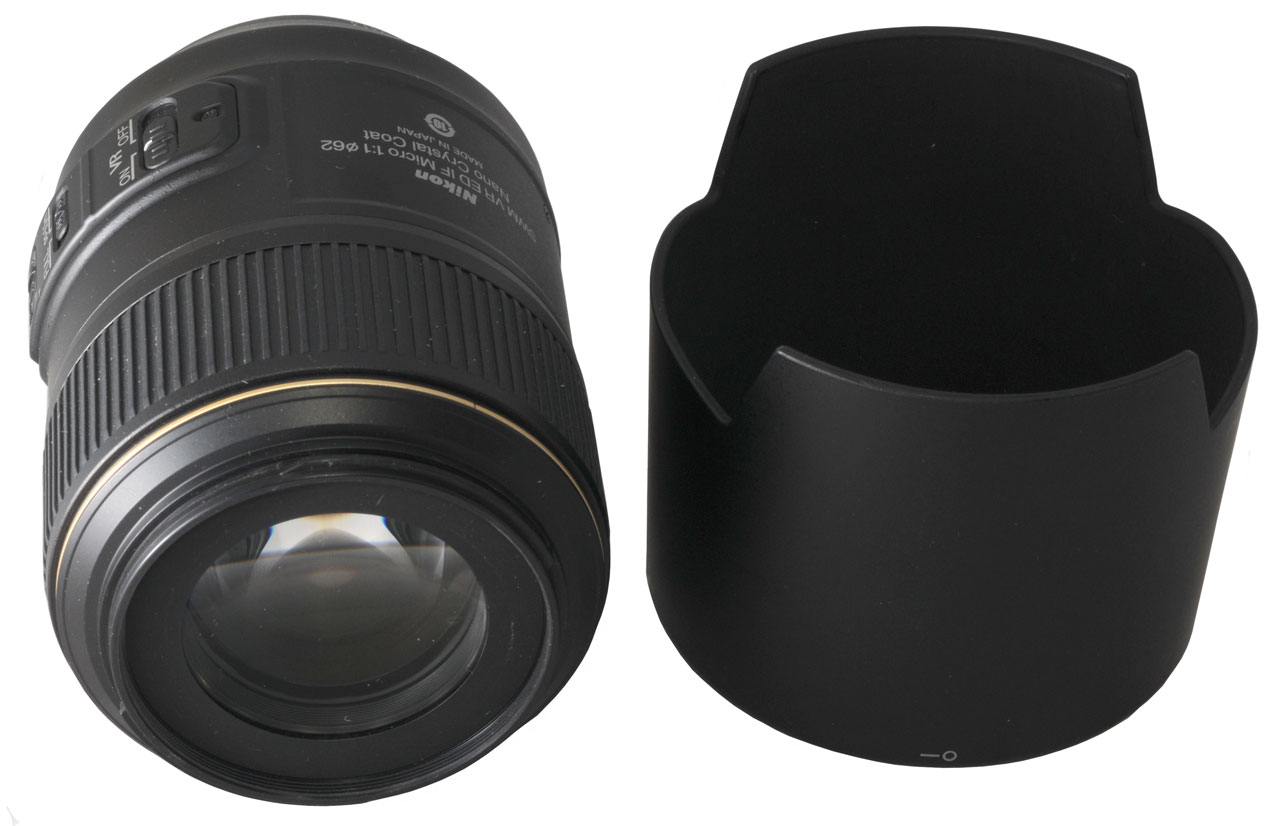
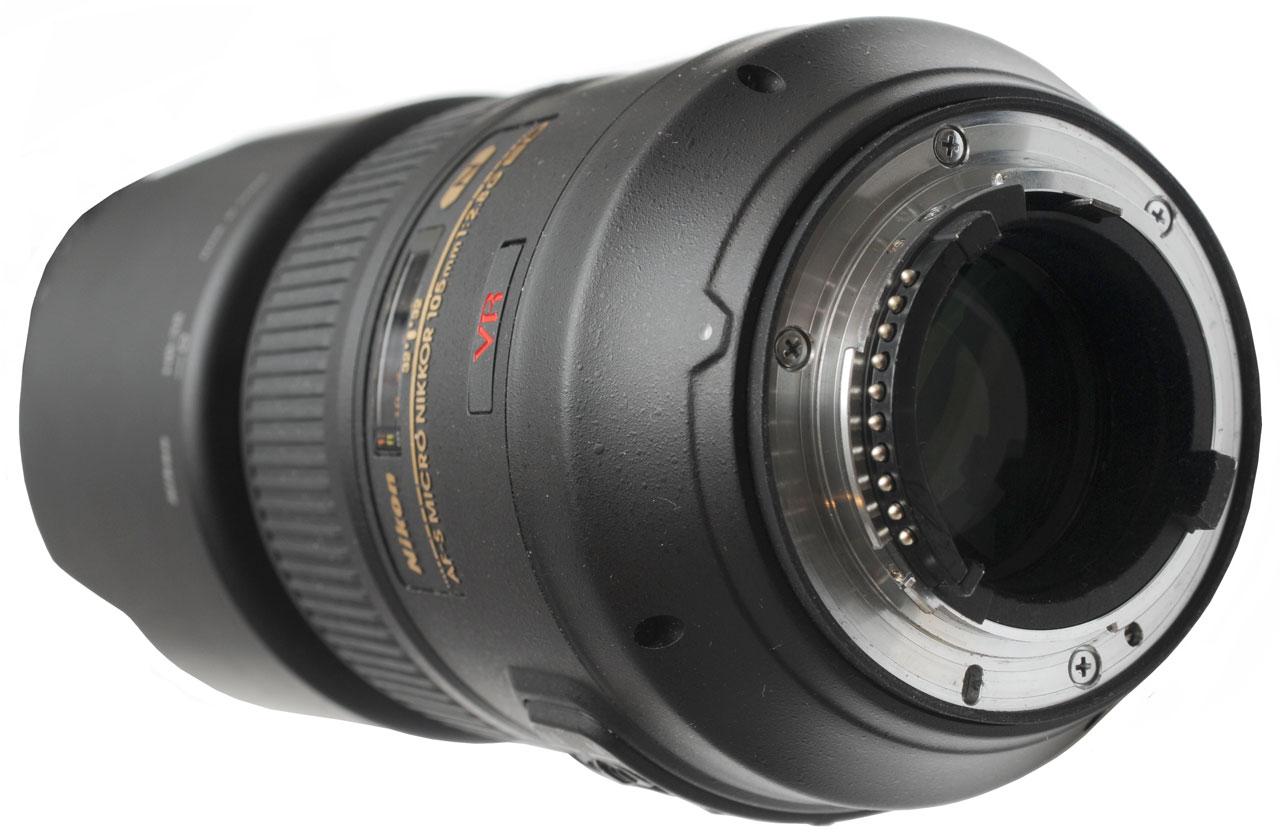
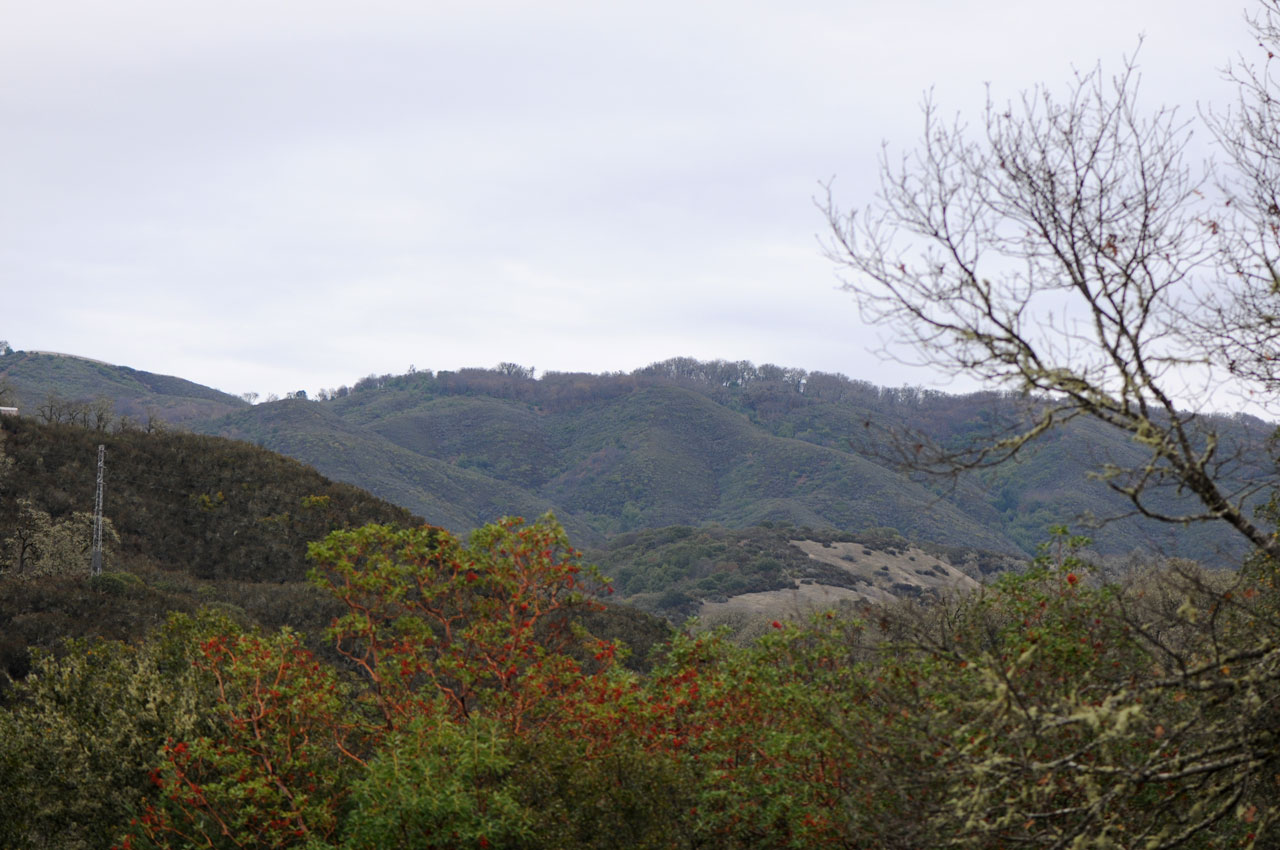

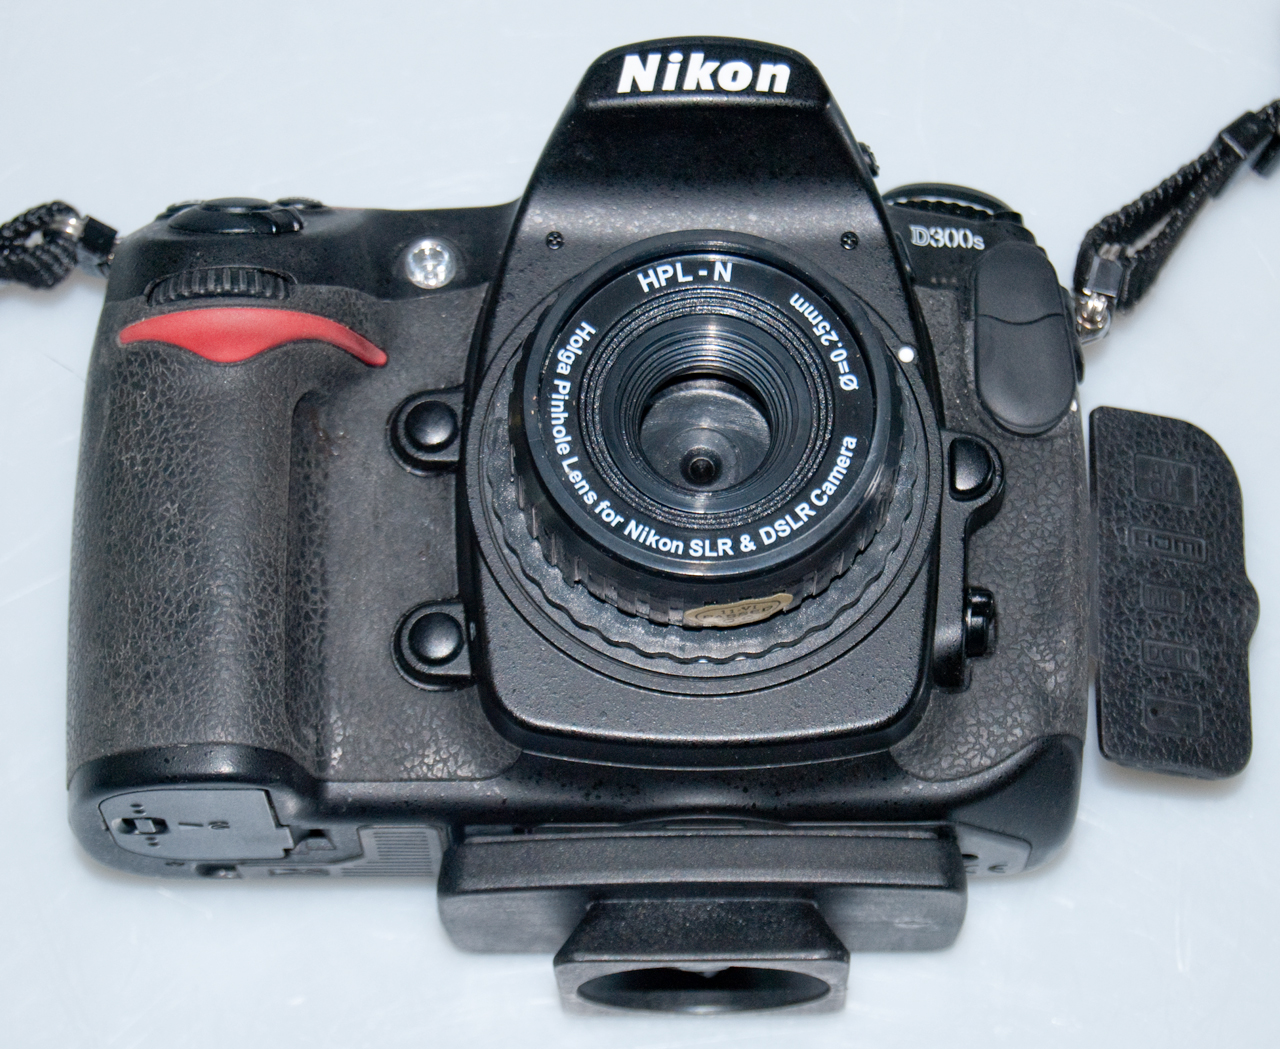
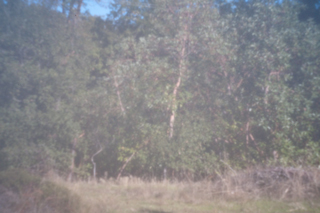
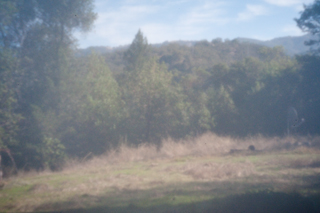
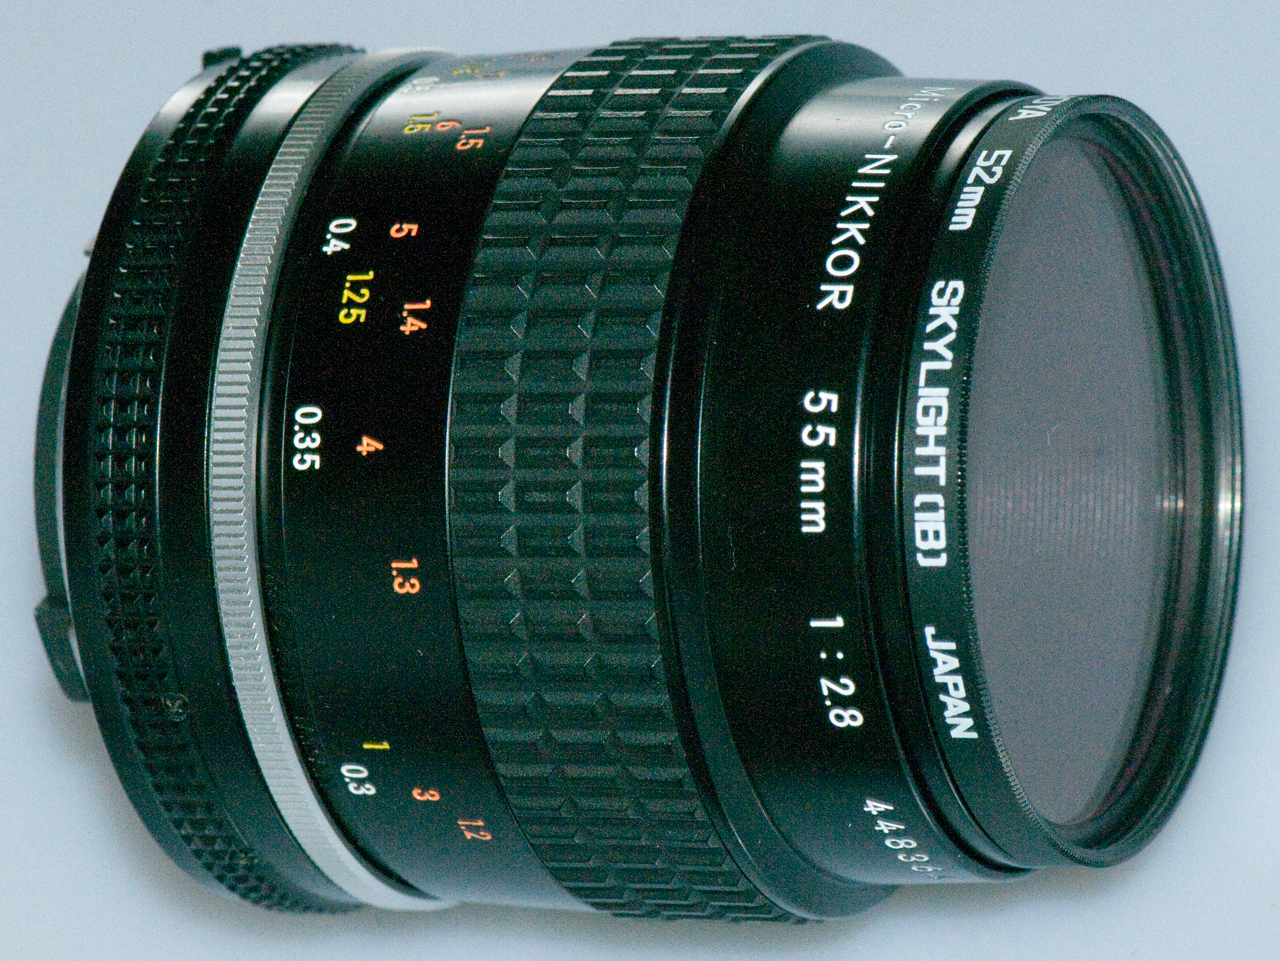
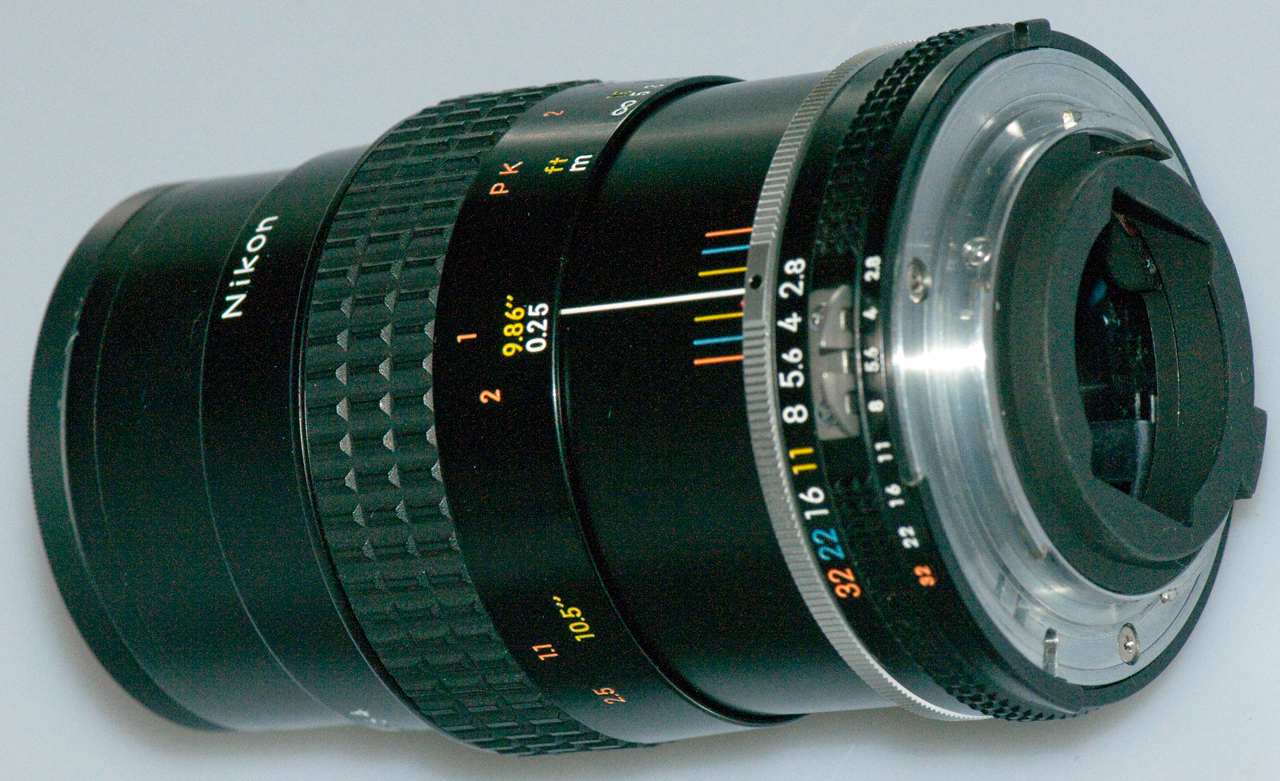

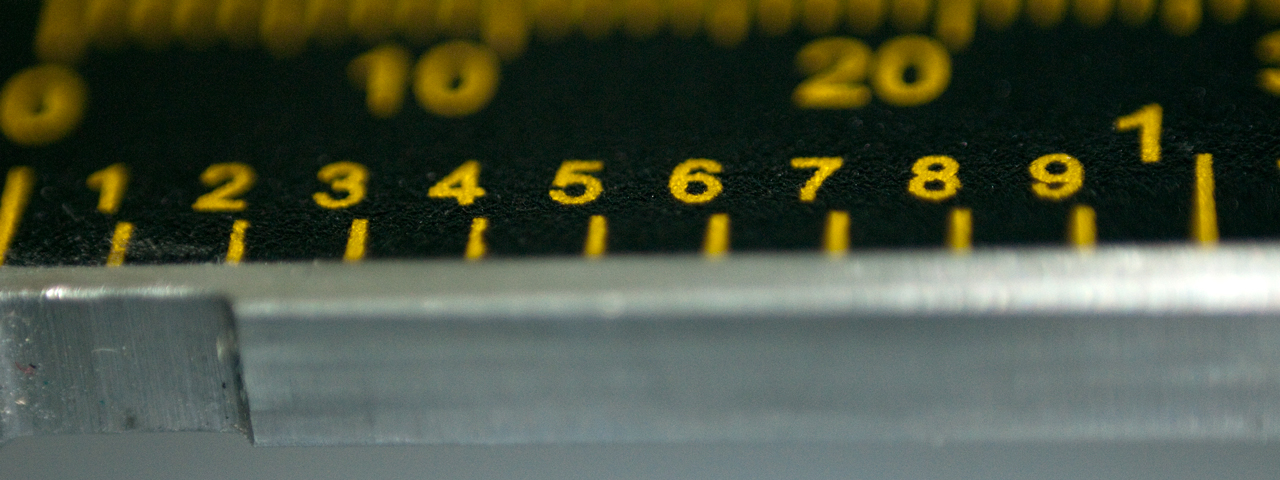

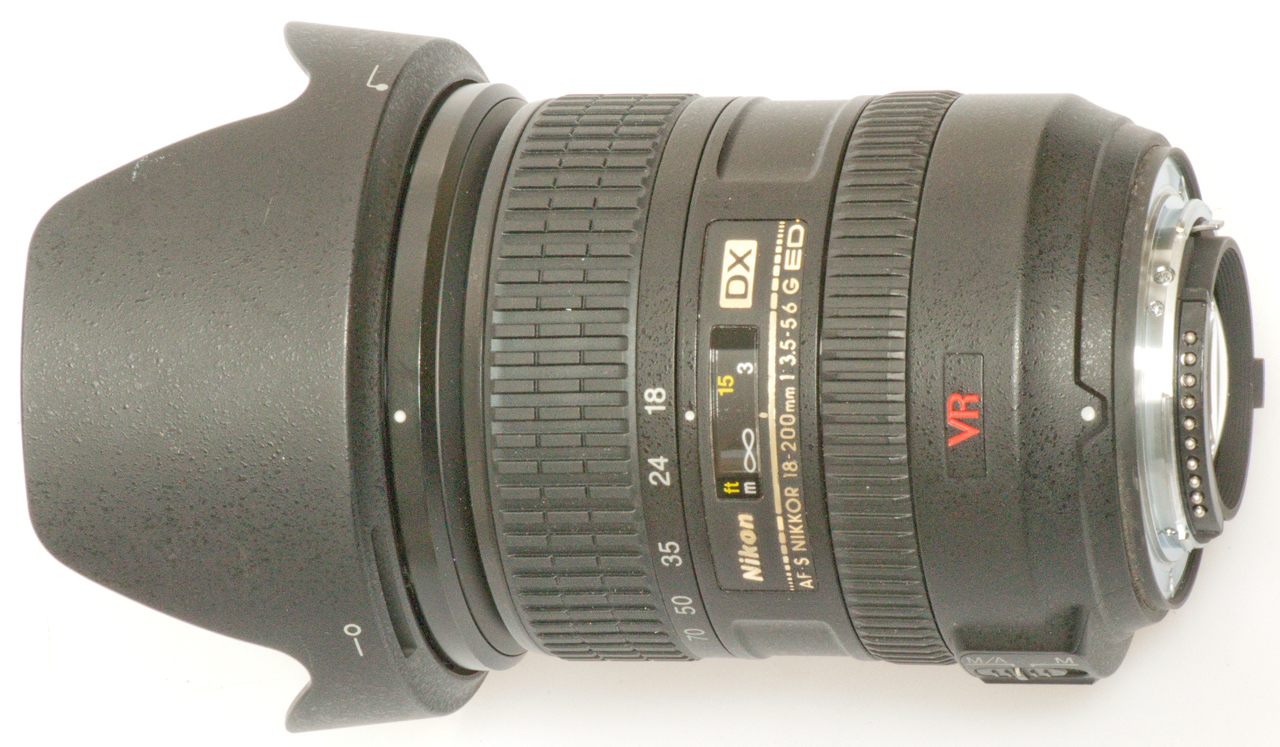

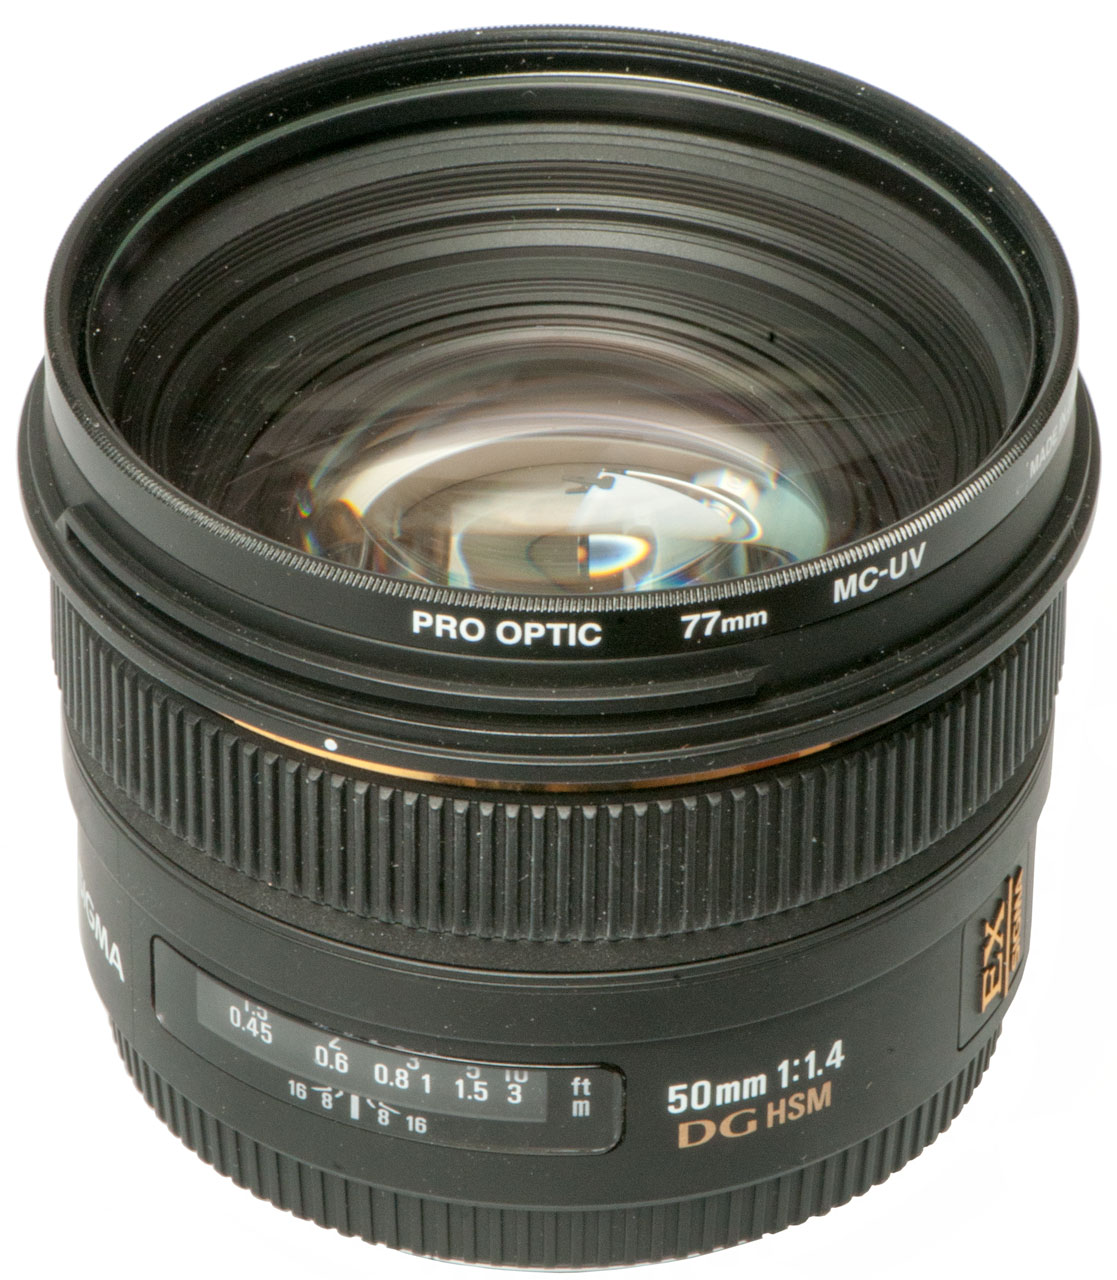

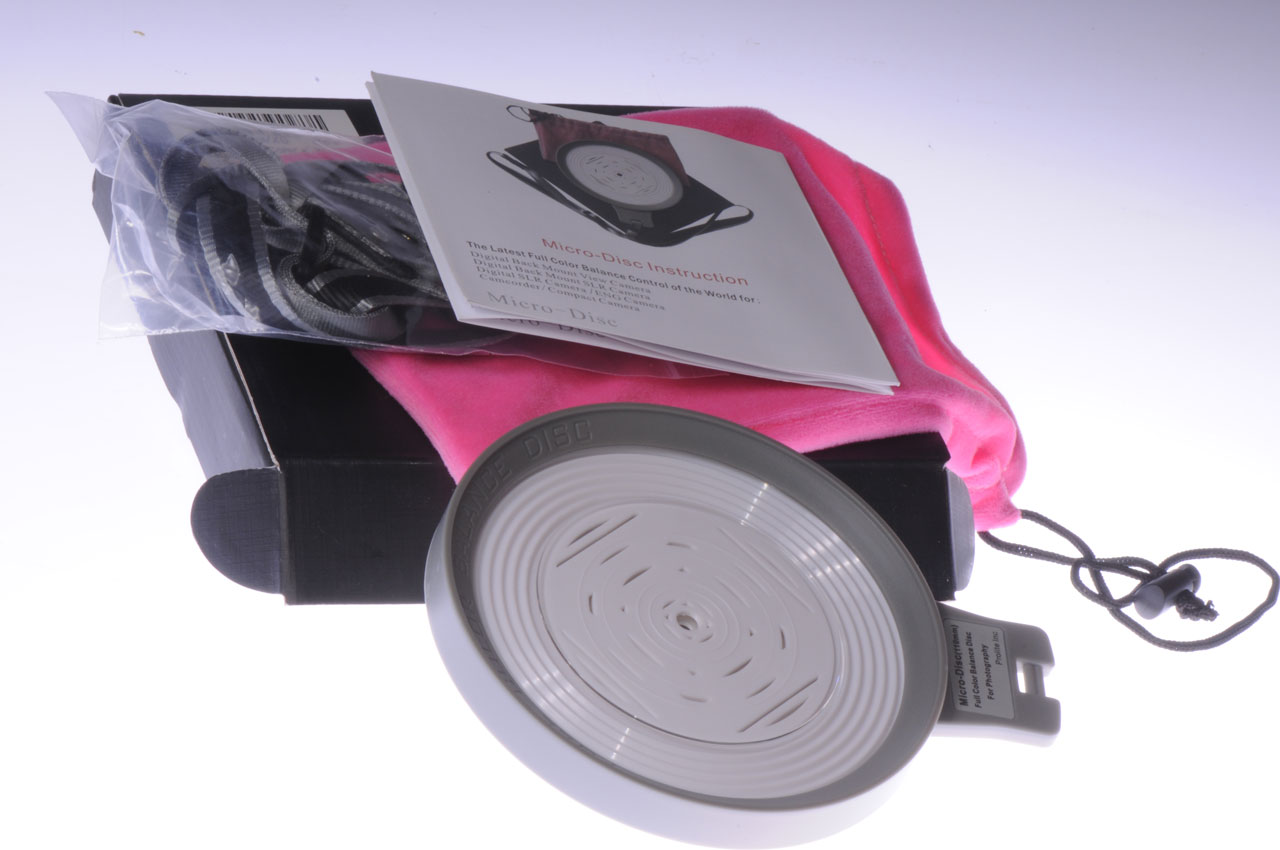


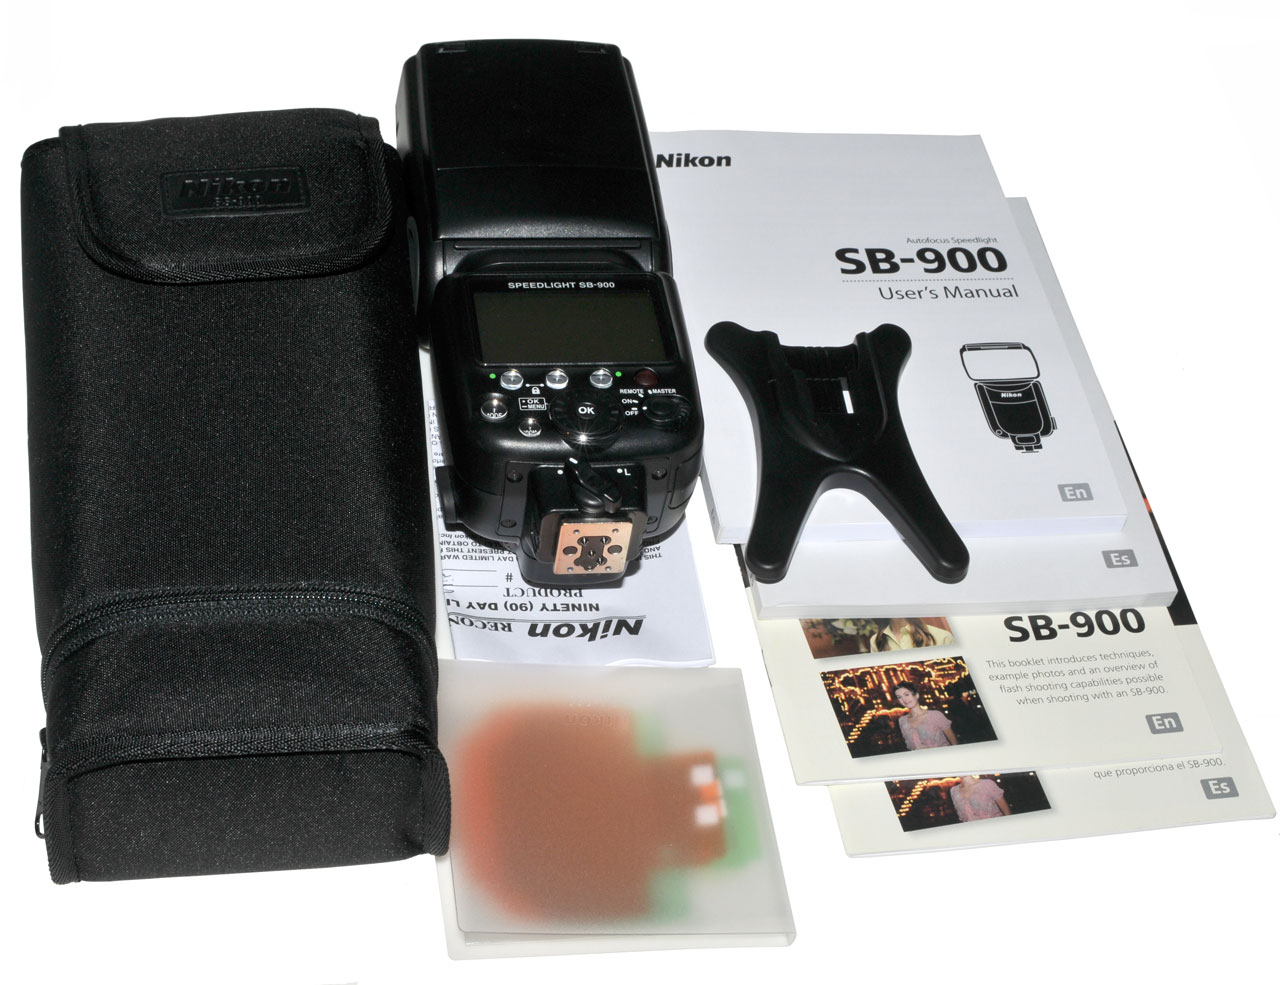


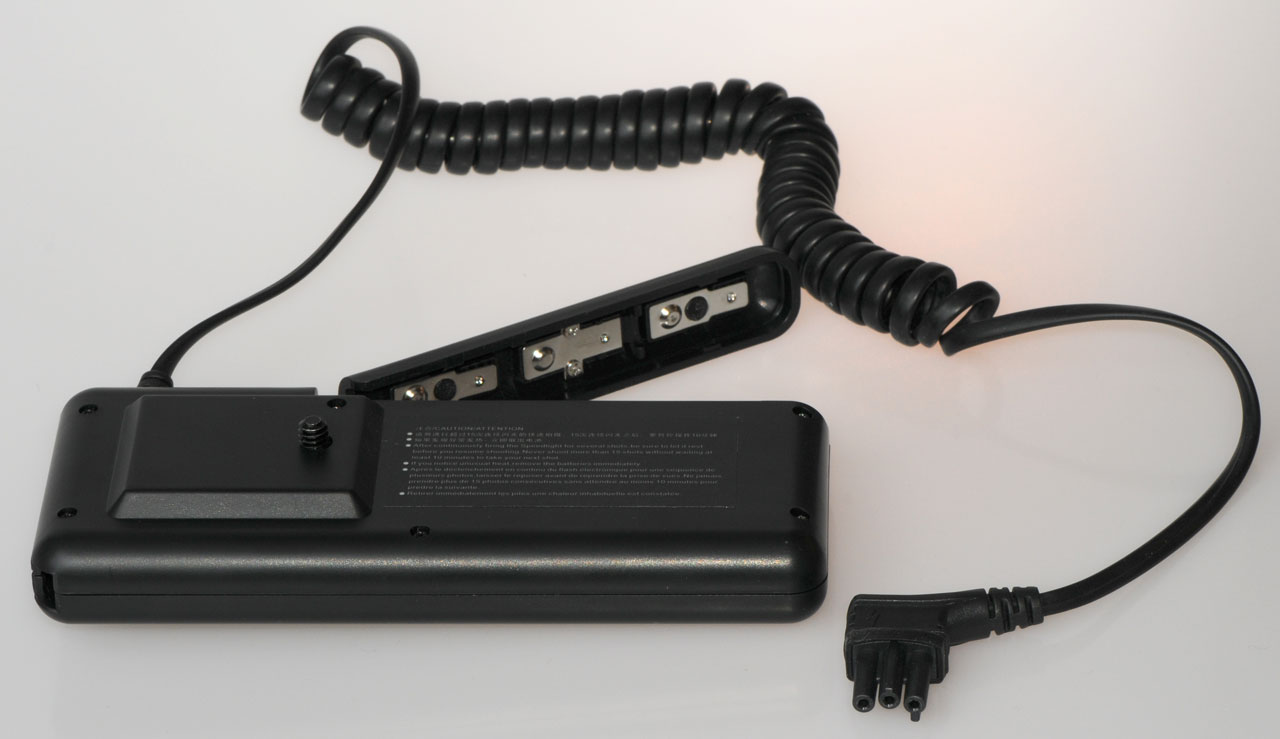


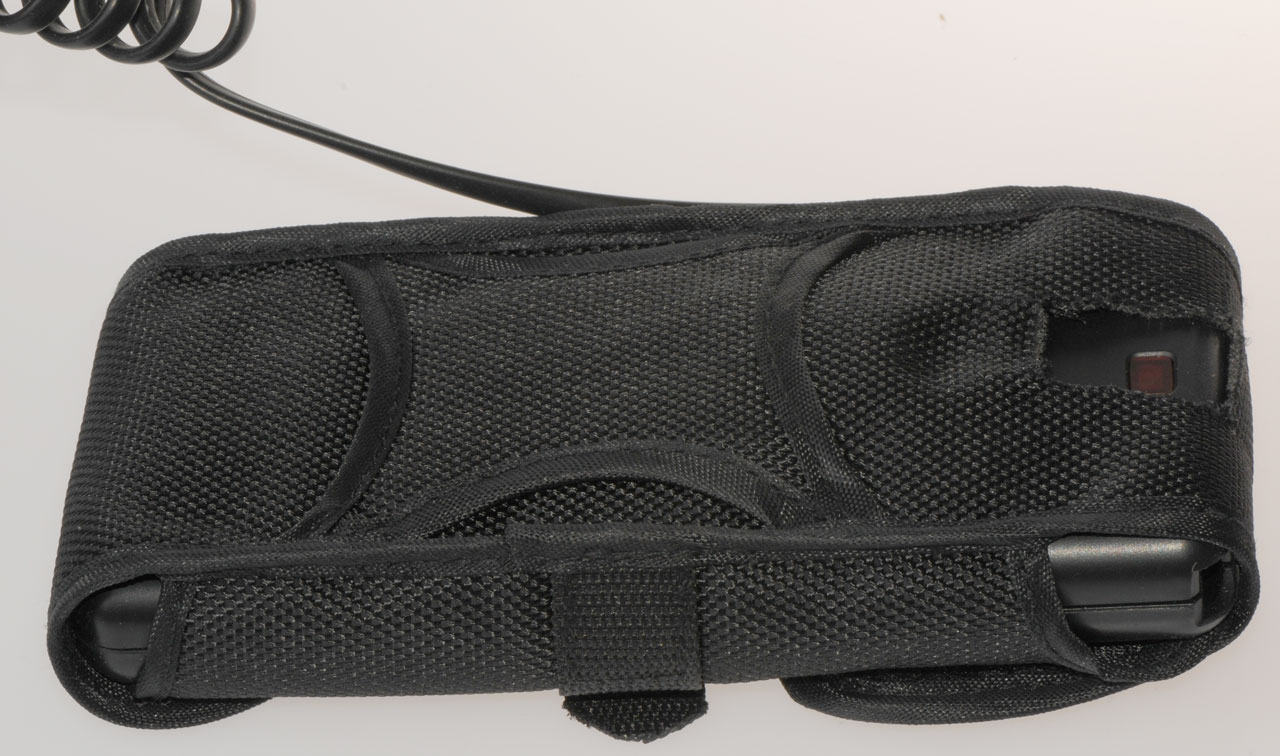
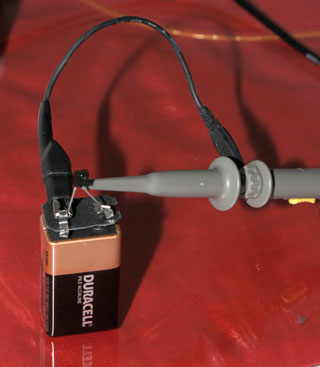
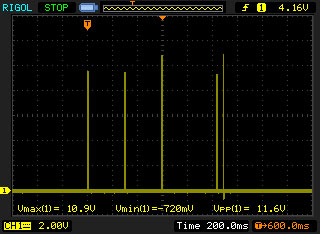
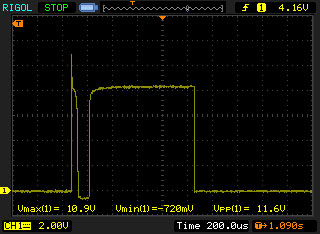


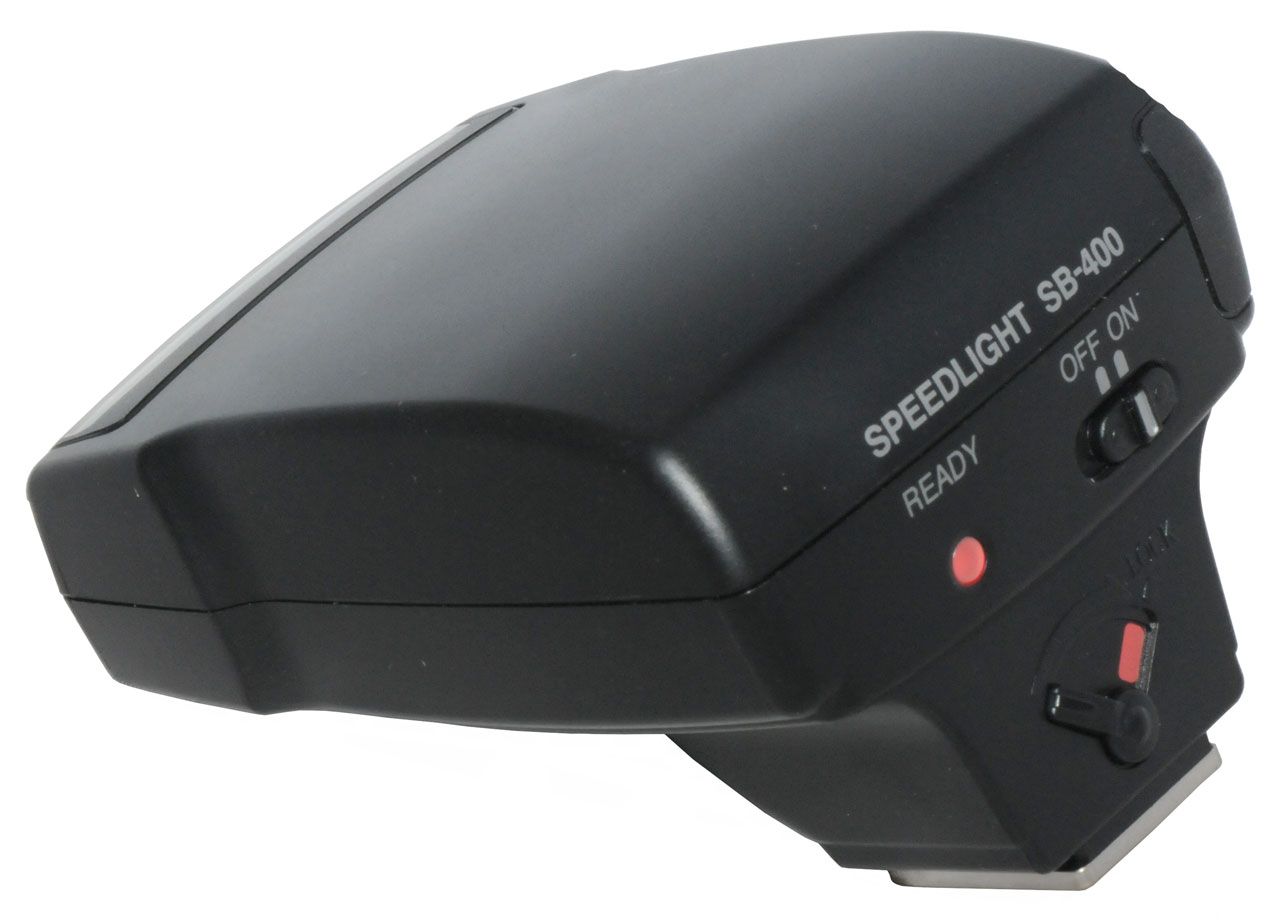
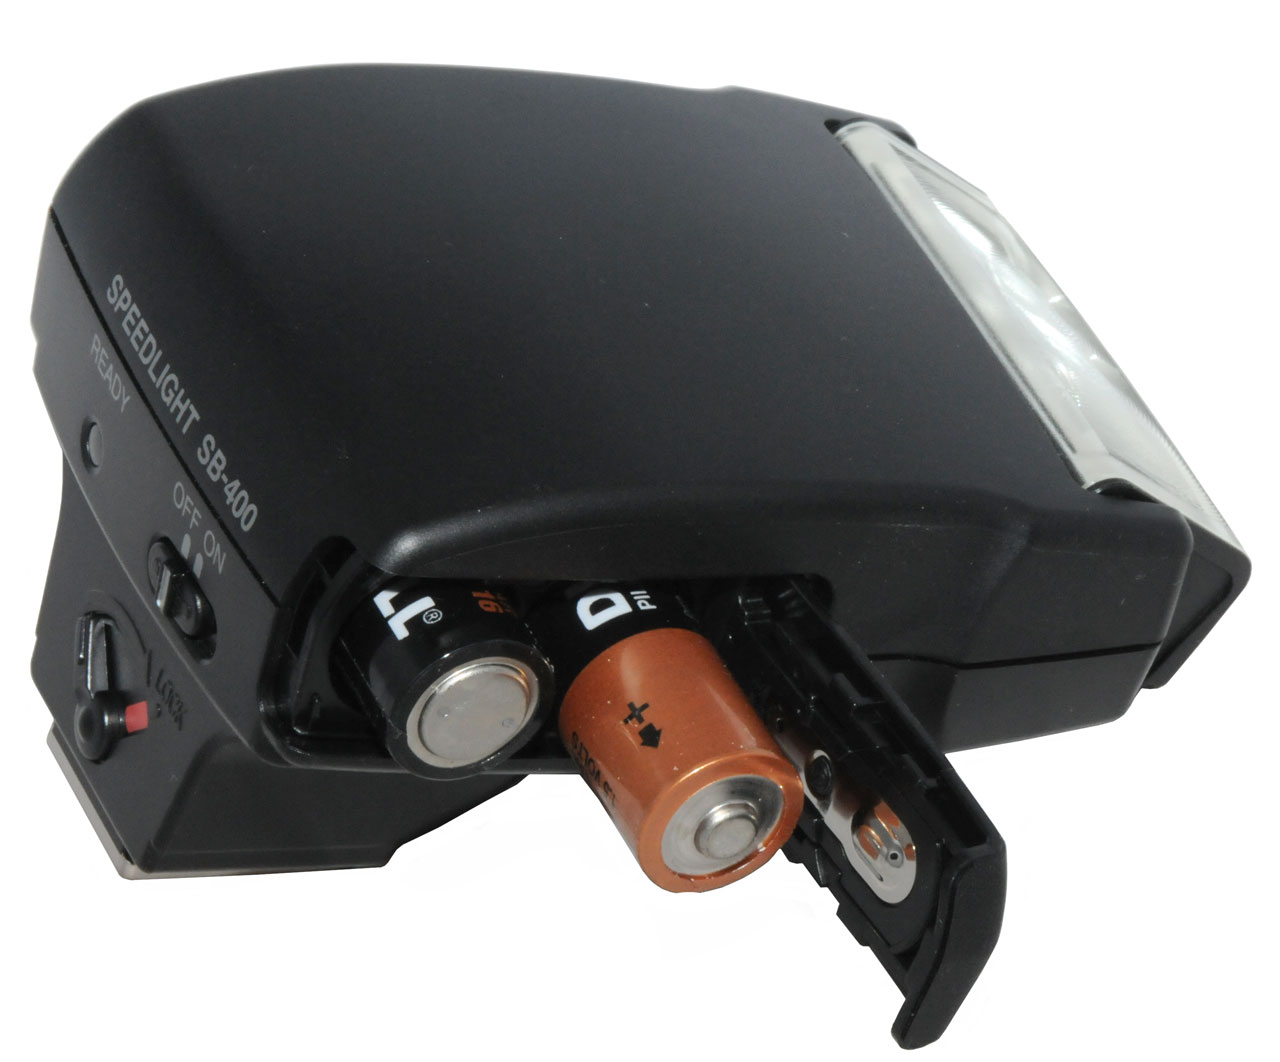


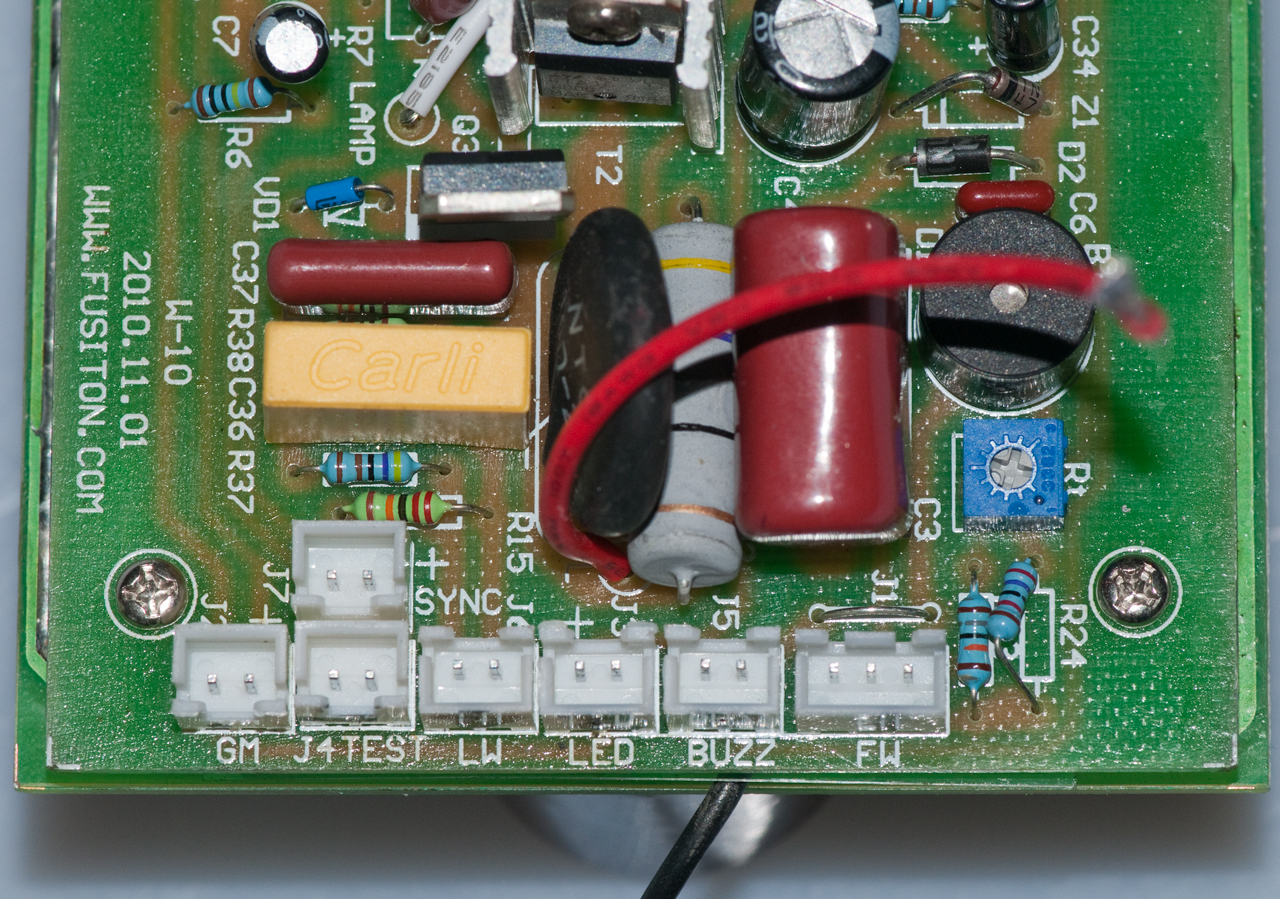


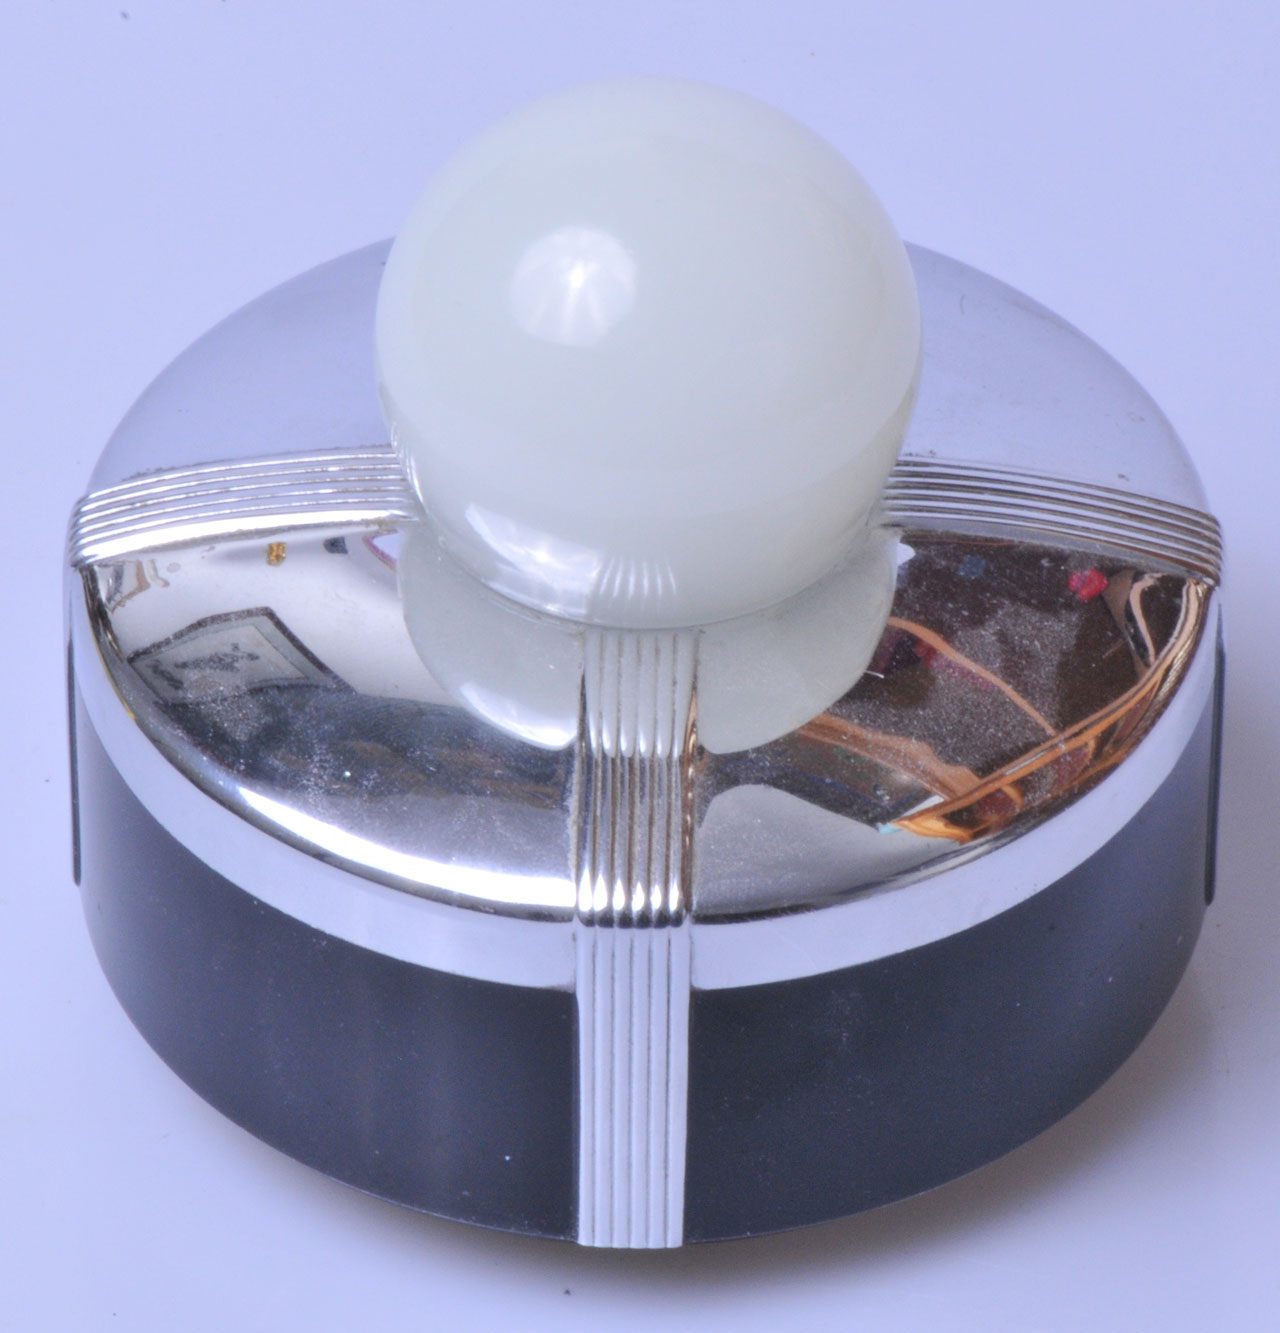
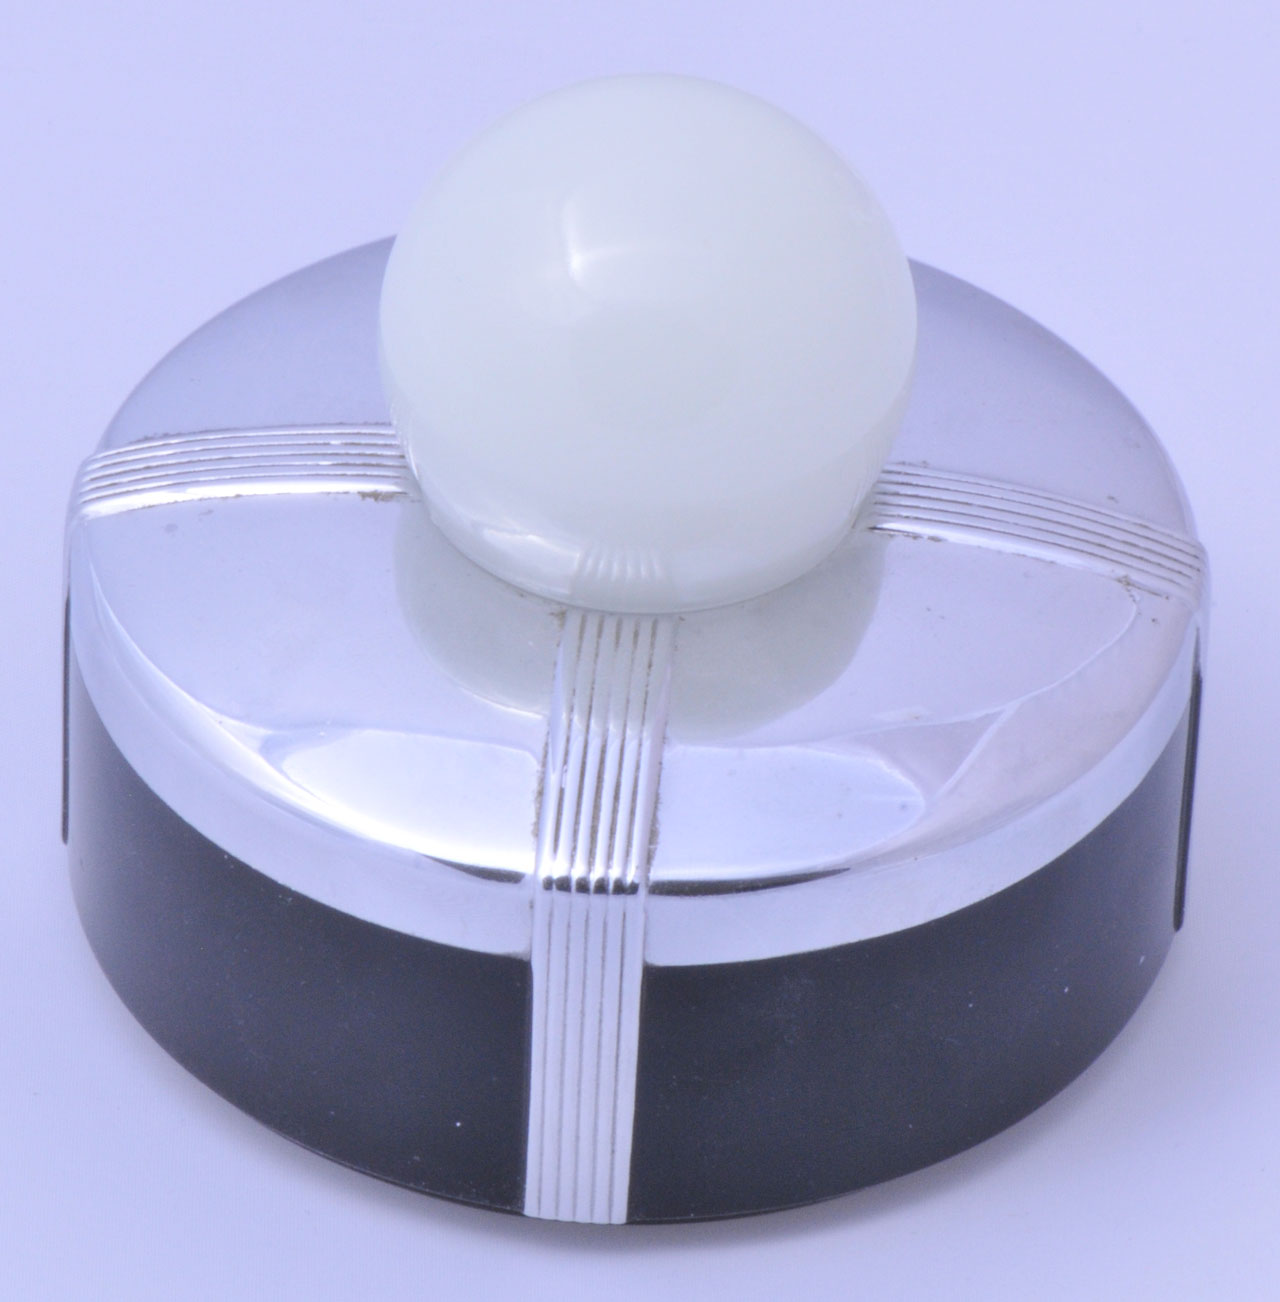

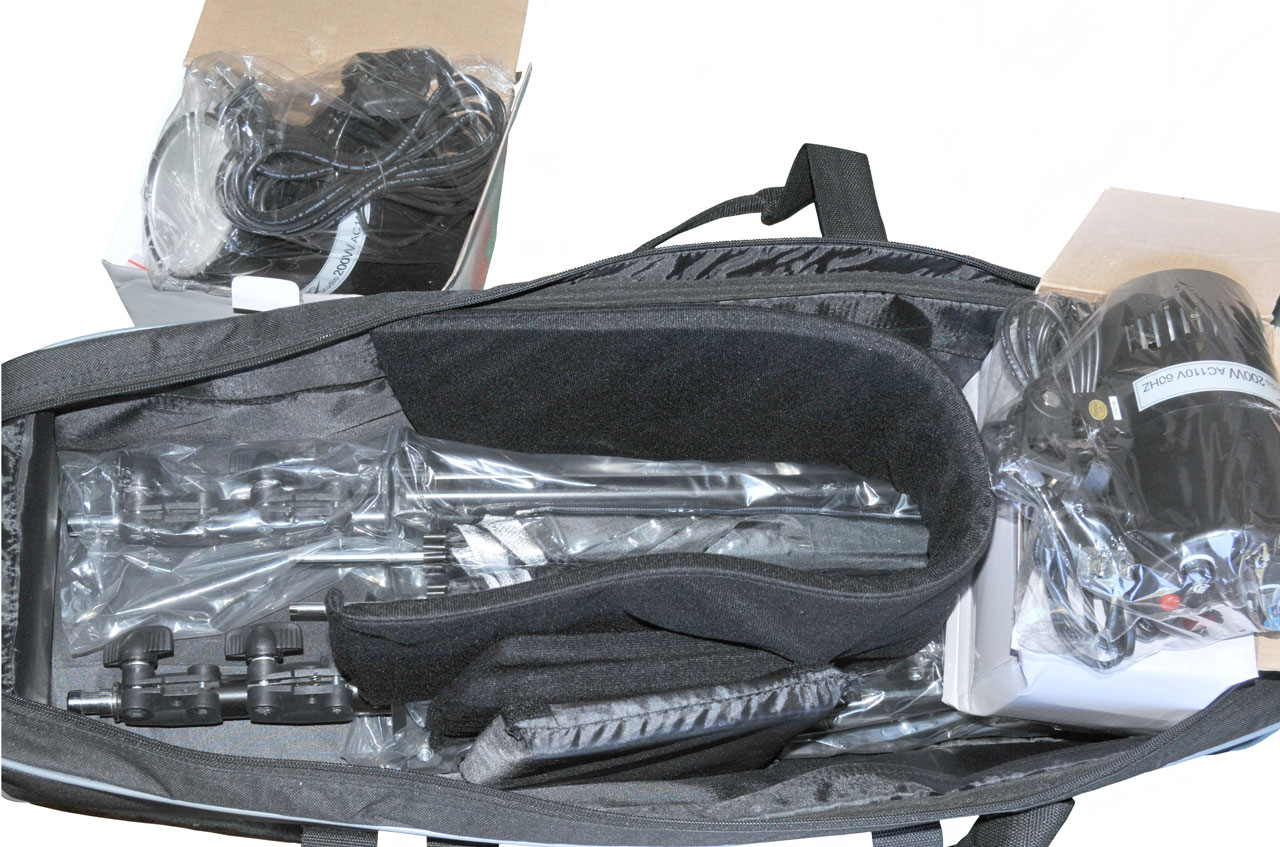

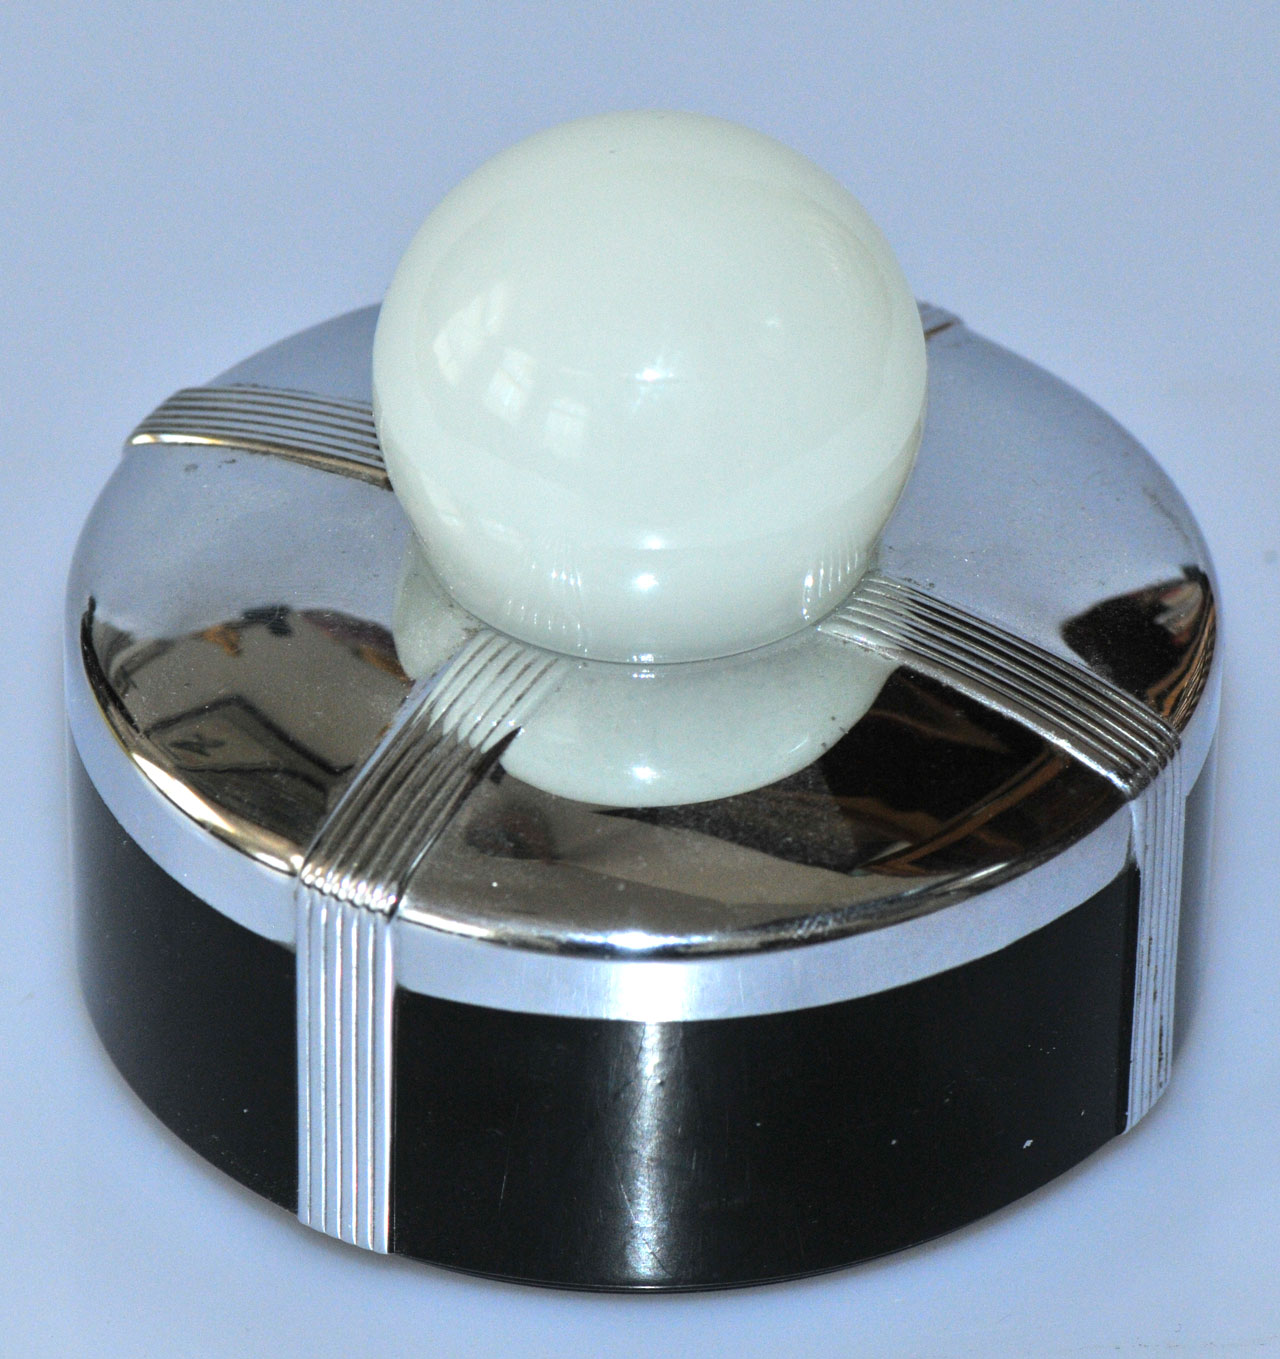


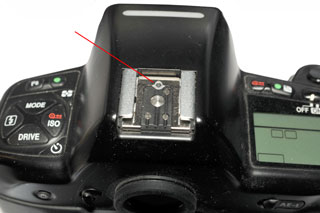
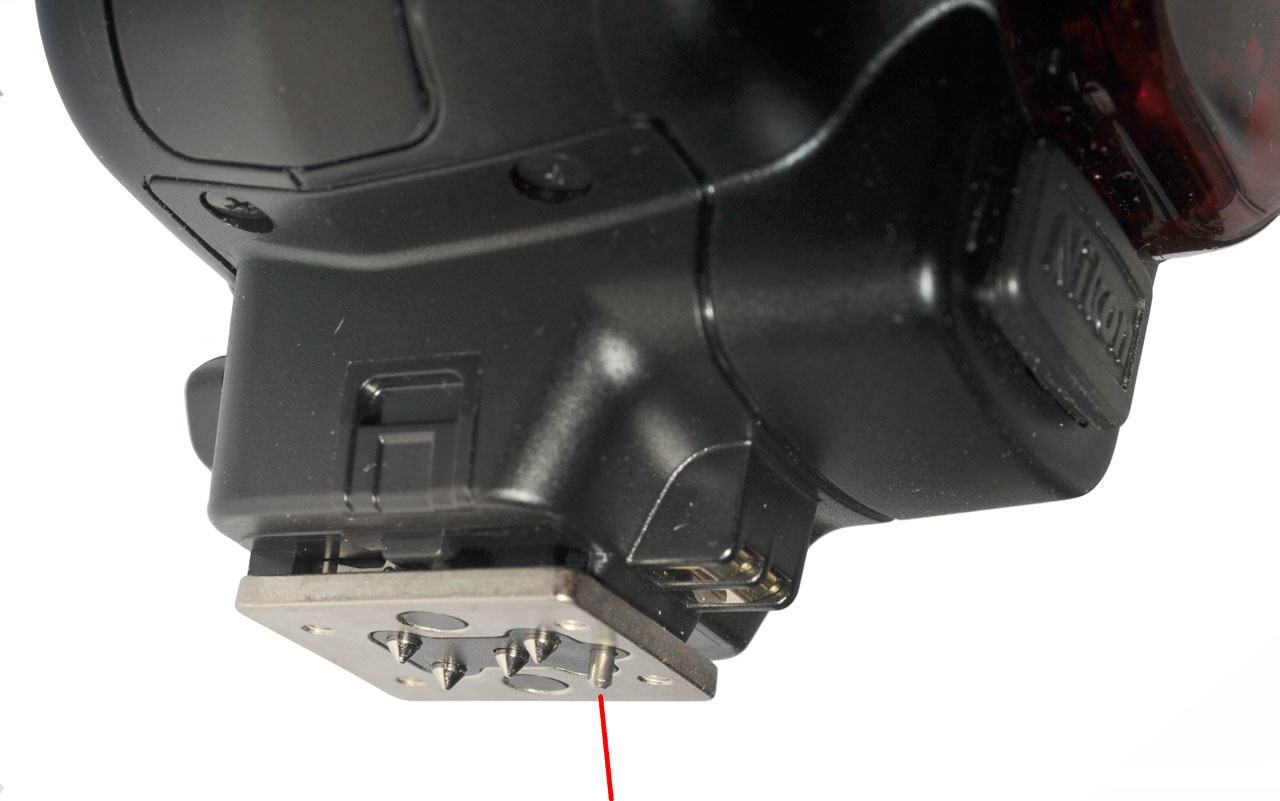
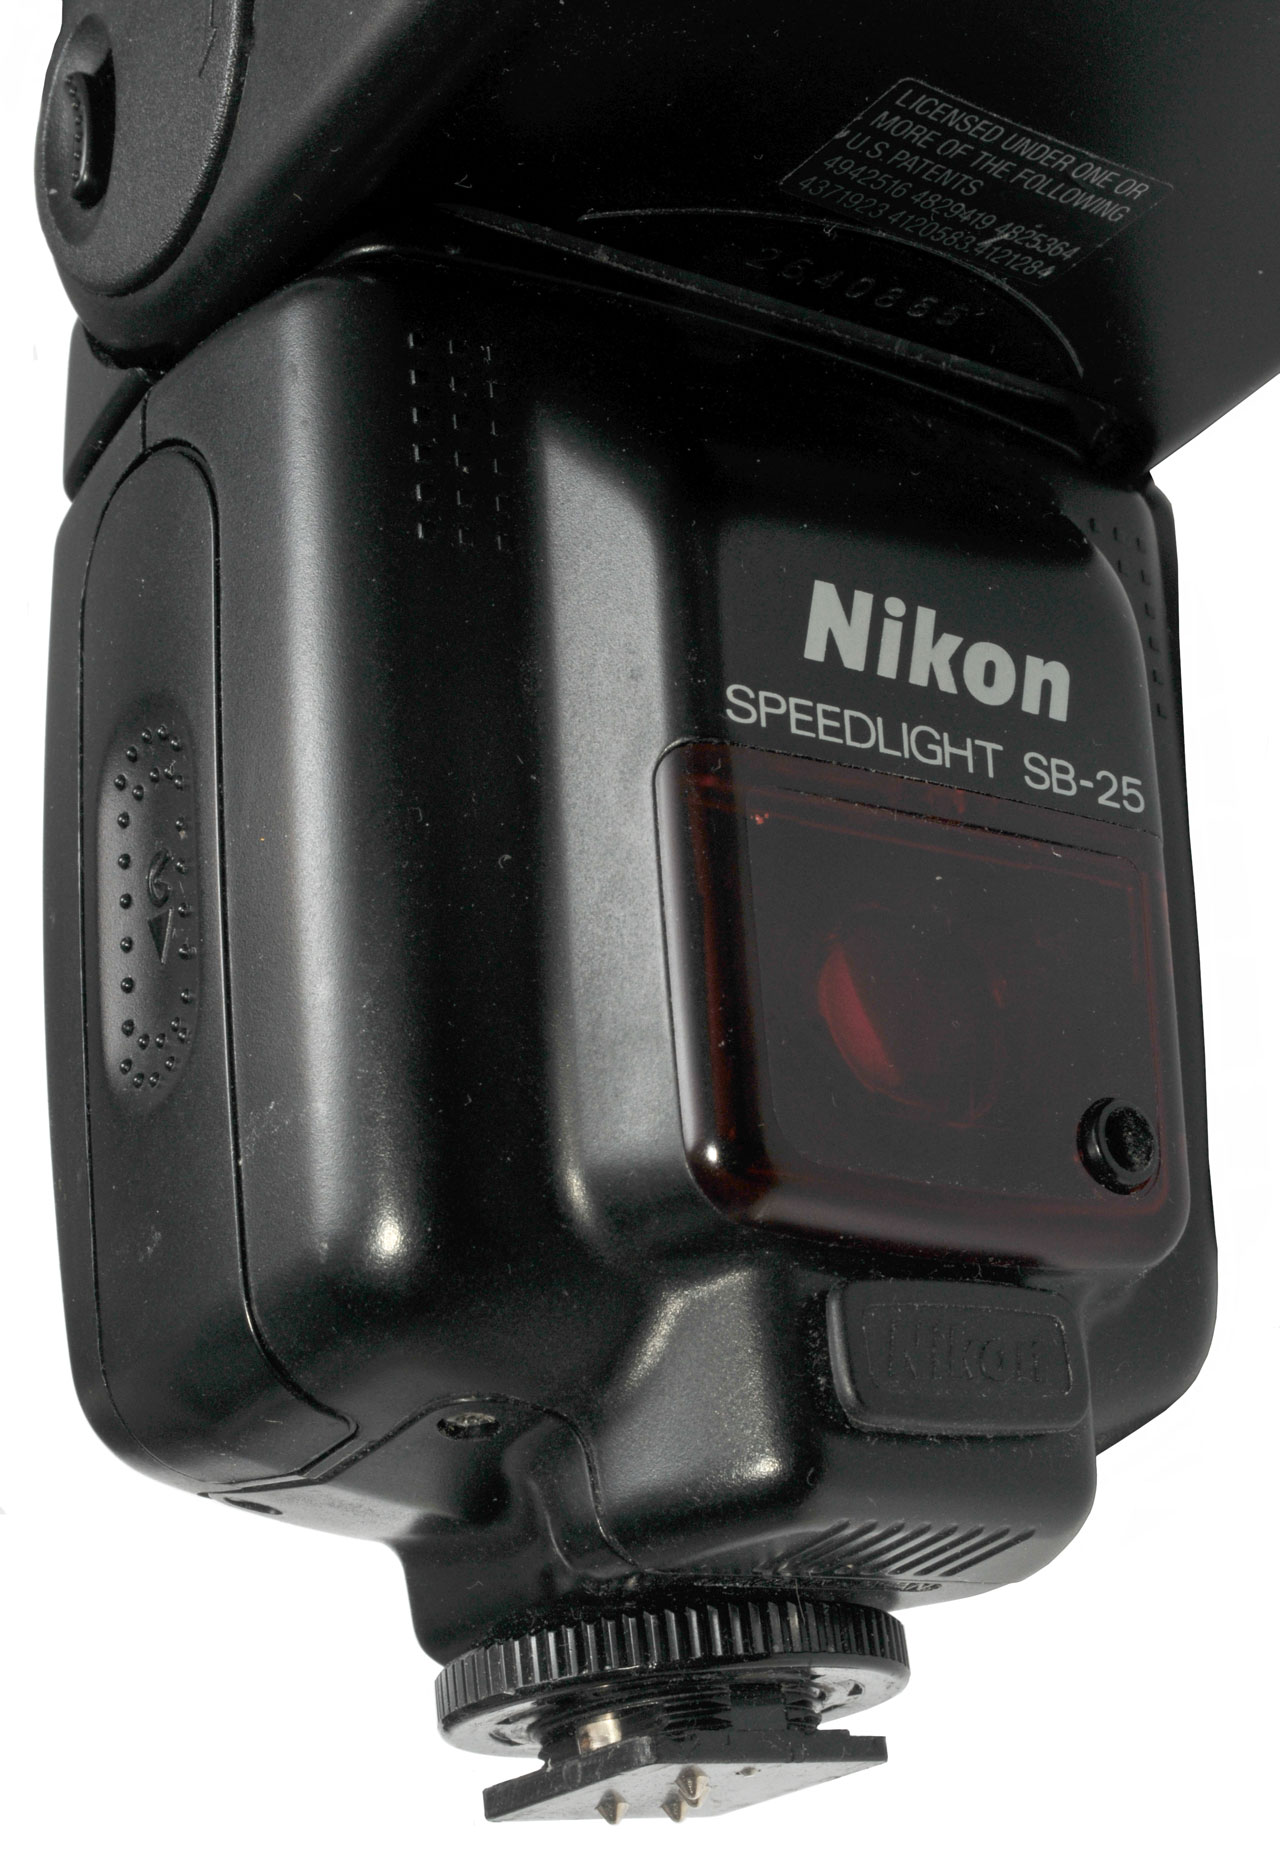

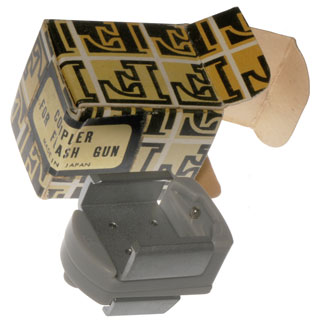
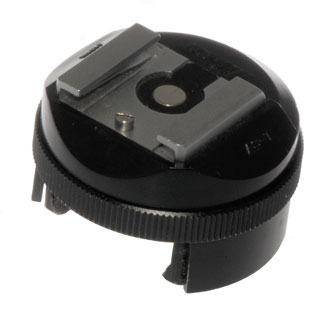
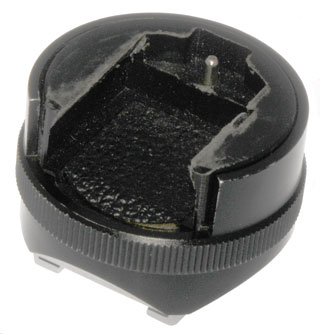
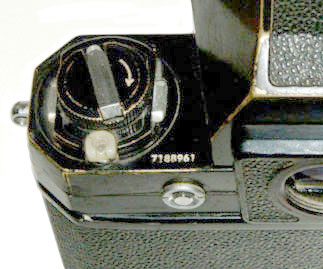
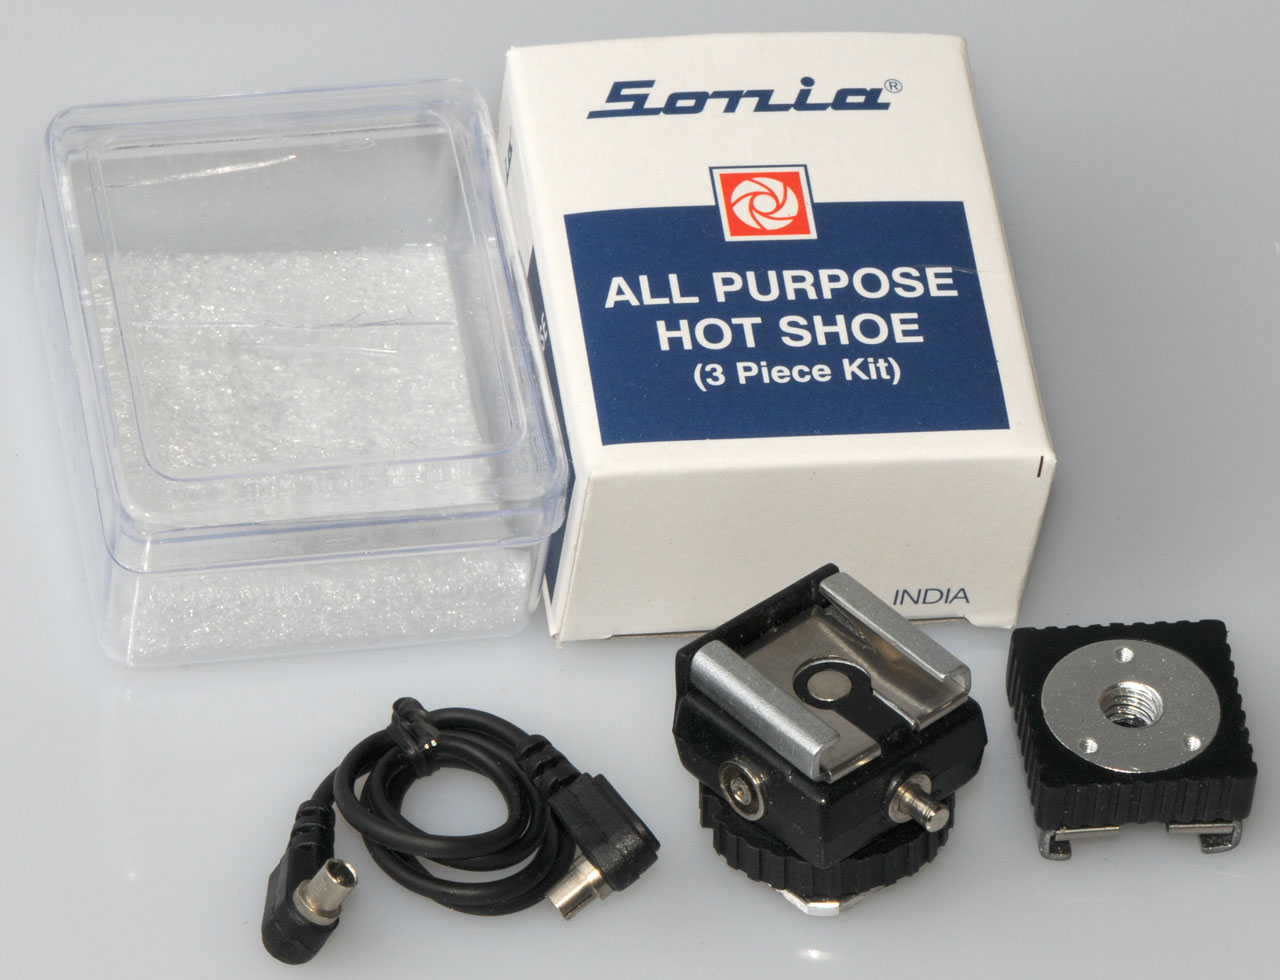

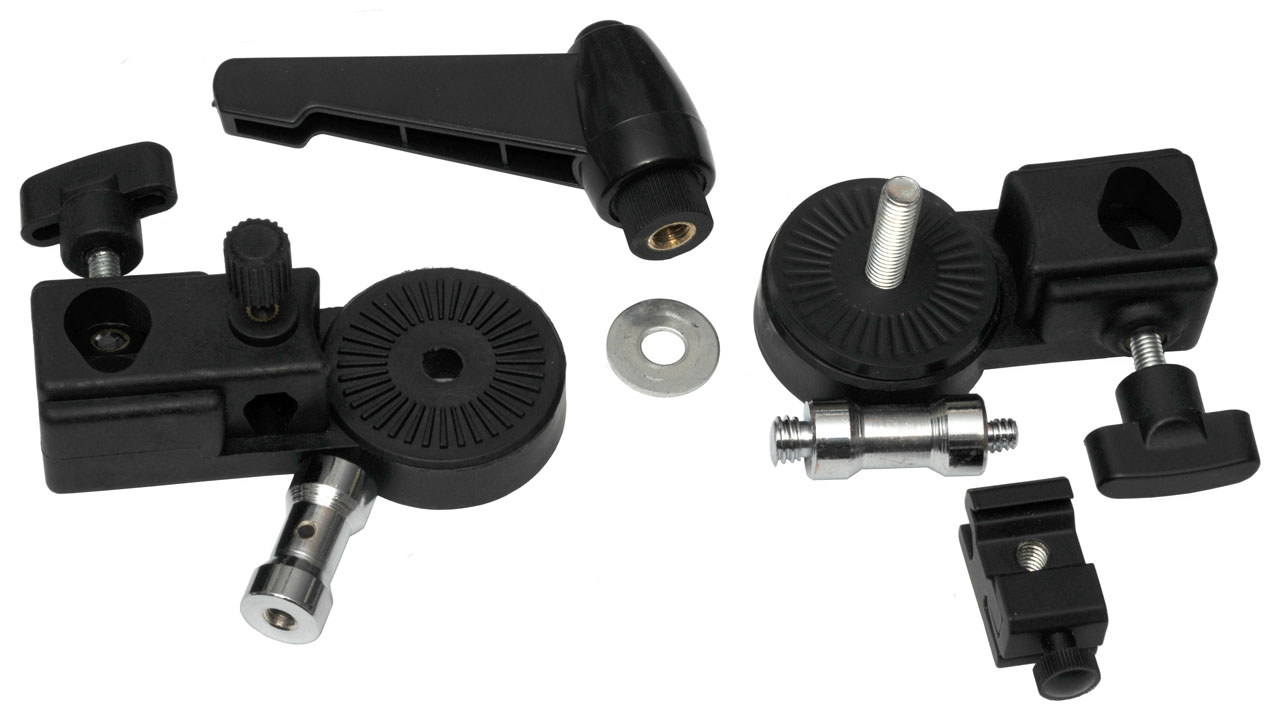

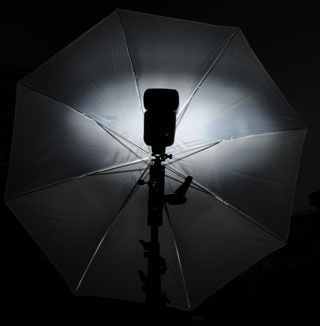
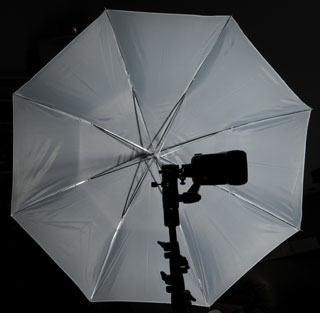
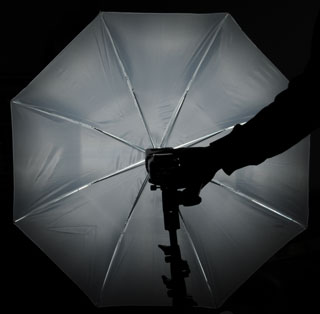
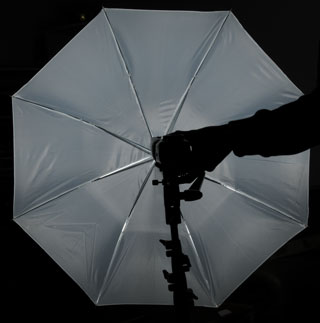
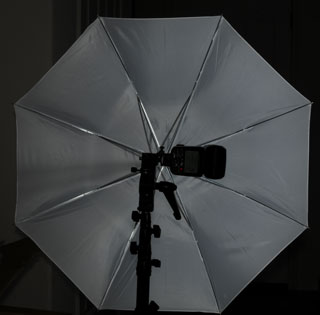
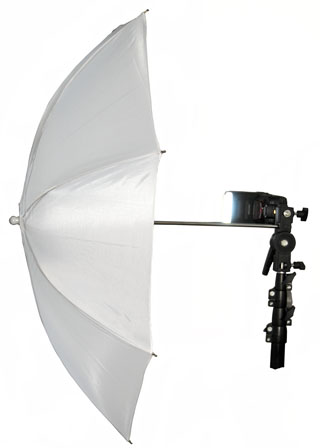

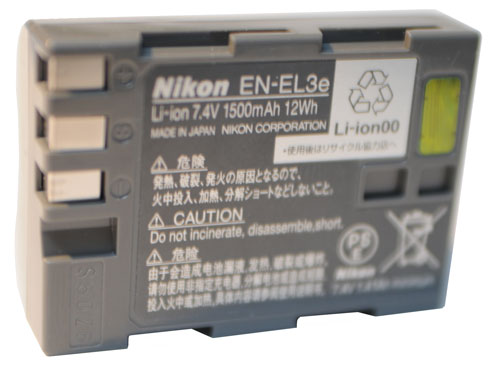
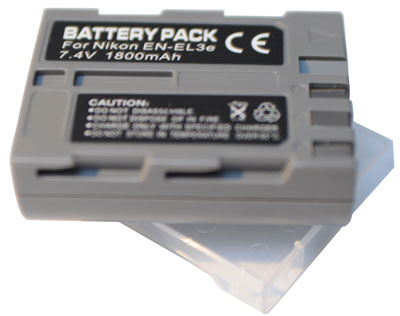
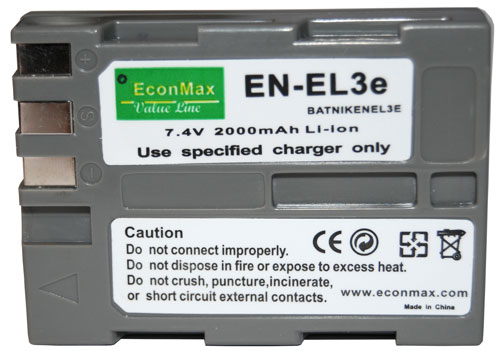
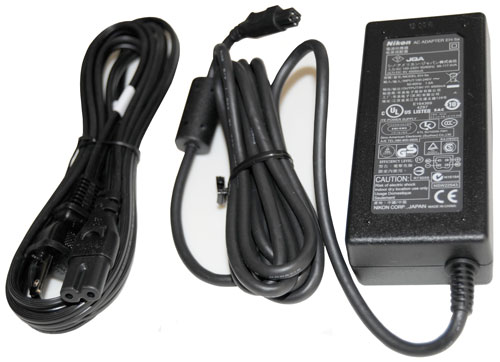
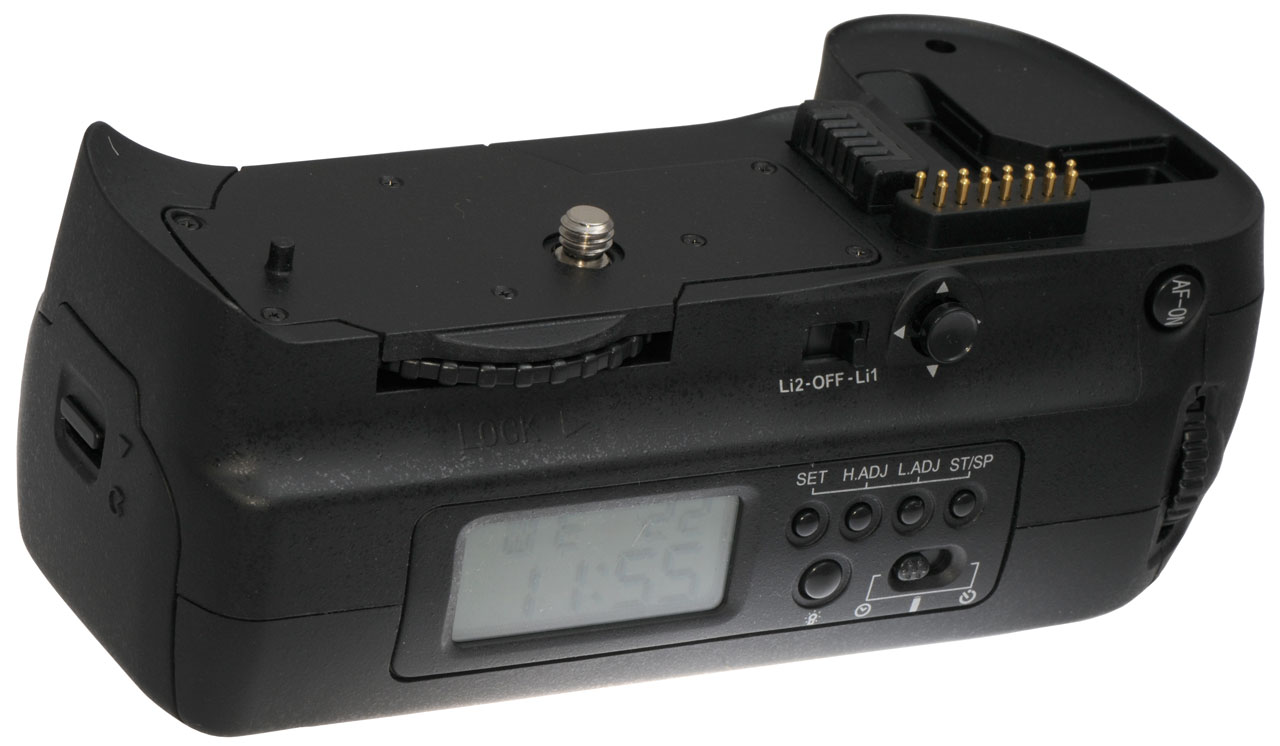
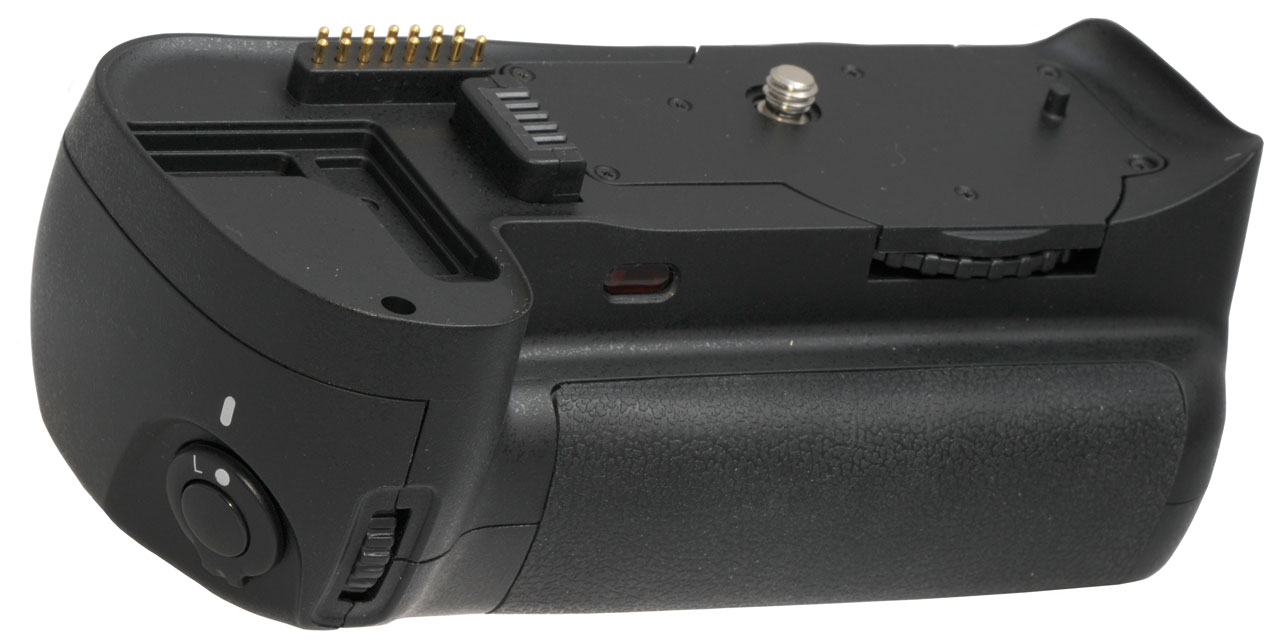

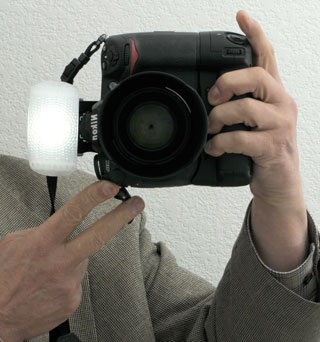


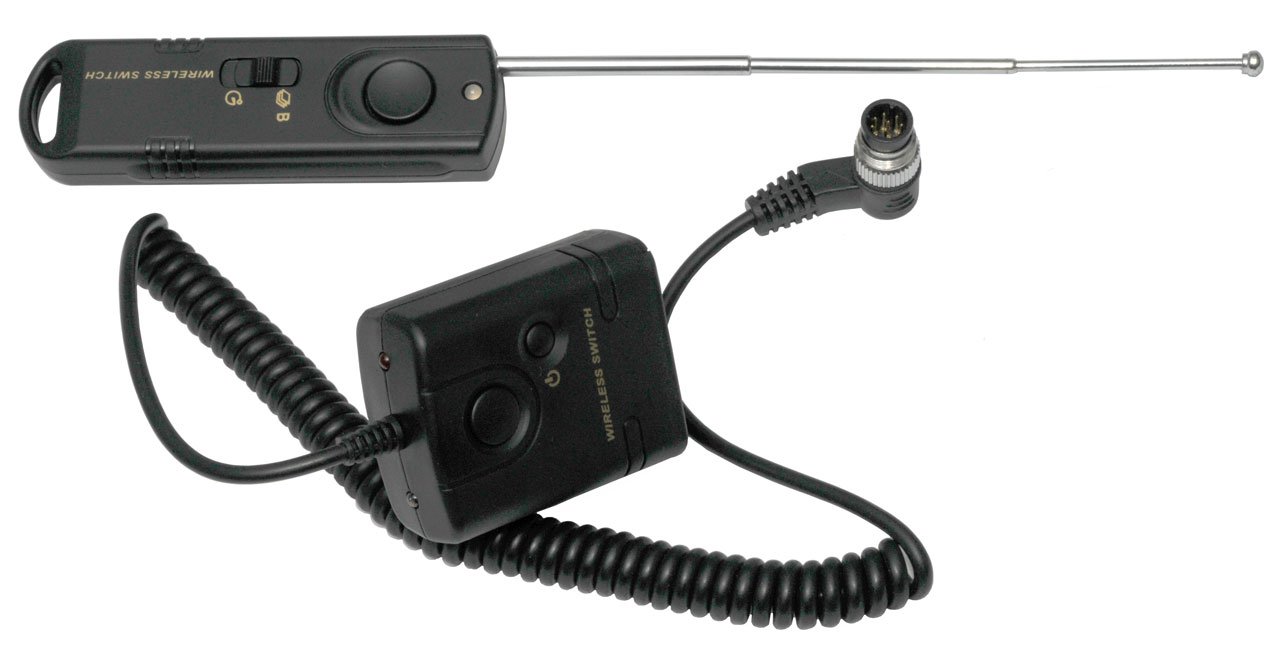


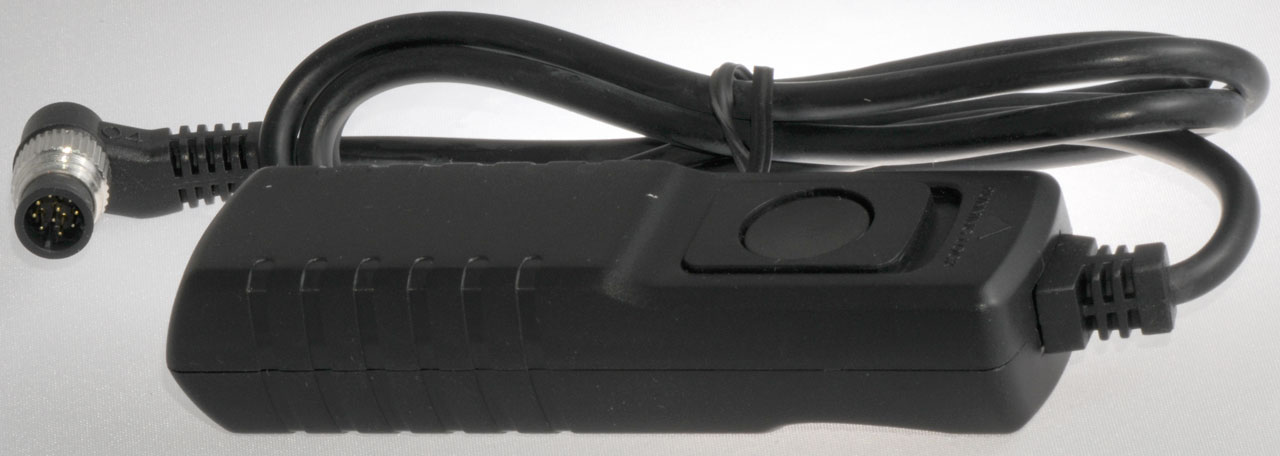


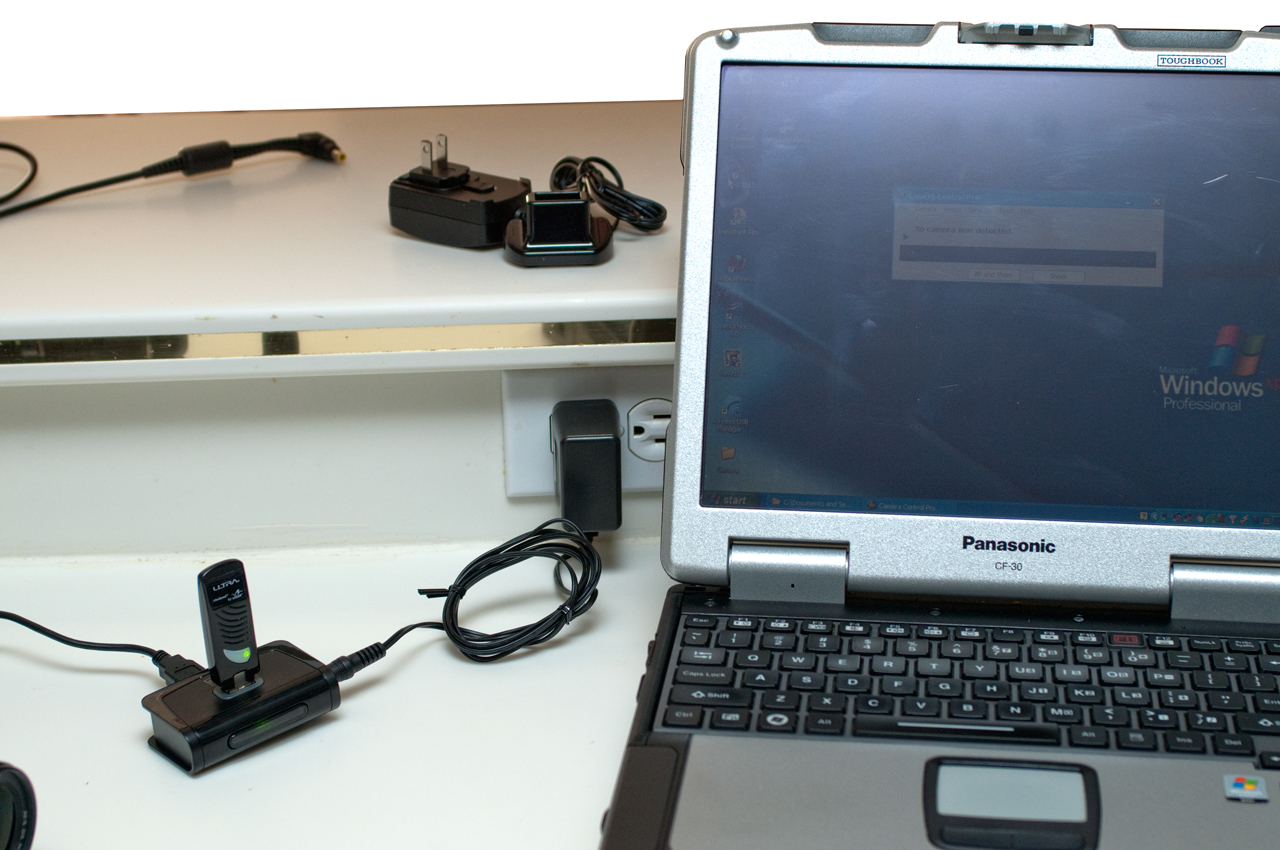


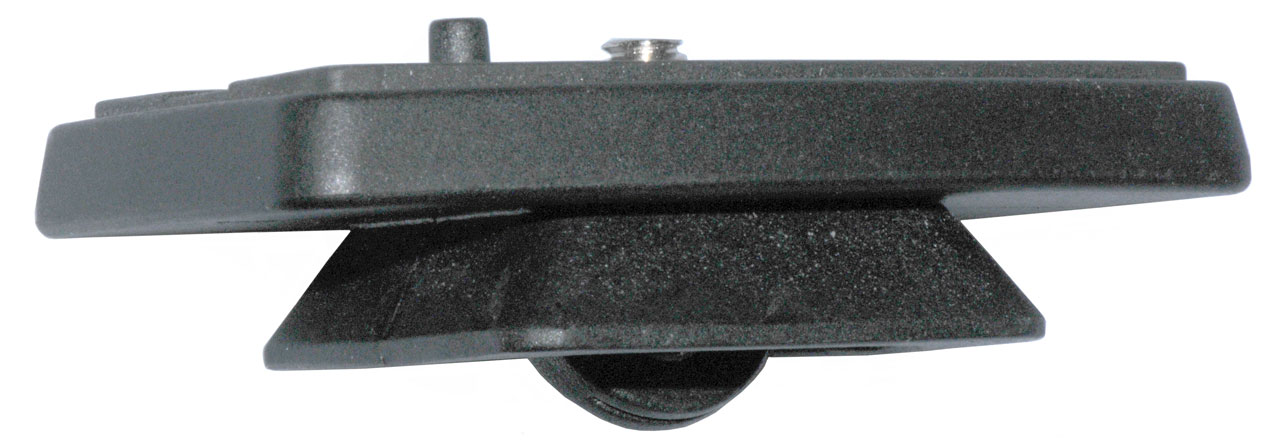
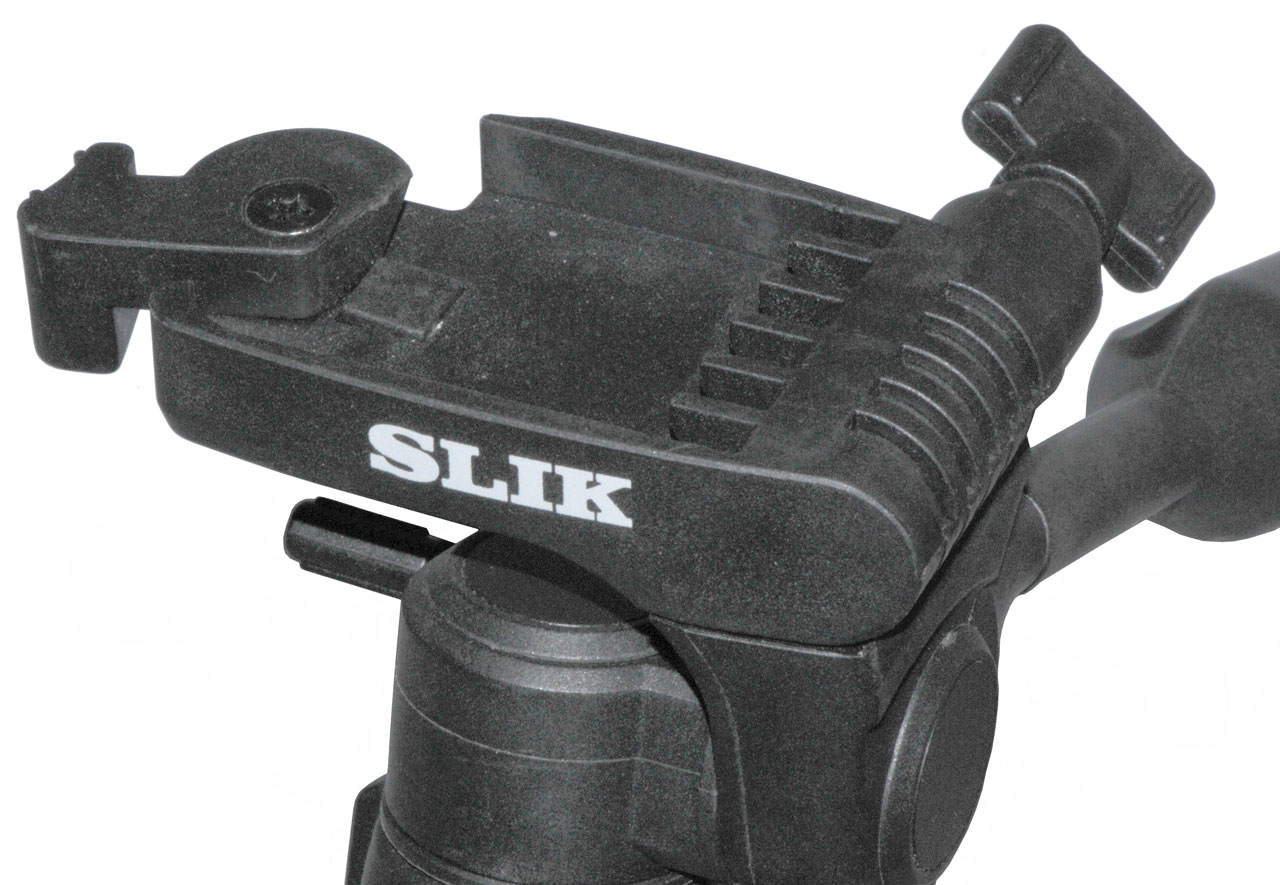

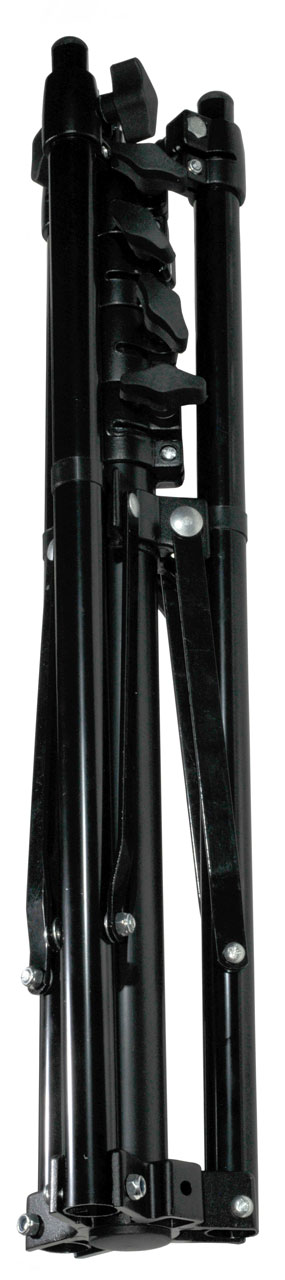


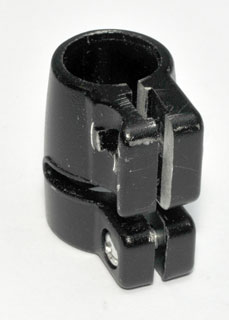
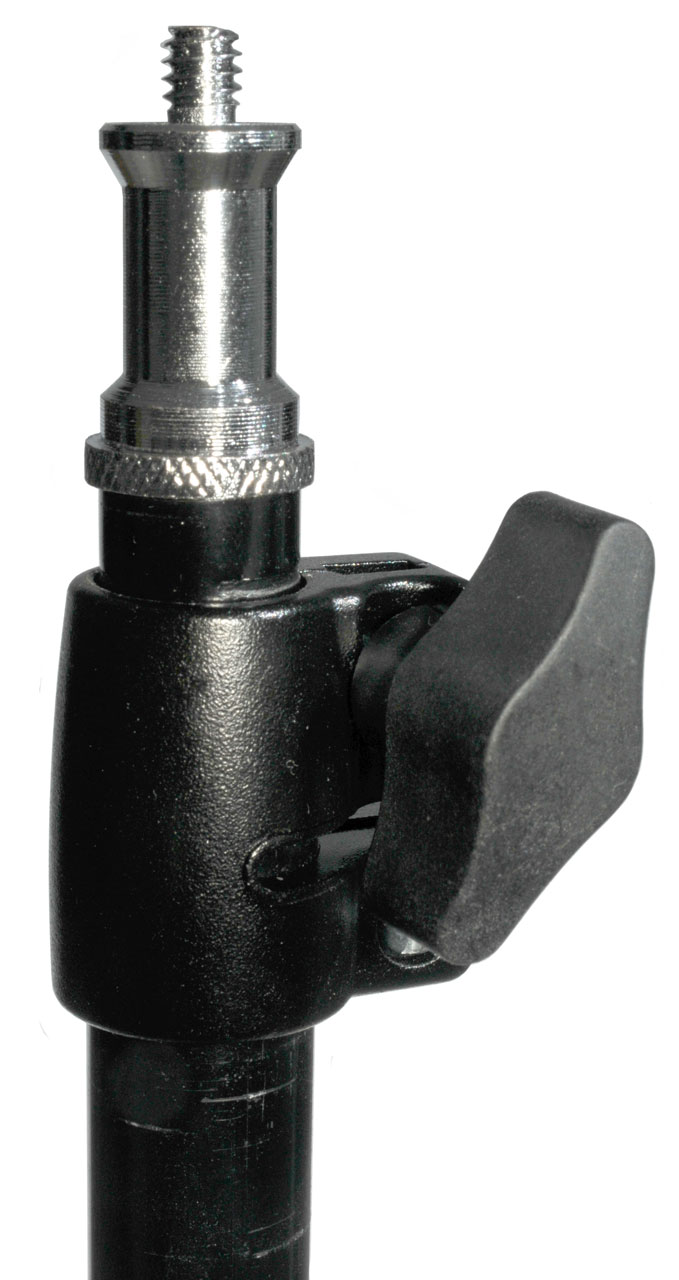


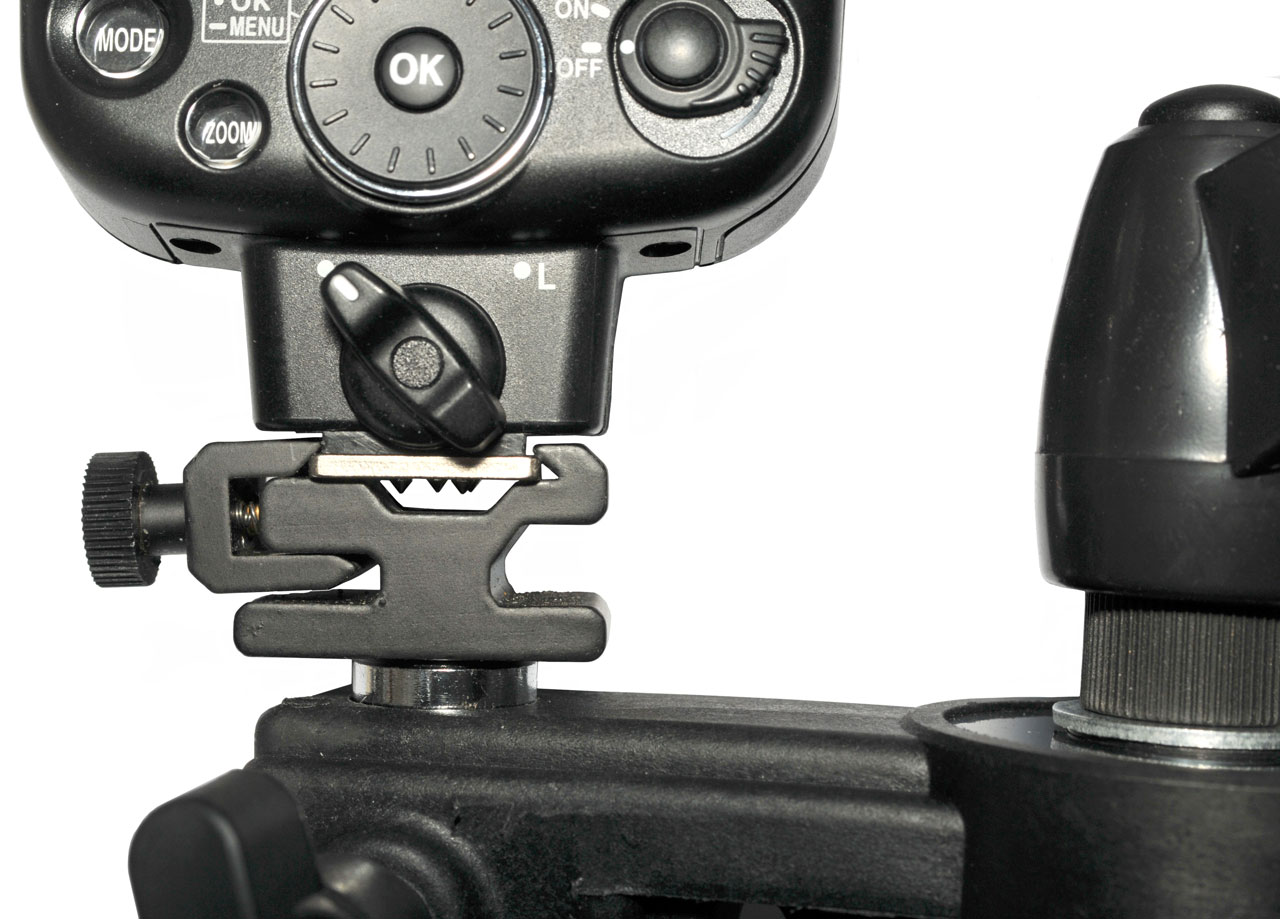

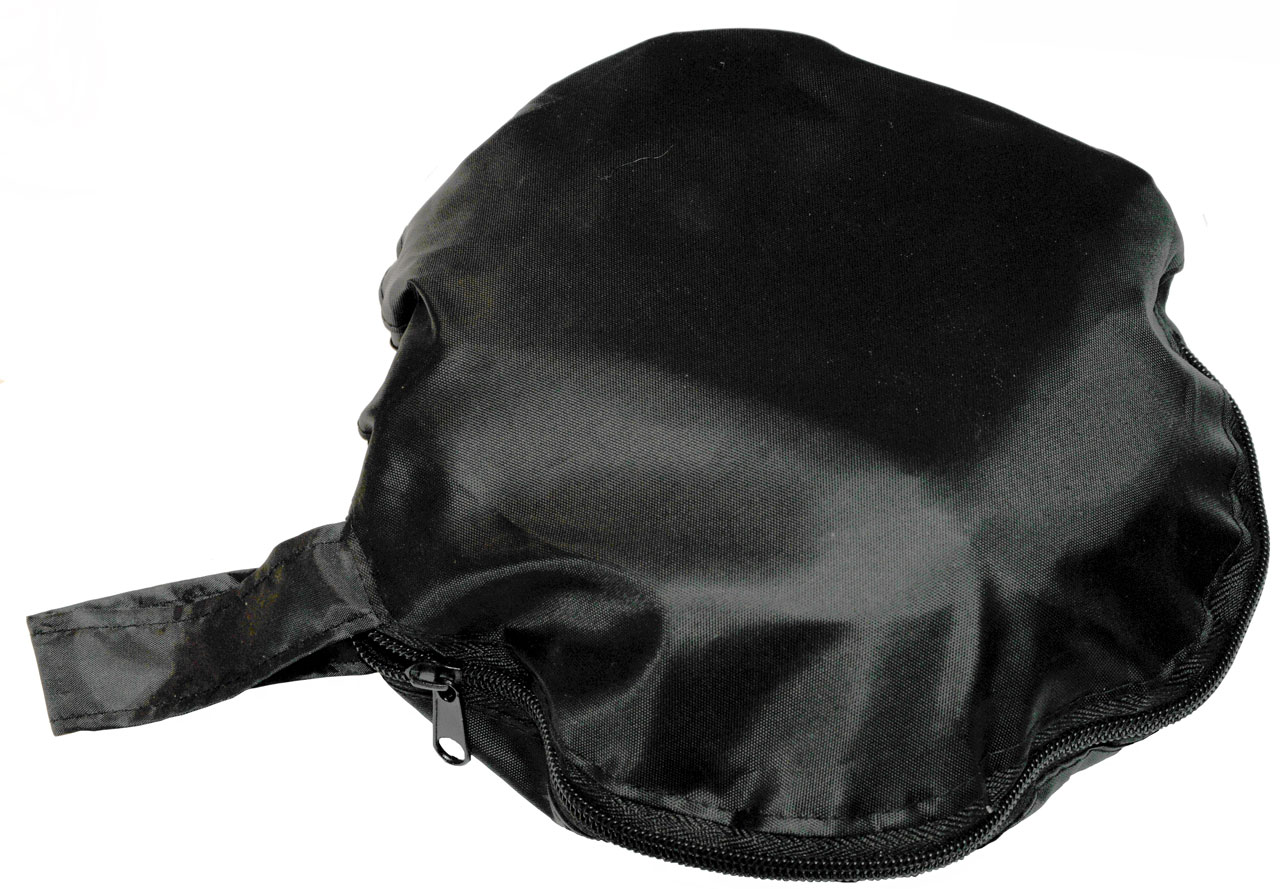
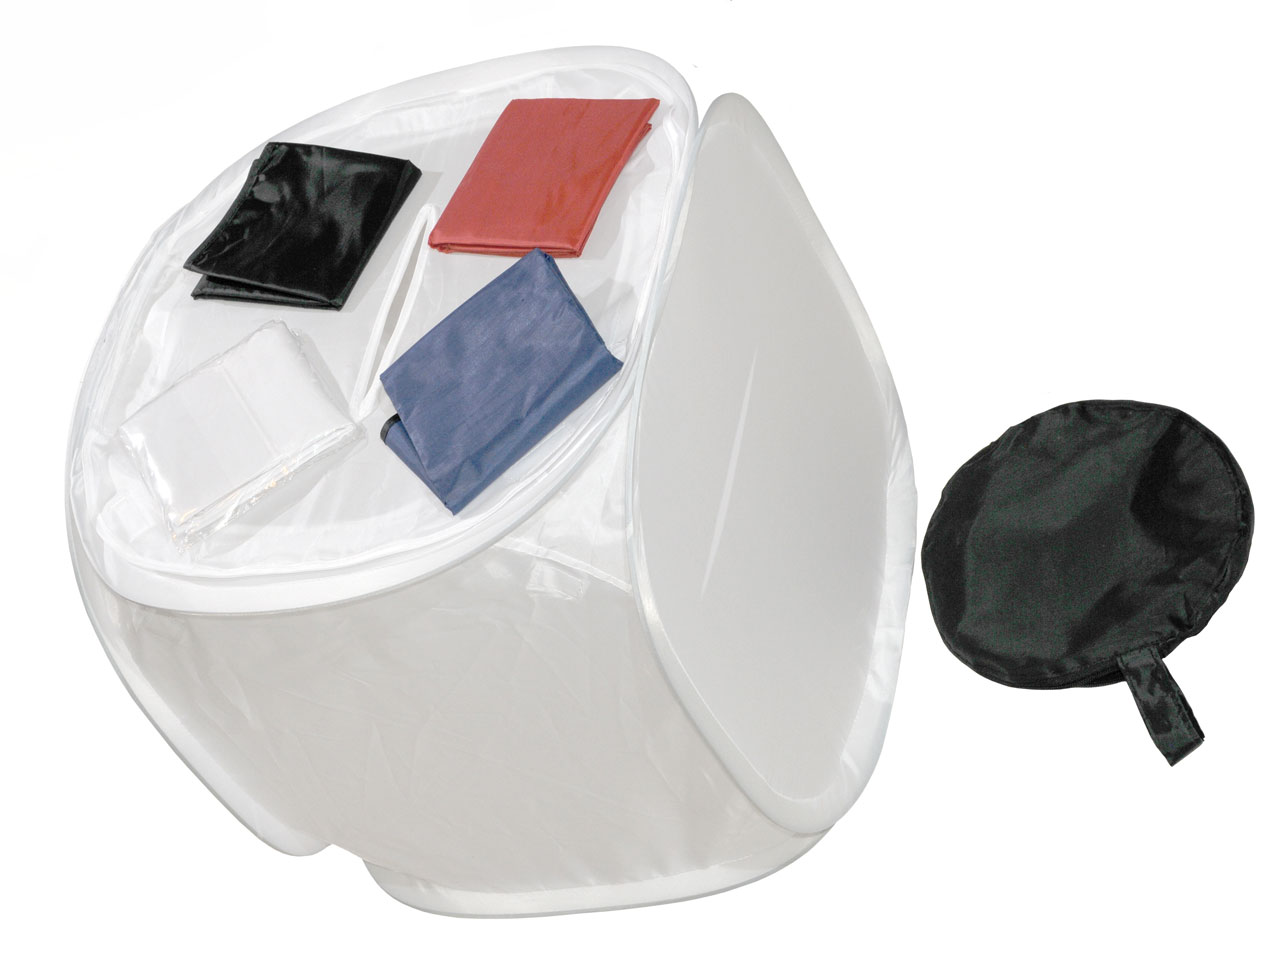
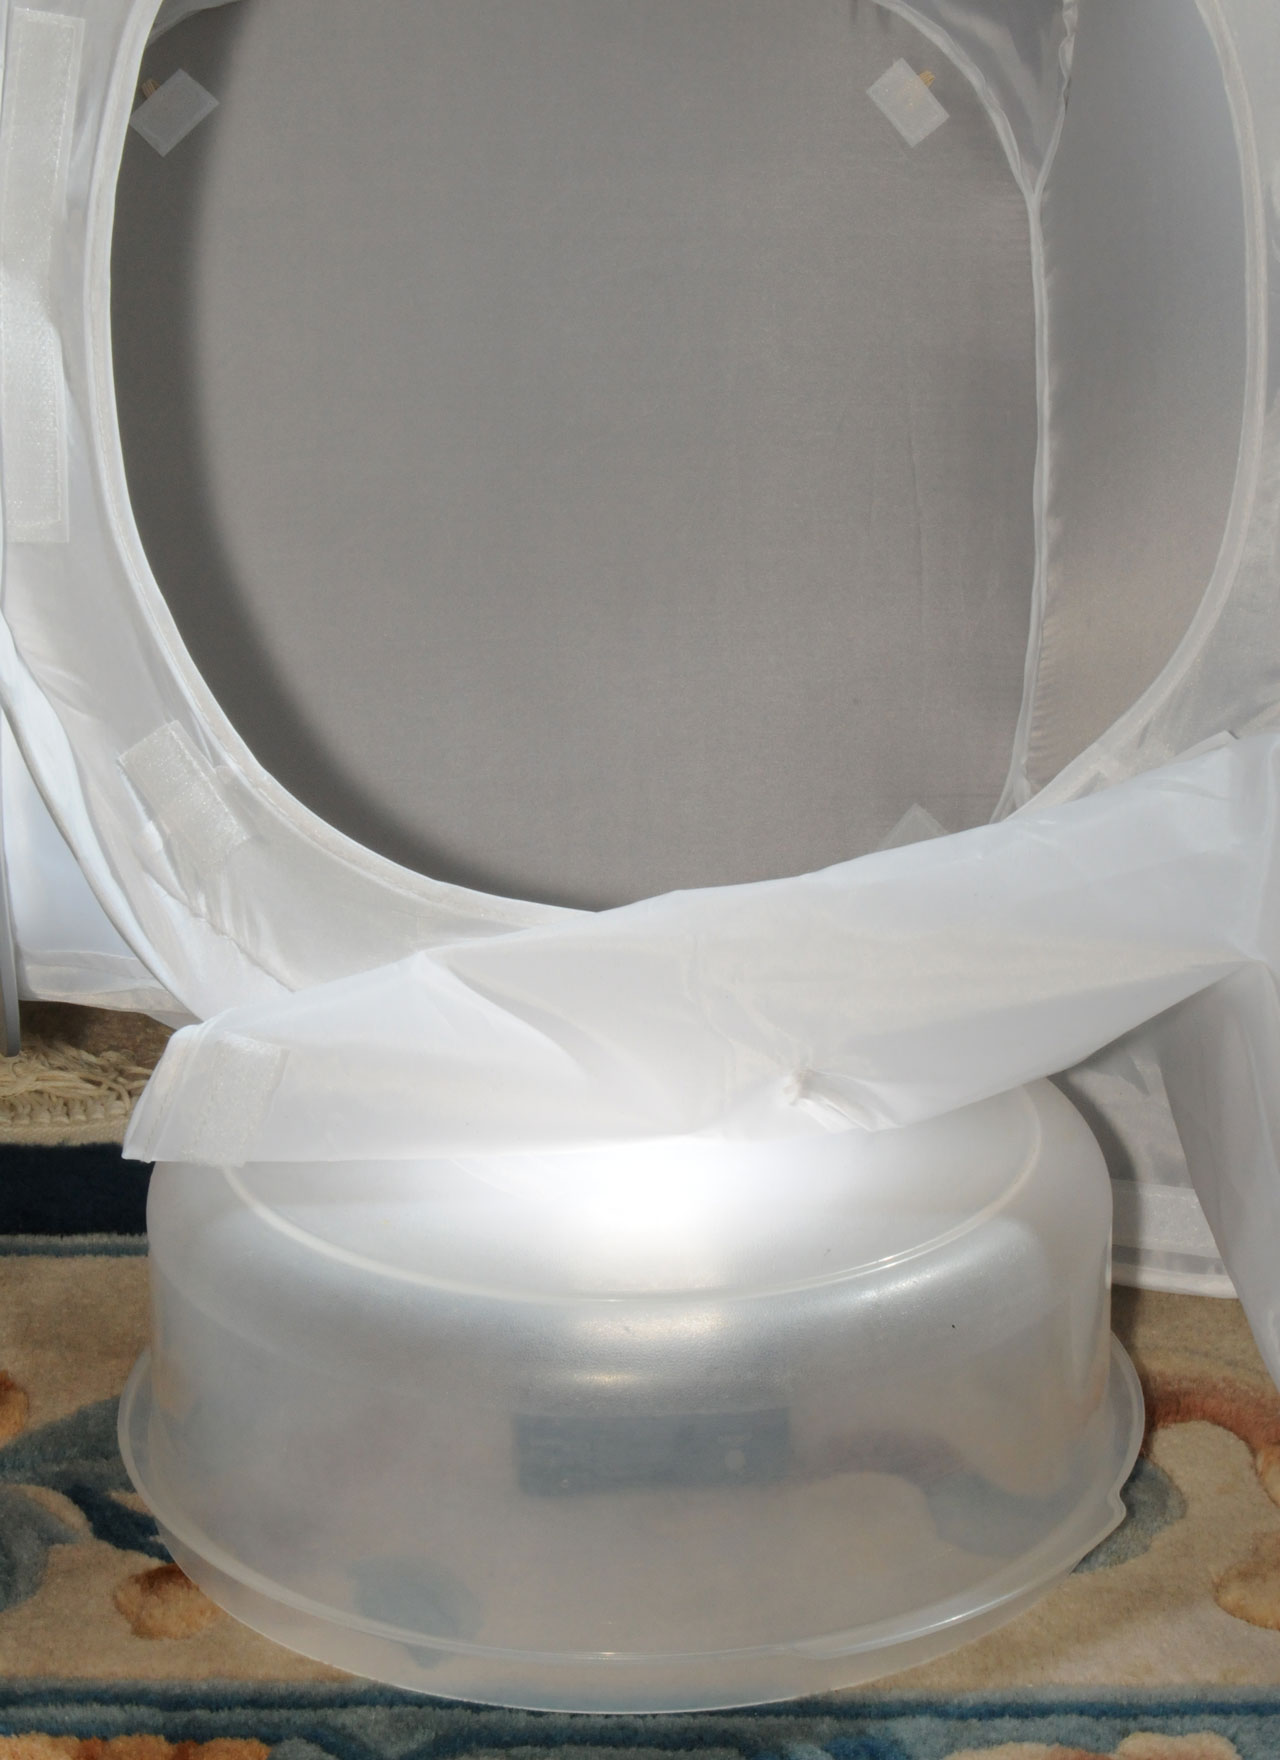
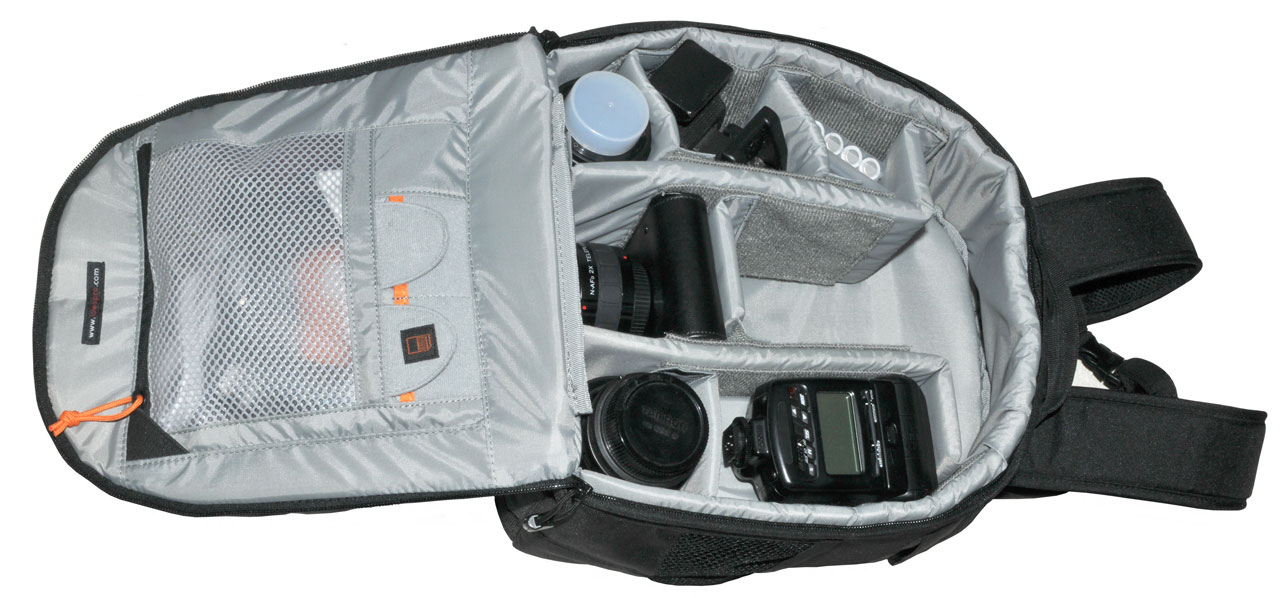

