Digital Photography 101
© Brooke Clarke 2011 - 2022Art
Portraits
Product Photography
In the Field
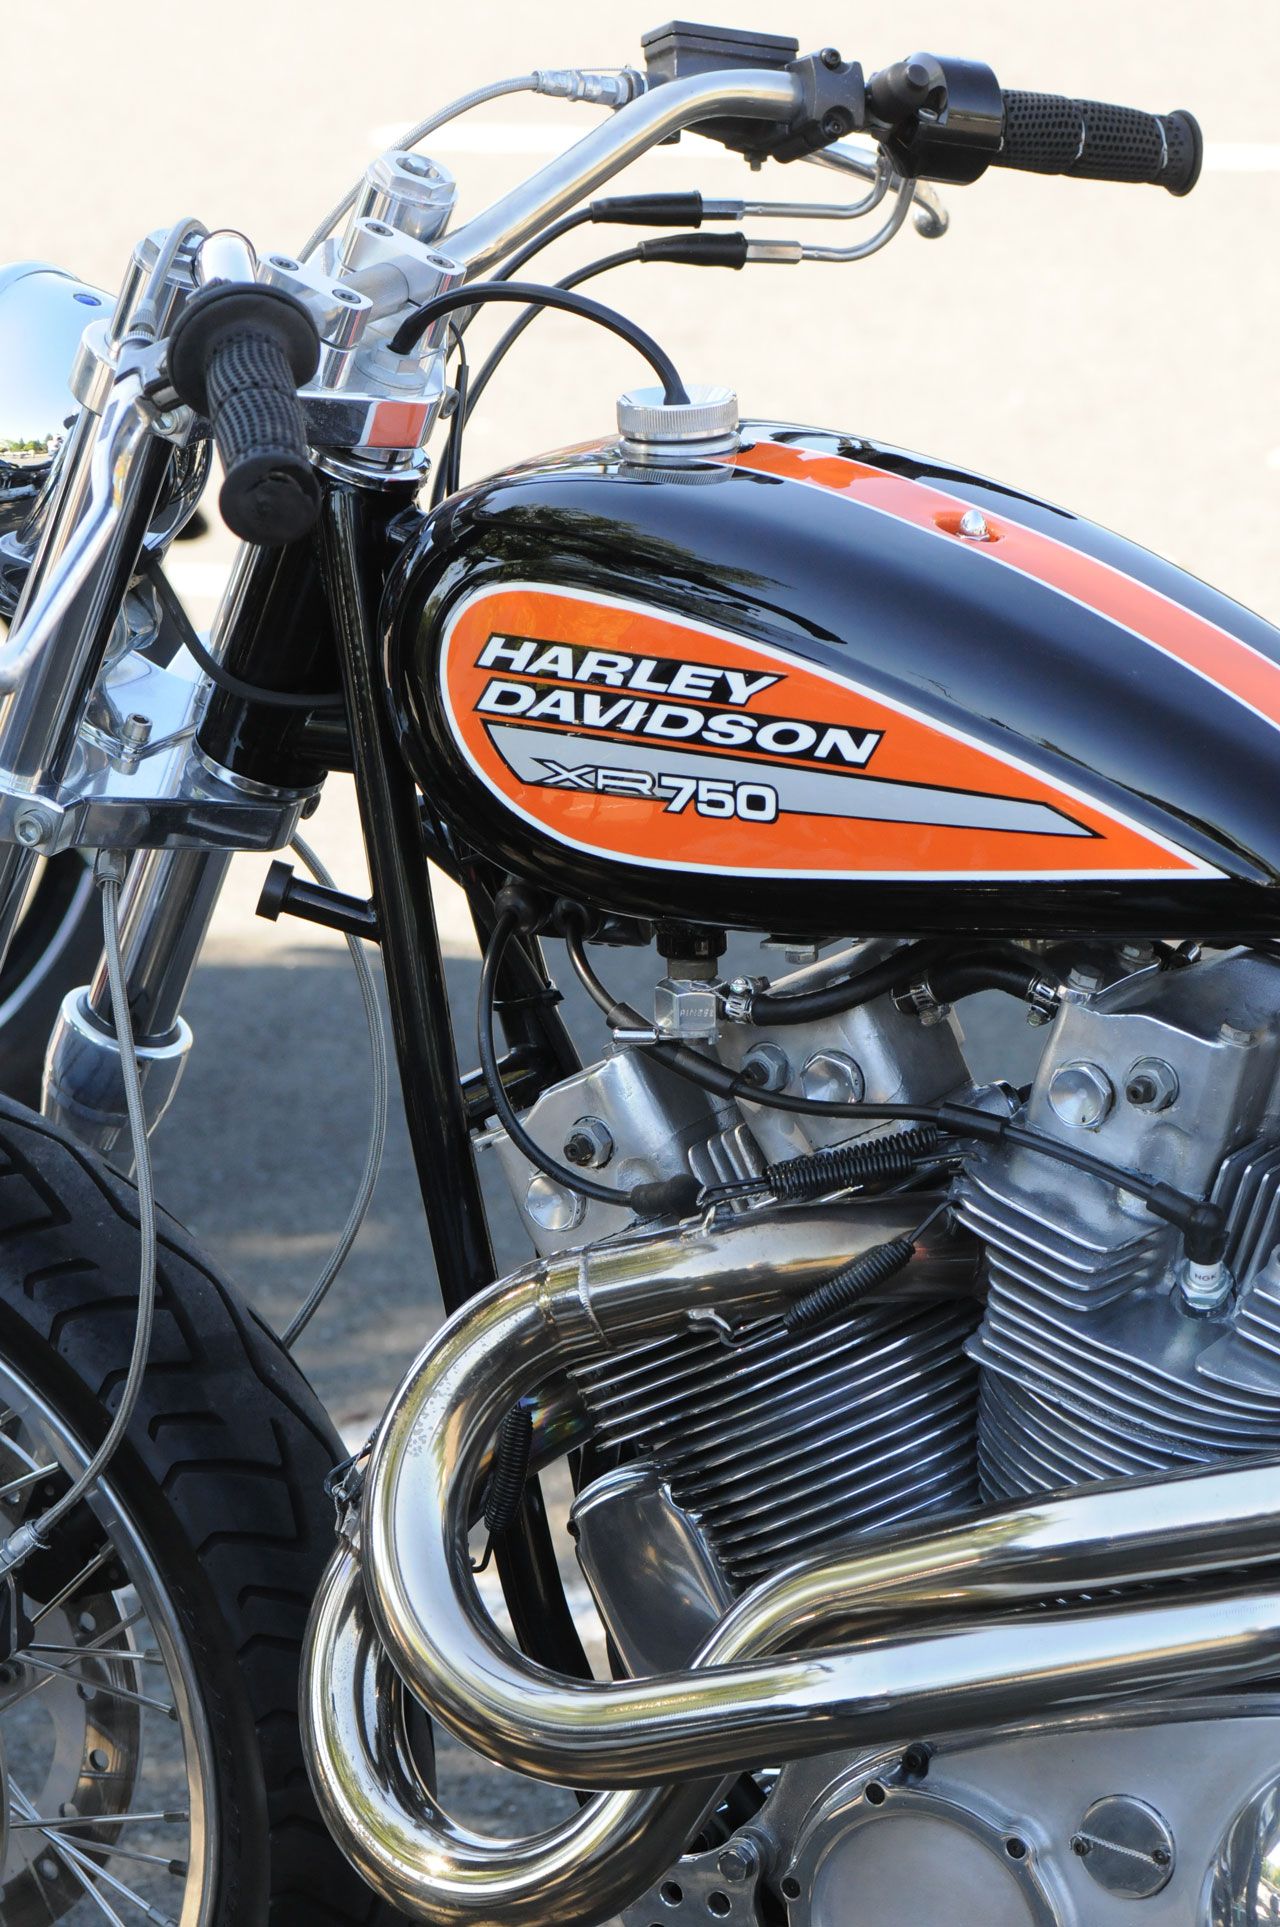
Motorcycle Show
Driving
Lighting Workshop
Magic Finger Frost
Beetle on Driveway
Ukiah Garden Club 5 May 2012
Solar Eclipse 20 May 2012 Ukiah
Locust Tree on my street
5 June 2012 Venus Transits the Sun Ukiah
Horse
17 June 2012 Car Show Santa Rosa
Century Plant
2022 Oct Zin grapes
Prints
Astronomy
The Lens
Chip Size
Focal Length
Speed
Bokeh
Resolution
Macro (Close Up)
Microscope Objective or C-mount Lens
Telephoto
Accessories
Focus
Viewfinder
Dominant Eye
Self Timer
Hyperfocal Distance
Focusing Modes
Manual Mode
Single Mode
Continuous Mode
Speed of focusing
Depth of Focus
Focus Lock
Mirror Up
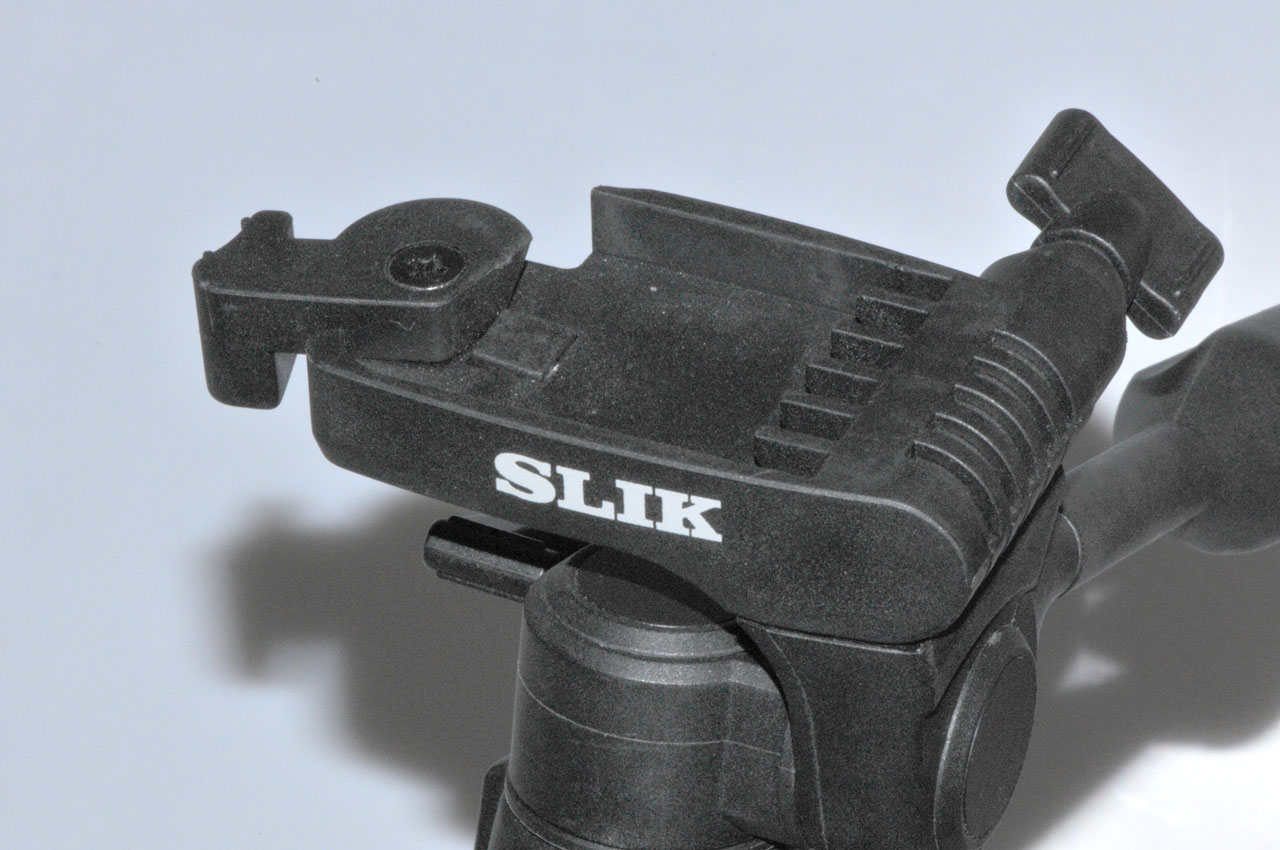
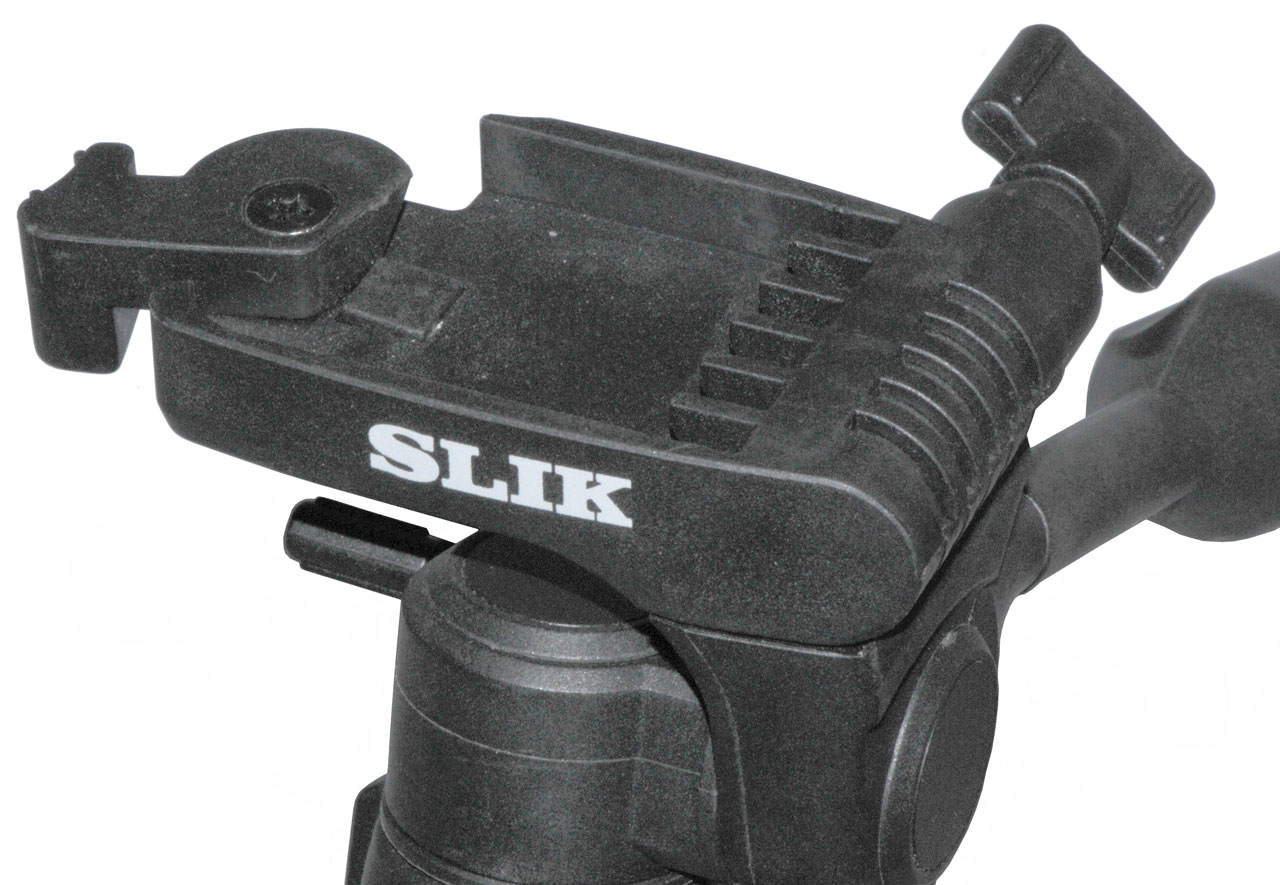
Tripod
Close Up Photography
Exposure
Stops
ASA or ISO Film Speed
Exposure Value
Metering Modes
Manual
Spot
Center Weighted
Matrix
Exposure Modes
Consumer Cameras
Auto
Professional Cameras
Manual (M)
Shutter (S)
Aperture (A)
Programmed (P)
Exposure Compensation
High Dynamic Range
Lab #02 Measure the Dynamic Range
Dark Frame Subtraction
Lab #1 f/16 Sunny Day Rule
Image Sensor
Physical Size
Number of Pixels
Size of Pixels
Release Mode
Color Balance
Flash On Camera
Red Eye
Distance
Fill Flash
Watt Seconds
Guide Number
Digital Files
Types
RAW
Getting Image Out of Camera
Possible Future Topics
Related
Web Pages
Costco Photo Processing
Nielsen & Bainbridge Frames
Ukiah Area Photo Related
Lytro
Links
Background
An email to someone who was getting started:
1. In order to see into shadows what's called High Dynamic Range (HDR) is what works. But rather than trying to do this using stacking multiple exposures, just use RAW (.NEF in the case of Nikon cameras) and set the bits per channel to the highest possible value (14 bits for the D300s camera). Note a .jpg has, by definition, 8 bits per color channel so 14 bits per color channel adds 6 full stops. When you "develop" the RAW file in Photoshop there are sliders for exposure and fill light (as well as color balance) since you are getting all the information from the imaging chip, i.e. the camera is not doing any image processing.
http://www.prc68.com/I/DigitalPhotography201StackingImages.shtml#HDR
2. One cause of shadows is a light that's looks like a point source, for example the sun. So instead you want a very "flat" light source. If using a flash gun, use a diffuser and/or aim it at the ceiling. I have a studio flash with a 51" umbrella plus a diffuser setup next to a light table.
http://www.prc68.com/I/PhotoStudioStrobeSystem.shtml#E640
3. Often the background can be a distraction from the main subject. Before I got the light table, and even now with it, I often use Photoshop to manually erase the background (See below). You will find this very difficult if there is a black shadow next to a black background, so this also is a learning experience in exposure and "developing".
http://www.prc68.com/I/PhotoStudioStrobeSystem.shtml#Light_Table
4. I've done "object removal stacking" as an experiment so know it's works. So if you know about it and there's people in some photos, you can take extra photos of the same subject and erase them later.
http://www.prc68.com/I/DigitalPhotography201StackingImages.shtml#ORS
5. A polarizing filter can eliminate some reflections.
http://www.prc68.com/I/Nikon.shtml#Filter62mm
6. There are a couple of things you can do to reduce blur. If hand holding the camera use a short time delay to release the shutter. I use 3 seconds. That way there is no camera shake caused by the hand movement of pressing the shutter. If you have a SLR and are doing tripod supported close up photography use the mirror lock to prevent "mirror flop".
Art
2X4
I choose the photography classes at De Anza Jr. college that were part of the Communications branch rather than the classes at San Jose State that were part of the science branch. The instructor (H.W. "Wick" Wichers) taught philosophy along with photography which I liked. He told the story:So in photography you've got to put a 2x4 in the photo to get the attention of the viewer. Without the 2x4 it's just a snap shot.
Framing
This has to do with panning the camera up-down-left-right zooming in-out and/or rotating the camera. There are different ideas on how to do this. For example most portraits in the U.S. are head shots where all of the head is in the frame. In Europe it's common that the shot it tighter cutting off part of the head.Composition
Includes framing and also includes changing your point of view, i.e. moving to somewhere else.A common mistake when taking a portrait is having something in the background that's distracting such as a telephone pole coming out of the subjects head. Taking a few steps to the left or right will eliminate the problem.
Subject Background Separation
Focus
By choosing the lens and f/stop it's possible to have the subject in focus and the background out of focus. Typically you want the lens wide open (Exposure mode A) this gives the smallest depth of field. Picking a lens with good bokeh is important for many subjects.Lighting
The subject needs to be properly lit but the background can be made to be either overexposed (high key photography) or underexposed (low key photography). One of the benefits of a photography studio is the ability to independently light the subject and background. This can be accomplished in the field by using flash lighting for the subject or (more difficult) the background.Composition
By simply moving the camera so that the background is either lighter or darker or further away (more out of focus) the subject background separation can be controlled.Ken Rockwell
Ken Rockwell starts off with the idea of FART before taking a photograph.F: You get a Feeling that this is something worthwhile as a subject for a photograph
A: Ask yourself why this would make a good photograph
R: Refine the image to bring out the quality that's attracted you
T: Take the photo
Then goes into what makes a great photograph,
then Composition: Sex and Balance, You can never get too much.
Portraits
Product Photography
Background Erasing
It's possible to take product photos without a studio. The key is in erasing the background. In order for the erasing to work the product needs to be illuminated in such a way that there's not part of the product that is underexposed and that is adjacent to undexposed background since in that area you can not seperate the product from the background.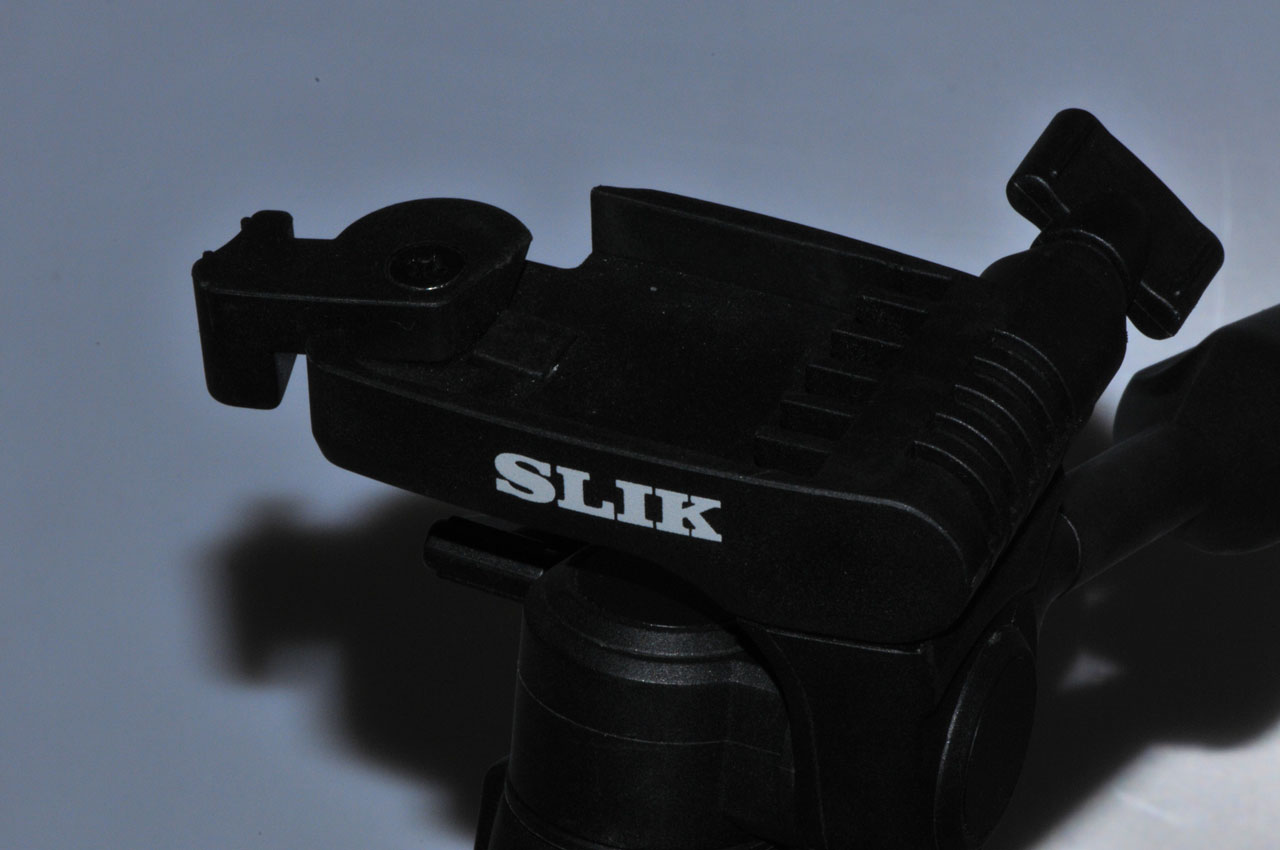 |
 |
 |
| As photographed.
Note a small f/stop is needed to get depth of field and the existing monolights do not provide enough light so the image is underexposed. |
After correcting the
levels in Photoshop. |
After erasing the
background manually. |
In the Field
|
Left
 |
|
 |
 |
 |
|
 |
Thoughts after the show:
- Studying a single subject (motorcycle) in great detail
may result in better photographs than trying to cover the
entire show.
- Using Active-D Lighting (High Dynamic Range HDR) may have improved the images.
- Using a tripod and Mirror Up might have improved the image sharpness.
- Using stitching might have allowed a full image, but it's doubtful that they would be at the same perspective.
- Asking the owner to move the motorcycle to separate it from the other nearby bikes would have allowed better shots.
- It may be that some of the same shots could have been made by being, for example, more than twice as close and taking a number of overlapping shots then stitching them together. The advantage in doing this would be to allow a poster-board print that was 20" x 30" that would still have very fine detail. The 11" x 14" poster prints had good detail, but might not if blown up much larger.
- Using A exposure mode and setting the f/stop to the sweet range of F/8 to f/12 for the 105mm lens might have resulted in sharper images.
Driving

A Buzzard (vulture) airing out his blood sitting on a telephone pole.
7 Jan 2012 taken with a cell phone and this is a tiny fraction of the total image.
Maybe a 6 foot wing span?
Lighting Workshop
Black back drop and various strobe lights, hired model.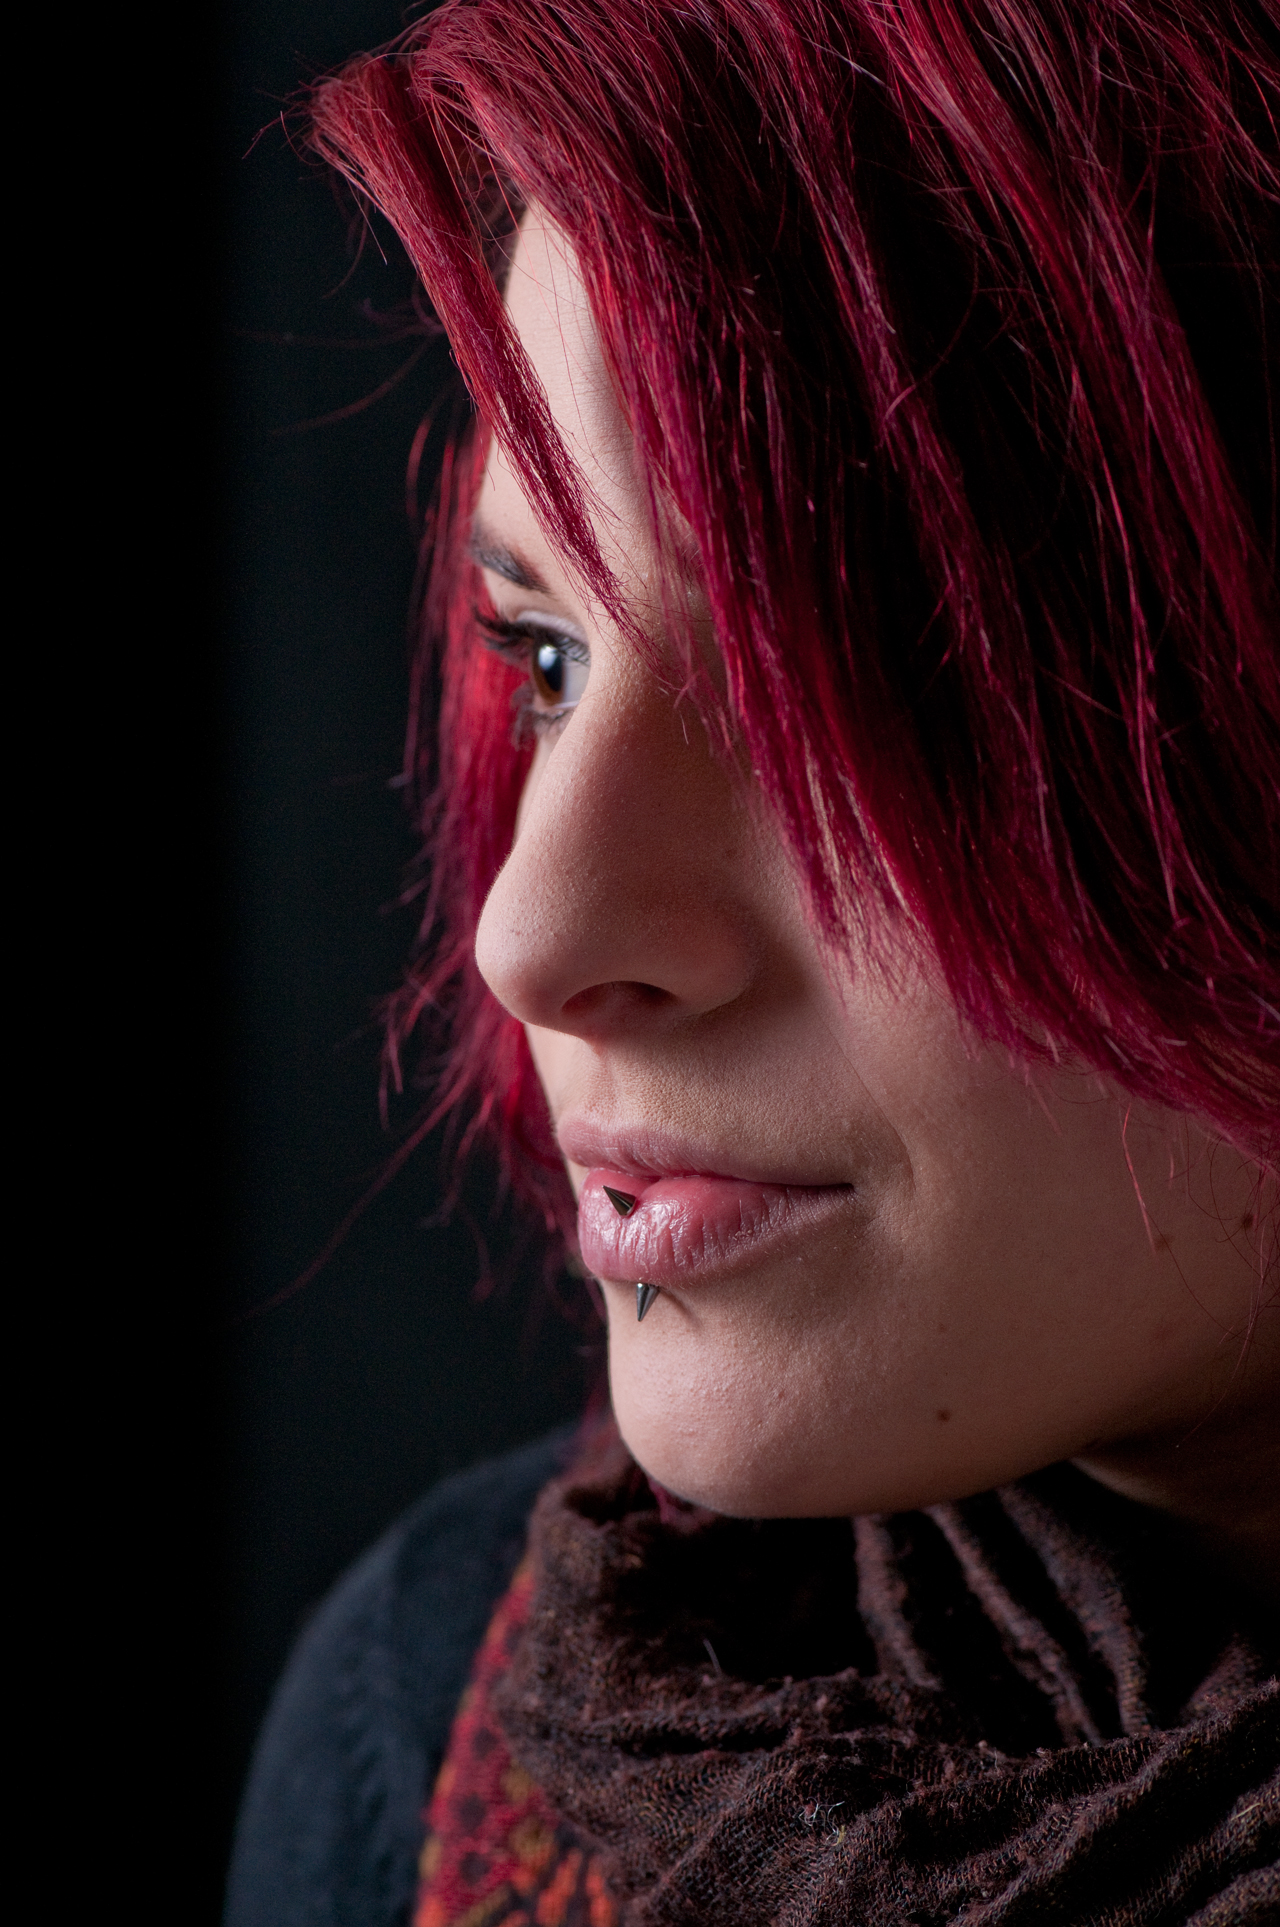
Magic Finger Frost
On mailbox tab 17 Jan 2012 about 6:45 am.
Beetle on Driveway
While photographing a GPS receiver sitting on the driveway this beetle came to have a look. Hard to take a close up of a moving animal.Notice the red at the base of the antennas. Click on photo to see larger version. If you know the name let me know it.
 |
 |
|
Ukiah Garden Club 5 May 2012
The first group of photos was taken outside because the
flowers were inside with a mix of window and tungsten
light. What's missing from the web page is the
fragrance.
Fig UGC1 |
Fig UGC2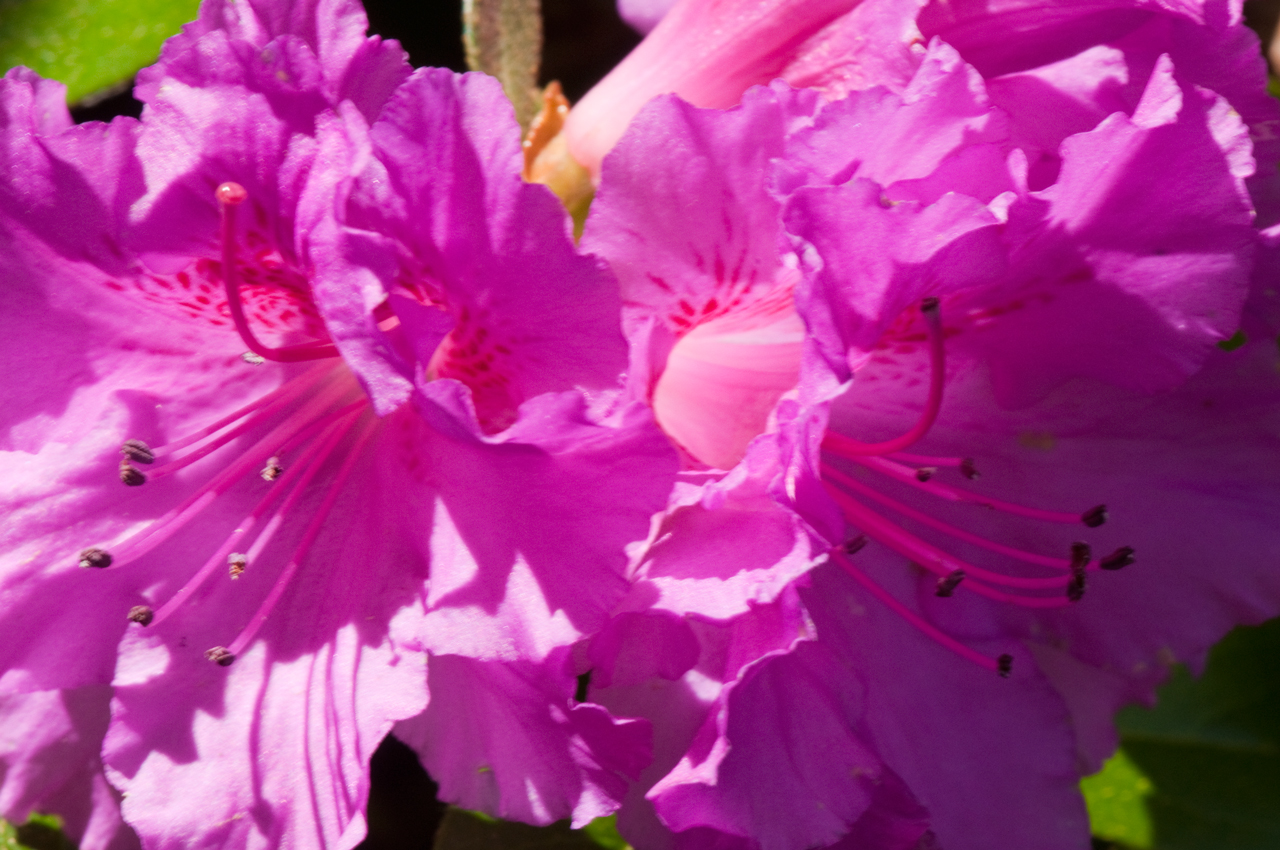 |
Fig UGC3 |
Fig UGC4 |
Fig UGC5 |
After going home to get the studio flash and a
translucent background the remaining shots were taken
indoors bouncing the flash off the ceiling.
Fig UGC6 |
Fig UGC7 |
Fig UGC8 |
Fig UGC9 |
Fig UGC10 |
Fig UGC11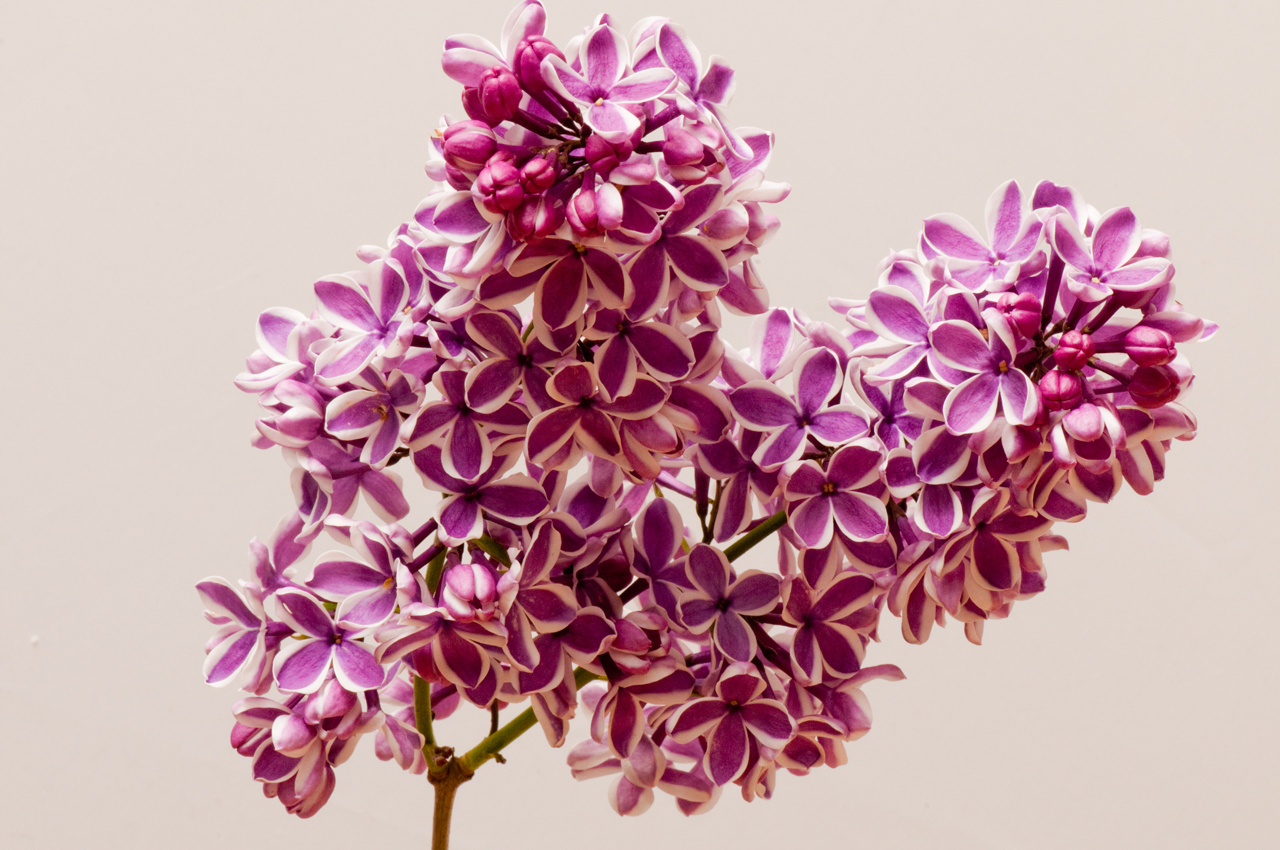 |
Fig UGC12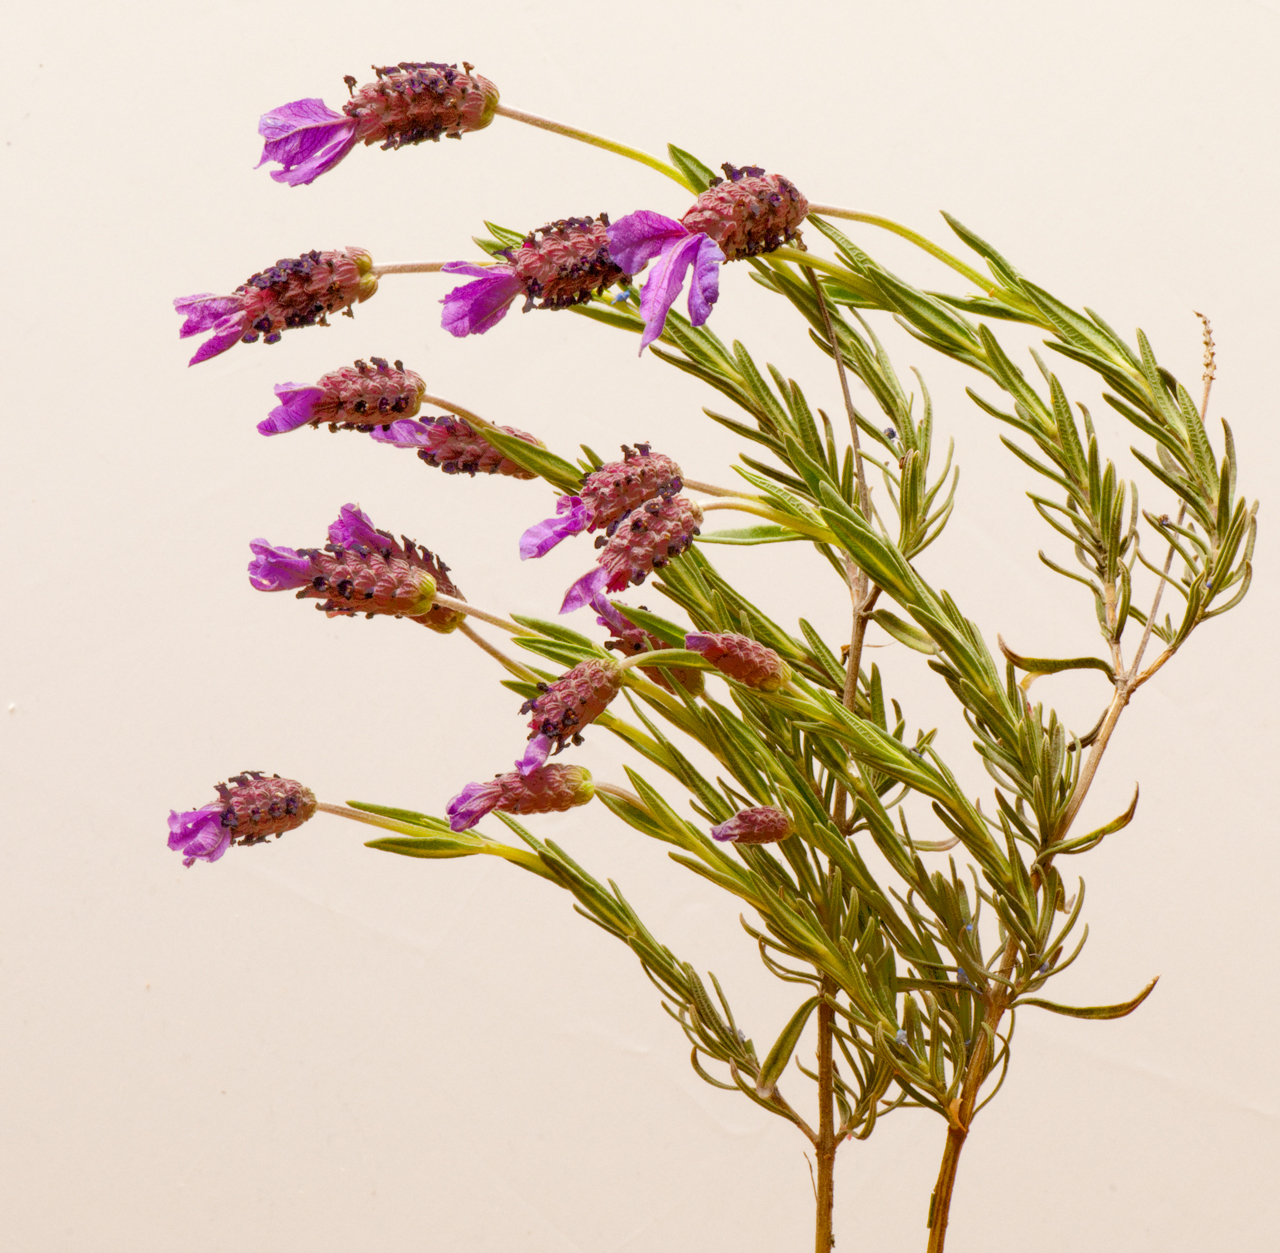 |
Fig UGC13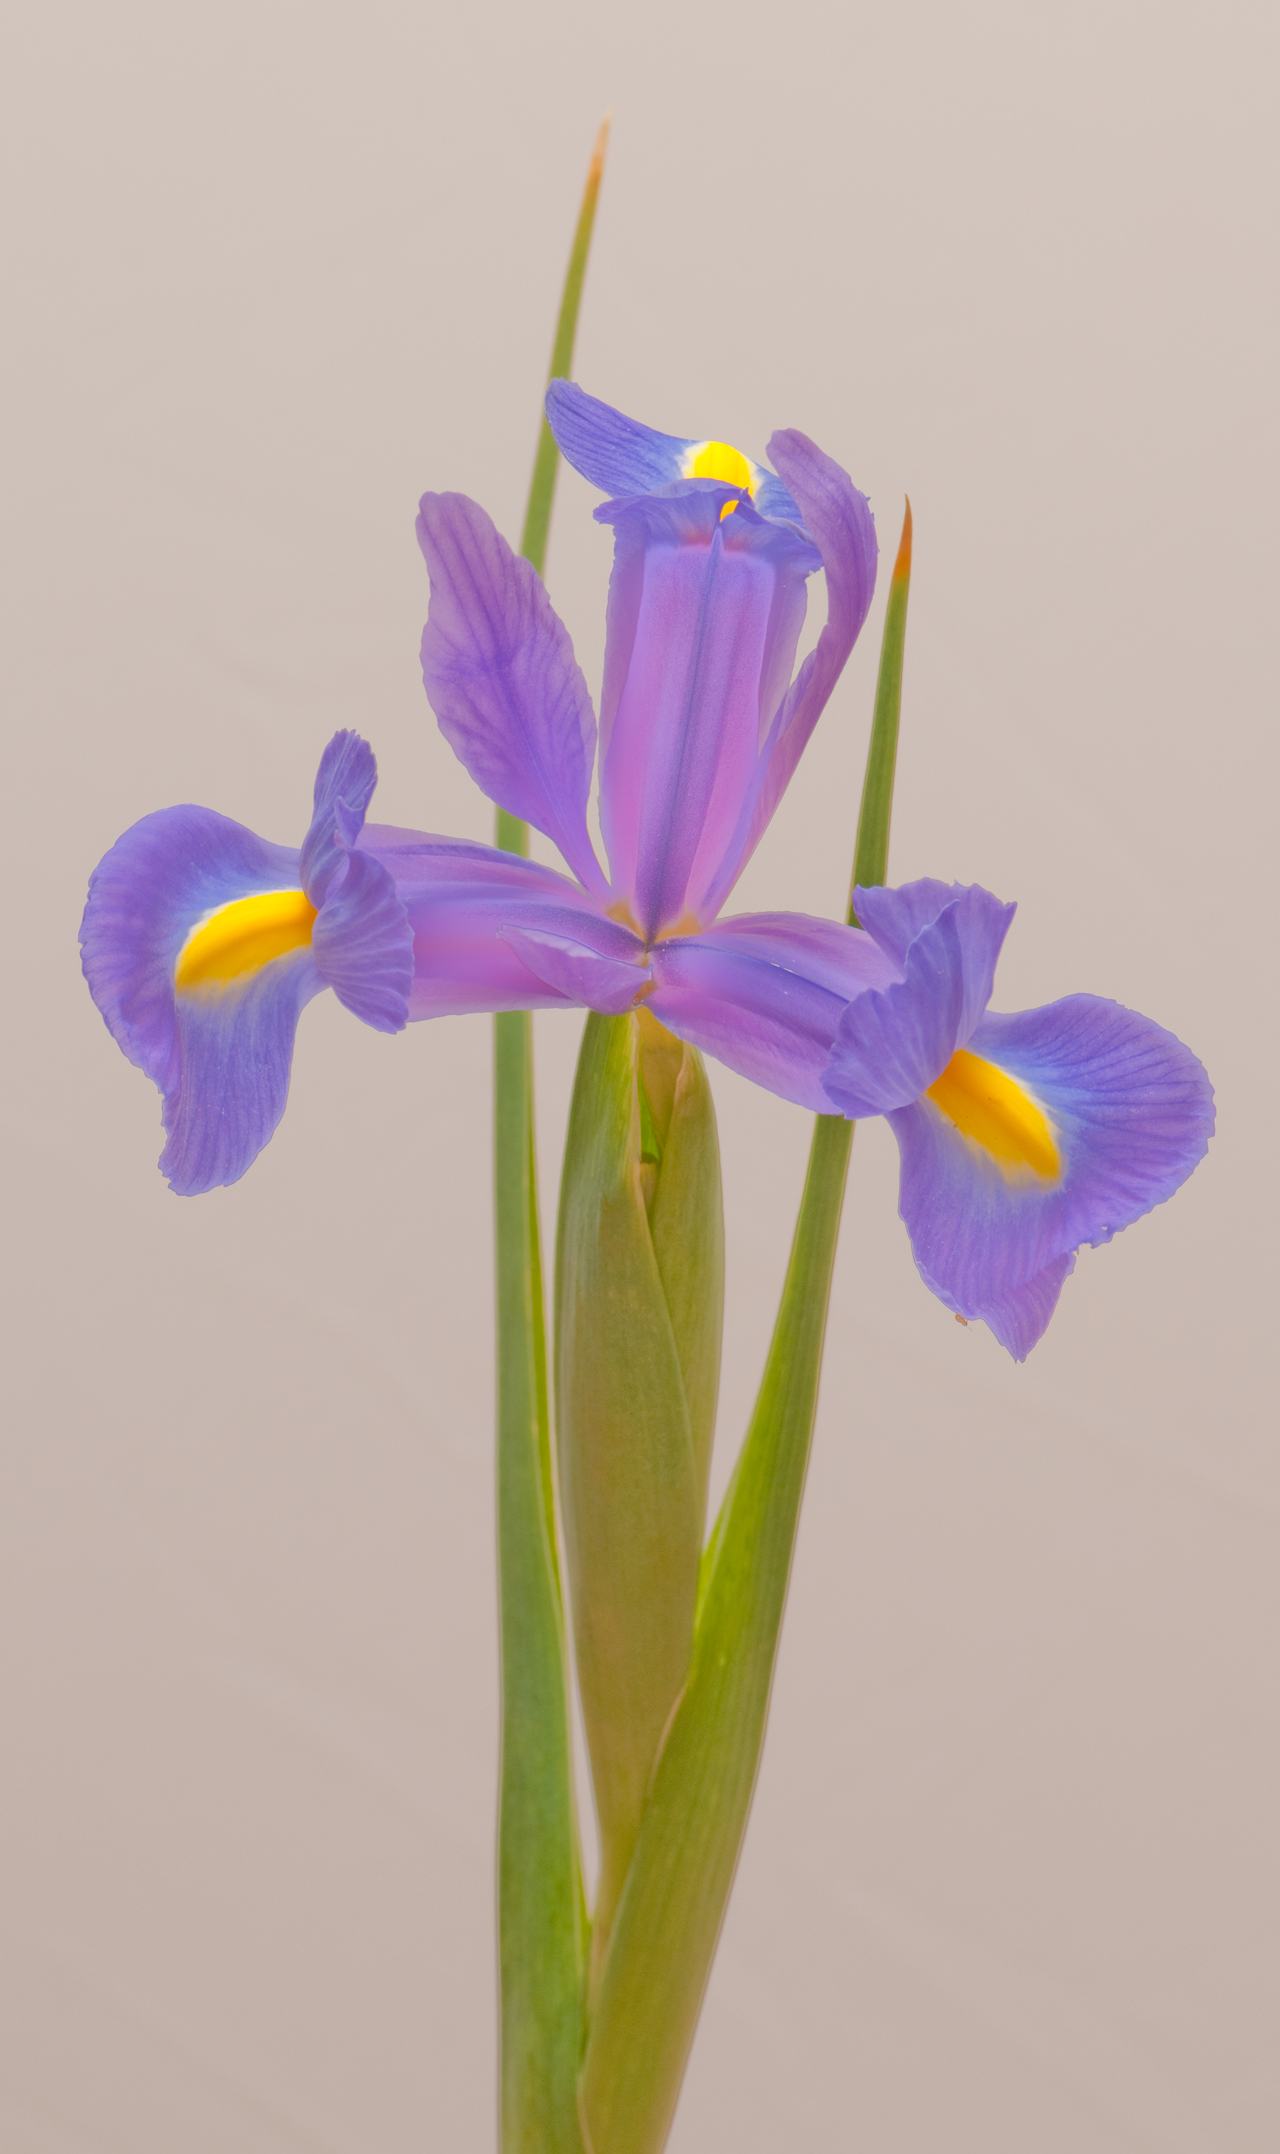 |
Fig UGC14 |
Solar Eclipse 20 May 2012 Ukiah
Taken from Paul's back patio near Ukiah using a solar
filter that fits my astronomical telescope.
16:32:06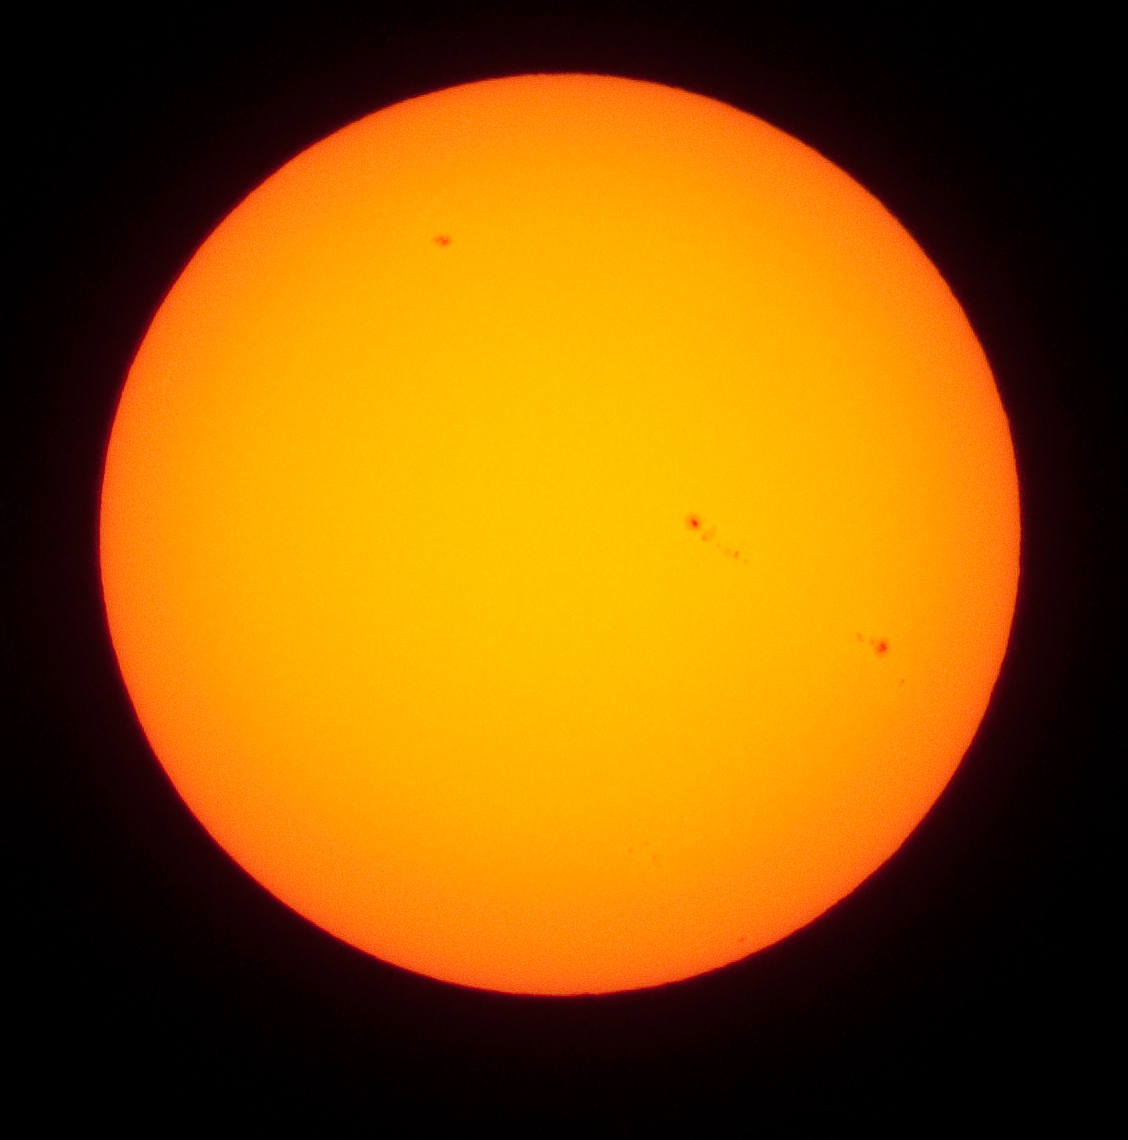 |
17:21:44 |
17:22:49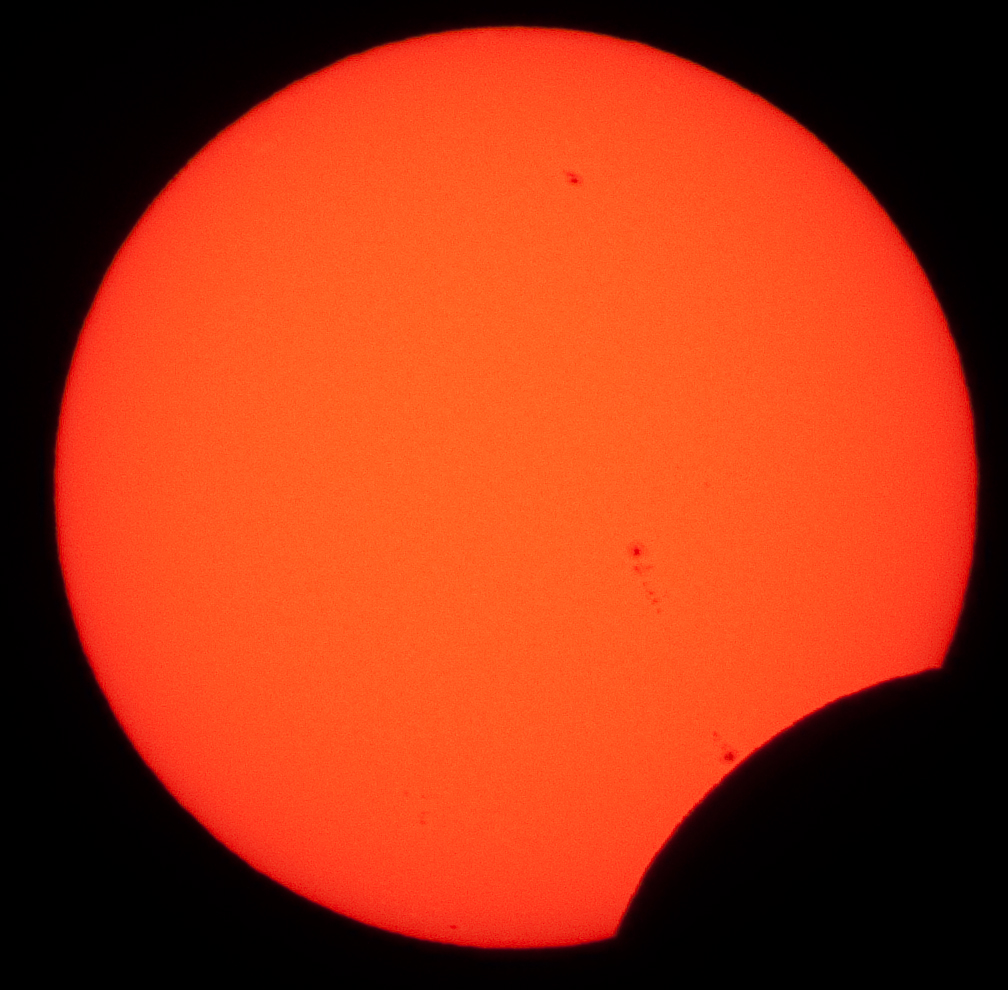 |
18:06:52 |
18:23:46 |
18:26:47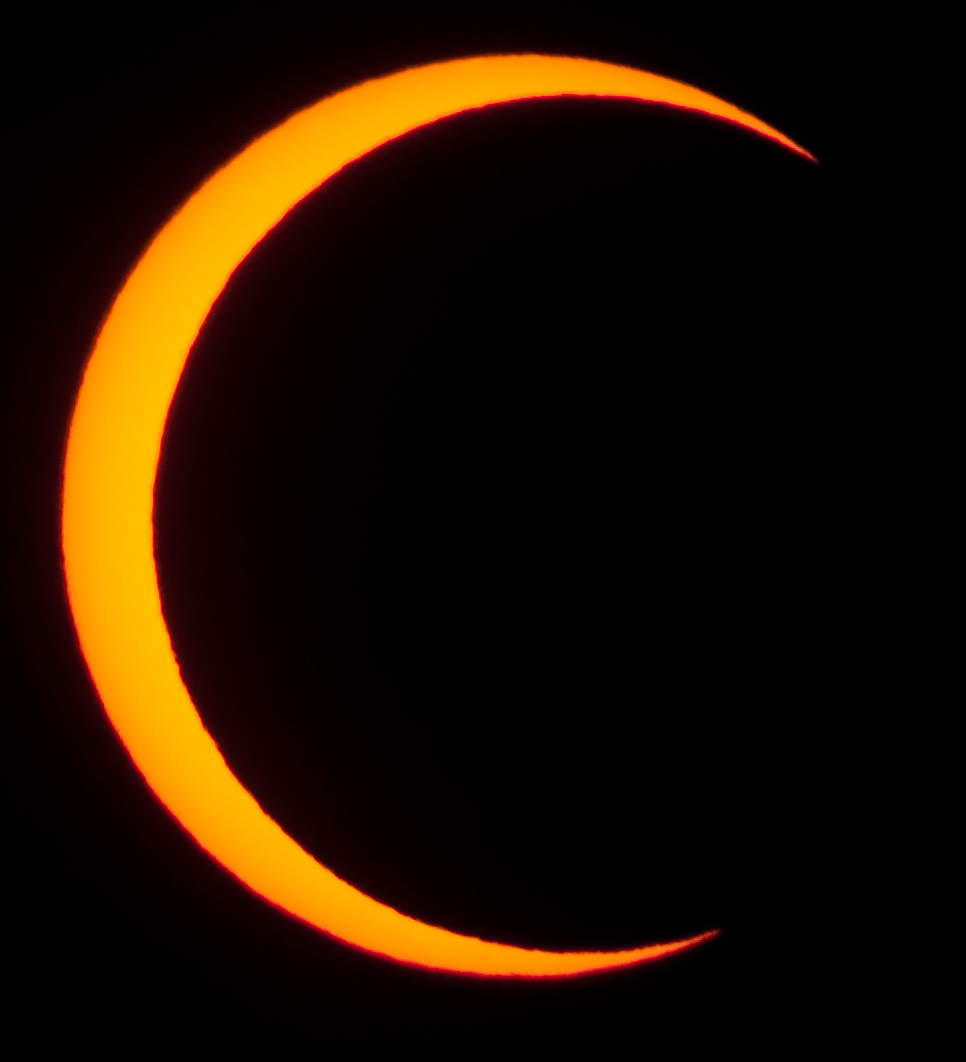 |
18:30:59 |
18:34:11 |
18:53:47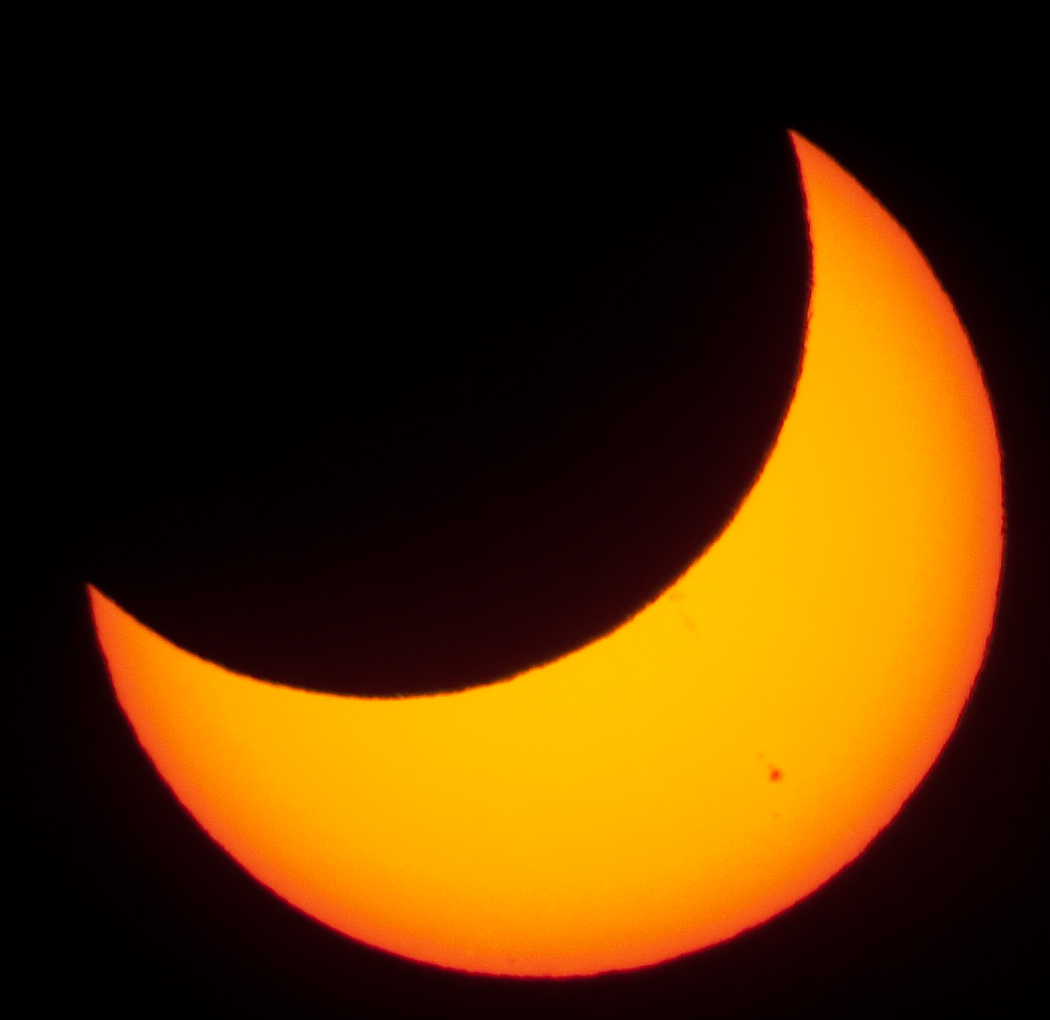 |
19:10:18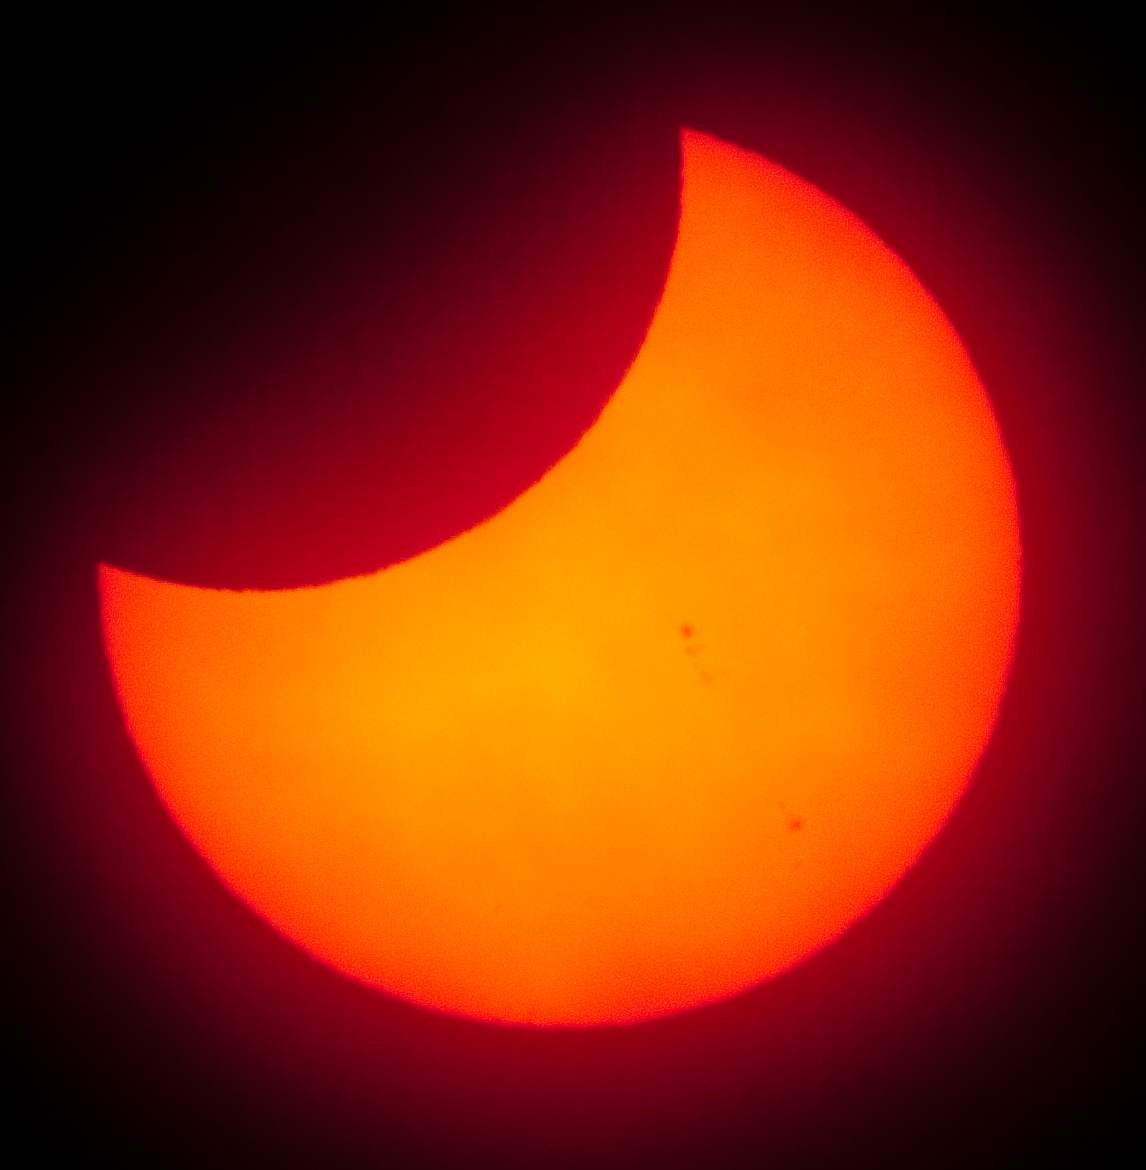 |
19:20:12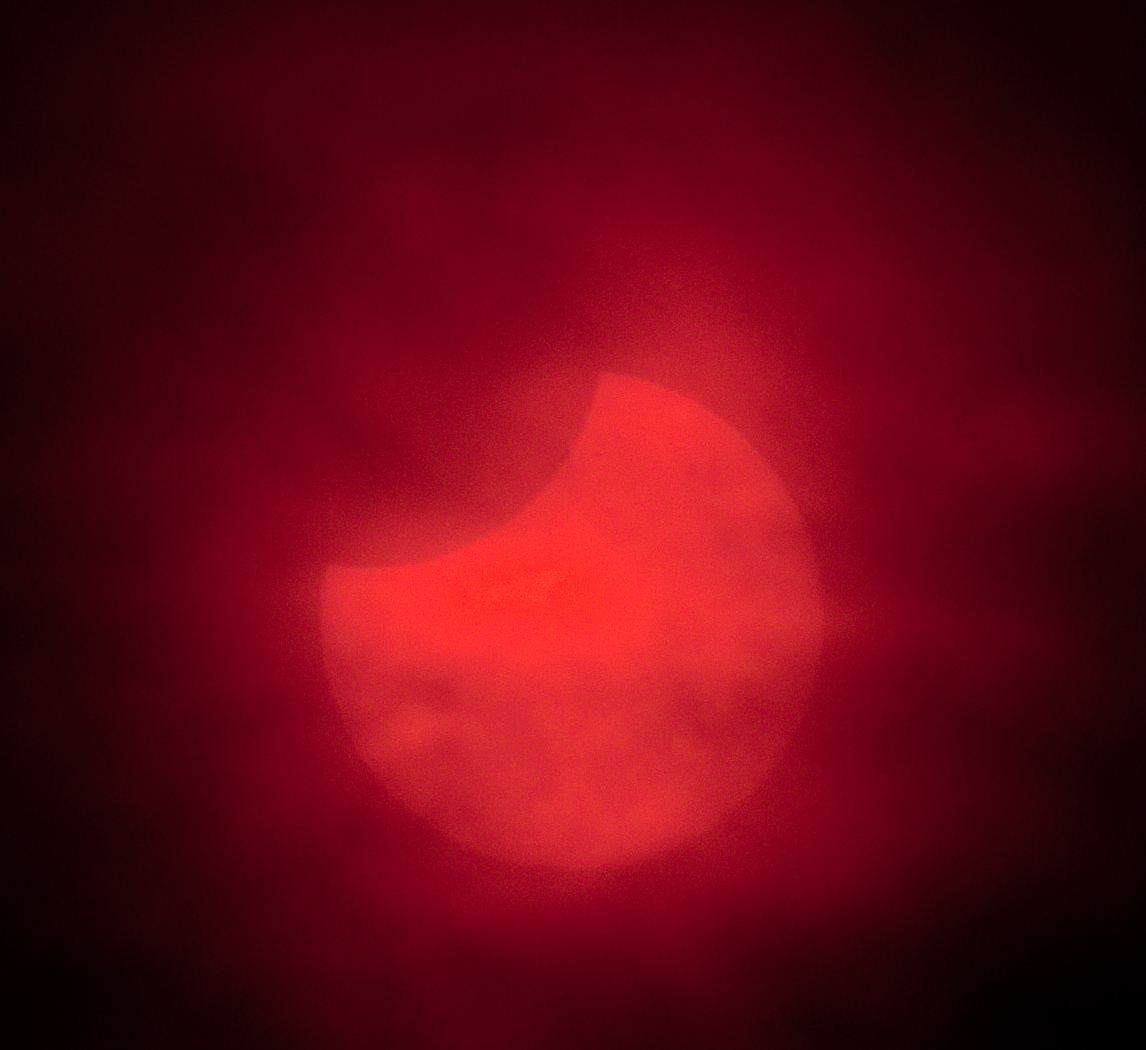 |
19:41:03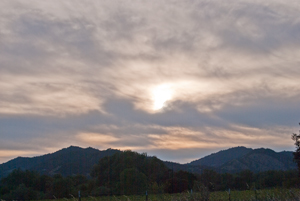 Cloudy at end |
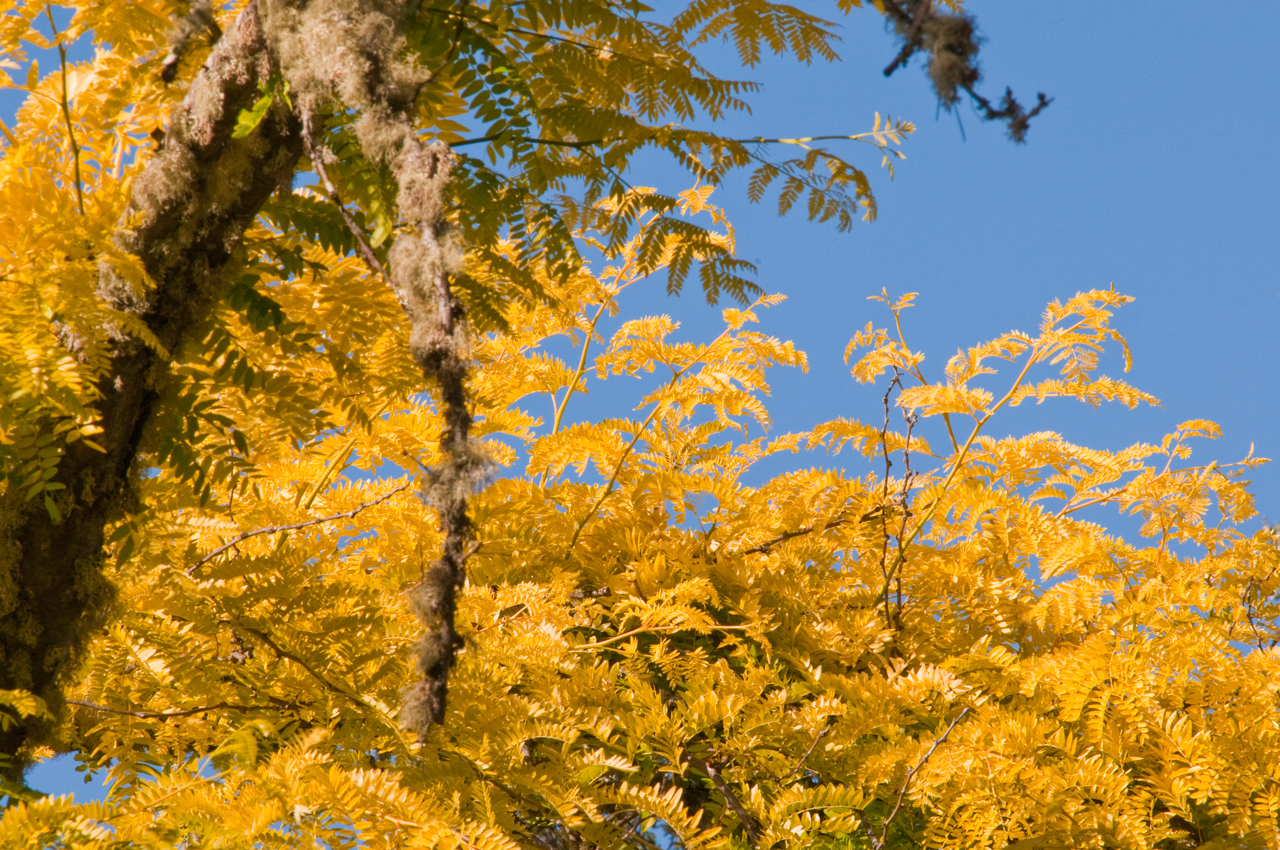
Locust Tree on my street
Seen while driving home in the afternoon. These are Honey
Locust trees (Wiki).
 |
 |
 |
5 June 2012 Venus Transits the Sun Ukiah
Photos taken with Nikon D300s with 300mm F2.8 Lens in the
parking lot of Motorsports of Ukiah on N. State St. with
astronomical solar filter.
| 15:17:50 Pacific Time
after first contact but before second contact (22:17:50 UTC) 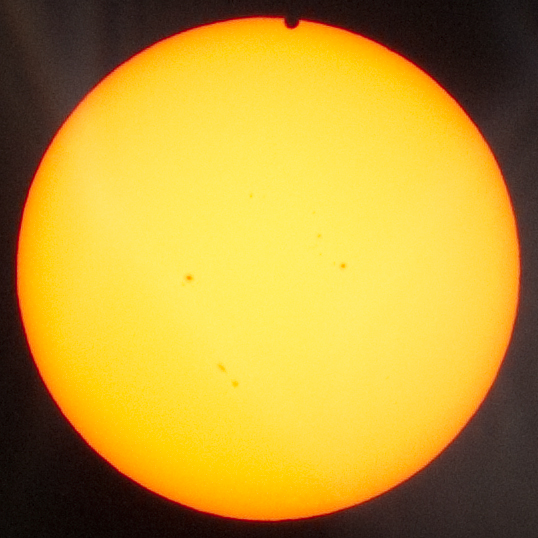 |
15:42:29 after second
contact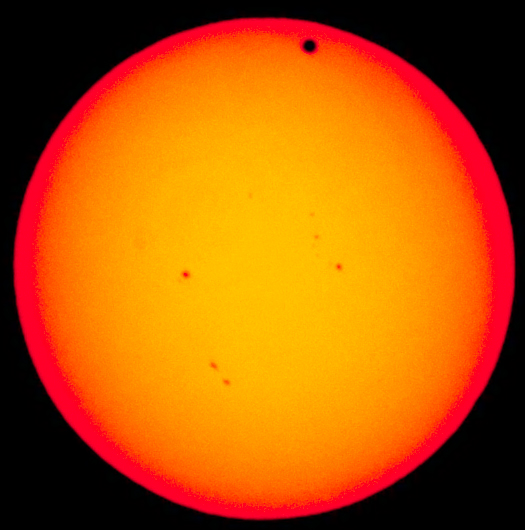 |
15:58:54 |
16:58:31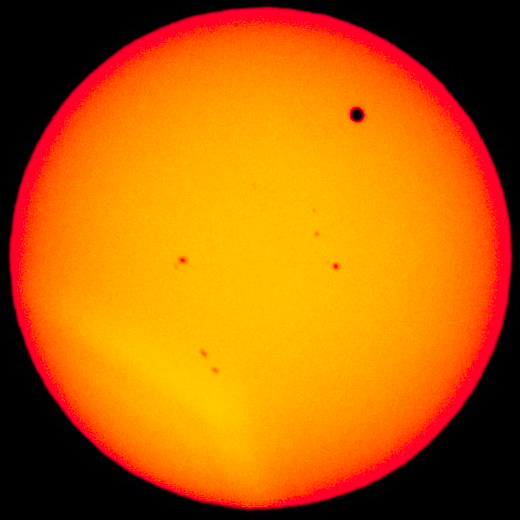 |
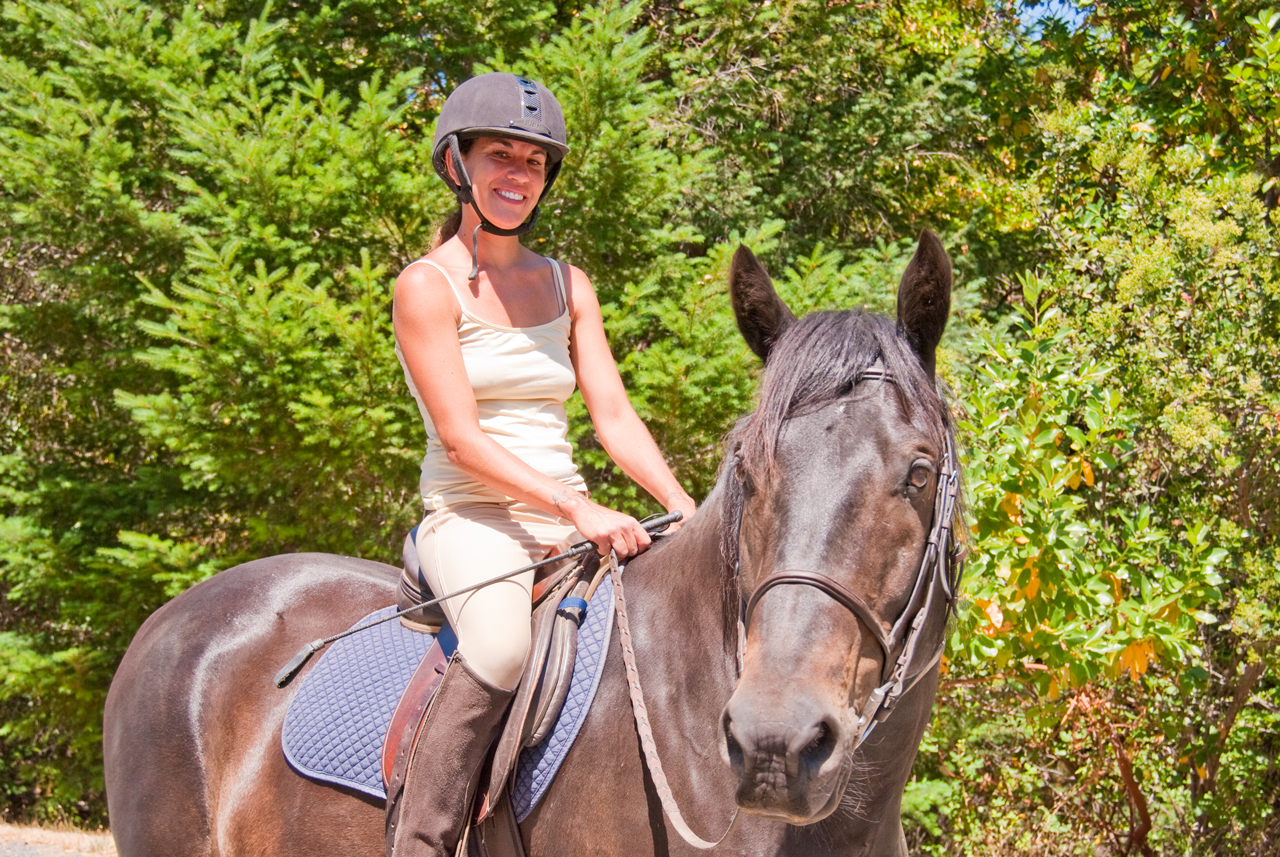
Horse
Neighbor Erin riding Oak in front of my house 13 July
2012.
It seems there's a horse trail at the end of the street
and so it's common to see people on horses here.
17 June 2012 Car Show Santa Rosa
Dual 4-barrel carbs
on super charged Chrysler Hemi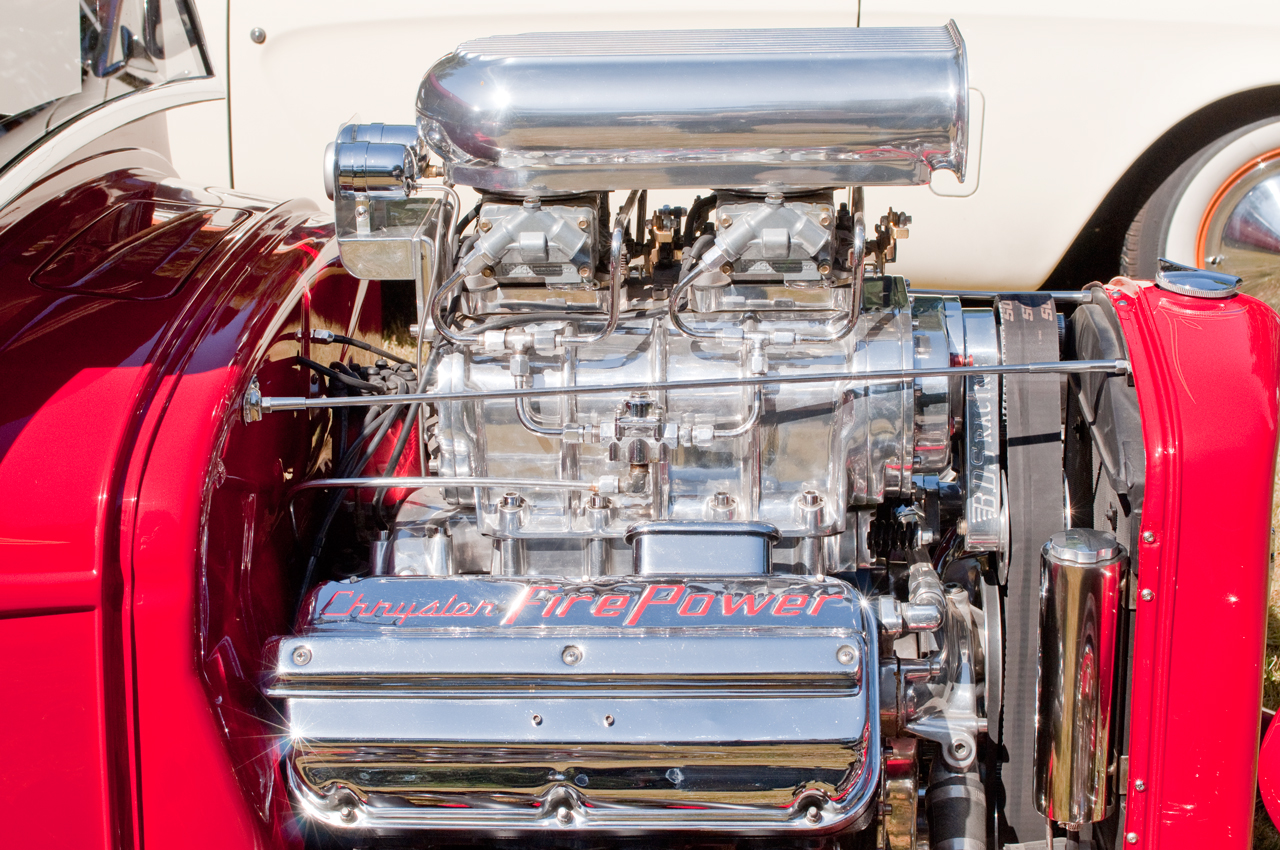 |
Three 2-barrel carbs
on super charged flat head Ford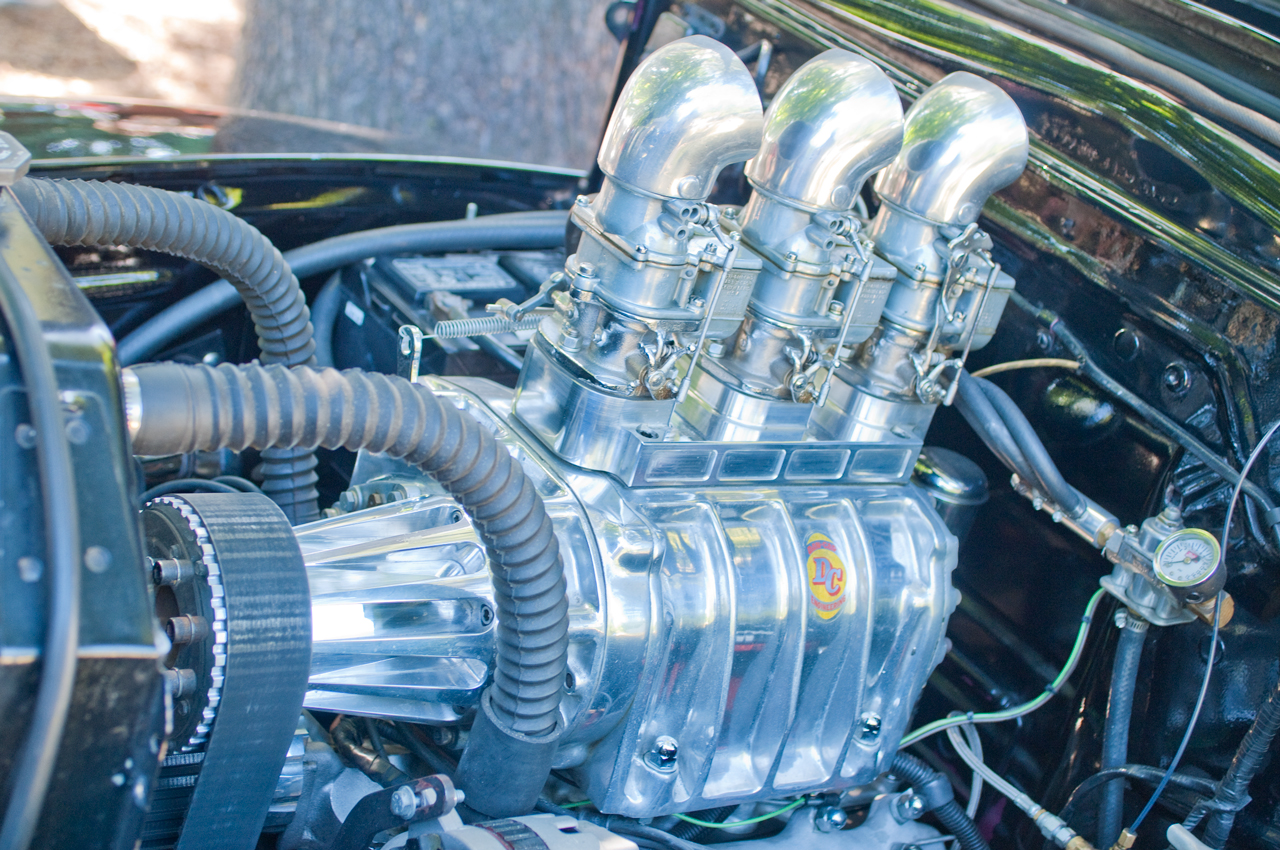 |
Dual 4-barrel carbs
on Buick (?)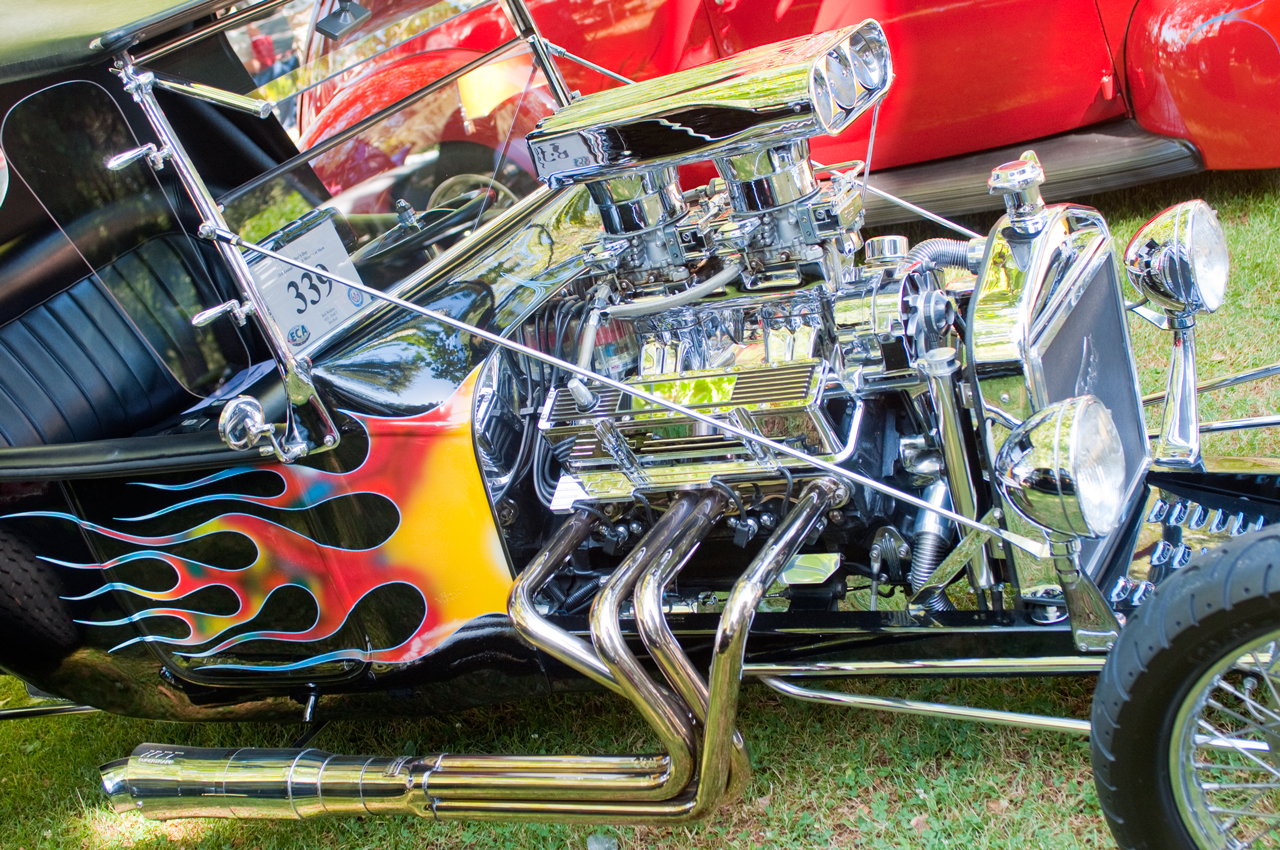 |
Dual 4-barrel carbs
on Buick (?)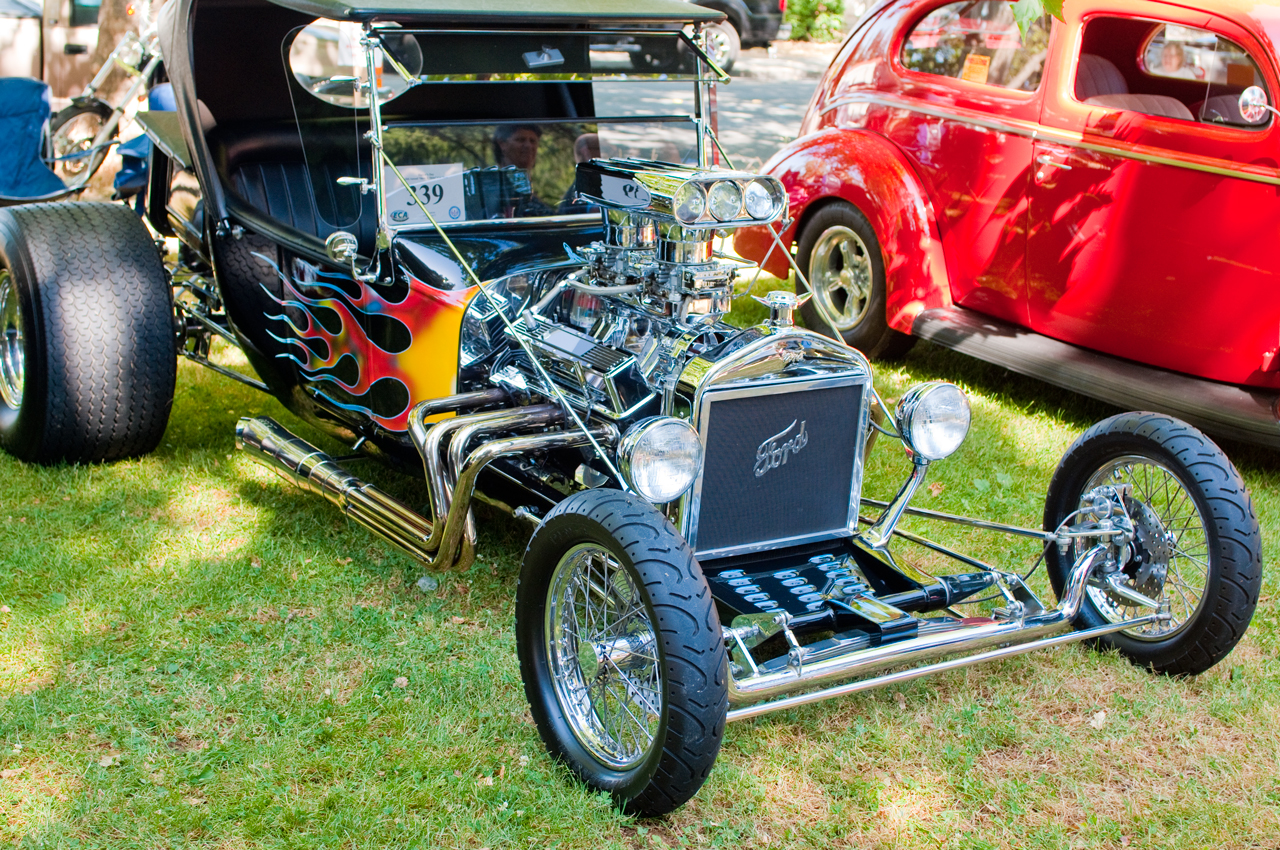 |
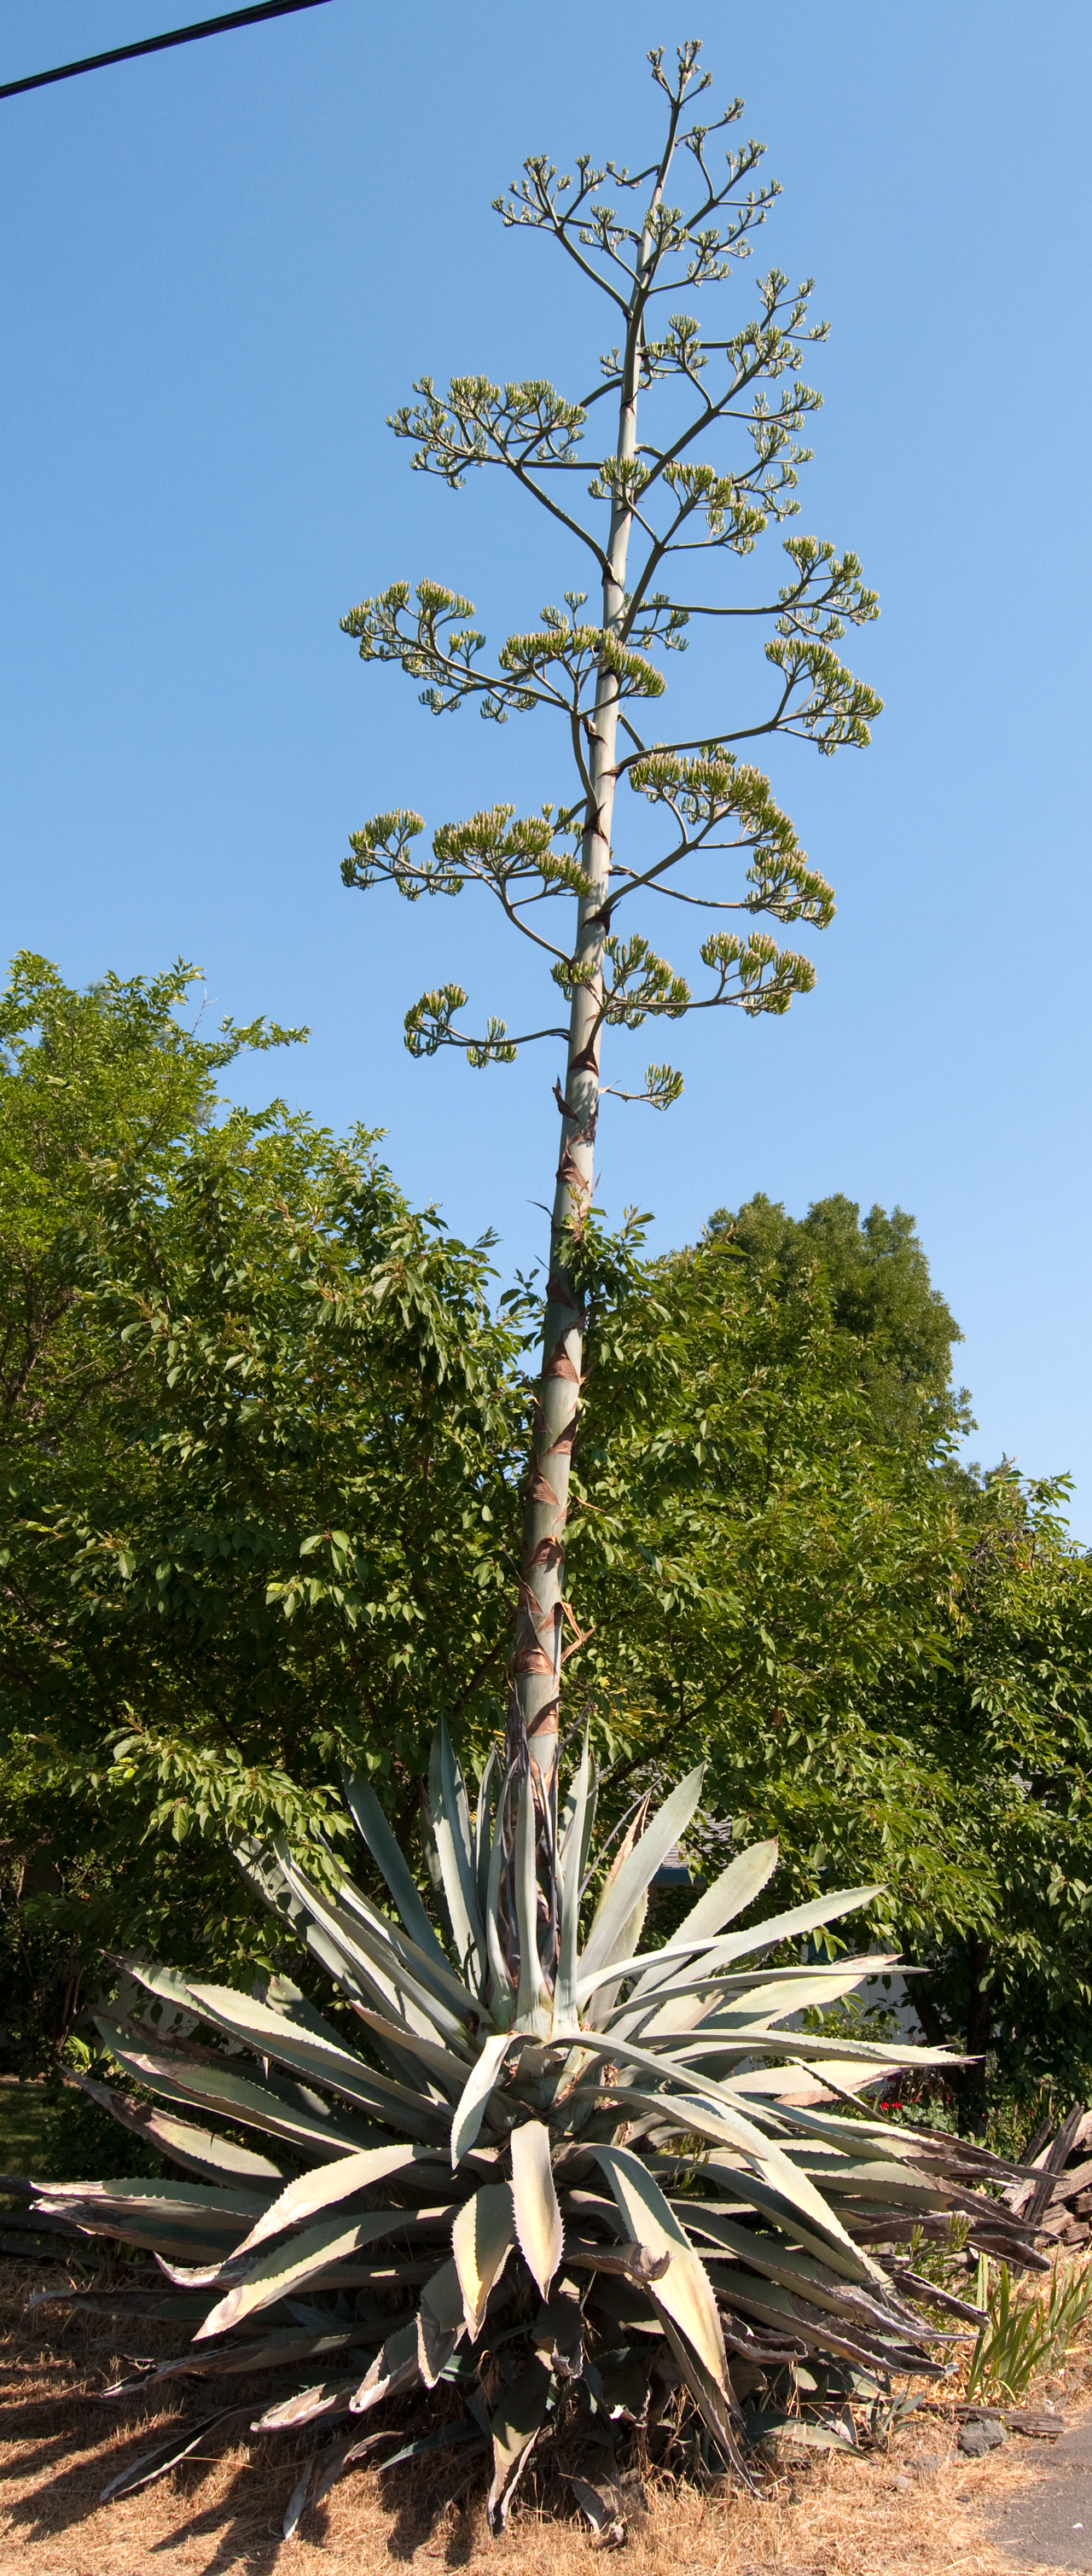
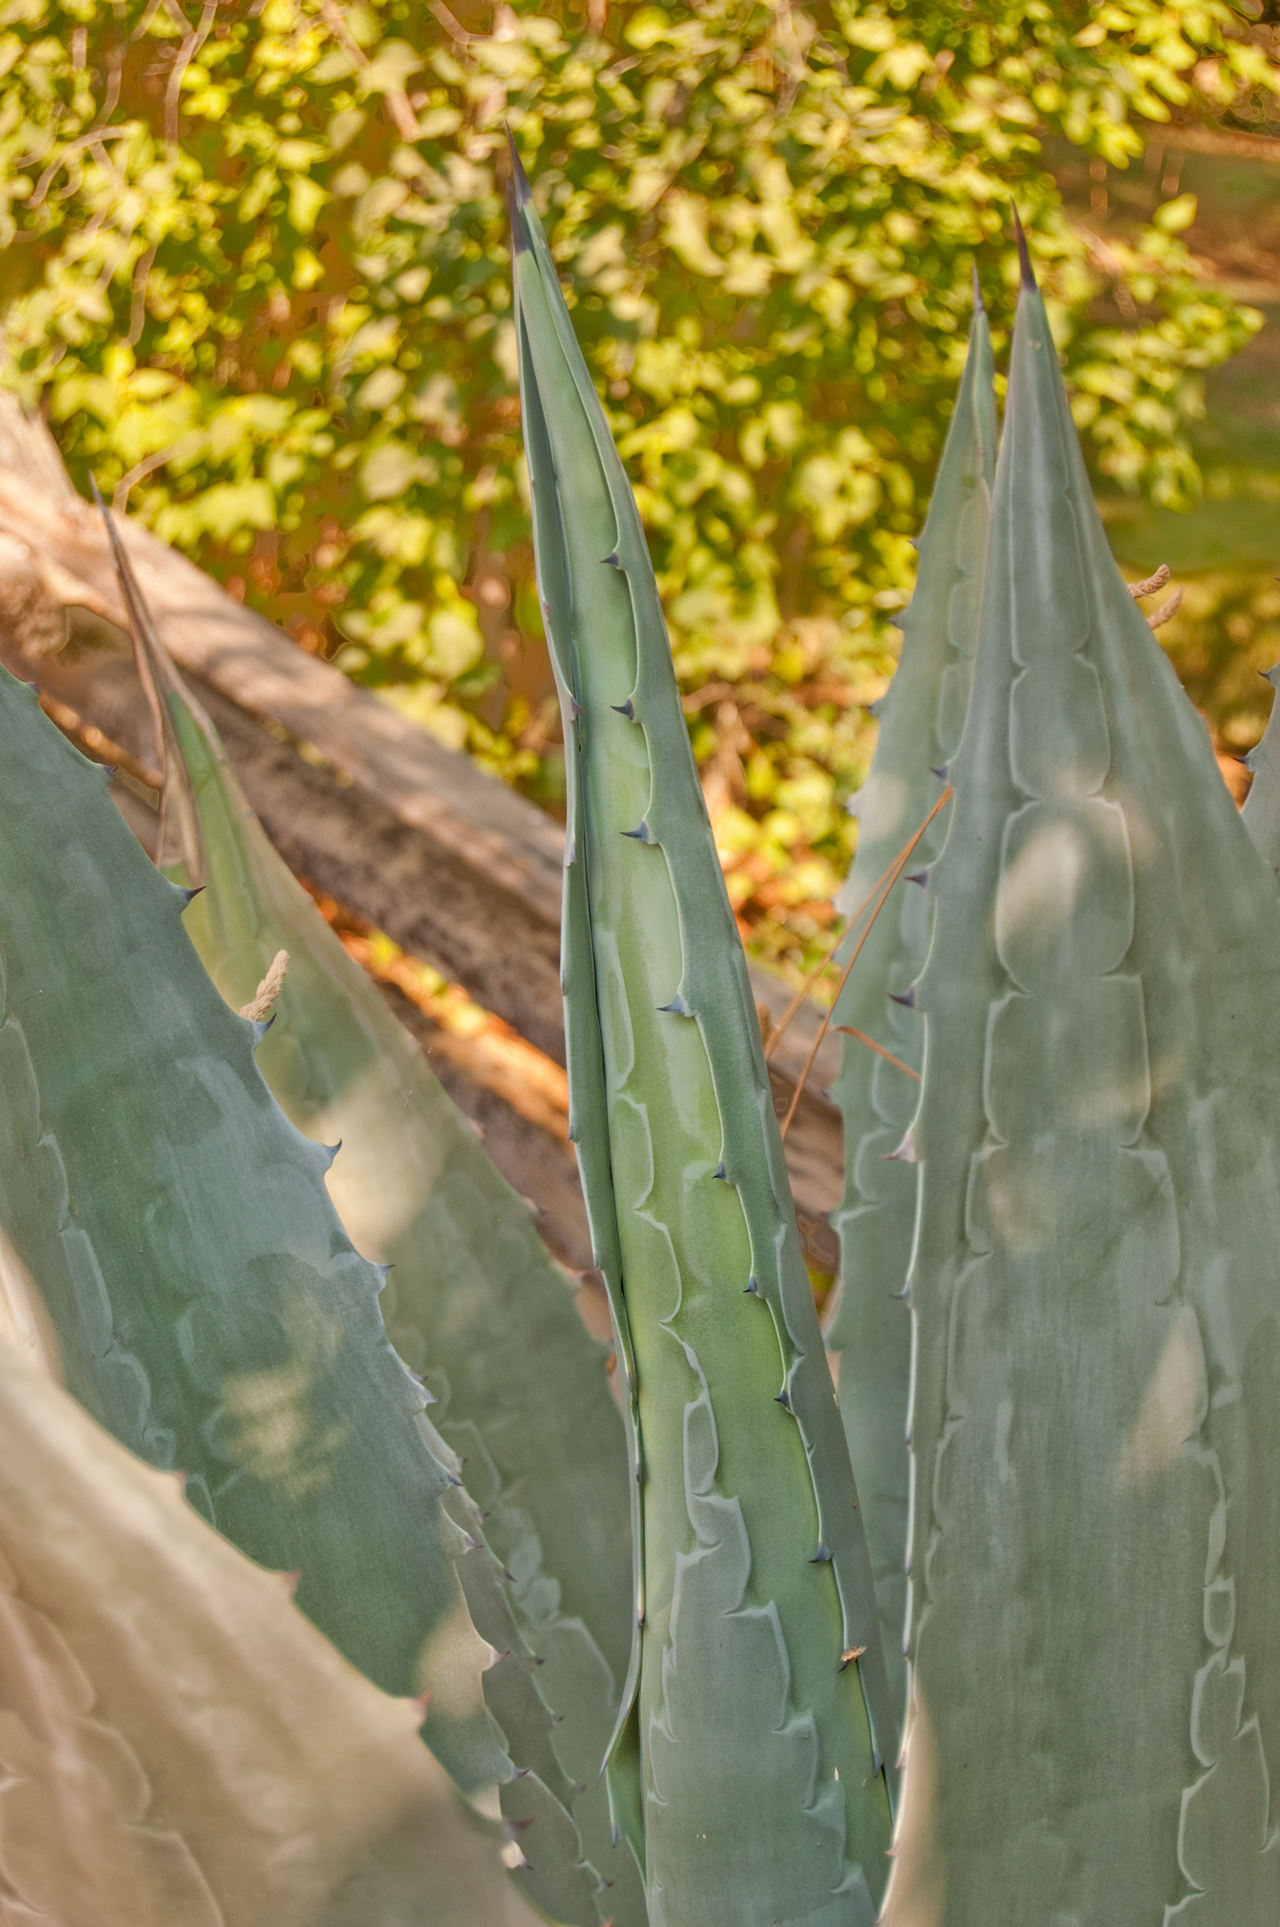
Century Plant
Wiki:Agave
americana or Agave
Flowers once after about 25 to 30 years after
planted.
The Agave tequilana (Wiki)
is grown in Mexico and is the source of Tequila
(Wiki).
Taken 12 July 2012 in Redwood Valley.
 |
 |
 |
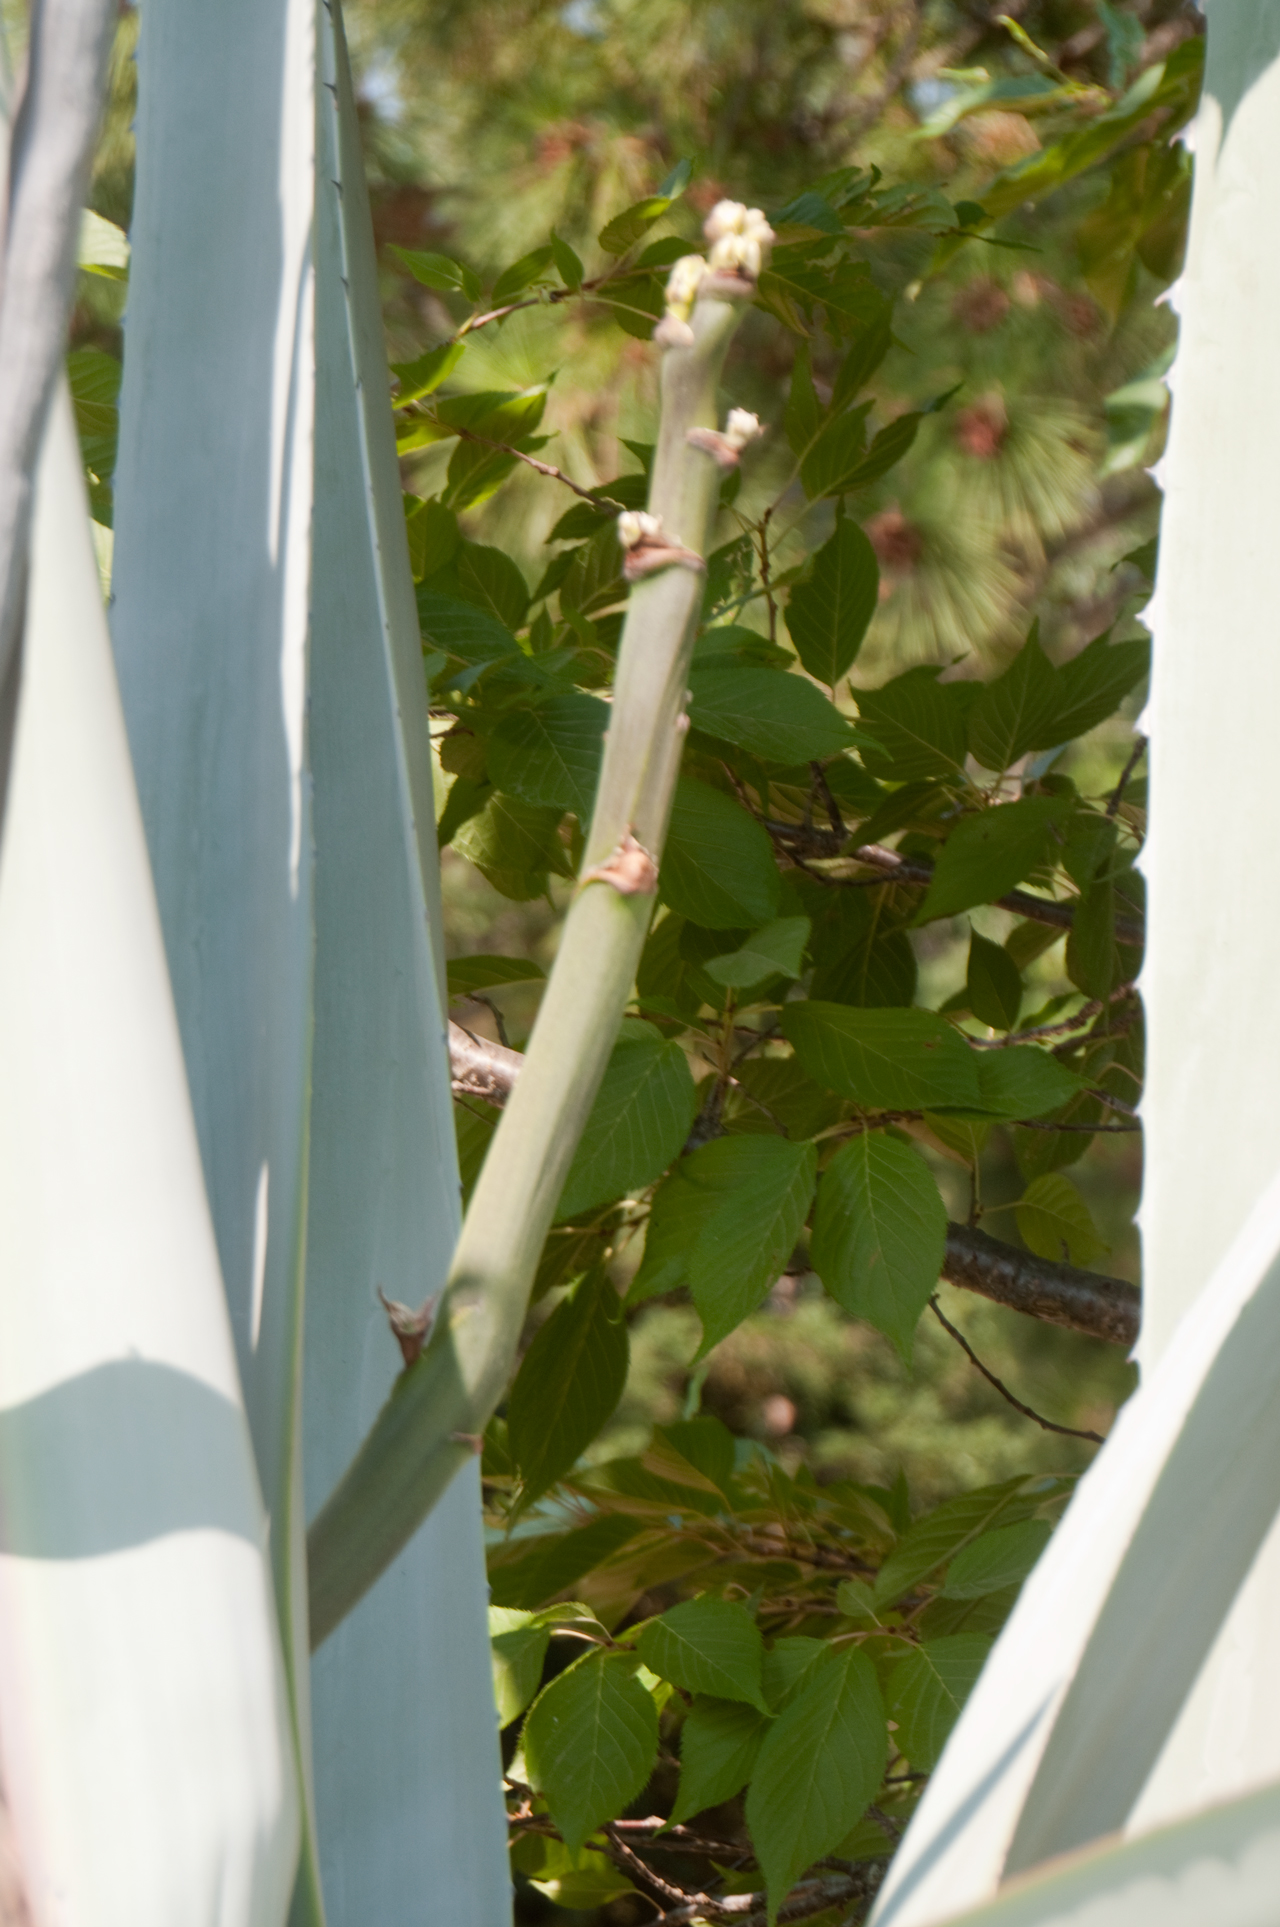 |
In Bloom with hummingbird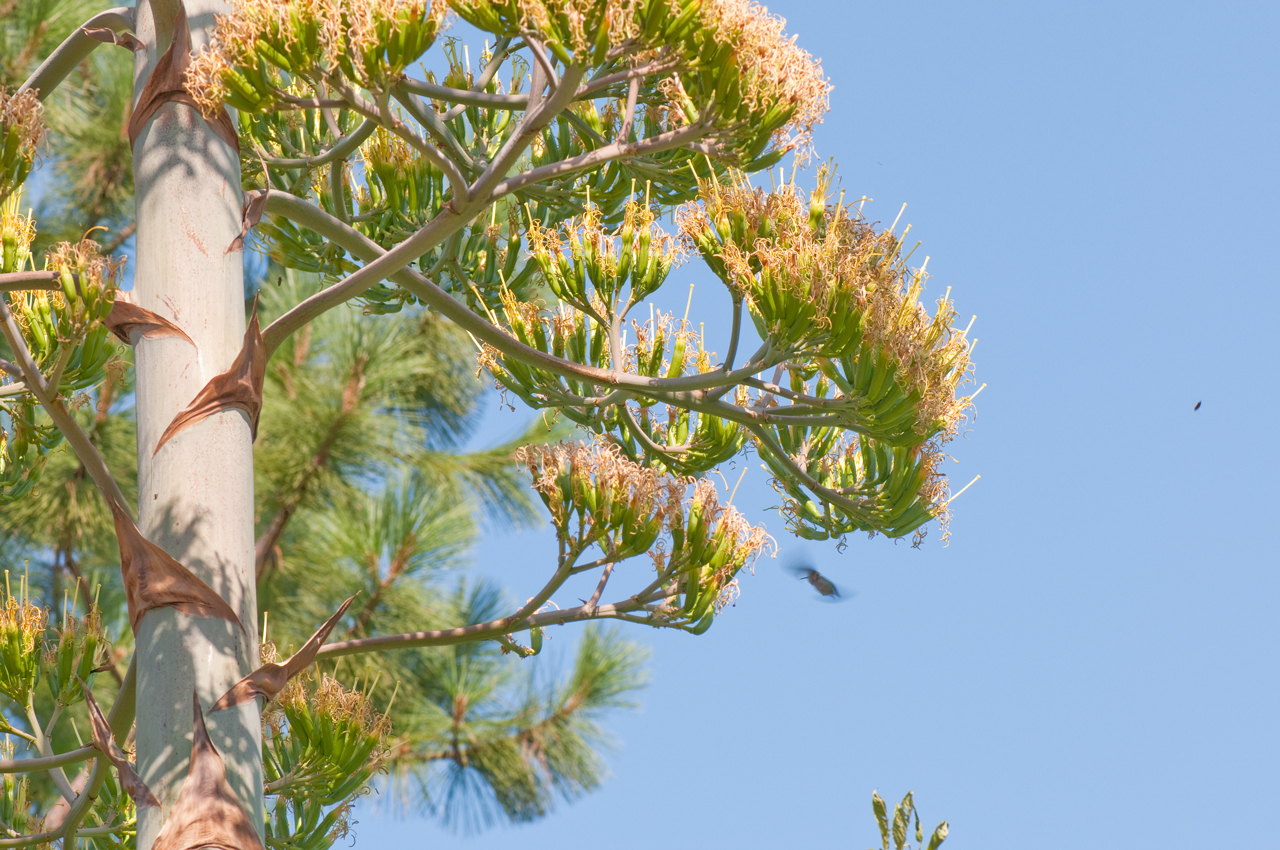 |
2022 Oct Zin grapes
 |
They test for sugar content using a Refractometer (Wiki)
to determine when to pick. |
Prints
| Camera |
Max
Resolution |
Theory
Print |
Real
Print |
| D300s |
4288
x 2848 |
14.3
x 9.5 |
12
x 8 |
| D60 |
3872
x 2592 |
12.9
x 8.6 |
10
x 8 |
| 4200
x 3300 |
14
x 11 |
||
| D300s
2x2 |
6000
x 4800 |
20
x 16 |
|
| D300s
3x3 |
9000
x 6000 |
30
x 20 |
For a 30 x 20 print it would be best to use a 3x3 mosaic of D300s images with some overlap for stitching.
The problem with stitching (2x2, 3x3 above) is that the camera needs to be moved in translation, not panning to avoid distortion. There may be a way around this by using Photoshop perspective correction, but it's not easy if it is possible.
Giclée (Wiki)
This is a term that means using a dot matrix printer for art quality prints . For example the Epson Professional Printers.The Epson Stylus Pro 4900 uses 10 pigment inks and prints up to 17" wide.
Dye-sublimation printer (Wiki)
Each dot can be any color, thre's no dithering like in a dot matrix printer. That's to say it's a continuous-tone technology, where each dot can be any color.Computer Printers (Wiki)
The most common type is the gray scale laser printer that works by fusing toner (very small black particles).Minilab (Wiki)
These use classical photographic chemical processes for the negative and print (two separate machines). They are fully automated and about the size of a chest type freezer. The print size may be limited to 4x6 or smaller, but some can do up to 8x12.Astronomy, astro photography
- Tripod
- ISO 1000 (instead of the stock 200)
- Mirror Up release mode
- Noise Reduction (Nikon: Shooting Menu\Long Exposure noise reduction: On)
- flashlight
- cable release
- moonless night
 |
Orion's belt, Nikon
300mm f/2.8 3 sec ISO 1000 Arri Tripod with Camera pointing opposite direction & handle reversed. |
|
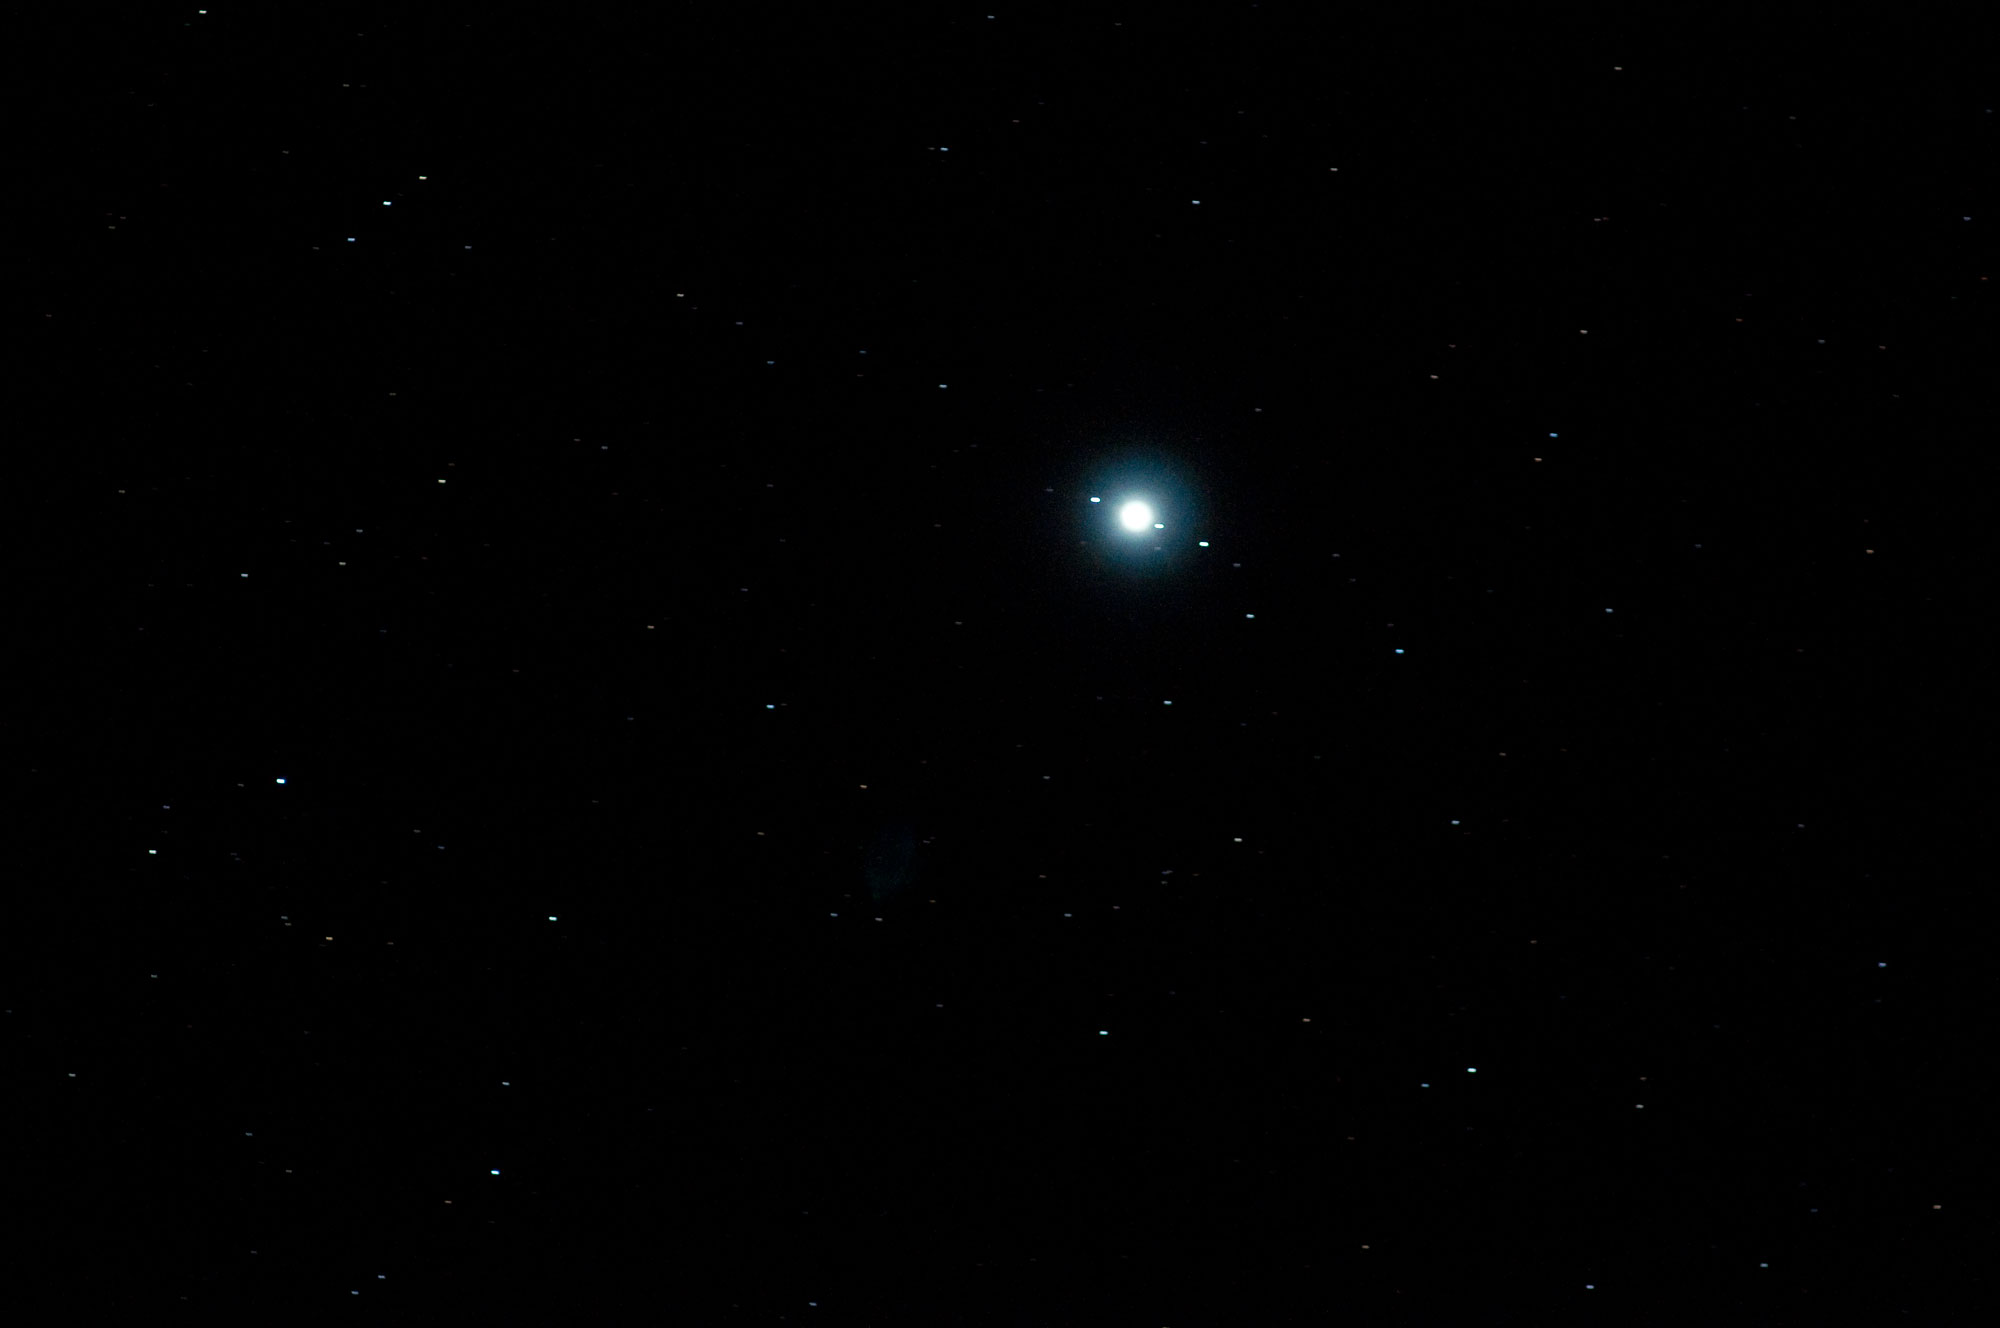 |
24 Sep 2011 D300s + 300mm f/2.8, Mirror Up, Manual exp f/2.8 3 sec, ISO 2000, Long Exposure Noise Reduction ON Arri Tripod with legs as short as they go (and rubber removed from top of QR adapter plate). In this image you can see Jupiter and 3 moons. There's a little streaking from star movement at 3 seconds and a lot of streaking for longer exposure times. Need to try ISO 3200. A Polar aligned star tracking mount would allow longer exposures without star trails. |
|
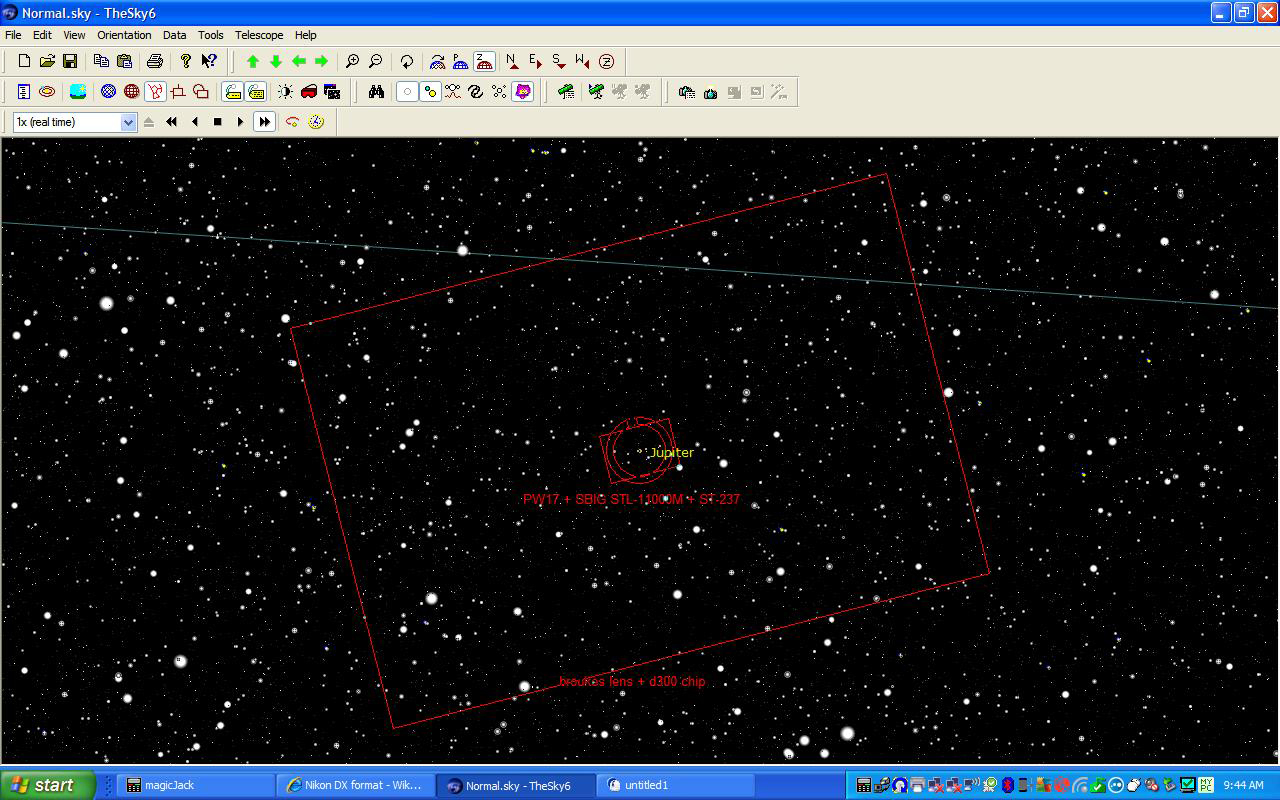 |
The Sky6 sky map
showing the field of view of the Nikon D300s with the
300mm f/2.8 lens Supplied by Paul. |
|
 |
Orion's belt 24 Sep 2011 0313:53 PDT Nikon D300s w/300mm lens ISO 2000, 2 sec f/2.8 Note there is a small amount of star trailing at 2 seconds |
|
 |
I saw a photo taken by
Chris Pugh that showed what looked like a daytime
scene, but it was taken at midnight on a moonless
night. The thing that was striking was there were stars in the sky. he said it was a 30 second time exposure. I had just been reading: How to Shoot the Night Sky (Introduction to Astrophotography) where the Rule of 600 is mentioned.
30 seconds, F3.5, ISO 3200 Exp Comp +5, Long Exposure Noise Reduction ON, Tripod |
The Lens
Wiki: Camera Lens, Photographic Lens Design, Optical Lens Design
DxOMark Lens Ranking -
Chip Size
A normal 35mm film camera runs the film left to right and the frame size is 24mm high x 36 mm wide. It's expensive to make Full Size (FX) imaging chips that are that big and they only appear on professional DSLR cameras. A more common imaging chip for high end DSLR cameras is the half frame (DX) size. If the view angle of a lens on a 35mm film camera is X degrees, then when that lens is used on a DX type DSLR the view angle will be X/2, i.e. it's as if a 2X tele-extender was added to the lens.Important Note: The aspect ratio of 35mm film is 2:3 or 1.5. This is different from 8x10 which is 4:5 or 1.25. So using an 8x10 aspect ratio print with a digital camera image means you must crop (cut away some of the image. That means that when shooting you need to know that's going to happen or else you will end of cropping the print.
Historical NoteEarly view cameras used 8"x10" film, probably because the resolution of the first generation films was much poorer than today's films. Later view cameras and the Speed Graflex (Wiki) press cameras used 4"x5" film. Note you get four sheets of 4x5 film from a single sheet of 8x10 film, they have the same aspect ratio. In the 1960s every camera store stocked 4x5 film in a selection of emulsions. Contact prints, which can made without an enlarger, were common and so came 8"x10" photographic printing paper. But there is a disconnect between the aspect ratio of 8x10 paper and the image from a 35mm film camera or today's DSLR cameras which have a 3:2 or 1.5 aspect ratio. But there are 1.5 aspect ratio sizes: 4x6, 8x12, 12x18, 16x24 & 20x30. |
Common Print sizes in this ratio are (See Costco below): 4x6, 8x12, 12x18, 16x24 (not from Costco), 20x30.
The Golden Ratio (Wiki) is an aspect ratio that's very pleasing to the human eye an is 1.618.... The DSLR (35mm film) aspect ratio of 1.5 comes closer to the golden ratio than does the first generation sheet film ratio of 1.25. So from an artistic perspective using the newer aspect ratio paper sizes makes sense.
Focal Length
This is a measure of the magnification of the lens. The longer the focal length the closer the subject appears.For a full frame (FX) 35mm film camera the "standard" 50mm lens has a focal about equal to the diagonal of the frame (43mm).
For a half frame (DX) digital camera a standard lens would be 25mm.
A lens with a focal length less than the standard would be called a wide angle lens and one with a longer than standard focal length would be called a telephoto lens.
The focal length is the distance from the optical center of the lens to the focal plane when the lens is focused on a subject at infinity (very far away).
When a lens is focused at the closest possible subject it is two focal lengths between the center and the subject and two focal lengths between the center and the image, or four focal lengths between the subject and it's image. Most normal lens focus mechanisms do not have enough extension to do that so extension tubes can be added between the lens and camera body for close up work. The better close up extension kits include a way to reverse the lens to improve it's optical performance when used for close up work. A "close up" or macro (Nikon: micro) lens has more focus travel and typically a different optical design so it will work well when focused on close subjects.
Example
 |
Magnifying Glass
focusing distant trees Focal Length 6.75" Lens diameter: 2.75" f number = 6.75"/2.75" = f/2.45 The D300s taking the photo is set at ISO: 2000 1/5 sec & f/36. |
 |
Paper with different
size holes labeled with f/number for the focal
length of the magnifying glass |
 |
Mask added for f/4,
better focus than f/2.45 photo above. |
 |
Mask added for f/5.6,
better focus |
 |
Mask added for f/8 The ones with smaller f/stops are too dim. |
 |
When a lens is
focused as close as possible to a subject it's 2 x
FL from subject to lens, and 2 x FL from lens to image. In this case it's about 13.5" from candle to lens and about 13.5" from lens to image. So to change the focus of a lens from infinity to something closer you need to move the lens away from the image plane. This is why extender rings are used to move a lens away from the image place for close up photography. |
Rule of Thumb: For a non image (i) stabilization (vibration reduction VS) lens the shutter speed should be faster than 1 / (focal length in mm).
For example for a 105mm lens the shutter speed should be faster than 1/100 sec. But with vibration reduction turned on the shutter speed can be a stop or two slower, say 1/50 sec.
Note that the fastest possible shutter speed on many film cameras was 1/500 sec. That meant that the longest telephoto lens you could hand hold was 500mm. But modern digital cameras now have shutter speeds that are a number of stops faster. Nikon D300s to 1/8,000 and the D60 to 1/4,000. That means you can hand hold a much longer telephoto lens. The addition of image stabilization adds to that. Some modern cameras have a large optical zoom capability allowing extreme telephoto shots while hand holding the camera, something a cold war spy only could dream about.
Speed
How fast is that lens? The lens speed is a measure of how much light it can gather. This is expressed by the wide open f/stop of the lens. A classical glass lens will have a typical speed for a given focal length, for example 300mm and f/4. A more modern "Extra-low Dispersion" (ED) lens designs uses one or more Fluoride glass (Wiki) lens elements. They are a faster lens, for example 300mm and f/2.8. They are also much more expensive. Some film 35mm lenses were made as fast as f/0.9.Bokeh (Wiki) (Ken Rockwell)
This is a lens property that has to do with how out of focus areas of an image look. Nikon makes Defocus Control, or DC lenses which allow manual adjustment of the spherical aberration so that you can control bokeh. These are NOT for getting a soft focus image, but rather to control the out of focus background. They tend to be pricey. I think only available in 105mm and 135mm focal lengths.5841590 Aberration controllable optical system, Nikon Corp, Nov 24, 1998, 359/763 ; 359/659; 359/764
7715118 Macro Lens System, Hoya Corp, May 11, 2010, 359/754 ; 359/791 - a macro lens with controlled spherical aberration
6950246 Imaging optical system and apparatus using the same, Olympus Corp, Sep 27, 2005, 359/771 ; 359/772; 359/773
Resolution
There's a limit to resolution based on the diameter of the objective (primary) lens. The larger the lens the higher the resolution. So as a perfect lens is stopped down the resolution will degrade. But most lenses are not made perfectly and so have better resolution when stopped down 2 or 3 stops from full open. Note this is different than depth of field where stopping down a lens causes increased depth of field, but at the same time lowers resolution.
This is one of the reasons astronomical telescopes have such large primary optics (typically a mirror) to separate stars that are close together.
DigitUnderstanding image sharpness part 1: Introduction to resolution and MTF curves by Norman Koren
About ISO 12233 Chart Data and Sample Images - Digital SLR and Lens Image Quality Comparison -as you move the mouse the arrow points to the right or left so you can compare two lenses. I haven't checked all the other lenses but the Nikon 300mm f/2.8 seems to be the sharpest of them all.
For most lens designs there is a range of f/stops where the lens performs best and that's in the middle of it's range of f/stops. For example the Nikon 105mm Micro Nikkor has a range of f/2.8 to f/36 but has the best resolution between f/8 and f/12.
Math
The common way a camera lens is specified is by it's Focal Length (FL) and f/stop, such as 300mm f/2.8.To find the diameter divide the FL by the f/stop = 300 mm / 2.8 = 107.1 mm (divide by 25.4 to get inches) 107.1 / 25.4 = 4.22" lens diameter.
The diffraction limited resolution = (1.22 * wavelength) / (lens diameter) [ all in the same units]
So there's a limit on how good a lens can be based on the primary optic's diameter. But most lenses are not diffraction limited. The typical lens has different resolution for different f/stops and typically the center f/stops are the best.
Cameras
| D60 |
D300s |
|
| Sensor
Size |
23.6 x 15.8 mm | 23.6 x 15.8 mm |
| Sensor
Pixels |
3,872 x 2,592 | 4,288 x 2,848 |
| Pixel
Size |
6.09
x 6.09 um |
5.58
x 5.54 |
Lens
The angular optical resolution of a lens (Wiki) depends on the objective diameter.Also in astronomy how faint a star you can see depends on the usable area of the objective. For a lens the usable area is the objective diameter. But for reflecting telescopes that have a central obstruction you need to subtract the obstruction's area from the objective area to get the light gathering area.
Star spot size vs. f/number
| f/2.8 |
f/4 |
f/5.6 |
f/8 |
f/11 |
f/16 |
| 1.9
um |
2.7 |
3.8 |
5.4 |
7.4 |
10.7 |
Photodo - has some lens resolution Modulation Transfer Function (MTF) data
http://www.the-digital-picture.com - has a lot of sample lens test chart photos
Macro (Close Up) photography
There are special considerations needed to take good macro photographs such as flowers.
Microscope Objective or C-mount Lens for Macro photography
17 Oct 2011 - working on how to do this.
Telephoto Photography
Extension Rings, Tele-Converters & other Lens Related Accessories
Focus
When the focus of a lens is adjusted the lens is moved back and forth relative to the imaging chip. This changes the magnification. The amount of magnification change is very small if the subject is many many focal distances in front of the lens. For example when using a 50mm lens to take a photo of a subject that's 10 feet in front of the lens the radio of object distance to lens FL is about 61 which is much greater than 10.
But when doing macro photography where the subject to lens distance is close to the lens focal length the change in magnification is significant. This may be a problem if you want to do focus stacking because the plate scale (Wiki) will be different for each image. To avoid that problem when focus stacking the lens is not adjusted and the whole camera is moved between exposures, hence the StackShot.
Viewfinder
Older cameras have a provision to add a diopter correction lens to the viewfinder to correct for your eyes. Modern cameras have an adjustment that allows making a correction for your vision. I have my camera set so that no glasses are worn when taking photos. When looking into the viewfinder adjust the focus so that the non image features (digital readouts, fiducial marks (Wiki) in the field of view) are in sharp focus. Then activate the auto focus feature and now both the image and features should all be in sharp focus.Dominant Eye (Wiki)
Most people have a strong eye and a weaker eye. To
determine which of your eyes is dominant, with both eyes open
point you finger at some object then, without moving your
hand, use your left and right eye to view the scene by closing
one eye. With one eye the object will be lined up and
with the other eye it will not be lined up. When looking
through the camera viewfinder it's best to use your dominant
eye.Self Timer
Pressing the shutter button is one of the most disruptive things you can do in terms of moving the camera. That's going to blur the image, so I'm putting this note under Focus. For hand held shooting my standard self timer setting is 3 seconds. So after pressing the shutter I pay attention to framing and being still.Hyperfocal Distance
Most 35mm Single Lens Reflex cameras (Wiki: SLR) support the use of an interchangeable lens that contains a means of focusing and setting the f/stop. It was common to have a distance scale for focusing work against an index mark. Adjacent to the index mark there were other depth of focus (Wiki) index marks in different colors. Acceptable focus would be obtained between the two depth of focus marks for the selected f/stop.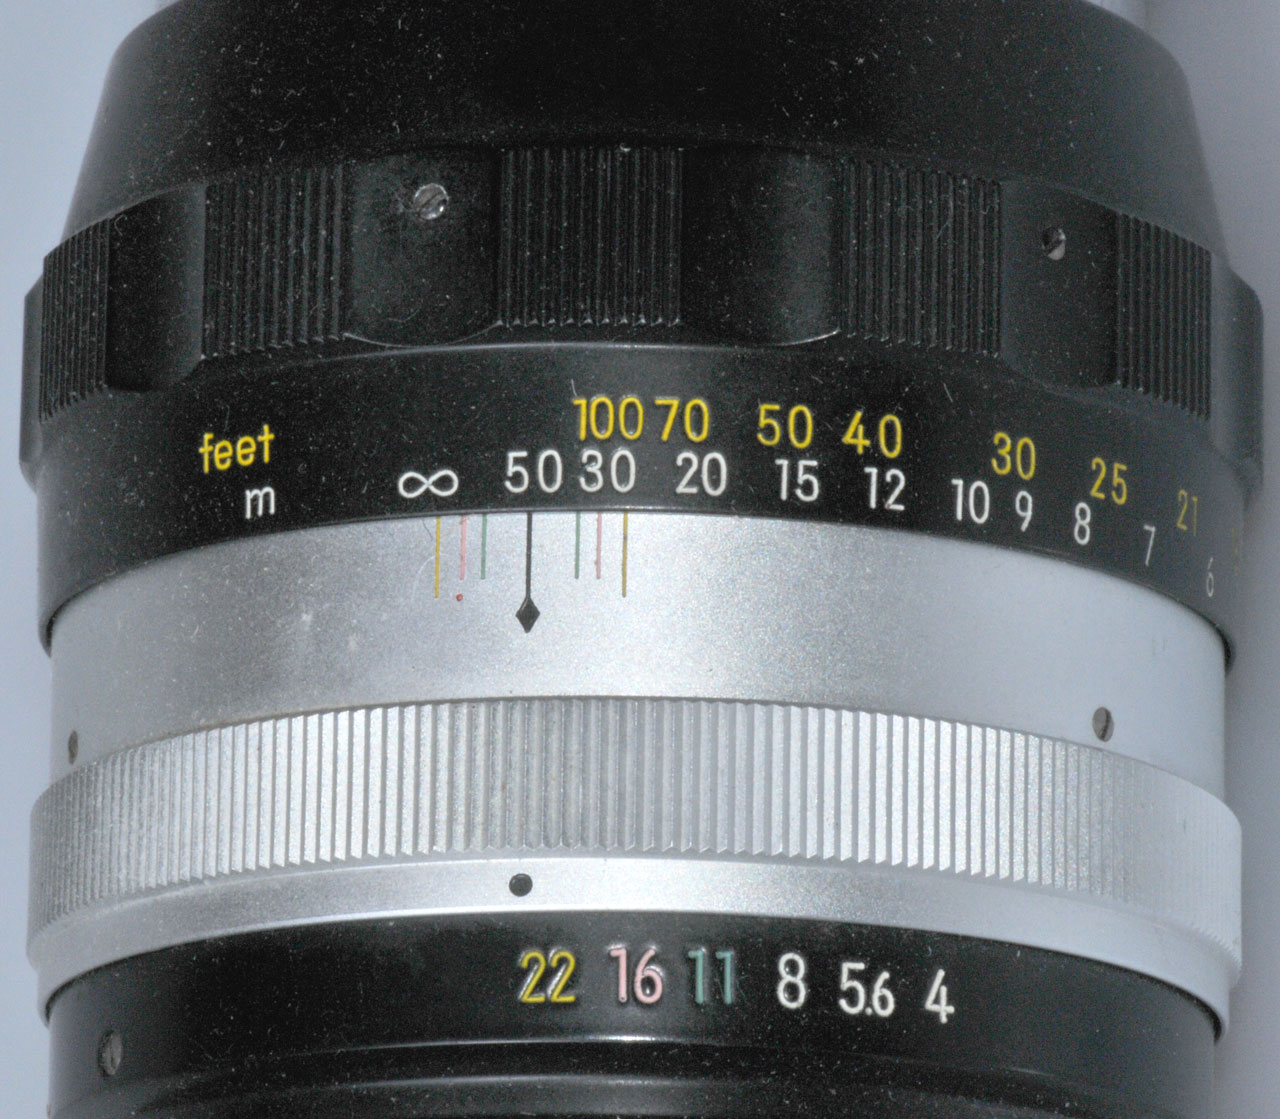 |
The Nikon lens Aperture
is set to f/22 and the focus is set so that infinity
is on the left yellow depth of field index. That
brings the best focus point to about 50 feet while the
depth of focus extends to 30 feet, i.e. it's set at
the hyperfocal distance. Note that when set at f/11 (green depth of focus index lines) the depth of focus is narrower (maybe infinity to 50 feet) so for the maximum depth of focus you want the smallest aperture setting (highest f/number). When taking portraits where you want the background to be out of focus setting the f/stop to the largest aperture (smallest f/number) is the thing to do. Also using a mild to strong telephoto lens helps to separate the subject from the background in terms of focus. This may cause parts of the head to be out of focus, so normally you should focus on the eyes. |
The method of focusing a digital SLR camera has changed as they have evolved. Basically the camera body has a computer that looks at how the image changes as the focus is adjusted and sets the focus automatically. But, there are times when it just does not work. For example if there is not enough light or the scene does not have straight lines running in the correct orientation, etc. In these cases switching to manual focus is a solution. There are number of different ways this is done that are covered by many patents.
Focusing Modes
Manual Mode
As the name implies, focus is done by manually turning the focus ring on the lens.Single Mode
This is the most common focus mode and is probably the default mode for the camera. In single mode focus the camera goes through the focus routine just once, typically when the shutter is at the half pressed position. Some Nikon cameras have a provision that will not allow an exposure to be made if the camera thinks it's out of focus. To get around this you can switch to Manual focus Mode.Continuous Mode
When the shutter is half pressed the camera goes into the focus routine and stays in the routine. The idea is that as the subject moves the camera will follow focus. For example when taking a macro photograph of a flower that's being blown by wind single mode focus does not work because the focus needs to dynamically follow the flower, but using continuous mode solves that problem.Depth of Field (=Depth of Focus)
f/stop
Lens Focal Length
When a longer focal length lens is used and the subject is framed the same as when a shorter focal length lens is used (i.e. you stand back with the longer lens) the depth of field is less with the longer lens. This is why a "Portrait" lens is typically 2 to 6 times the focal length of a "Standard" lens.Focus Lock
This allows aiming the camera at the subject and setting and locking focus. Then you can re-frame the scene so the subject is no longer at the focus point in the frame. On the Nikon D300s you can lock the focus by a half press of the shutter.Mirror Up
See Mirror Up under Release Modes.Tripod
Even though the 105mm lens has image stabilization (Vibration Reduction VR in Nikon speak) there's a limit to what it can accomplish. Even a tripod is not as stable as you would desire. Some things that can be done to improve the stability of a tripod are:- lower and lock the crank up top extension
- collapse the legs to their shortest length
- lock down all the clamps
- use the camera's built in timer rather than a cable release or the worse thing, pressing the shutter manually
Close Up Photography
There are some special considerations involved in close up photography.Magnification
Depth of Focus
1. Stop down the lens. Many macro lenses are capable of f/36 or smaller. This will increase the depth of focus but presents two new problems.
 |
This is really two
rails that can be stacked. The idea is that in
addition to doing focus stacking you could also do
sticthing left to right, or they can be stacked so
both work in the same direction. The large knob is connected to a pinion gear and and there's a rack gear on the bottom of the unit. The small knob controls the amount of friction, but does not really lock the slide. A Nickle coin works well for the 1/4-20 screw head (top right of photo). Note this screw is too long to be used on the Nikon D300s. Maybe if the correct size washers can be found to install by removing the screw and putting the washers between the screw head and the slide (not between the slide and camera)? |
 |
Showing the two units connected in the same direction. When a single unit is used the camera support bracket is not on the center line and I don't see how it can be changed to be on the center line since the support bracket to rail mounting holes are a rectangular pattern. |
Exposure
The lowest cost cameras had a fixed shutter speed that allowed correct exposure for a normal daytime scene when the recommended film was used. For example the exposure for a normal outdoor scene in direct sunlight is f/16 at 1/(ASA or ISO film speed). For example for a film speed of 200 (ASA or ISO) the exposure would be f/16 at 1/200 of a second shutter speed.
Digital cameras replace the film with a Charge Coupled Device (Wiki: CCD) or CMOS image sensor (Wiki:APS). This sensor determines the quality of the resulting image. The most common parameter that's advertised is the number of pixels (Wiki). Generally more is better and costs more.
ASA or ISO Film Speed
Film speed is a measure of a film's sensitivity to light. Higher film speed numbers mean the film will work better in dimmer light. The resolution of a film is inversely proportional to it's film speed. For example films used in the graphic arts where very fine detail is needed have film speeds in the single digits. Films for use in night photography may have a film speed in the thousands but the resulting image has a lot of grain structure. These are linear scales so an ISO of 400 is twice as sensitive to light as an ISO of 200.In digital cameras there is also noise at the higher film speeds. For astronomical use (i.e. taking pictures of mostly black) the Cannon digital SLRs have an advantage over the Nikon digital SLRs because of how they handle black images (dark frames in astronomy speak).
Exposure Value (Wiki)
This is a logarithmic way to express the exposure
(combination of f/stop and shutter speed). For example
EV 16 is equivalent to f/16 @ 1/125 (Wiki).They
range from EV -6 (f/16 @ 256 minutes) to EV 21 (f/16 @
1/8,000). Some cameras, like the Hasselblad (official page, my comments), have the
lens rings for f/stop and shutter speed locked together (you
need to pull them apart to change the EV) so that once set
any rotation of the combined ring is the same exposure
value.EV = Log2(N*N/t) where N is the f/# and t is shutter speed in seconds.
Log2(X) = Loge(X)/Loge(2) = LN(X)/LN(2)
Example: f/16 @ 1/200 sec
EV = LN(16*16/(1/200))/LN(2) = LN(256 *200)/LN(2) = LN(51200)/LN(2) = 15.64
Stops (Wiki)
1.4, 2, 2.8, 4, 5.6, 8 11, 16, 22, 32, 45, 64, 90 these f-numbers are the ratio of the focal length of the lens divided by the diameter of the entrance pupil.
The amount of light depends on the area of the lens that the light can go through. Since the area of a circle is a function of the square of the diameter the square root of 2 (or 1/2) shows up in the ratios called f/stops.
Note that alternate f/numbers double, for example:
| 0.7 |
1.4 |
2.8 |
5.6 |
11 |
22 |
44 |
88 |
||||||||
| 1 |
2 |
4 |
8 |
16 |
32 |
64 |
128 |
Note that an exposure of f/16 at 1/200 sec is the same as an exposure of f/22 at 1/100 sec. That's to say the image sensor will receive the same amount of light for either of these exposures.
The number of possible equivalent exposures that are available depends on the limits on the lens possible f/stops, the camera's possible shutter speeds and the sensitivity of the image sensor (ISO number).
Also note that the light from a lamp falls off as the square of the distance between the lamp and the subject. So you can use the above f/numbers for the distance between the lamp and subject. For example if you move a studio light that was 5.6 feet from the subject to 11 feet the light will be cut in half.
Metering Modes
The last generation of film SLR cameras had digital metering modes. One of the fantastic things about digital exposure modes is that they can do things that took a lot of effort to accomplish when manual control was used. The metering modes are based on various types of light meters.Manual
This is the same as it was on the early cameras. The photographer sets the f/stop and shutter speed. Metering is off.Spot
A small spot, typically in the center of the frame, is used to measure the light and set the exposure.Center Weighted
An area in the center of the frame, usually inside a circle that's displayed in the viewfinder, is used to set the exposure where the center gets more weight than the outside of the circle. This mode mimics the way early light meters worked.Matrix
A number of areas, in some manufacturer specific arrangement, are used to analyze the image and decide on the exposure. Typically this mode is required for the camera to do most of it's high technology features.Exposure Lock
Allows locking the exposure while the frame is aimed somewhere and then moving the view somewhere else to make the exposure.Exposure Modes
Consumer Cameras
Auto
In this mode the camera sets both the f/stop and the
shutter speed. In the simplest case this amounts to
a Point-And-Shoot mode where no control by the
photographer is involved in the exposure.| Auto P: Program Auto Exp Tv: Shutter Time Value Av: Aperture Value M: Manual C: Common Movie Stitch SCN: Scene Indoor Sunset Night Scene Fireworks Beach Aquarium Foliage Snow High ISO Sports Night Snapshot Portrait |
Cannon SX-20 |
Clockwise AUTO1 - Point & Shoot (the flash will automatically pop-up if needed) P - Programmed S - Shutter priority A - Aperture priority M - Manual shutter & aperture Night Portrait1 Close up1 Sports1 Child1 Landscape1 Portrait1 Auto (Flash Off)1 |
Nikon D60 (See
Nikon page D60
paragraph)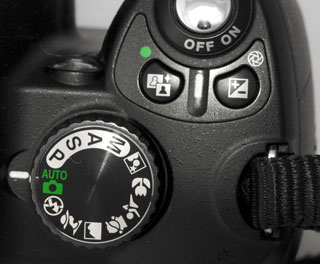 |
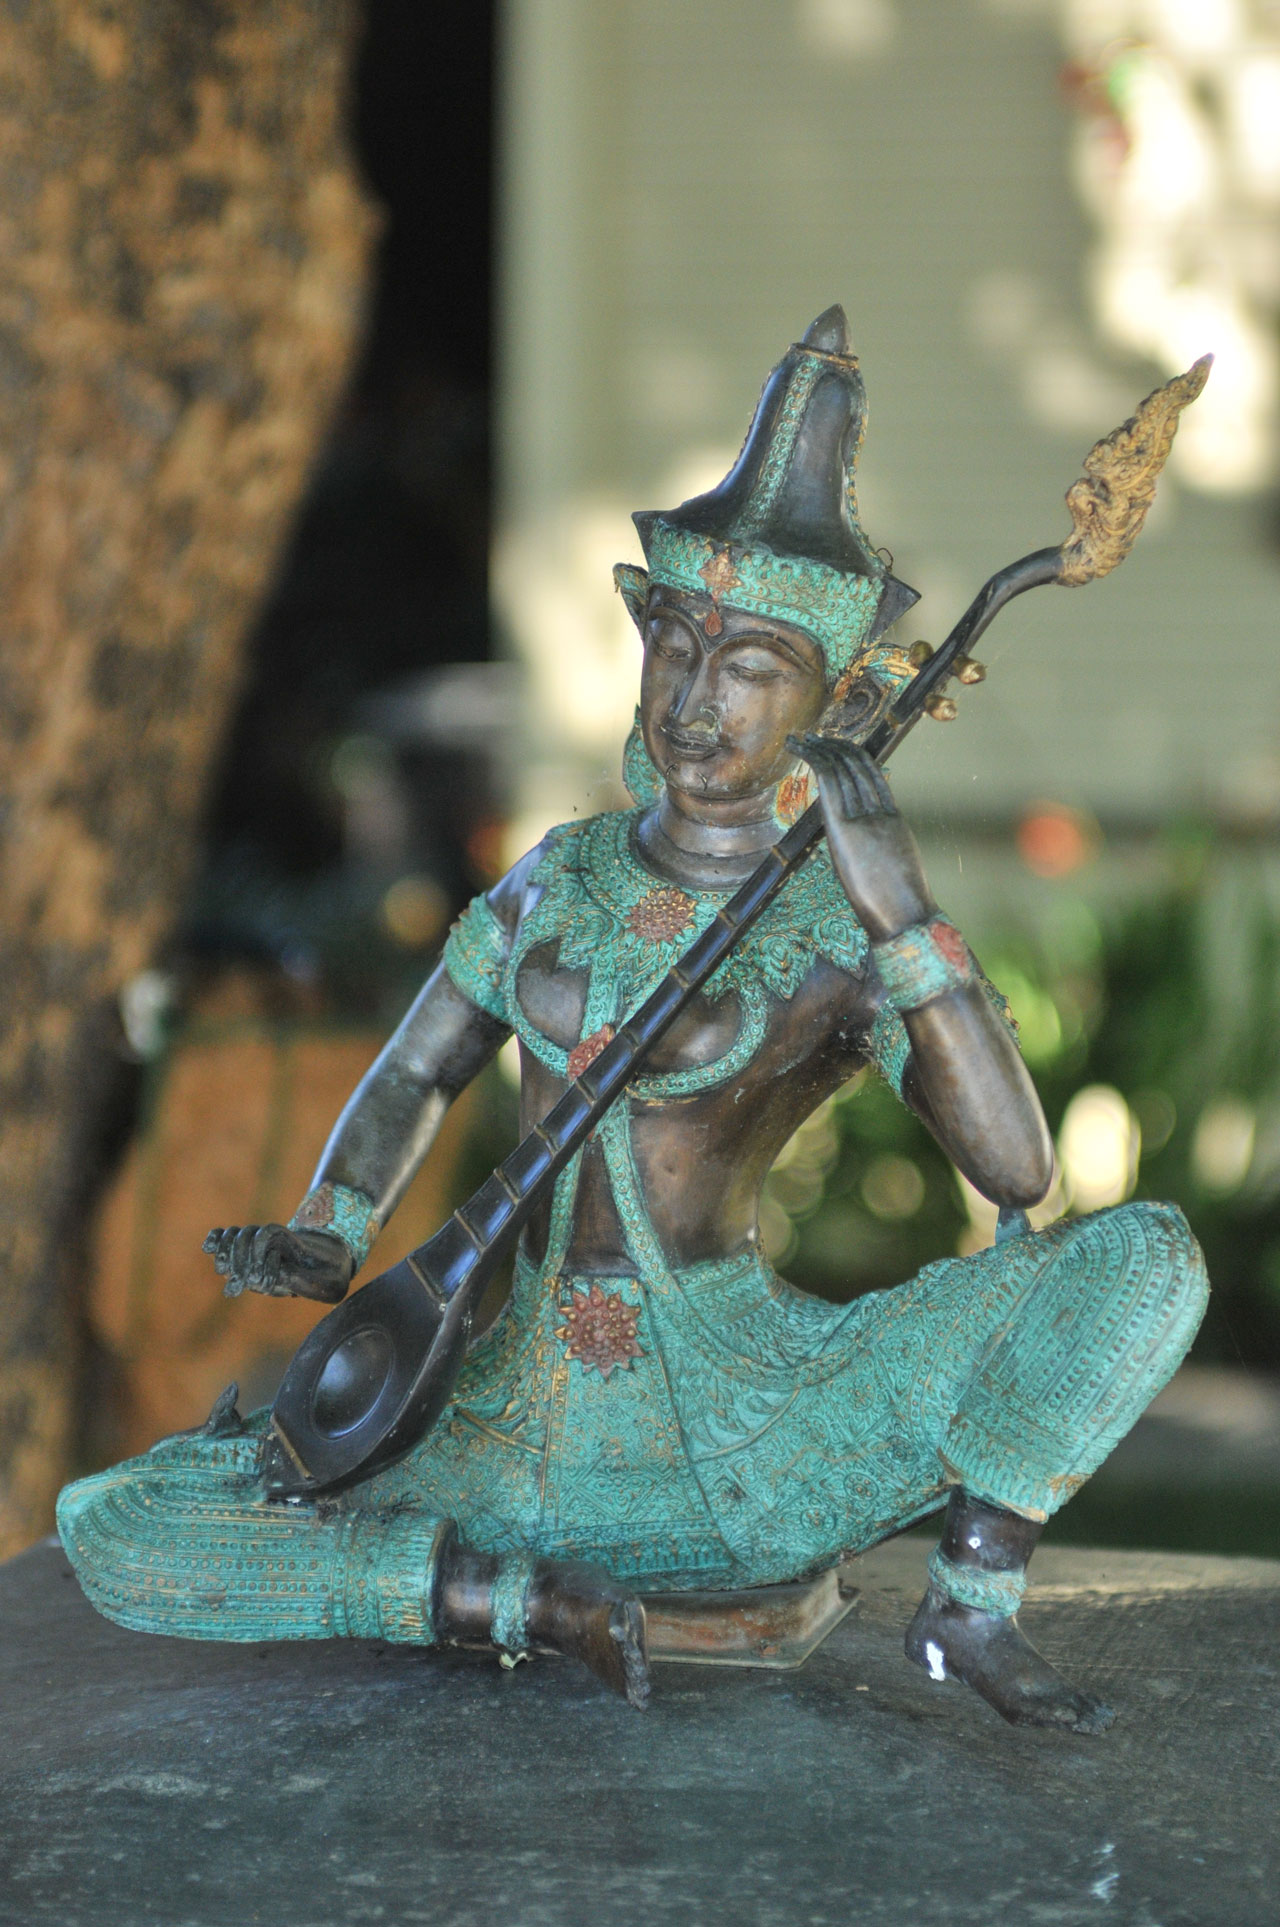
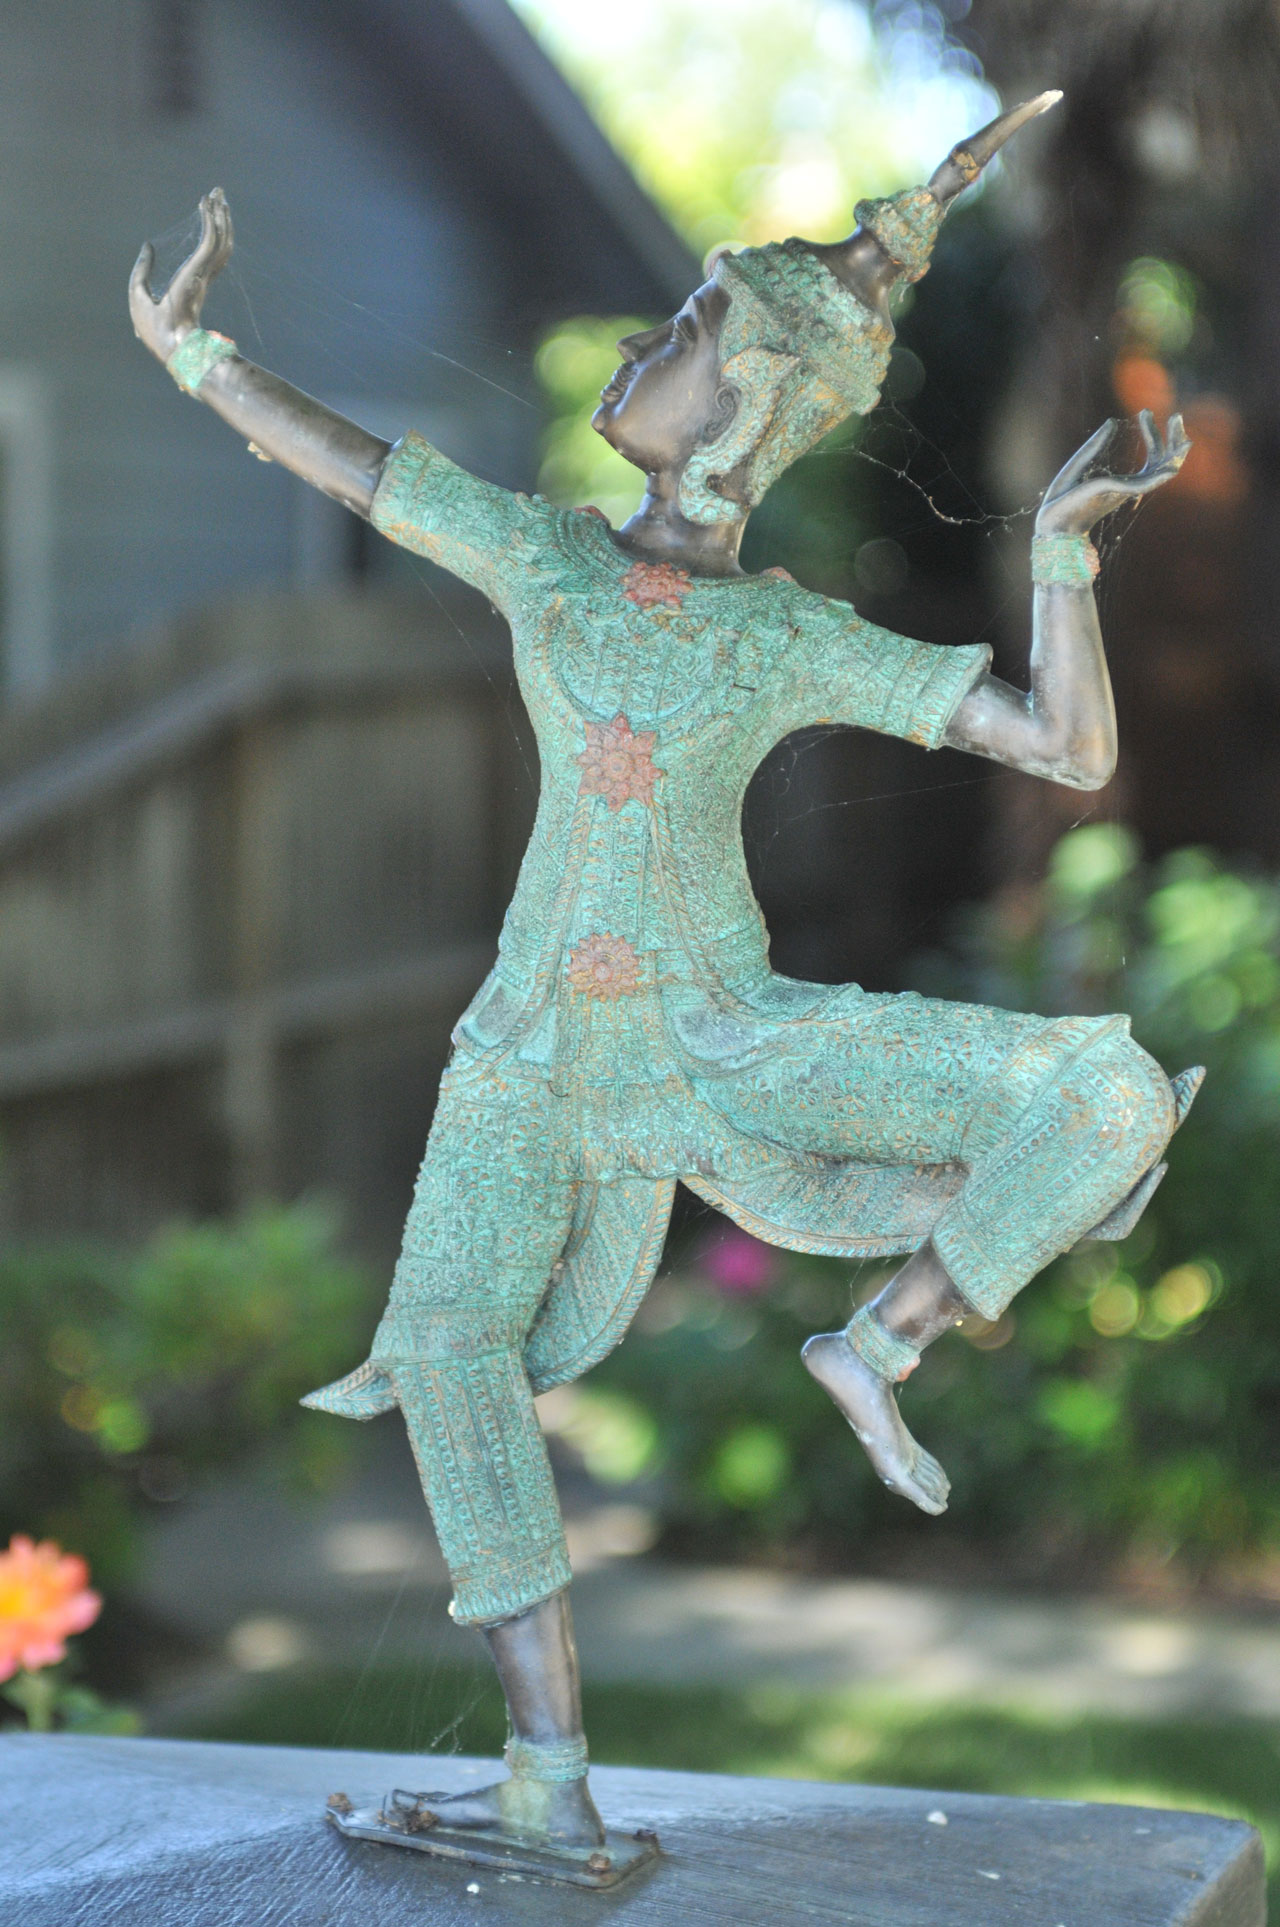
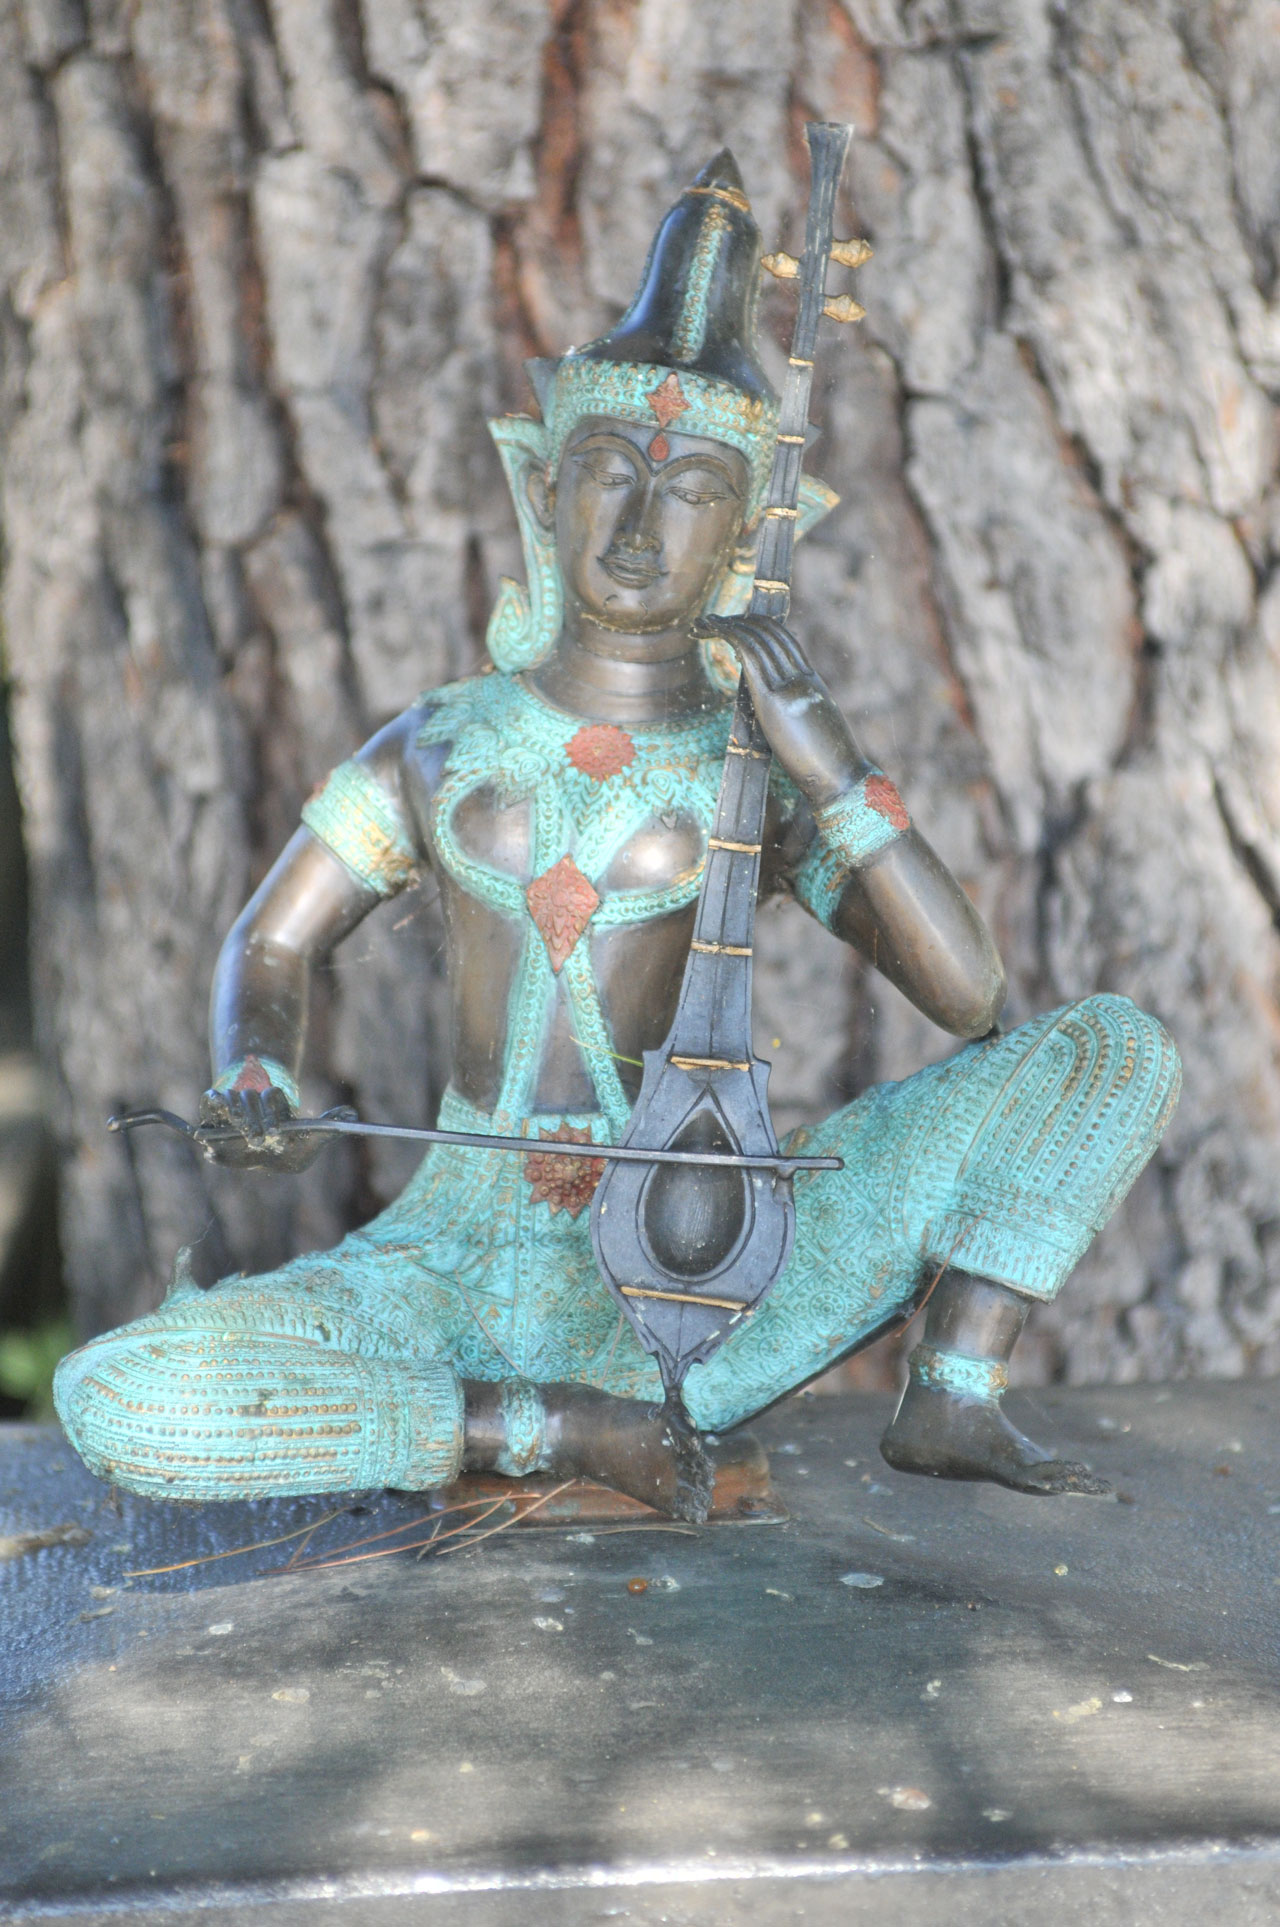
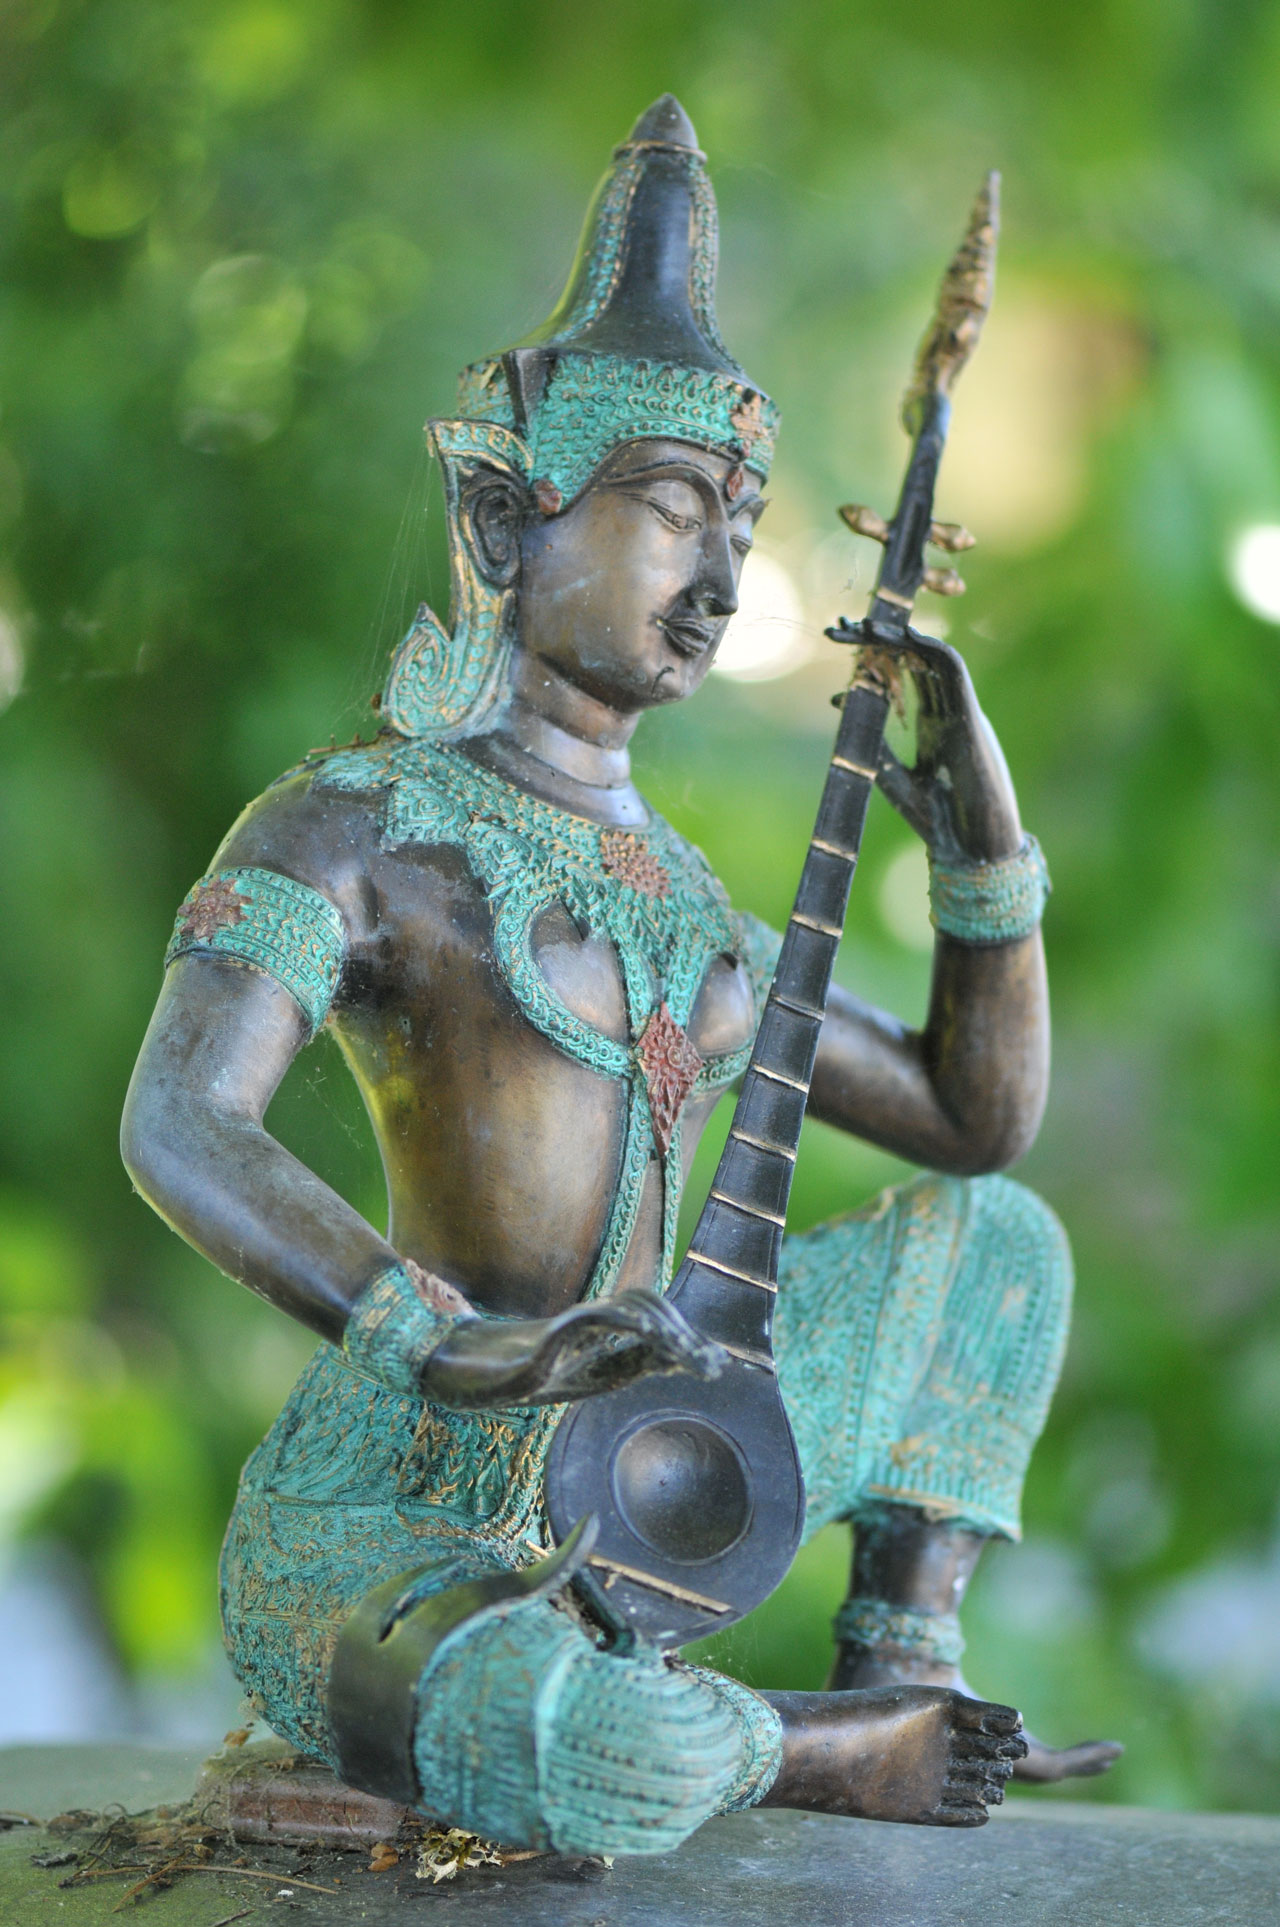
Professional Cameras
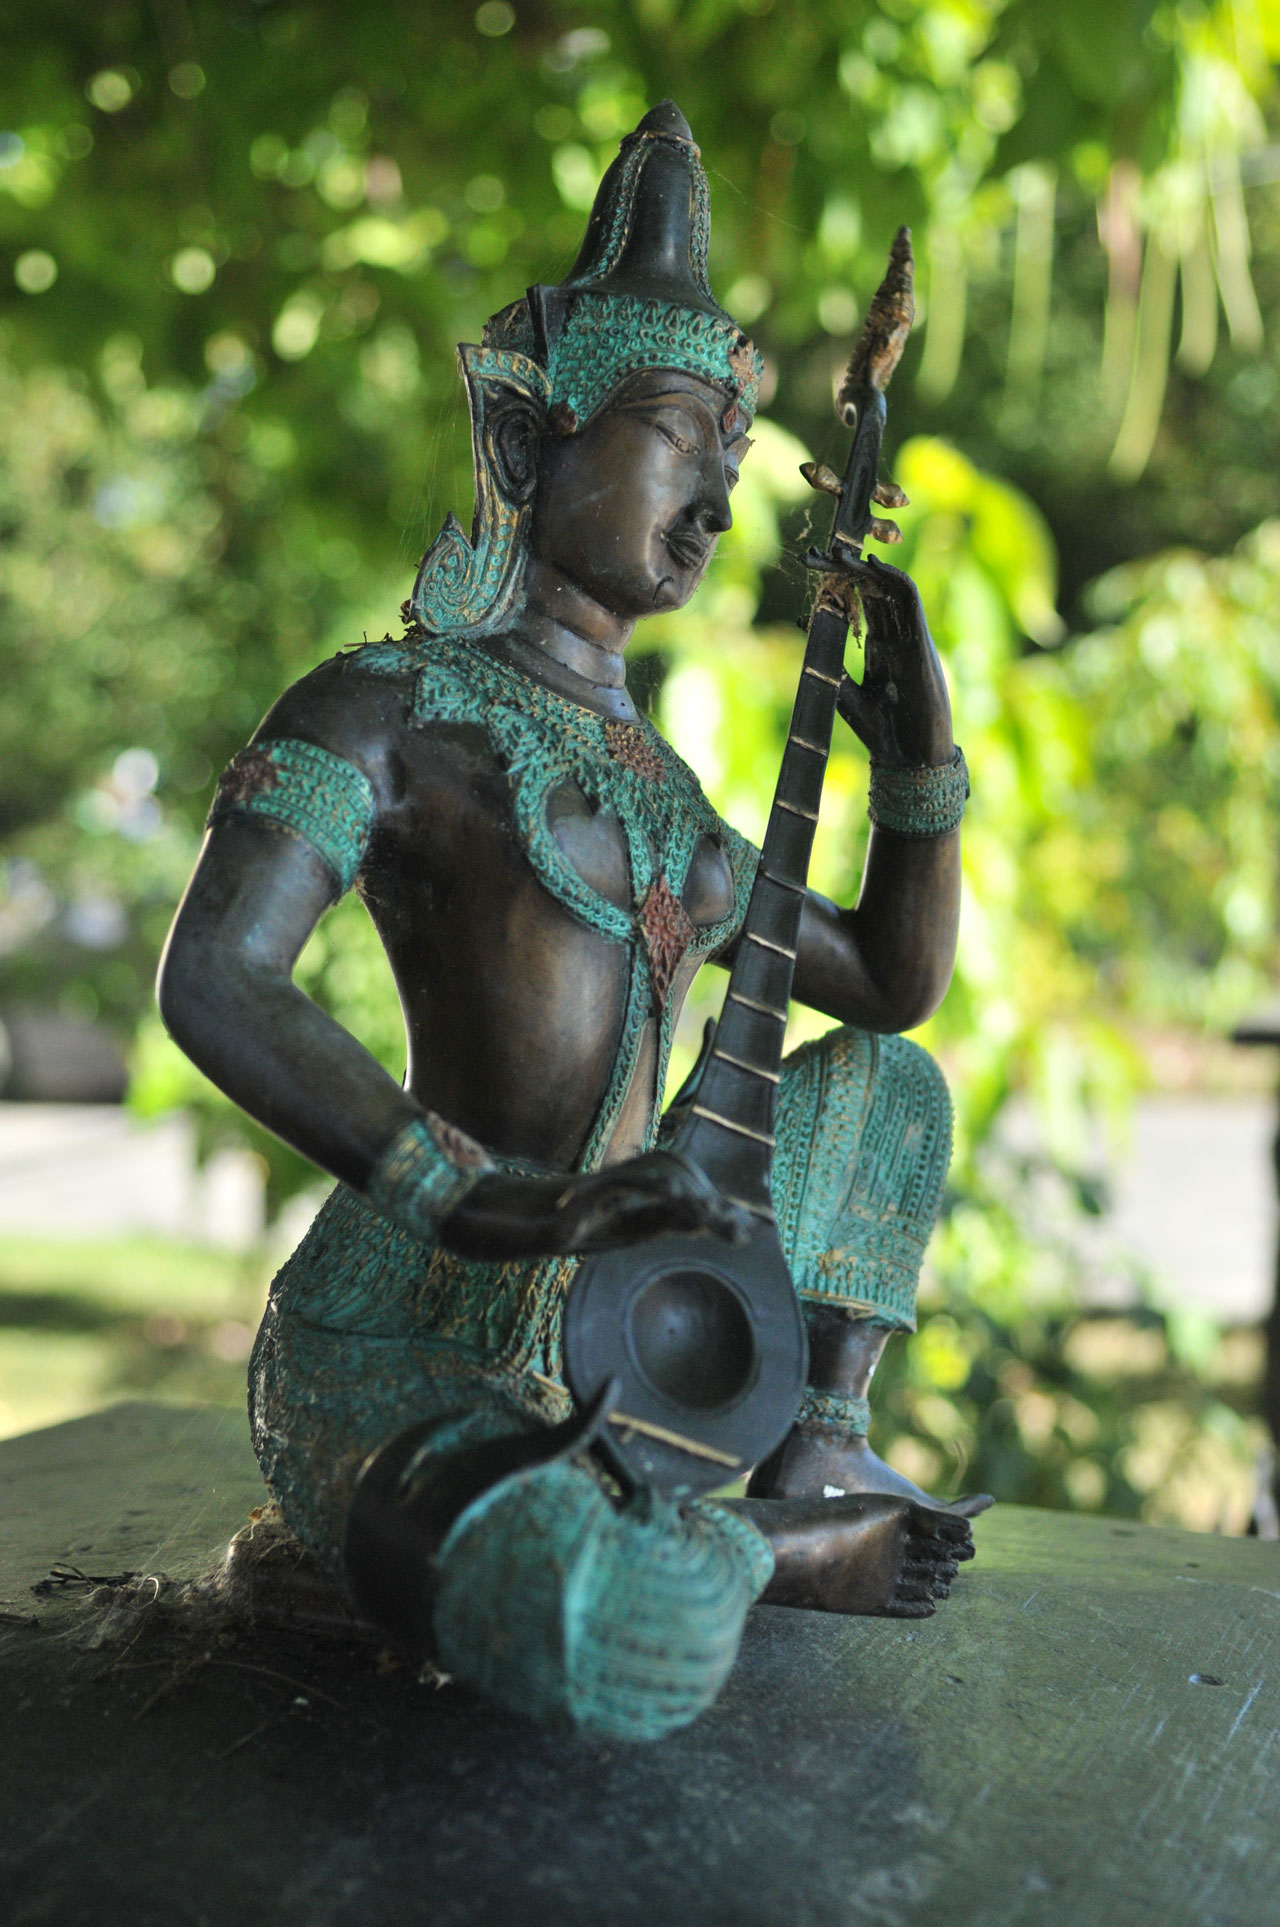
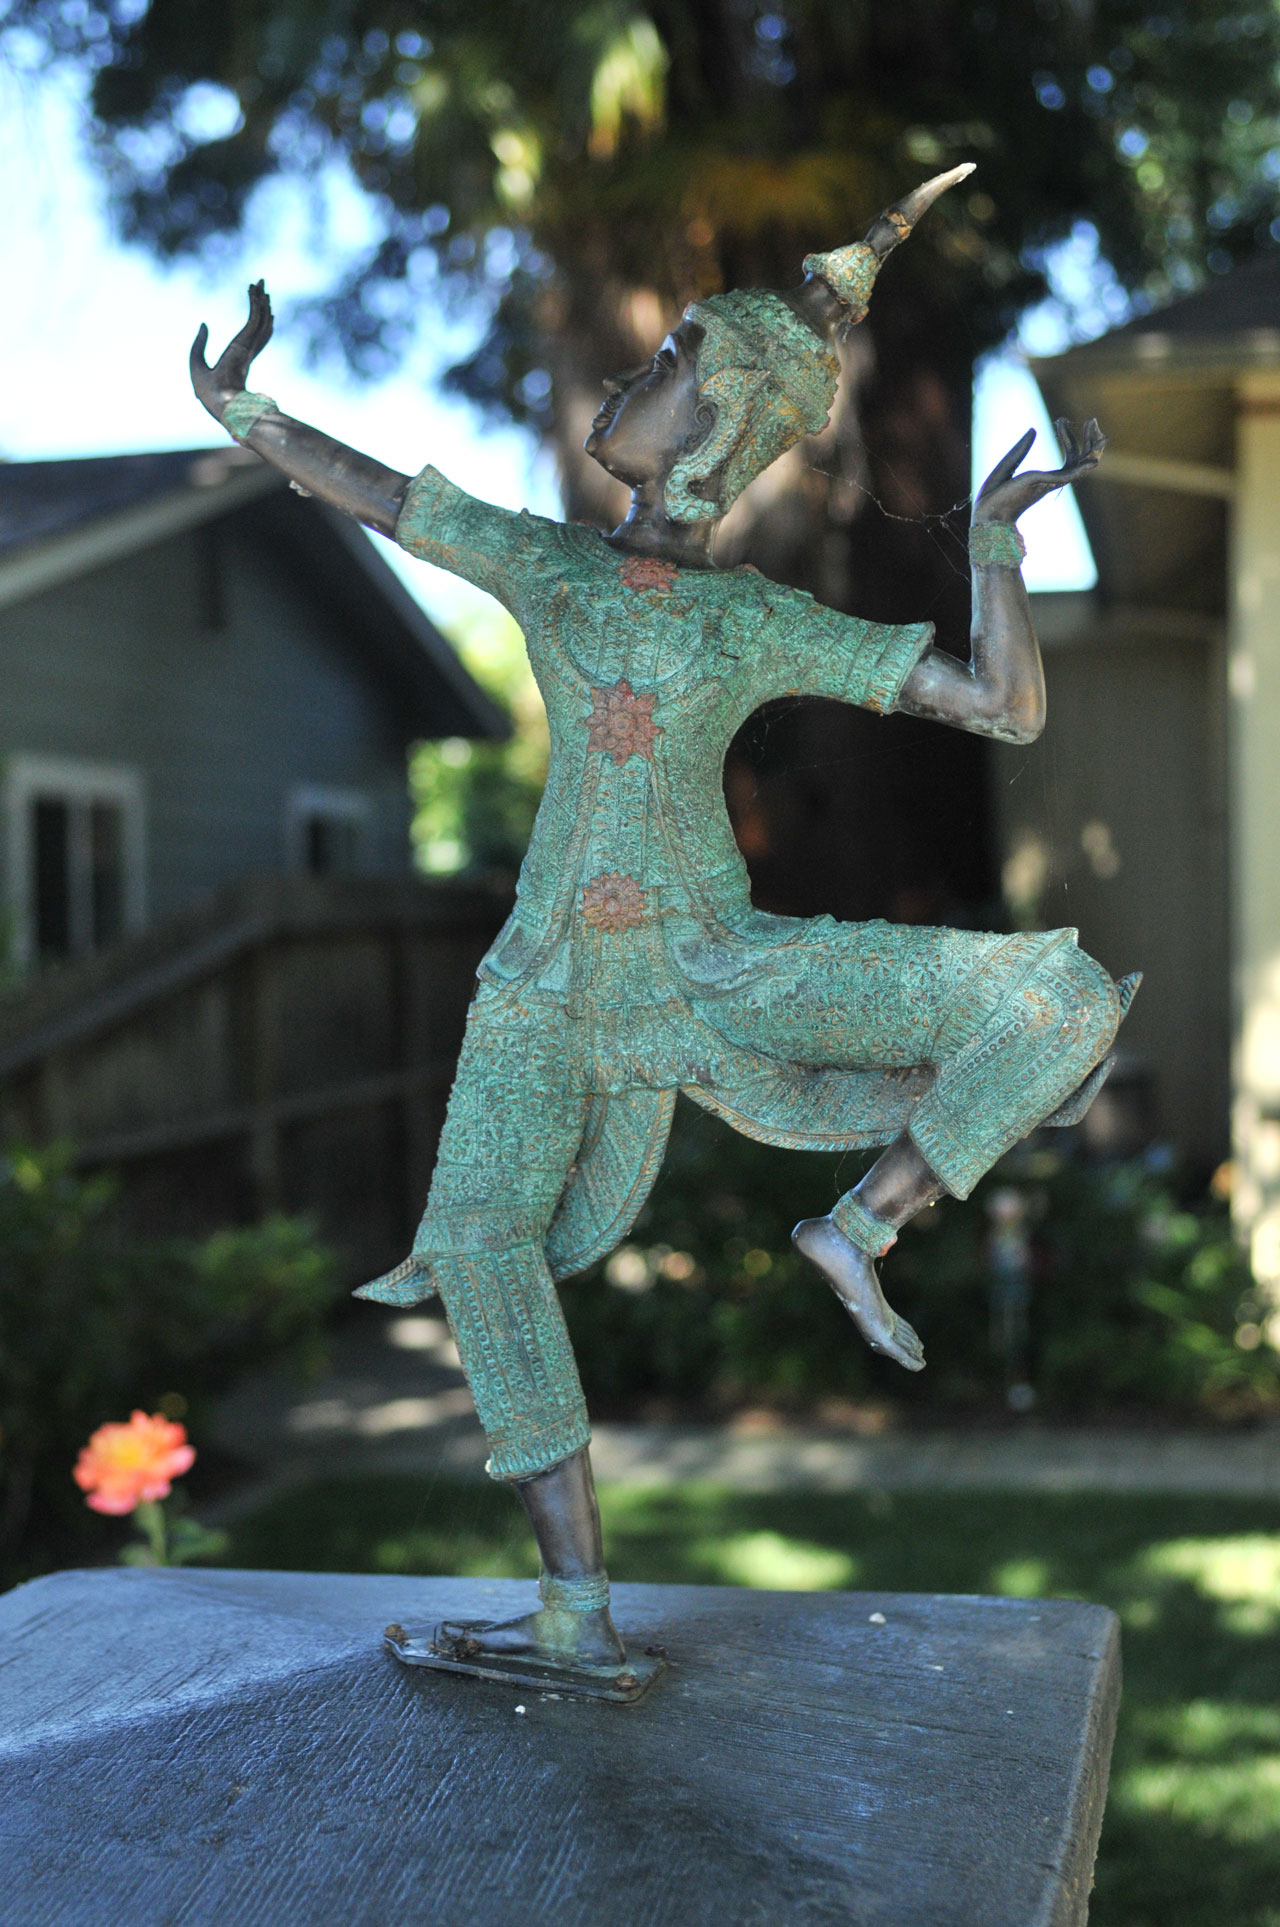
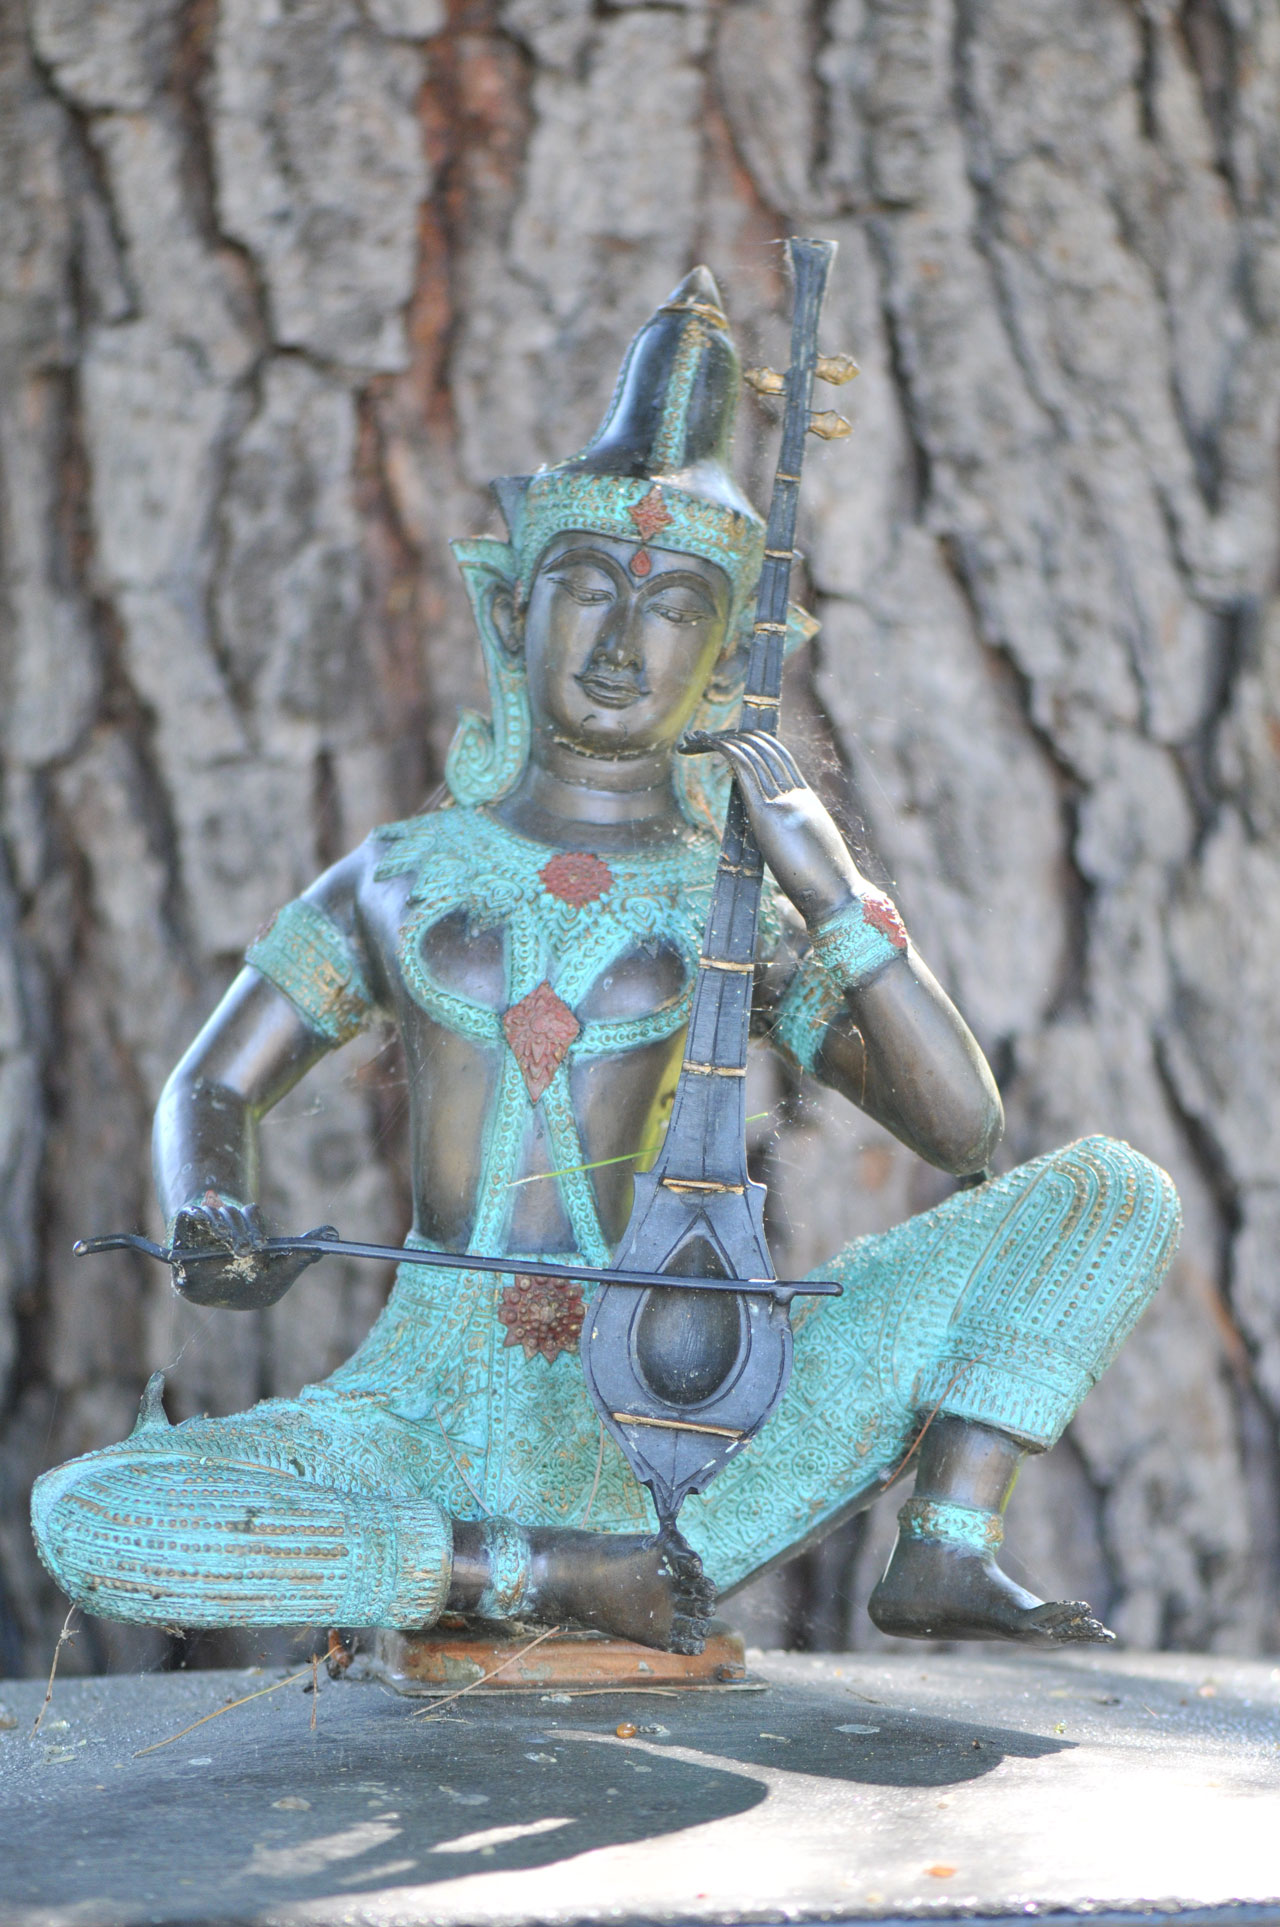
| These statues are in
front of a house and shaded by large trees.
There's two ways to get a pleasing background: 1) stand somewhere so that the house does not show, i.e. only plants in the background, 2) open the lens as wide as possible to minimize the depth of field (see DOF) (f/2.8 for the 105mm lens & f/2.8 for the 300 mm ED AI-S Lens) 479 Clay St. Photos taken in A mode. No coping, Only format conversion in Photoshop, no adjustments. Nikon D300s. Lens
|
||||||||||||||||||||||||


Programmed (P)
In this mode the camera sets both the f/stop and the shutter speed. In the simplest case this amounts to a Point-And-Shoot mode where no control by the photographer is involved in the exposure.Exposure Compensation
On many cameras by pressing a button and then turning a knob the Exposure Value can be changed from whatever it was. This is typically used after an exposure has been made and you want a lighter or darker image. On cameras with a visible histogram no pixels at the left means overexposed and no pixels on the right means underexposed.High Dynamic Range (Wiki)
Lab #02 Measure the Dynamic Range
Example 1:
ISO 200 & A = f/16
Shutter speeds: wispy clouds = 1/640, tree trunk 1/30
1/30 (/2=) 1/60 (/2=) 1/120 (/2=) 1/240 (/2=) 1/480 (/2=) 1/960 so a little over 4 stops.
Calculating Exposure Value
f/16 @ 1/640 = EV 17.32 and f/16 @ 1/30 = EV 12.91 difference is 4.41 stops. No dynamic range problem.
Image Stacking
Photoshop CS4 can do HDR by means of stacking, see Digital Photography 201: Stacking Images. There are other programs that do HDR image stacking.
In the Camera
This is different from the Nikon Dynamic-Lighting that is done after an image has already been taken in the Retouch Menu "D-Lighting".
| This concern with dynamic range
has been solved by using RAW files and changing
the Nikon D300s default setting from 12 to 14
bits per color channel. See:
HDR stacking. |
Dark Frame Subtraction
Nikon calls this Noise Reduction (NR) and it shows up on the D300s in the Shooting Menu with the title: Long exp. NR On/Off.This is a common practice in astronomical photography. The idea is that large area imaging chips are not perfect, that's to say there may be some individual hot pixels or maybe one edge of the active area is near a part of the IC that's thermally hotter than the rest of the chip so there are some hot pixels in that area. A way to mitigate the effect of these hot pixels is to first take the normal exposure and take a dark frame with the same camera settings. Then subtract the dark frame from the normal image. For example if the normal image was of a star field and there was a hot pixel, then in the normal image you might see and "extra star". But after the dark frame is subtracted the "extra star" is removed.
This method is not limited to astro photography, but works on any scene were there's a lot of dark areas were you want to see detail.
Lab #1 f/16 Sunny Day Rule (Wiki)
1. P or Automatic mode
2. M or manual mode shutter speed = 1/ISO & f/16
3. A or Aperture mode f/16 & auto shutter
4. S or Shutter mode 1/ISO & auto f/stop
If the camera is working properly you would expect the P, S and A exposures to all be the same and maybe the M exposure to be off a little.
Here is an example for the Nikon D300s
| Mode |
f/ |
time |
EV |
Note: P, S & A=14 something is wrong since the EV for M is off by 1.6 stops |
| P |
8 |
1/250 |
13.96 |
|
| S |
9 |
1/200 |
13.98 |
|
| A |
16 |
1/60 |
13.91 |
|
| M |
16 |
1/200 |
15.64 |
Tried pushing and holding two green buttons to reset camera.
Tried Resetting the Shooting and Custom menus (second item from top).
Sent question to Ask Nikon - 23 Aug 2011. The response was switch to spot metering.
Nikon D300s in spot metering
| Mode |
f/ |
time |
EV |
The result of
spot metering is no change.
The results are the same as before. |
| P |
8 |
1/250 |
13.96 |
|
| S |
9 |
1/200 |
13.98 |
|
| A |
16 |
1/60 |
13.91 |
|
| M |
16 |
1/200 |
15.64 |
Here is data on the Nikon D300 (not s) ISO = 200
| Mode |
f/ |
time |
EV |
|
| P |
13 |
1/640 | 16.72 |
|
| S |
22 |
1/200 | 16.56 |
|
| A |
16 |
1/400 | 16.64 |
|
| M |
16 |
1/200 | 15.64 |
| Mode |
f/ |
time |
EV |
only off by 1/3 stop. |
| P |
7.1 |
1/800 |
15.30 |
|
| S |
16 |
1/200 |
15.64 |
|
| A |
16 |
1/200 |
15.64 |
|
| M |
16 |
1/200 |
15.64 |
Comment
The Nikon D60 shows an Exposure Value of 15.6 in all four exposure modes as does the Nikon D300 and D300s when in Manual metering mode.The discrepancy occurs with the Nikon D300 and D300s when in one of the automatic exposure modes (P, A, S) where the D300 (P, S, A) reports and EV of 16.6 and the D300s (P, S, A) reports 14. Very strange.
If you know why this is let me know.
Image Sensor
DxOMark ranking of DSLR image sensors for color depth (portraits), dynamic range (landscapes) and low light - hi ISO (sports).
Physical Size
Number of Pixels
Size of Pixels
Release Mode
Single Frame (S)
One way around this is to switch to Manual Focus Mode.
Another way is to change the _____ setting under Menu / ? / ?
Continuous Low Speed (CL)
Continuous High Speed (CH)
Quiet (Q)
Self-Timer (clock icon)
Mirror Up (MUP)
A drawback of the SLR design is that the mirror needs to be raised prior to an exposure. The "mirror slap" does move the camera. On the Hasselblad it's a real problem. On the Nikon D300s it's still noticeable, that's why they have a Mirror Up (Mu) option on the Release Mode Dial at the upper left (viewed from behind). When the shutter is at half press the camera does the auto focus and at full press the mirror locks up. If you wait about 30 seconds the exposure is made.Color Balance
It turns out that the Nikon D300s and D60 have AUTOmatic as the default setting for color balance. So, when a photo is taken of the color test chart (see Bruce Lindbloom below) using strobe lights or an incandescent lamp the resulting images are identical. That's to say that the AUTO mode works. The special lens caps & color targets that are available may not be needed for these camera models, or may only be needed for very exacting color rendering requirements.
Note that when using a RAW file format, such as NEF for Nikon cameras, you can make white balance adjustments in the Adobe Camera Raw (ACR) application just by clicking on a part of the scene that you know contains no color, such as a white background or a gray card. So if when taking photos where color balance might be an issue you may want to include a gray card in the first frame to set white balance. Then in ACR make a group of all shots taken in that light and as a group set the color balance for all of them based on the gray (or known white) reference.
In order for the colors in an image to look like we're used to seeing them the camera needs to be set for the color temperature of the light that falling on the subject and background. The default camera setting is for daylight as the source of light. If a photo is taken indoors where the light is from incandescent bulbs the color in the final image will appear to orange. If the indoor light is from cool white florescent lamps then the image will appear too green.
There are a number of ways to get the desired color balance. I say "desired" rather than correct because for artistic reasons you may want to deviate from the "correct" color balance which would render each color in such a way that it was as close as possible to matching the subject so that the final image is more pleasing to the eye. This usually means warming up the color temperature when there are skin tones in the photo.
http://www.brucelindbloom.com/ - has technical info related to color spaces - After downloading the four reference images, when that folder was selected using the Costco Java applet only two images were in the directory (probably the 8 bit per channel images). The preview images were very different one had a lot more dynamic range than the other (maybe the gamma 2.2 image). I've ordered a 16x20 posterboard to both see how it looks and to use as a test subject for White Balance tests.
Camera Color Setting
For Nikon SLR cameras there are color balance settings. These can be accessed three ways:1. Pressing the WB button and turning the sub command (front) dial.
2. Using the White Balance menu:
3. Pressing the WB button and turning the Main command (rear) dial.
| D300s Shooting Menu White Balance |
D60 Shooting Menu White Balance |
|
| AUTO | AUTO | Requires "D" (Distance is sent
to camera) or "G" (camera controls aperture) lens. Takes into account the built-in camera flash. |
| Incandescent | Incandescent | |
| Florescent | Florescent | |
| Flash | Flash | |
| Cloudy | Cloudy | |
| Shade | Shade | |
| Choose color temp. | - |
1. Pressing the WB button and turning the sub command (front) dial. |
| PREset Manual | PREset Manual | The white balance is
measured using a gray or white subject or is transfered from another image stored in the camera that has the desired color balance. |
There are special lens caps with white translucent material (on order 22 Aug 2011) and also special two sided "lens) that has slots (on order 22 Aug 2011). These are to support the PREset Manual color balance mode where you acutally measure the light. More on this later.
When the Nikon D300s is set to AUTO color balance it automatically corrects the color balance (white balance). For example the photos of the test chart when illuminated by studio flash units looks the same as when illuminated by a 4800K tungsten lamp.
Flash On Camera
Red Eye (Wiki)
When the flash is close to the lens it may cause the subject's
eyes to glow red. This typically happens in dim settings
with cats, people, etc. Most cameras with a built-in
flash have a Red Eye Reduction mode where there is a short
flash that preceeds the exposure that causes the subject's
pupils to close down prior to the actual flash exposure.Distance
The light falls off as the square of distance, so if a subject is properly exposed by the flash at 4 feet then at 8 feet (2 x the distance) the light will be 1/4 as bright. This effect can be used to cause the background to be black. |
Photo taken in the
daytime. Nikon D300s with SB-900 flash. A mode set to f/36. |
Fill Flash
It may be possible to control the flash output so that instead of providing all the light on the subject, it will only provide light that's 1 or 2 stops less. This allows filling in shadows that otherwise would be black to very dark. This can make outdoor photos much more pleasing.Watt Seconds
Guide Number
The Guide Number (Wiki) is a measure of the light output from a flash (bulb, or electronic). It assumes the shutter is open long enough to capture all the light. It also assumes the film speed is ISO = 100. Since this is the linear ISO number multiplying the ISO number by 4 should double the distance (the same as doubling the guide number).Guide Number = (flash to subject distance) * f/number. Note guide numbers have a length unit, such as 90 feet or 30 meters.
The D300s built-in flash has a guide number of 56 feet when ISO is 200. The SB-900 guide number varies between 13 meters (42.6 feet) to 57 meters (187 feet) depending on how the flash zoom is set (and at an ISO of 100). Notice that the built-in flash is specified at ISO 100, but the external flash is at ISO 200 (ISO 200 is the lowest value unless you degrade the image).
Digital Files
There are advantages to connecting DSLR cameras to a computer when in a studio setting.
Image Size
Most digital cameras allow the photographer to select what size images will be stored. The default setting may be a medium size offering a compromise between maximum image quality and maximum number of images on the memory medium. I set my camera to the maximum available image size and live with whatever the number of images stored. This way there is the most room to work with the image in post processing.Types
.jpg
By far the most common file type is the jpg. (Wiki: jpeg Joint Photographic Expert Group). It's advantage is that the file size can be smaller than other file types like bit map (Wiki: bmp) I convert to this format as the last step when using an image for a web page or to email someone, but do not use it as a camera output file type if the camera supports a non lossy file format. The reason is that every time a .jpg file is opened in and subsequently saved the quality is degraded, sort of like working with successive generations of an analog film image..tiff
Tagged Image File Format (Wiki) is an option on many cameras. It's a loss-less file format so the image does not degrade with multiple generations. The Nikon D300s generates a file of about 35 Mega Bytes when in the highest resolution image mode. This is my standard camera output file.RAW (Nikon: .NEF)
This file type (Wiki: RAW)
has the smallest amount of image processing done by the
camera and so is the most powerful in terms of allowing post
processing "developing" software to manipulate the
image. Different cameras have different image sensors
and treat the resulting data in different proprietary
ways. For example Canon and Nikon have scrambled the
data in each of their raw files so competitor can not tell
how their cameras work (Nikon calls it's RAW format
(NEF). So to use RAW files you typically need a
software add-on that will decode the RAW file from your
specific camera.THE H-U-G-E advantage of using RAW files is that the dynamic range is much greater than the 8 bits per color channel of .jpg files. The Nikon D300s supports either 12 or 14 bits per color channel! This extends the dynamic range by 6 stops!
The RAW file is very much like a negative and gives you a better quality, flexibility and control than using other formats.
The Nikon has an option of outputting a NEF and a jpg file of each shot. This is not a good idea because if you get thumbnail images of both it's easy to get confused and select the jpg as the image to use in your work flow. Better to only output the NEF file.
Note that computers know about .tiff, .jpg and other file types and so when you open a folder and select the Thumbs option you see small versions of the images. The thumbnail versions are not available when working with RAW files so they are harder to work with. (Sometimes my computer shows a preview of the NEF file) That's why there are software programs just for managing images. For example Lightroom (Wiki) supports RAW formats.
Adobe Bridge (comes with Photoshop CS4) allows using two types of meta data to manage images. Some meta data comes in the EXIF (Wiki) data from the camera and other meta data you can add to an image in Bridge.
Adobe Camera RAW (ACR)
In Photoshop or Bridge the Camera RAW plug-in allows
working with RAW files. Note each brand of camera
has their own file format (suffix on the file name such as
.NEF for the Nikon RAW file format). Edits in ACR do
not permanently change the image file, but are a process
that's applied to it.There is a lot of control available in ACR of exposure, color balance, and things like fill light as well as adjustment of the histogram.
At the bottom of Camera RAW there's what appears to be a link that allows setting how you want to handle the RAW files and it has options for:
Color Space:
Color Match RGB - early Mac 8 bits/channel
ProPhoto RGB (Wiki) - Kodak 16 bits/channel - But I don't know of anyone who makes prints = poor choice in ACR
sRGB (Wiki) - for monitors, HDTV, etc (the default for most applications)
| It seems that 16
bit/c printing does not offer much advantage
over 8 bit/c - Hype
or Hero Take 2: 16 Bit Printers. But my guess is that doing all the work up to the printer output at 16 bits/c will result in a higher quality image. Note the "Print" command and most computer screens are "24 bit color" i.e 8 bits/channel RGB. Costco only accepts 8 bits/channel image files. |
Adobe Versions
| Software |
ACR | DNG |
|
| Photoshop 7 |
1.0 |
||
| Photoshop CS3 |
4.6 |
||
| Photoshop CS4
(first version to support focus stacking) |
5.0 to 5.7 (have
5.7.0.213) |
||
| Photoshop CS5 |
to 6.6 |
||
| Photoshop Elements
10 Premiere Elements 10 |
to 6.6 |
||
| Lightroom 2 (ver
2.7 for ACR 5.7) |
5.7 |
||
| Lightroom 3.6 |
6.6 |
The Nikon D300s can be set to use AdobeRGB and Adobe Camera Raw (ACR) can also be set to output this color space. It's what I'm using as of 7 Nov 2011.
Depth: (Wiki)
1024 x 1542 pixels (3.4" x 5.1") to 4081 x 6144 pixels (13.6" x 20.5")
These are probably arrived at based on the Bayer color filter (Wiki) (Kodak Patent 3971065).
Resizing in Camera Raw (external link) - they say take the nominal size in ACR and use Photoshop Bicubic Smoother when increasing the image size (and Bicubic Sharper when decreasing size)
| Increasing image
size in ACR may lead to a higher quality image
than when using Photoshop, but that's not clear. You can increase the resolution in Photoshop IMAGE \ Image Size, but this is done by interpolation so is not really adding anything. |
Screen
Glossy Paper
Matt Paper
.DNG (Wiki)
When saving DNG files from ACR you have the option of backdating the version number. This was necessary when sending a file to Bragadoon for printing.
Getting Image Out of Camera
USB cable
This is the method I used to use. The cable is always plugged into my desktop computer so it's quick and easy to let the Nikon Transfer program download only the new photos from the camera to the file where I store them.|
WARNING
It's possible to wear out the USB-B Micro connector
in the camera! Ask how I know this. The
repair cost is over $200 and you loose the use of
the camera for a couple of weeks. Note: I may take a dozen or more photos a day but more importantly may make 0 to 6 USB connections to the camera per day on a 24/7/365 basis. I'm now looking into other ways of getting the images out of the camera that involve a wireless connection. That means no mechanical stuff to wear out. See Eye-Fi. |
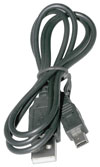 |
There are three common USB cables all of them have the USB-A male connector that mates with standard desktop computer USB ports. The other end may be the USB-B 5-pin Mini Cable, like the one shown that's used on the Nikon Digital cameras, or the USB-B Micro cable. |
Memory Cards and Sticks
The Nikon D300s uses two cards, one a Compact Flash and the other an Secure Digital (SD). It's possible to pull the card from the camera and insert it into a computer, but not all computers will have a compatible card reader, it seems a special adapter is always needed. For a small number of photos this method is more work than it's worth for me. But to move all the photos on a card, like after a vacation or all day photo shoot this is a much faster way to move a lot of data.PictBridge (Wiki)
Many digital cameras support PictBridge which allows the
images to be directly printed using a USB cable or a memory
card. I haven't used it because you have no control of
the image, it's just whatever the camera image looks like.Wireless
There are now (2011) two kinds of adapters that allow the camera to be part of an IEEE 802.11 WiFi wireless network (Wiki). One is a Compact Flash card (see Eye-Fi on the Nikon page). But it's very picky about what computer you use and what software is already on that computer,The other is an external hardware adapter like the Nikon WT-4A (Nikon). This system allows both downloading photos and camera control when using Camera Control Pro 2 (optional). $1000 price range.
In the not too distant future the Wifi interface will be built into the camera. This would allow remote flash units to be standardized independent of manufacturer where each one has it's own IP address. Multiple camera setups and many other now not thought of things will be possible.
HDMI Cable
DSLR cameras that have movie capability typically allow the use of an HDMI cable (Wiki) to view the movie on an HD TV set. Like the USB cable there are full size and mini ends, with the mini end common for the cameras. Once connected you can use the HD TV to view still images either as selected by the normal camera viewing method or there might be a slide show mode. I haven't explored this.Prints
Costco Photo Processing
Dec 2015 - The ONLY way to use a printer profile is to pickup the print from the store. If you have the print mailed it comes from Auburn, WA and you have no control over which of many printers they use.This is very different than what used to happen, i.e. the local Costco printed and shipped.
So far I've ordered "Enlargements & Posterboards" and a 16x20 canvas.
Note: "Gallery" means one of their stock photos.
Posterboards are just under 0.050" thick and are a very cost effective way to put photographs on your wall.
Note when uploading a file there are two things I have found result in a higher quality print.
1. .TIF files look better than .jpg files (based on the same image and about the same file sizes)
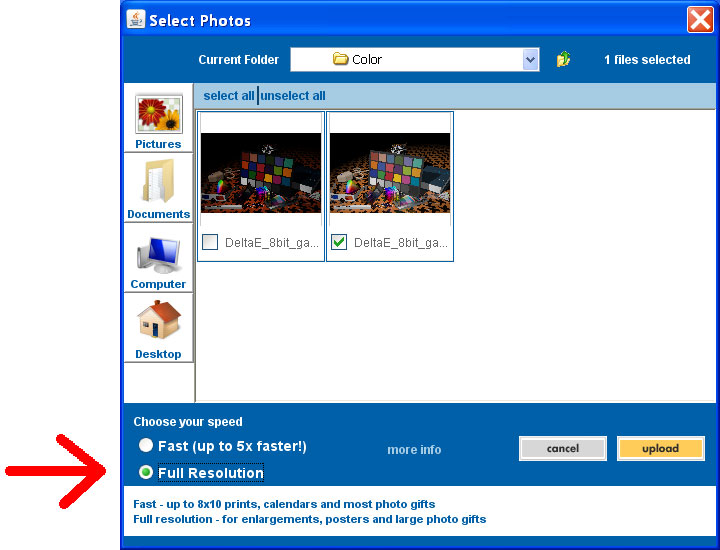
2. Be sure to select FULL Resolution, the default is Fast upload. I can't understand why they even have the Fast option.
Resolution is based on 300 DPI
The camera resolution sets a limit on the size of enlargement that's possible from a single image.
Note pat attention to the cropping options. If done incorrectly you may not get what you expect. I now make a special file from Photoshop where the size is the same as the print. So, if I did that correctly, there should be no crop warning.
When shooting in RAW (NEF) mode and with AUTO color balance selected the camera may choose a crazy color temperature, like happened when shooting fall tree leaves. The camera choose 4100K. The resulting print had almost brown leaves, not bright red. So that was fixed in Adobe Camera Raw. This is the first time I've had a problem with the camera messing up the color balance, but it can be fixed in ACR.
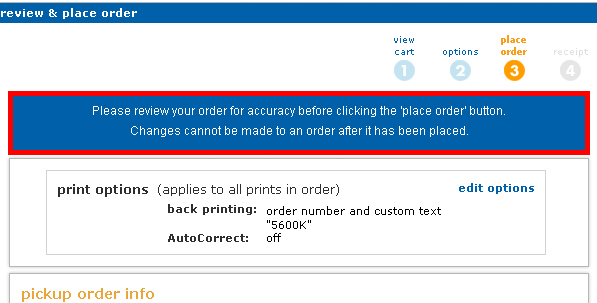
Another problem is that the default at Costco is to Auto Correct your color balance. But you have the option of turning that off just prior to when your order is submitted. You can click on edit options and modify (1) what gets printed on the back and (2) check a box to turn off Auto Correct. I've done that and when you come back to the place order page you can see that I've changed both of them.
For using Costco store specific color printer profiles, see my Digital Photography 203: Color Management
Uploading Methods
14 Oct 2011Firefox html
Firefox Java
IE8 ActiveX
DSLR cameras have a 1.5 aspect ratio.
| Size |
Aspect Ratio |
Res |
Print $ ea. |
Posterboard |
Canvas $ ea |
| 4x6 |
1.50 | 1200x1800 |
0.13 |
- |
- |
| 5x7 |
1.40 |
1500x
2100 |
0.39 |
- |
- |
| 8x10 |
1.25 |
2400x3000 |
1.49 |
- |
- |
| 8x12 |
1.50 | 2400x3600 |
1.49 |
- |
- |
| 11x14 |
1.27 |
3300x4200 |
2.99 |
9.99 |
- |
| 12x16 |
1.33 |
3600x4800 |
-- |
- |
34.99 |
| 12x18 |
1.50 | 3600x5400 |
2.99 |
- |
- |
| 8x8 |
1.00 |
2400x2400 |
1.49 |
- |
- |
| 12x12 |
1.00 |
3600x3600 |
2.99 |
- |
- |
| wallets(4) |
? |
-- |
0.39 |
- |
- |
| 16x20 |
1.25 |
4800x6000 |
5.99 |
14.99 |
44.99 |
| 18x24 |
1.33 |
5400x7200 |
- |
- |
54.99 |
| 20x301 |
1.50 | 6000x9000 |
8.99 |
24.99 |
69.99 |
Using Photoshop 7 on the 155MB TIF file to make a jpg file with the highest quality resulted in a file size of 17MB which took 5 minutes for upload at "Full Resolution".
CVS has a photo department that offers a 20x30 poster print for $20, but there are a couple of problems.
It's not clear what they mean by "poster", it may just mean something large rather than poster board.
CVS has a file size limit of 8 MB, way too small to get any decent resolution on an 8x10 print let alone a 20x30.
 |
Note: You can mount
posterboard directly to a wall using Elmer's Tack (is
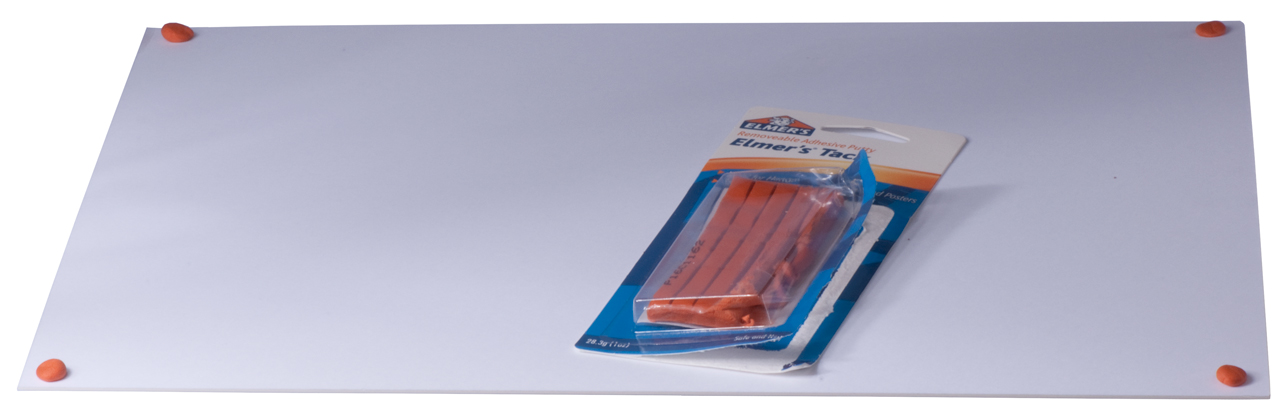
Orange) (Wiki: Blu Tack) Elmer's Tack applied as small balls on the four corners of an 11x14 Costco Posterboard. It also works on framed pictures that are hung from a wire where they seem to always be tilted. One small ball on a lower corner keeps the frame plumb. If you get it on the front it can stain the posterboard orange, probably also the wall. |
 |
Staples has Henkel Duck
Poster Putty that's blue in color and maybe works better
than the Elmer's Tack (photos have fallen down). I've used this before and like it. |
 |
Museum Putty is not the stuff to use for this. It's job is anchoring things so they will not move in earthquakes. |
Possible Future Topics
Flash
(external camera mounted & Studio)
Direct, bounce, soft box (tent), diffusers, reflectors
Camera Control Software
Post Processing Software (Stacking)
By far the most common things I do in Photoshop are:
- Crop the image
- Adjust the histogram
- Erase the background on product photos (this allows shooting without a studio)
Filters
Bracketing
Movie Mode
The key features are:
- the ability to change the lens
- the ability to change the ISO speed. This allows shooting in ambient light (no flood lights needed)
- the ability to shoot in HD modes (9:16 image format) YouTube has increased it's file size limit to allow HD images.
3D Photography
So far (2016) there's not a cost effective way to take a 3D movie to display on my Sony TV (not Red-Blue but rather left-right eye blinking full color) which can be edited.
Related
Digital Photography 202: Close-Up, Macro & Micro
Digital Photography 203: Color Management
Digital Photography 204: Studio Flash
High Dynamic Range Photography
Photography
Photoflash
Nikon
Ukiah - a number of photos
Nielsen & Bainbridge
8550 Chetle Ave. Unit B
Whittier, CA 90606
David Trevino - Manager
(562) 986-2000
(562) 968-2038 (fax)
(800) 321-2934
Lytro
"Light Field Camera" - focusing is done after taking the
image.
US8289440 B2
USD666660 S1
US20120249550 A1
13/192,331Reference Objects and/or Facial/Body Recognition, Filing date: Jul 27, 201, 382/118
Patents
6339891 Metal Picture Frame, E. Cox, Jan 22, 2002, 40/785 ; 40/782; 403/294; 403/401 -Corner joint does not distort when tightening clamp screw (34).
Archival Metal Frames
| Frame Size | 11x14 | 11x14 | 16x20 | 16x20 |
| Photo Opening | 8x10 | 5x7 | 8x10 | 11x14 |
- Artcare 8-ply gallery white mat
- Artcare 2-ply mount board
- UV glass
Ukiah Area Photo Related
Braggadoon Signs & Graphics435 North Main Street
Fort Bragg, CA 95437
alan at braggadoon . com
707 964 5050
Can use DNG version _____.
Photo Finish
125 N. State St.
Ukiah, CA 95482
(707) 462-6242
REDIMAT
343 W Robles Ave.
Santa Rosa, CA 95407
(707) 584-9600
Rileystreet Art Supply
103 Maxwell Ct.
Santa Rosa, CA 95401
(707) 526-2416
Tripple-S Camera
260 S. School St.
Ukiah, CA 95482
(707) 462-3163